background image

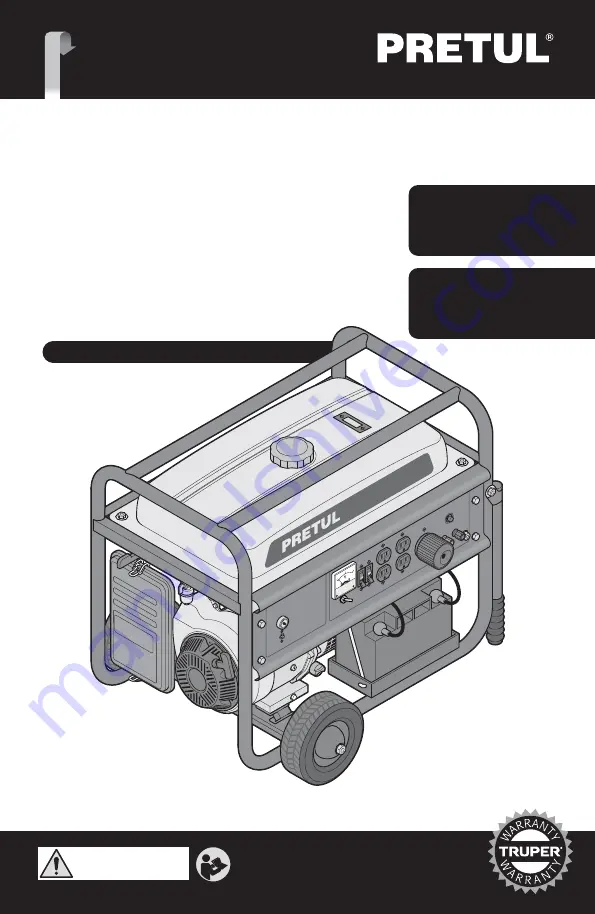
Manual

Power

Generator

Model

Code

GEN-55P
GEN-70P

Applies for:

26035
26036

13 Hp

16 Hp

Motor GEN-55P

Motor GEN-70P

CAUTION

Read this manual thoroughly

before using the tool.

EN

GL

ISH

ES

PAÑOL

Summary of Contents for 26035

Page 1: ...Manual Power Generator Model Code GEN 55P GEN 70P Applies for 26035 26036 13 Hp 16 Hp Motor GEN 55P Motor GEN 70P CAUTION Read this manual thoroughly before using the tool ENGLISH ESPAÑOL ...

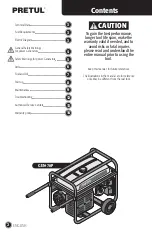
Page 2: ...n make the warranty valid if needed and to avoid risks or fatal injuries please read and understand the entire manual prior to using the tool CAUTION 3 3 3 4 5 6 7 8 9 12 13 14 Technical Data Fuel Requirements Electric Diagram General Safety Warnings for power Generators Safety Warnings for power Generators Parts Fuel and Oil Start up Maintenance Troubleshooting Authorized Service Centers Warranty...

Page 3: ... 5 A Black Black 1 0 mm2 Black Black Yellow Green 2 5 mm2 X Y W G White White White White White White White V G L N G L N 9 holes male tab Oil Control Winding Brown Brown Rectifier Bridge 10 A Key Blue 1P Switch 25 A Return Route 4 0 mm2 10 A Red 1 0 mm2 White Green Black Black White Green White Green White 1 0 mm2 Yellow Black Purple Purple Oil Protection Red Battery Black Spark Plug Start Up Win...

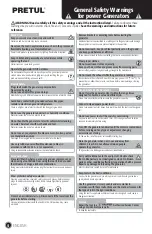
Page 4: ...ting part in the generator could damage the equipment or cause severe personal injuries to the operator Do not overreach Keep both feet perfectly set on the ground and keep good balance at all times These measures lead to better controlling the tool in unexpected situations Wear proper clothes Do not wear loose clothes or jewelry Keep your hair clothes and gloves away from moving parts Loose cloth...

Page 5: ...t connections taking into account the differences between the power supply and the generator technical specifications Protection against electric shock depends on the circuit breakers are specially homogenized for the generator If the circuit breakers must be replaced go to a Authorized Service Center Alternate current connections within the electric system shall be carried out by a certified elec...

Page 6: ... Battery Fuel Tap Fuel Tank Fuel Tank Meter Air Filter Control and Connection Panel 6 Electric generators made with one cylinder air cooled gasoline motor are a portable electric energy source for recreational use travel or camping for emergencies during blackouts or for domestic use out of range of the power company 12 V Terminals Output Voltage Selector 4 120 V Outlets 240 V Outlet Control and c...

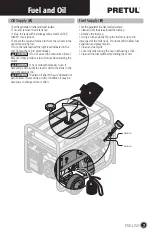
Page 7: ...k oil level before each use If necessary add oil until the level is within the limits in the cap oil measuring rod Replace oil after 50 hours operation or each season In very dusty or dirty conditions it may be necessary to change oil more often Oil Supply A Set the generator in a flat leveled surface Clean and dry the area around the fuel cap Remove the fuel cap Using a funnel slowly fill up the ...

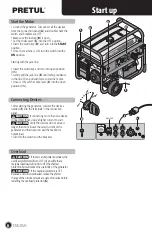
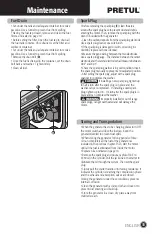
Page 8: ...G ENGLISH Start up After starting the generator connect the devices needed F into the terminals in the connection panel If connecting more than one device connect first those using a higher current to start Verify the devices do not exceed longer than 30 minutes the rated current of the generator and that never exceed the maximum output load Turn ON the switch and the breakers Connecting Devices C...

Page 9: ...tor power is lower by 3 5 per each 1000 feet above 6890 feet above sea level The decrease in power will be more drastic if no adjustments to the carburetor are carried out Consult a Authorized Service Center to make the adjustments Operating in High Altitude CAUTION General review Motor oil Air filter Sediment container Spark plug Valve clearance Fuel tank and strainer Fuel line Fuel tank cap Regu...

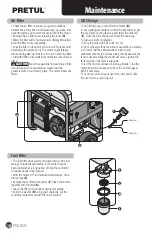
Page 10: ...long period of time the sediment container needs to be cleaned With the motor OFF and ambient temperature close the fuel tap E Remove the sediment container F Clean the interior together with the filter G Leave the filter and container drying completely Verify the washer H is in good conditions Set the sediment container and fuel filter back in place Fuel Filter Oil Change The oil drain cap is set...

Page 11: ...fuel tap to drain all the fuel tank contents Once drained set the filter and sediment container Set under the tank and adequate container to receive gasoline Use a funnel to prevent fuel from spilling Remove the drain bolt D Once the fuel is drained in the container set the drain bolt back and washer Tighten firmly Clean all fuel Spark Plug Before removing the spark plug E clean the area around th...

Page 12: ... level Make sure oil level is within the minimum and maximum level in the oil measuring rod Verify spark in the spark plug 1 Disconnect the spark plug cable Clean the dust around the spark plug and remove it 2 Connect the cable to the spark plug 3 Turn ON the motor switch 4 Make contact with the lateral electrode of the spark plug with any metallic part of the motor that is free of oil It is impor...

Page 13: ...IENTE 304 LOCAL 30 INTERIOR DE PASAJE ROBLEDO COL CENTRO C P 43600 TULANCINGO HGO TEL 775 753 6615 775 753 6616 SUCURSAL GUADALAJARA AV ADOLFO B HORN 6800 COL SANTA CRUZ DEL VALLE C P 45655 TLAJOMULCO DE ZUÑIGA JAL TEL 33 3606 5285 AL 90 FIX FERRETERÍAS AV PASEO DE LA REPÚBLICA 3140 A COL EX HACIENDA DE LA HUERTA C P 58050 MORELIA MICH TEL 443 334 6858 FIX FERRETERÍAS CAPITÁN ANZURES 95 ESQ JOSÉ P...

Page 14: ...horized by In order to make the warranty valid or to purchase components and spare parts you must present the product and its proof of purchase at Av San Isidro 110 Col Industrial San Antonio ALC Azcapotzalco C P 02760 CDMX Mex or at the store where you bought it or at a service center listed in the attached warranty policy and or at www truper com Transportation costs resulting from compliance of...

Page 15: ...do o reparado por personal no autorizado por Para hacer válida la garantía o adquirir piezas y componentes deberá presentar el producto y su comprobante de compra en Av San Isidro 110 Col Industrial San Antonio Alc Azcapotzalco C P 02760 CDMX Méx o en el establecimiento donde lo compró o en algún Centro de Servicio de los enlistados en el anexo de la póliza de garantía y o en www truper com Los ga...

Page 16: ...LIBERTAD ORIENTE 304 LOCAL 30 INTERIOR DE PASAJE ROBLEDO COL CENTRO C P 43600 TULANCINGO HGO TEL 775 753 6615 775 753 6616 SUCURSAL GUADALAJARA AV ADOLFO B HORN 6800 COL SANTA CRUZ DEL VALLE C P 45655 TLAJOMULCO DE ZUÑIGA JAL TEL 33 3606 5285 AL 90 FIX FERRETERÍAS AV PASEO DE LA REPÚBLICA 3140 A COL EX HACIENDA DE LA HUERTA C P 58050 MORELIA MICH TEL 443 334 6858 FIX FERRETERÍAS CAPITÁN ANZURES 95...

Page 17: ...e asegúrese de que el nivel de aceite este entre los limites mínimo y máximo en la varilla Verifique la chispa de la bujía 1 Desconecte el cable de la bujía limpie el polvo alrededor de la bujía y retírela 2 Conecte el cable a la bujía 3 Encienda el interruptor del motor 4 Ponga en contacto el electrodo lateral de la bujía con cualquier parte metálica del motor libre de combustible Es importante r...

Page 18: ...ar todo el contenido del tanque de combustible Una vez drenado coloque el filtro y el contenedor de sedimentos Coloque debajo del carburador un contenedor adecuado para recibir gasolina y utilice un embudo para evitar que se salpique el combustible Retire el perno de drenaje D Una vez que se ha drenado el combustible en el contenedor coloque de nuevo el perno de drenaje y su arandela apretándolos ...

Page 19: ...a ambiente cierre la llave de combustible E Retire el contenedor de sedimento F limpie su interior junto con el filtro G Permita que el filtro y contenedor se sequen por completo Verifique que el empaque H se encuentre en buenas condiciones y vuelva a colocar el contenedor de sedimentos y el filtro de combustible en su lugar Filtro de combustible Cambio de aceite El tapón de drenaje de aceite se l...

Page 20: ...Bujía Despeje de válvula Tanque de combustible y colador Línea de combustible Tapa del tanque de combustible El mantenimiento regular y cuidadoso es esencial para mantener los niveles de seguridad y el desempeño óptimos del generador Antes de limpiar reparar inspeccionar o guardar el generador apague el motor y espere a que el motor se enfríe por completo Mantenga tuercas pernos y tornillos ajusta...

Page 21: ...alanca del ahogador C en la posición de abierto ON Arranque del motor Después de haber arrancado el generador conecte los dispositivos que necesite F en los contactos del panel de conexión Si conecta más de un dispositivo conecte primero los que utilicen una corriente más alta para su arranque Verifique que los dispositivos no excedan la corriente nominal de generador por más de 30 minutos y que n...

Page 22: ...nivel se encuentre entre los límites de la varilla del tapón Cambie el aceite después de 50 horas de operación o cada temporada En condiciones de mucho polvo o suciedad puede ser necesario hacer el cambio de aceite más a menudo Abastecimiento de aceite A Coloque el generador en una superficie plana y nivelada Limpie y seque el área alrededor de la tapa del combustible Retire la tapa del combustibl...

Page 23: ...e de combustible Tanque de combustible Medidor del tanque de combustible Filtro de aire Panel de control y conexión 6 Partes Los generadores eléctricos con motor a gasolina de un cilindro enfriados por aire son una fuente de energía eléctrica portátil para uso recreativo viajes o campamen tos para emergencia durante apagones o para uso doméstico sin alcance de la compañía de luz Terminales 12 V Se...

Page 24: ...rando las diferencias entre el suministro eléctrico y las especificaciones técnicas del generador La protección contra choques eléctricos depende de que los interruptores de circuito estén homogeneizados especialmente para el generador Si los interruptores de circuito deben ser reemplazados acuda a un Centro de Servicio Autorizado para su reemplazo Las conexiones de corriente alterna dentro del si...

Page 25: ...artes rotativas del generador pueden causar daños al equipo o al operador No sobrepase su campo de acción Mantenga ambos pies bien asentados sobre el suelo y conserve el equilibrio en todo momento Esto permite un mejor control de la herramienta en situaciones inesperadas Vista adecuadamente No vista ropa suelta o joyas Mantenga su pelo su ropa y guantes alejados de las piezas en movimiento La ropa...

Page 26: ... Carbones 220 V 110 V 20A 20A 30 A X Y W G 1 2 3 4 7 5 6 11 9 8 10 12 V G L N G L N 10 A Bobinado Rojo Azul Azul Rojo Rojo 2P Interruptor 20 8 A Rojo Rojo 1 0 mm 2 Rojo 1 0 mm 2 Rojo Rojo Rojo Blanco Blanco Blanco Negro Blanco Blanco Blanco Blanco Blanco Rojo 1 0 mm 2 Blanco Verde Negro Negro Blanco Verde Blanco Verde Blanco 1 0 mm 2 Amarillo Negro 1 0 mm 2 Negro 1 0 mm 2 Negro Bobinado Bobinado B...

Page 27: ... de Servicio Autorizados Póliza de Garantía Guarde este instructivo para futuras referencias Los gráficos de este instructivo son para referencia pueden variar del aspecto real de la herramienta 3 3 3 4 5 6 7 8 9 12 13 14 ATENCIÓN GEN 70P Para poder sacar el máximo provecho de la herramienta alargar su vida útil hacer válida la garantía en caso de ser necesario y evitar riesgos o lesiones fatales ...

Page 28: ...ico Modelo Código GEN 55P GEN 70P Este instructivo es para 26035 26036 13 Hp 16 Hp Motor GEN 55P Motor GEN 70P 9 750 W 12 000 W No utilice el aparato sin leer el instructivo G A R A N T I A G A R A N T I A ADVERTENCIA ESPAÑOL ENGLISH ...

Reviews: