background image

Summary of Contents for 400 Crosswalk Sport 831.24840.0

Page 1: ...0 0 Serial No Write the serial number in the space above for reference Number Decal Assembly Operation Maintenance Part List and Drawing Sears Roebuck and Co Hoffman Estates IL 60179 TREADMILL EXERCIS...

Page 2: ...Note The decal s may not be shown at actual size KEEP HANDS ANDFEET AWAY FROM THISAREA WHILE THE TREADMILL iSINOPERATION Protect yourself and others from risk of serious injury Read the user s manual...

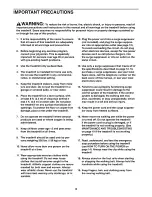
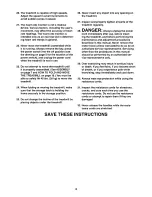
Page 3: ...specifications described on page 12 To purchase a surge suppressor see your local Sears store call the telephone number on the back cover of this manual or see your local electronics store Failure to...

Page 4: ...e treadmill regularly DANGER Always unplug the power cord immediately after use before clean ing the treadmill and before performing the maintenance and adjustment procedures described in this manual...

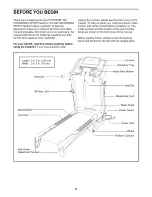
Page 5: ...ave questions after reading this manual please see the back cover of this manual To help us assist you note the product model number and serial number before contacting us The model number and the loc...

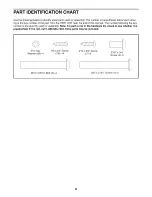
Page 6: ...PART LIST near the end of this manual The number following the key number is the quantity used for assembly Note If a part is not in the hardware kit check to see whether it is preattached If it is n...

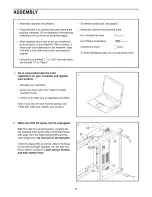
Page 7: ...screwdriver needlenose pliers To avoid damaging parts do not use power tools Go to www proformservice com registration on your computer and register your product activates your warranty saves you tim...

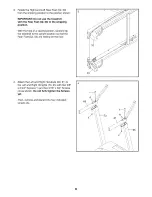
Page 8: ...h the help of a second person carefully tip the treadmill to the upright position so that the Rear Feet 52 53 are resting on the floor 53 Attach the Left and Right Handrails 69 81 to the Left and Righ...

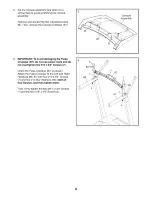
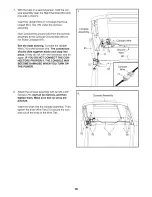
Page 9: ...ANT To avoid damaging the Pulse Crossbar 97 do not use power tools and do not overtighten the 10 x 3 4 Screws 7 Orient the Pulse Crossbar 97 as shown Attach the Pulse Crossbar to the Left and Right Ha...

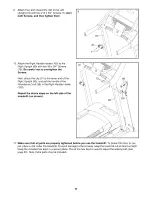
Page 10: ...wire The connectors should slide together easily and snap into place If they do not turn one connector and try again IF YOU DO NOT CONNECT THE CON NECTORS PROPERLY THE CONSOLE MAY BECOME DAMAGED WHEN...

Page 11: ...95 and set the handle of the Resistance Cord 98 in the Right Handle Holder 100 Repeat the above steps on the left side of the treadmill not shown 98 11 Make sure that all parts are properly tightened...

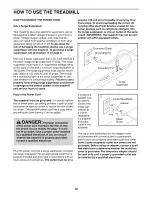
Page 12: ...resistance for electric current to reduce the risk of elec tric shock The treadmill power cord has a plug with a grounding pin see drawing 1 on this page Plug the power cord into a surge suppressor a...

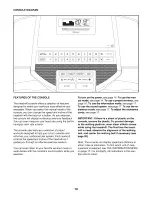
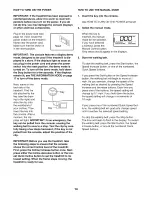
Page 13: ...listen to your favorite workout music or audio books with the console s sound system while you exercise To turn on the power see page 14 To use the man ual mode see page 14 To use a preset workout see...

Page 14: ...he treadmill take the following steps to ensure that the console shows the correct incline level of the treadmill First press the Incline increase button once Next press either the Incline decrease bu...

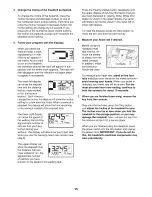
Page 15: ...itor see step 6 The upper display can show the elapsed time the distance that you have walked or run the approximate number of calories you have burned or the speed of the walking belt Press the Prior...

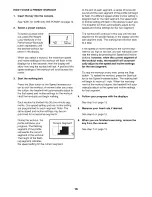
Page 16: ...tes the speed setting for the current segment Current Segment At the end of each segment a series of tones will sound and the next segment of the profile will begin to flash If a different speed and o...

Page 17: ...USE THE SOUND SYSTEM To play music or audio books through the console sound system while you exercise plug a 3 5 mm male to 3 5 mm male audio cable not included into the jack on the console and into a...

Page 18: ...ratures above 85 F 30 C HOW TO MOVE THE TREADMILL Before moving the treadmill fold it as described at the left CAUTION Make sure that the catch is resting against the latch pin Moving the treadmill ma...

Page 19: ...pped Reset SYMPTOM The power turns off during use a Check the power switch see drawing c at the left If the switch has tripped wait for five minutes and then press the switch back in b Make sure that...

Page 20: ...wear If you suspect that the walking belt needs more lubricant see the front cover of this manual If the walking belt still slows when walked on see the back cover of this manual SYMPTOM The walking...

Page 21: ...ergy If your goal is to burn fat adjust the intensity of your exercise until your heart rate is near the lowest number in your training zone For maximum fat burning exercise with your heart rate near...

Page 22: ...hilles Stretch With one leg in front of the other reach forward and place your hands against a wall Keep your back leg straight and your back foot flat on the floor Bend your front leg lean forward an...

Page 23: ...ip 24 2 Roller Spacer 75 5 Wire Tie 25 14 Foot Rail Flat Washer 76 2 Frame Spacer 26 8 8 Flat Washer 77 2 Base Cap 27 2 3 8 Star Washer 78 4 Base Pad 28 2 M8 Weld Nut 79 19 8 x 3 4 Screw 29 2 M8 Flang...

Page 24: ...14 37 9O 38 19 25 40 26_ 25 14 90 19 28 2 84 85 47 48 46 49 31 E E 26 16 13 4O 26 75 82 I 11 X 10 I 0 I 11 Q o o_ D Z o oo o3 i o oo o 3 oo 133...

Page 25: ...EXPLODED DRAWING B Model No 831 24840 0 RO814B 44 65 88 93 32 11 60 88 65 44 61 62 63 25...

Page 26: ...EXPLODED DRAWING C Model No 831 24840 0 R0814B _ 79 69 99 68 96 4 _ 36 18 _32 _ 78 35 _ 8 97 79 _ 79 79 81 68 j_ 78 8 8 32 _ 7 79 _ i 18 4_94 _ 79 100 34 27 91 2O 77 78 26...

Page 27: ...EXPLODED DRAWING D Model No 831 24840 0 RO814B 70 67 75 79 27...

Page 28: ...r 1 800 488 1222 Call anytime day or night U S A only www sears com To purchase a protection agreement U S A or maintenance agreement Canada on a product serviced by Sears 1 800 827 6655 U S A 1 800 3...

Reviews: