background image

Summary of Contents for 400 Gi Treadmill

Page 1: ...Serial Number Decal Assembly Operation Maintenance Part List and Drawing _ CAUTION Read all precautions and instruc tions in this manual before using this equipment Save this manual for future referen...

Page 2: ...Y 6 OPERATHON AND ADJUSTMENT 10 HOW TO FOLD AND MOVE THE TREADMHLL 23 TROUBLESHOOTHNG 25 CONDiTiONiNG GUiDELiNES 27 ORDERHNG REPLACEMENT PARTS Back Cover FULL 90 DAY WARRANTY Back Cover Note An EXPLOD...

Page 3: ...at a time 9 Wear appropriate exercise cJothes when using the treadmill Do not wear Joose cJothes that eouJd become caught in the treadmill AthJetic support clothes are recommended for both men and wom...

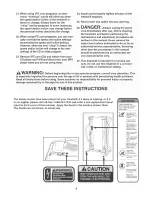
Page 4: ...treadmill is intended for in home use player when you are not using them only Do not use this treadmill in a commer cial rental or institutional setting A_WAR NING Before beg inn_ng this orany e ercis...

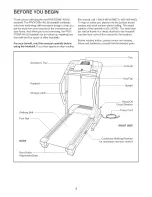
Page 5: ...u have questions after reading this manual call 1 800 4 MY HOME 1 800 469 4663 To help us assist you please note the product model number and serial number before calling The model number of the tread...

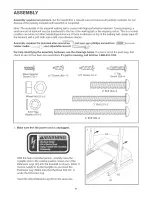
Page 6: ...rewdriver rubber mallet cZ_TL_x _ and adjustable wrench _ For help identifying the assernbJy hardware see the drawings below if a part is not in the parts bag first check to see if it has been pre ass...

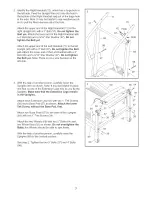
Page 7: ...Donottighten the Boltyet Note Thereisnota wireharness onthe leftside 71 42 72 Hole With the help of another person carefully lower the Uprights 69 as shown Note It may be helpful to place one foot on...

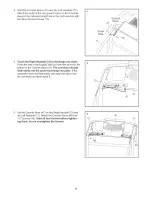
Page 8: ...the end of the Upright Wire 42 into the socket in the bottom of the Consob Base 47 The connector shouJd shale easily into the socket and snap into place if the connector does not slide easily and snap...

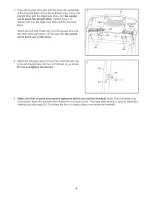
Page 9: ...the other wires with three 1 2 Screws 48 Be careful not to pinch any of the wires 48 47 48 Attach the Storage Latch 29 and the Latch Spacer 44 to the HeftUpright 69 with two 3 4 Screws 2 as shown Do n...

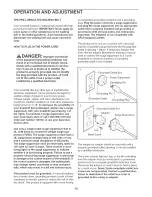
Page 10: ...ning properly FaiJure to use a properly functioning surge suppressor couJd result in damage to the controJ system of the treadmill If the control system is damaged the waJking belt may change speed ac...

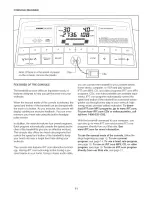
Page 11: ...he speed and incline of the treadmill to keep your heart rate near a target heart rate during your workouts The console also features iFIT com interactive technol ogy Having iFIT com technology is lik...

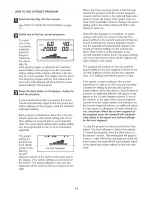
Page 12: ...king belt as desired by pressing the Speed and buttons Each time a button is pressed the speed setting wiil change by 0 1 mph if a button is held down the speed setting wili change in increments of 0...

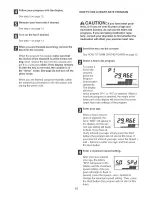
Page 13: ...handgrip pulse sensor make sure that your hands are clean if there are sheets of clear plastic on the metal contacts on the handgrip pulse sen sor remove the plastic To measure your heart rate stand...

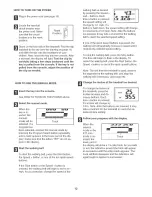
Page 14: ...readmill is about to change the speed setting and or the incline setting wiii flash in the display to alert you When the first segment is completed all speed settings will move one column to the left...

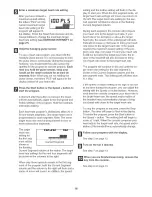
Page 15: ...e power cord insert the key into the consote See HOWTO TURN ON THE POWER on page 12 Select a heart rate program To select a heart rate p program press the Program Select button repeatedly The display...

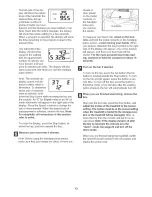
Page 16: ...ed setting and the incline setting wiii flash in the dis play to alert you When the first segment ends a taGqet heart rate settings wifl move one column to the left The target heart rate setting for t...

Page 17: ...your stereo has an RCA type AUDIO OUT jack see instruction A below If your stereo has a 1 8 LINE OUT jack see instruction B If your stereo has only a PHONES jack see instruction C A Plug one end of a...

Page 18: ...he consob Hug the other end of the cams into the LINE OUT jack on your computer Note While the cable is plugged into the LINE OUT jack do not plug your headphones into the headphone jack on the consol...

Page 19: ...on pages 17 to 19 To download iFiT com MP3 pro grams go to wwwJFlT com To purchase iFlT com CDs or videocassettes call toil free 1 888 533 1333 Follow the steps below to use an iFIT com MP3 CD or vide...

Page 20: ...line of the treadmill does not change when a chirp is heard Make sure that the letters 1FIT appear in the display and that the time is not flashing in the display If the time is flashing press the Sta...

Page 21: ...the on screen countdown ends the program wiii begin and the walking belt wiii begin to move Hold the handrails step onto the walking belt and begin walking During the program an electronic chirping s...

Page 22: ...ng belt has moved and the total number of hours 3 E Mile Is _Hours that the treadmill has been used An E for English miles or an M for metric kilometers will appear in the right side of the display Pr...

Page 23: ...e treadmill until the storage latch closes over the catch Make sure that the storage tatch is fully engaged over the catch To protect the floor or carpet from damage place a mat under the treadmi Keep...

Page 24: ...age Hatchto the Heft Pivot the treadmHHdown until the frame and foot rail are past the storage Hatch 2 HoHdthe treadmHHfirmHywith both hands and Howerthe tread mHH to the floor Do not drop the treadmi...

Page 25: ...M The power turns off during use SOLUTION a Check the circuit breaker located on the treadmill frame near the power cord see the drawing above if the circuit breaker has tripped wait for five minutes...

Page 26: ...69 4663 PROBLEM The walking belt is off center or slips when walked on SOLUTmON a if the walking belt is off center first remove the key and UNPLUG THE POWER CORD mfthe walking belt has sHfted to the...

Page 27: ...ries for en ergy Only after the first few minutes does your body begin to use stored fat calories for energy if your goal is to burn fat adjust the speed and incline of the tread mill until your heart...

Page 28: ...ut Ground Screw 68 4 8 Cable Tie Platform Nut 69 1 Uprights Fan Grill Back 70 1 Grommet Motor Tension Nut 71 1 Left Handrail Storage Latch 72 1 Latch Catch 73 1 Choke Rear Endcap Pad 74 1 Left Foot Ra...

Page 29: ...EXPLODED DRAWJNG Model No 831 295350 R1104A 76 10 _ 49 96 95 4 _Lb 6 3 5 _ 49 19 23 13 25 60 9o 67 _ 44 29 2 13 63 82 48 37 27 4O 84 66 39 39 41 48 _ 37 e _ 48 72 _71 s4...

Page 30: ...6655 U S A 1 800 361 6665 Canada il i i i i Para pedir servicio de reparaci6n a domicilio Y1 888 SU HOGAR sM 1 888 784 6427 para ordenar piezas _ i iii Registered Trademark TMTrademark sM Service Mar...

Reviews: