background image

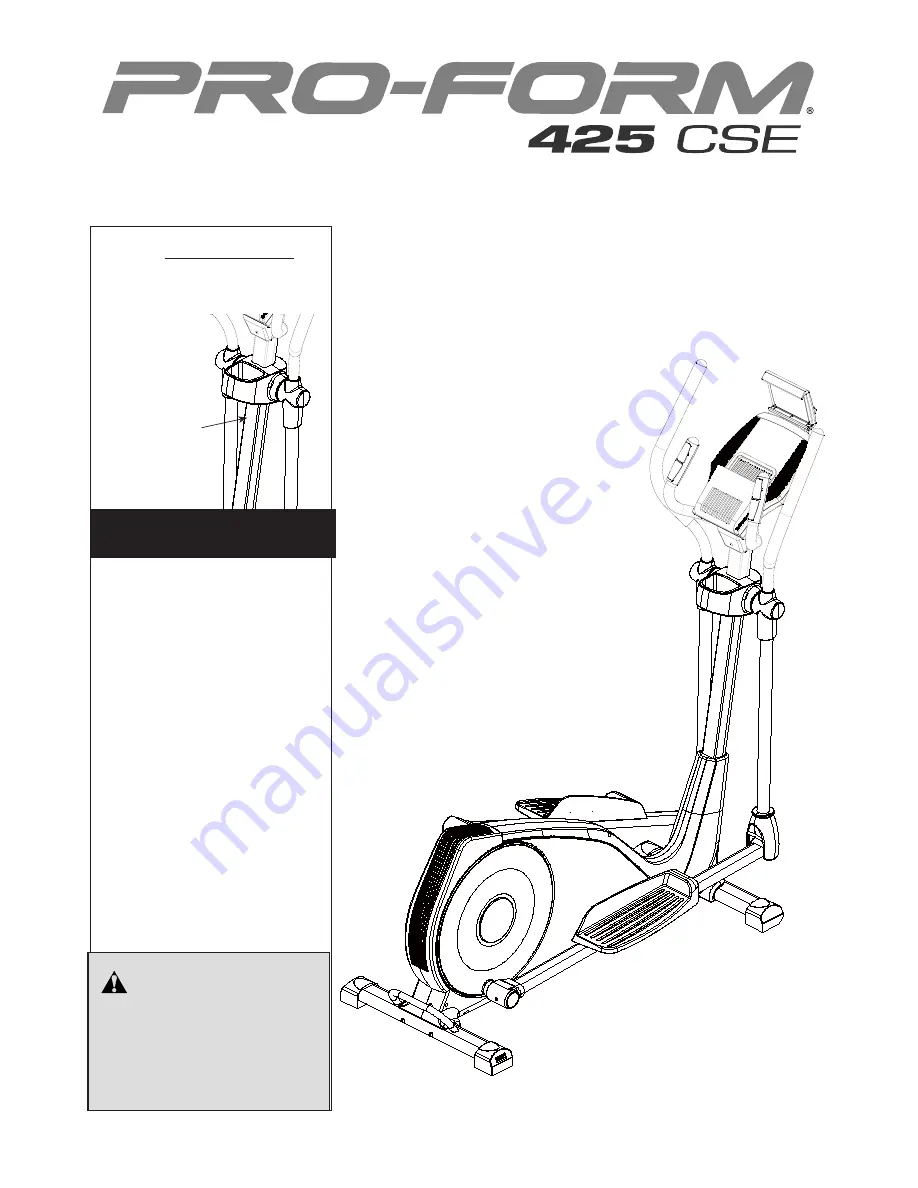
Serial Number 

Decal

Model No. PFEVEL59216.0

Serial No.                                  

Write the serial number in the space 

above for reference.

USER’S MANUAL

    CAUTION

Read all precautions and 

instructions in this manual 

before using this equipment. 

Keep this manual for future 

reference.

CUSTOMER SERVICE

UNITED KINGDOM

Call: 0330 123 1045

From Ireland: 053 92 36102

Website: www.iconsupport.eu

E-mail: csuk@iconeurope.com

Write: 

ICON Health & Fitness, Ltd.

Unit 1D, The Gateway

Fryers Way, Silkwood Park

OSSETT

WF5 9TJ

UNITED KINGDOM

www.iconeurope.com

Item.91

Item.92

Item.93

44

45

46

47

80

79

78

53

54

30

52

51

50

1

2

3

4

6

9

8L 7L

14

15

16

11

20

21

22

23

37

17

18

26

27

8R

31

32

33

34

35

36

9

5

10

11

12

24

29

30

39

55

56

58

21

22

43

49

48

61

63

48

64

65

65
88

70

69

68

73

74

21

66

67

75

76

77

81

83

84

87

89

90

13

7R

57

59

23

42

41

40

62

72

71

60

48

86

25L

25R

28L

28R

38L

38R

19

82

85

51

94

95

97

96

82

83

37

83

84

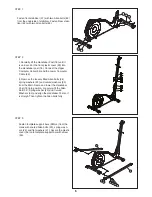
STEP 1

33
22
34
35

90

36

18

84

STEP 2

28R

28L

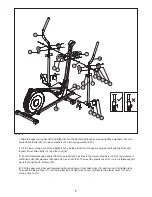
STEP 3

55

56

21

22

59

23

STEP 4

21

22

23

7R

9

29

30

31

32

15

14

16

8R

7L

8L

11

17

9

51

19

26

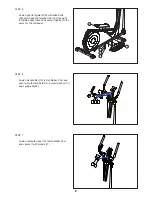
STEP 5

25R

40
22

39

25L

STEP 6

10

34 22 13

STEP 7

11

12

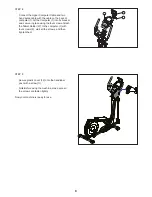
STEP 8

1

2

97

96

STEP 9

11

12

STEP 10

NO 92*1

PFIVEL59216

NO 83*4

NO 59*2

NO 13*3  NO 22*3  NO 34*3

NO 21*4  NO 22*4  NO 23*4

NO 33*6

NO 34*6

NO 22*6

NO 91*1

NO 19*2

NO 14*2   NO 16*2

NO 14*2   NO 16*2

NO 39*6 NO 40*6 NO 22*6

NO 26*2   NO 29*2
NO 30*2   NO 51*2

Summary of Contents for 425 CSE

Page 1: ...tructions in this manual before using this equipment Keep this manual for future reference CUSTOMER SERVICE UNITED KINGDOM Call 0330 123 1045 From Ireland 053 92 36102 Website www iconsupport eu E mail csuk iconeurope com Write ICON Health Fitness Ltd Unit 1D The Gateway Fryers Way Silkwood Park OSSETT WF5 9TJ UNITED KINGDOM www iconeurope com STEP 10 STEP 10 ...

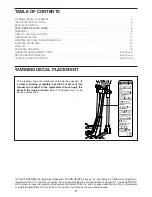
Page 2: ...TS WARNING DECAL PLACEMENT WARNING DECAL PLACEMENT 2 IMPORTANT PRECAUTIONS 3 BEFORE YOU BEGIN 4 PART IDENTIFICATION CHART 5 ASSEMBLY 6 HOW TO USE THE ELLIPTICAL 10 CNSOLE FEATURES 11 MAINTENANCE AND TROUBLESHOOTING 16 EXERCISE GUIDELINES 17 PART LIST 18 EXPLODED DRAWING 19 ORDERING REPLACEMENT PARTS Back Cover RECYCLING INFORMATION Back Cover TECNICHAL SPECIFICATIONS Back Cover STEP 10 This drawin...

Page 3: ...igthing more than 250 lbs 115 kg 9 Wear appropriate clothes while exercising do not wear loose clothes that could become caught on the elliptical Always wear athletic shoes for foot protection while exercising 10 Hold the handlebars or the upper body arms when mounting dismounting or using the elliptical 11 The pulse sensor is not a medical device Various factors may affect the accuracy of heart r...

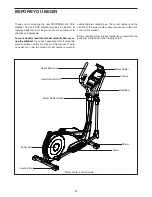
Page 4: ...ing this manual please see the front cover of this manual To help us assist you note the product model number and serial number before contacting us The model number and the location of the serial number decal are shown on the front cover of this manual Before reading further please familiarize yourself with the parts that are labeled in the drawing below Heart Rate Monitor Upper Body Arm Tablet H...

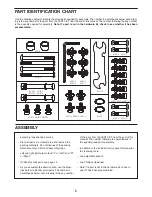
Page 5: ... 2 ASSEMBLY Assembly requires two persons Place all parts in a cleared area and remove the packing materials Do not dispose of the packing materials until you finish all assembly steps Left and right parts are marked L or Left and R or Right To identify small parts see page 19 As you assemble the exercice bike use the draw ings below to identify small parts The number in parentheses below each dra...

Page 6: ...wer the Handlebar Post 18 into position Loosely re fit the Allen Bolt 34 Spring washer 22 and Curved Washers 33 and align the Handlebar Post so it is straigh Then tighten the Allen bolts fully STEP 1 Fasten front stabilizer 37 with two Allen bolts 83 from the underside of stabilizer Fasten Rear stabi lizer 82 with two Allen bolts 83 STEP 3 Fasten footplate support bars 28R L from the crank with co...

Page 7: ...en footplate support bars 28 R L parallel don t incline to the lower swing bars 15 R L and secure it with Allen bolts 26 washers 29 and nylon lock nuts 30 Then put the plastic cover 31 onto footplate support bar left and right with screws 32 IV Fit the upper swing bar and lower swing bar and secure it four Allen bolts 14 and four nut 16 tighten fully Then put the plastic cover 7 onto swing bar lef...

Page 8: ...the right footplate support bar and secure it tightly Do the same for the left pedal STEP 6 Fasten Handle Bar 10 to Handlebar Post and secure it with Allen Bolt 34 Curved washer 13 and spring pad 22 STEP 7 Fasten computer rack 12 to Handlebar Post and secure it with screws 11 11 12 25R 40 22 39 25L ...

Page 9: ... and secure in place using the four screws Attach the Tablet Holder 97 to the computer 1 with four screws 2 start all the screws and then tighten them STEP 9 Secure plastic cover 12 onto the handlebar post with a screw 11 Note Before using the machine make sure all the screws are fasten tightly Now your machine is ready for use 11 12 1 2 97 96 ...

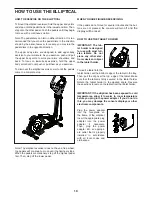
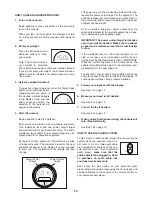
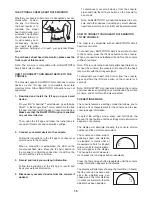
Page 10: ...ower pedal WHEN YOU ARE FINISHED EXERCISING If the pedals do not move for several minutes and the but tons are not pressed the console will turn off and the display will be reset HOW TO USE THE TABLET HOLDER IMPORTANT The tab let holder is designed for use with most full size tablets Do not place any other elec tronic device or object in the tablet holder To insert a tablet into the tablet holder ...

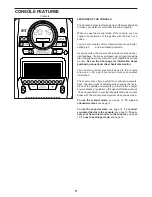
Page 11: ...nal chest heart rate monitor You can also connect your smart device to the console and use an iFit app to record and track your workout information The console also offers a selection of onboard workouts Each onboard workout automatically changes the resis tance of the pedals and prompts you to maintain a target power output as it guides you through an effective workout You can even listen to your...

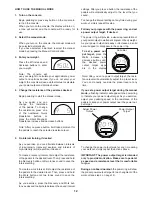
Page 12: ...stance of the pedals to the desired level Then press and hold the Work button until two tones sound to save the interval setting As you exercise press the Recovery and Work but tons as desired to alternate between the saved interval settings After you press a button the resistance of the pedals will automatically adjust to the level that you saved To change the interval settings at any time during...

Page 13: ... SETTINGS MODE on page 15 8 Measure your heart rate if desired You can measure your heart rate using either the handgrip heart rate monitor or an optional chest heart rate monitor see page 15 for information about the optional chest heart rate monitor Note The con sole is compatible with BLUETOOTH Smart heart rate monitors Note If you use both heart rate monitors at the same time the BLUETOOTH Sma...

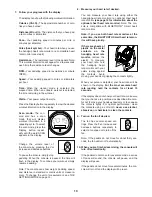
Page 14: ... In the power ring power output is displayed in watts per kilogram of body weight As you exercise keep your power output near the power output target for the current segment by increas ing or decreasing your pedaling speed IMPORTANT The power output target is intended only to provide motivation Make sure to pedal at a speed and a resistance level that is comfortable for you If the resistance level...

Page 15: ...and hold the iFit Sync button on the console for 5 seconds Note All BLUETOOTH connections between the con sole and other devices including any smart devices heart rate monitors and so forth will be disconnected HOW TO CONNECT YOUR HEART RATE MONITOR TO THE CONSOLE The console is compatible with all BLUETOOTH Smart heart rate monitors To connect your BLUETOOTH Smart heart rate monitor to the consol...

Page 16: ... of mild dish soap IMPORTANT Keep liquids away from the console and keep the console out of direct sun light During storage remove the batteries from the console CONSOLE TROUBLESHOOTING If the console does not display your heart rate when you use the handgrip heart rate monitor see step 8 on page 13 If a replacement power adapter is needed call the telephone number on the cover of this manual IMPO...

Page 17: ...obic Exercise If your goal is to strengthen your car diovascular system you must perform aerobic exercise which is activity that requires large amounts of oxygen for prolonged periods of time For aerobic exercise adjust the intensity of your exercise until your heart rate is near the highest number in your training zone WORKOUT GUIDELINES Warming Up Start with 5 to 10 minutes of stretching and lig...

Page 18: ... 2 Flange Screw 47 2 Axle Cap 48 11 Drill Screw M5 15 49 1 Sensor with Cable 800mm 50 1 C Sharp Clip Φ8 51 1 Curved Washer Φ10 Φ15 0 5T 52 2 Washer Φ10 Φ15 1 0T 53 1 Idler wheel Φ37 20 5 54 1 Idler wheel mandrel Φ10 42mml bk 55 2 Screw M5 7 5 bk 56 2 Crank Connect Cover 57 2 Bearing 2203 2RS 58 2 C Sharp Clip Φ40 59 2 Tube Spacer Φ17 5 Φ22 12mm 60 8 Allen Bolt M6 15mm bk 61 2 Plastic Cover 62 2 Ro...

Page 19: ...52 51 50 1 2 3 4 6 9 8L 7L 14 15 16 11 20 21 22 23 37 17 18 26 27 8R 31 32 33 34 35 36 9 5 10 11 12 24 29 30 39 55 56 58 21 22 43 49 48 61 63 48 64 65 65 88 70 69 68 73 74 21 66 67 75 76 77 81 83 84 87 89 90 13 7R 57 59 23 42 41 40 62 72 71 60 48 86 25L 25R 28L 28R 38L 38R 19 82 85 51 94 95 97 96 ...

Page 20: ...al ORDERING REPLACEMENT PARTS This electronic product must not be disposed of in municipal waste To preserve the environment this product must be recycled after its useful life as required by law Please use recycling facilities that are authorized to collect this type of waste in your area In doing so you will help to conserve natural resources and improve European standards of environmental prote...

Reviews: