background image

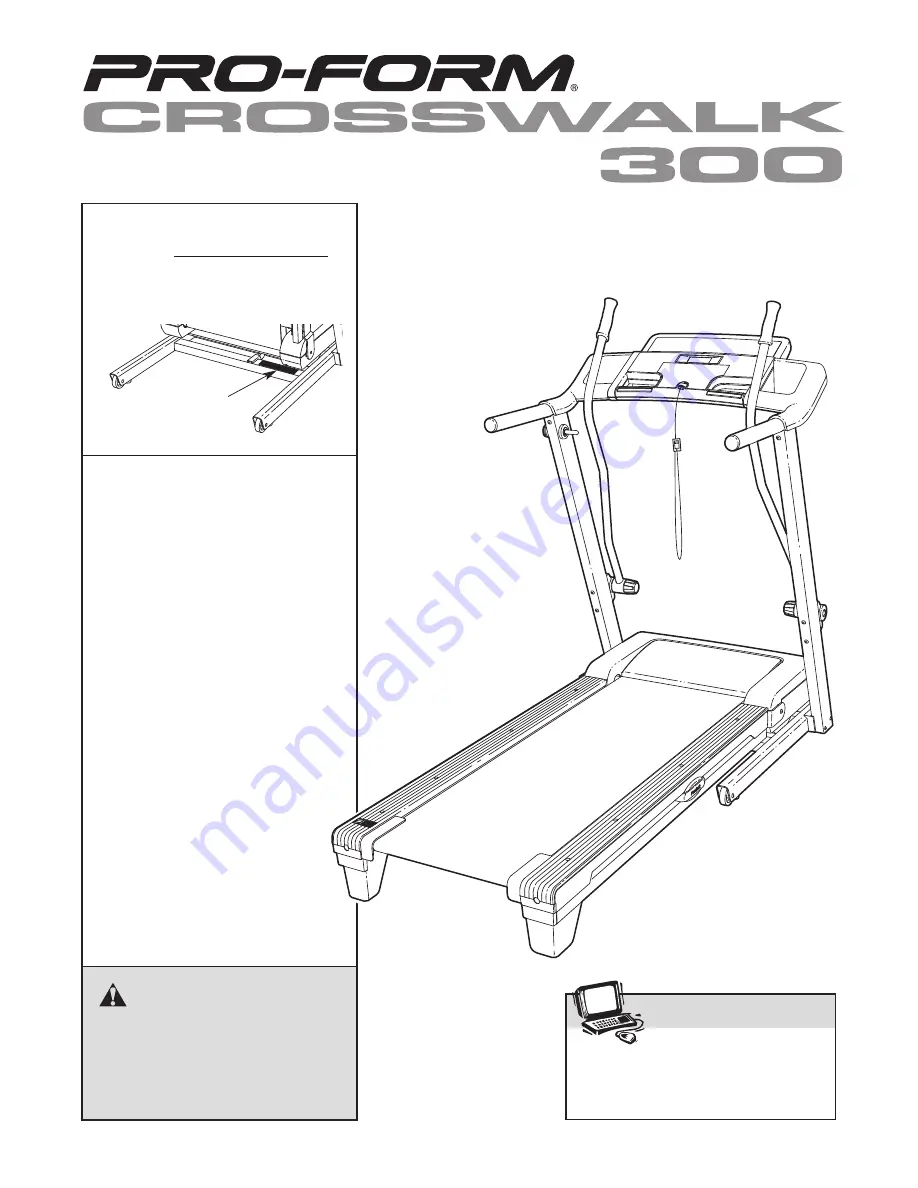
Serial

Number

Decal

Model No. PFTL39007.0  
Serial No. 

CAUTION

Read all precautions and instruc-
tions in this manual before using
this equipment. Save this manual
for future reference.

USER'S MANUAL

QUESTIONS?

As a manufacturer, we are com-
mitted to providing complete cus-
tomer satisfaction. If you have
questions, or if parts are missing,

PLEASE DO NOT CONTACT 
THE STORE; please contact
Customer Care. 

IMPORTANT: You must note the
product model number and    
serial number (see the drawing
above) before contacting us:

CALL TOLL-FREE:  

1-888-533-1333

Mon.–Fri. 6 a.m.–6 p.m. MST
Sat. 8 a.m.–4 p.m. MST

ON THE WEB:
www.proformservice.com

Write the serial number in the space
above for future reference.

Visit our website at

www.proform.com

new products, prizes,

fitness tips, and much more!

V

Summary of Contents for CROSSWALK 300

Page 1: ...ction If you have questions or if parts are missing PLEASE DO NOT CONTACT THE STORE please contact Customer Care IMPORTANT You must note the product model number and serial number see the drawing abov...

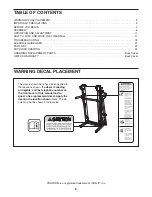
Page 2: ...WING 24 ORDERING REPLACEMENT PARTS Back Cover LIMITED WARRANTY Back Cover 2 The decals shown here have been applied in the locations shown If a decal is missing or illegible call the telephone number...

Page 3: ...ension cord 12 Use only a single outlet surge suppressor that meets all of the specifications described on page 11 To purchase a surge suppressor see your local PROFORM dealer or call the tele phone n...

Page 4: ...ill make sure that the frame is held securely in the storage position 23 Never insert any object into any opening on the treadmill 24 Inspect and properly tighten all parts of the treadmill regularly...

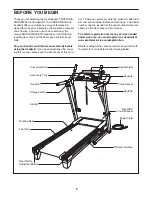
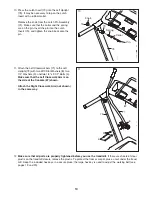
Page 5: ...front cover of this man ual To help us assist you note the product model num ber and serial number before contacting us The model number and the location of the serial number decal are shown on the f...

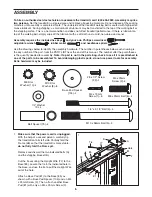
Page 6: ...of this manual The number after the parentheses is the quantity needed for assembly Note If a part is not in the parts bag check to see if it is preattached to one of the parts to be assembled To avo...

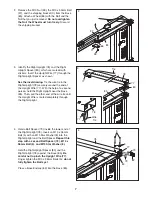
Page 7: ...With the help of a second person hold the Right Upright near the Base 85 Then pull the other end of the wire tie until the Upright Wire is routed completely through the Right Upright 85 77 78 80 77 3...

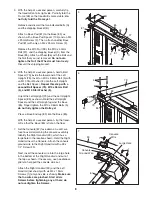
Page 8: ...ng bracket B Attach a Base Pad 81 to the Base 85 as shown with a Base Pad Spacer 104 and an M4 x 25mm Screw 2 Then attach another Base Pad 81 with only an M4 x 25mm Screw 2 Remove the M10 Nut 33 the M...

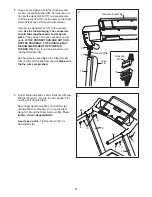
Page 9: ...ERLY THE CONSOLE MAY BE DAMAGED WHEN THE POWER IS TURNED ON Then insert the connectors into the Right Upright 78 Set the console assembly on the Right Upright 78 and the Left Upright not shown Make su...

Page 10: ...eft Upright 73 It may be necessary to tap on the Latch Insert with a rubber mallet Remove the knob from the Latch Pin Assembly 72 Make sure that the collar and the spring are on the pin Insert the pin...

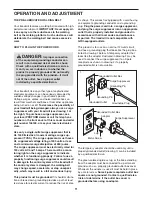
Page 11: ...ion or break down grounding provides a path of least resistance for electric current to reduce the risk of elec tric shock This product is equipped with a cord having an equipment grounding conductor...

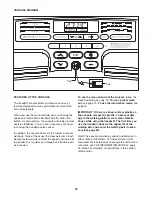
Page 12: ...rough an effective exer cise session To use the manual mode of the console follow the steps beginning on page 13 To use a preset work out see page 15 To use the information mode see page 16 IMPORTANT...

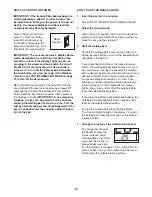
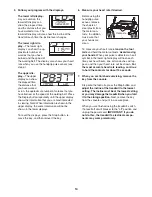
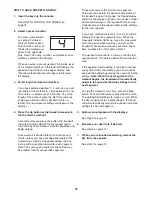
Page 13: ...E MANUAL MODE 1 Insert the key into the console See HOW TO TURN ON THE POWER at the left 2 Select the manual mode When the key is inserted the manual mode will be selected If a preset workout has been...

Page 14: ...tton re move the key and then reinsert the key 6 Measure your heart rate if desired Before using the handgrip pulse sensor remove the sheets of clear plastic from the metal con tacts In addition make...

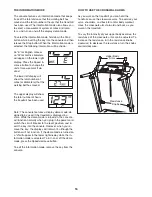
Page 15: ...incline setting may be programmed for consecutive segments Tones will sound at the end of each segment Three seconds before the speed and or incline of the treadmill is about to change the Speed displ...

Page 16: ...atures a display demo mode de signed to be used if the treadmill is displayed in a store While the demo mode is turned on the console will function normally when you plug in the power cord switch the...

Page 17: ...out of di rect sunlight Do not leave the treadmill in the stor age position in temperatures above 85 F 30 C HOW TO MOVE THE TREADMILL Before moving the treadmill convert it to the storage position as...

Page 18: ...back in PROBLEM The power turns off during use SOLUTION a Check the reset off circuit breaker see the drawing above If the circuit breaker has tripped wait for five minutes and then press the switch...

Page 19: ...few seconds If the displays are still lit see THE INFORMATION MODE on page 16 to turn off the demo mode PROBLEM The walking belt slows when walked on SOLUTION a Use only a single outlet surge suppress...

Page 20: ...y tightened you should be able to lift each edge of the walking belt 2 to 3 in 5 to 7 cm off the walking platform Be careful to keep the walking belt centered Then plug in the power cord insert the ke...

Page 21: ...goal is to strengthen your cardiovascular system you must perform aerobic exer cise which is activity that requires large amounts of oxygen for prolonged periods of time For aerobic ex ercise adjust t...

Page 22: ...oller Pulley 45 1 Walking Belt 46 1 Walking Platform 47 1 Right Foot Rail 48 1 Frame 49 1 Warning Decal 50 2 Rear Roller Bracket Plate 51 1 Left Foot 52 1 Right Foot 53 1 Hood 54 1 Reed Switch 55 1 Re...

Page 23: ...Base Pad Spacer 105 1 4mm Hex Key 106 1 5mm Hex Key 107 1 Incline Stop Bracket 108 1 Drive Motor Flat Washer 109 1 Controller Ground Wire 8 Blue Wire 2F 6 Blue Wire 2F 6 Blue Wire M F 6 Red Wire M F...

Page 24: ...5 42 43 16 14 23 23 35 41 39 23 23 15 22 40 17 50 30 30 50 17 100 22 15 35 51 52 1 1 23 23 35 28 1 47 23 40 1 23 41 35 48 28 49 29 29 59 59 105 106 34 101 103 103 24 EXPLODED DRAWING A Model No PFTL39...

Page 25: ...3 37 13 37 13 37 13 1 32 63 24 25 25 7 60 26 22 57 56 33 18 31 31 33 56 21 61 19 31 58 55 12 66 65 67 22 68 69 11 11 11 11 62 64 54 11 99 3 108 107 109 EXPLODED DRAWING B Model No PFTL39007 0 R1207A 2...

Page 26: ...72 4 9 8 5 83 82 6 10 6 10 20 36 4 9 20 36 81 2 5 8 78 82 80 81 2 81 2 27 86 33 85 81 2 33 86 27 79 79 77 77 84 84 74 71 8 75 8 97 96 74 8 75 76 97 96 22 102 104 104 26 EXPLODED DRAWING C Model No PFT...

Page 27: ...88 87 91 91 12 89 91 1 1 38 38 91 90 1 93 12 12 12 12 12 12 12 12 94 95 22 92 1 98 1 92 27 EXPLODED DRAWING D Model No PFTL39007 0 R1207A...

Page 28: ...le for indirect special or consequential damages arising out of or in con nection with the use or performance of the product or damages with respect to any economic loss loss of property loss of reven...

Reviews: