


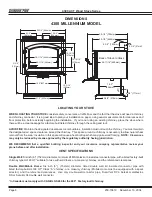

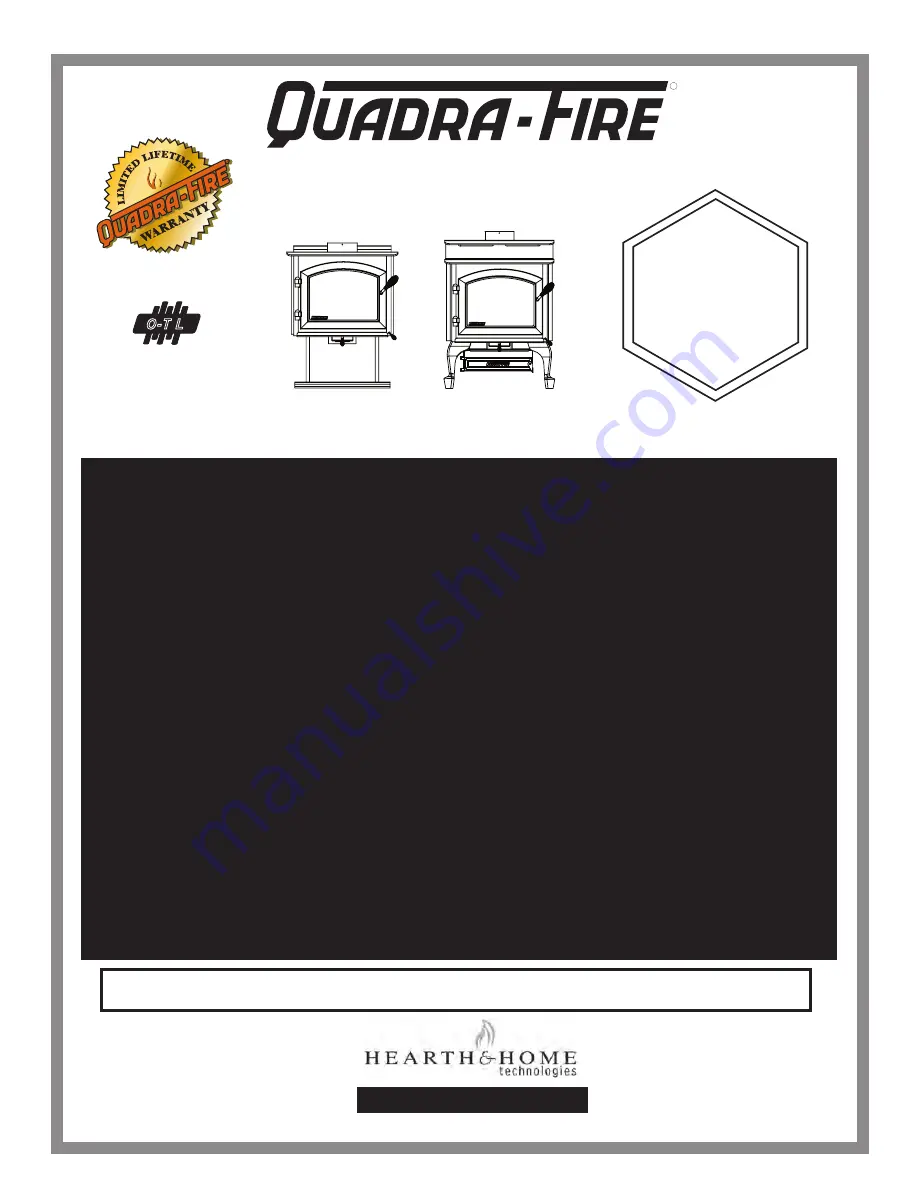
4300 WOOD STOVE SERIES
Advanced Combustion Technology (ACT)
1445 North Highway
Colville, WA 99114
SAVE THESE INSTRUCTIONS
Part 250-7061C December 10, 2004
www.quadrafire.com
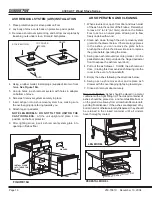
PRIOR TO FIRST FIRE
: Remove all labels from glass. Clean plated surfaces with a glass cleanser and soft cloth to
prevent staining from fingerprint oils.
O-T L
Tested and
Listed by
Beaverton
Oregon USA
OMNI-Test Laboratories, Inc.
C
This manual contains instructions for Installation, Operation & Maintenance. Please read this entire
manual before you install and use your new room heater. Failure to follow instructions may result in
property damage, bodily injury, or even death.
R
MILLENNIUM
STEP TOP UNI-BODY
IMPORTANT SAFETY NOTES:
1) When installing your stove, particular attention should be paid to fire protection. If this room heater is not properly
installed, a house fire may result. To reduce the risk of fire, follow the installation instructions. Contact local building,
fire officials or authority having jurisdiction about restrictions, installation inspection and permit requirements in your
area.
2) CAUTION: Never use gasoline, gasoline-type lantern fuel, kerosene, charcoal lighter fluid, or similar liquids to start
or “freshen up” a fire in this heater. Keep all such liquids well away from the heater while it is in use.
3) During operation, if any part of the stove starts to glow, the stove is in an overfired condition. Close the air controls
completely by pulling them out, until the glowing has stopped.
OVERFIRING VOIDS YOUR WARRANTY!
4) Cool ashes should be disposed of carefully, using a metal container.
5) Do not burn wet or green wood. Store wood in a dry location.
6) DO NOT BURN GARBAGE OR FLAMMABLE FLUIDS SUCH AS GASOLINE, NAPHTHA OR ENGINE OIL. Do not
burn treated wood, or wood with salt (driftwood, etc.). Burning materials other than wood (including charcoal) under
adverse conditions may generate carbon monoxide in the home, resulting in illness or possible death.
7) Do not permit creosote or soot to accumulate excessively in the chimney or inside the firebox.
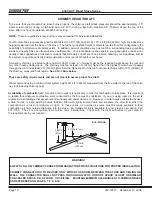
8) Check your chimney system thoroughly when installing into an existing metal or masonry chimney. Seek profes-
sional advice if in doubt about its condition.
9) Do not connect this unit to a chimnney flue already serving another appliance.
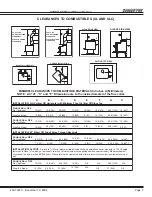
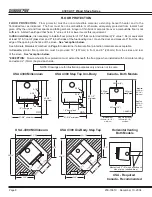
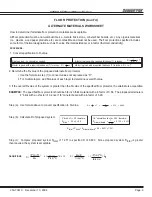
10) Comply with all minimum clearances to combustibles as shown in this manual for this appliance.
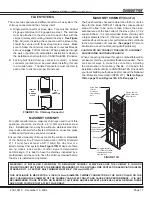
11) Build fire on brick firebox floor. Do not use grates, andirons or other methods to support fuel.
12) HOT WHILE IN OPERATION! Keep children, pets, clothing and furniture away. Contact can cause skin burns.
13) Do not connect to any air distribution duct or system.
14) RISK OF FIRE! Do not operate with stove door or ash removal system door open.
15) For further information refer to NFPA 211 (USA) or CAN/CSA-B365 (Canada).
16) Do not operate without fully assembling all components. Burning your stove wthout the legs attached (if supplied
with unit) will void your warranty, and could present a serious safety hazard.
17) Do not operate with broken glass.
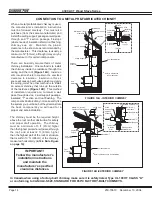
VERY IMPORTANT!!
BEFORE STARTING YOUR
FIRST FIRE READ
HOW TO OPERATE THE
2-STEP DOOR HANDLE
ON PAGE 20


