background image

1

April 23, 2019

7021-801B

R

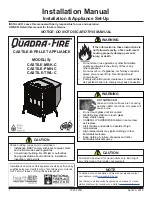
CASTILE-B PELLET APPLIANCE

MODEL(S):

CASTILE-MBK-C

CASTILE-PMH-C

CASTILE-TWL-C

Installation Manual

Installation & Appliance Set-Up

INSTALLER: Leave this manual with party responsible for use and operation. 

OWNER: Retain this manual for future reference. 

NOTICE: DO NOT DISCARD THIS MANUAL

Installation and service of this appliance should be performed by 

qualified personnel. Hearth & Home Technologies recommends 

HHT Factory Trained or NFI certified professionals.

Tested and approved for wood pellets only. Burning of 

any other type of fuel voids your warranty. 

CAUTION

CAUTION

Check building codes prior to installation.

•  Installation MUST comply with local, regional, state 

and national codes and regulations.

• 

Consult local building, fire officials or authorities 

having jurisdiction about restrictions, installation 

inspection, and permits.

WARNING

If the information in these instructions is 

not followed exactly, a fire could result 

causing property damage, personal 

injury, or death.

• 

Do not store or use gasoline or other flammable 

vapors and liquids in the vicinity of this or any 

other appliance.

• 

Do not over fire - If appliance or chimney connector 

glows, you are over firing. Over firing will void 

your warranty.

•  Comply with all minimum clearances to combustibles 

as specified. Failure to comply may cause house fire.

HOT SURFACES!

Glass and other surfaces are hot during 

operation AND cool down. Hot glass will 

cause burns.

WARNING

•  Do not touch glass until it is cooled

•  NEVER allow children to touch glass

•  Keep children away

• 

CAREFULLY SUPERVISE children in same room 

as fireplace.

•  Alert children and adults to hazards of high 

temperatures

•  High temperatures may ignite clothing or other 

flammable materials.

•  Keep clothing, furniture, draperies and other 

flammable materials away.

NOTE

To obtain a French translation of this manual, please contact 

your dealer or visit 

www.quadrafire.com

Pour obtenir une traduction française de ce manuel, s’il vous 

plaît contacter votre revendeur ou visitez 

www.quadrafire.com

Summary of Contents for CASTILE-MBK-C

Page 1: ...not followed exactly a fire could result causing property damage personal injury or death Do not store or use gasoline or other flammable vapors and liquids in the vicinity of this or any other applia...

Page 2: ...mostat Wall Control Location 6 C Tools And Supplies Needed 6 D Inspect Appliance and Components 6 E Install Checklist 7 3 Dimensions and Clearances 8 A Appliance Dimensions 8 B Clearances to Combustib...

Page 3: ...proper operation It is against federal regulations to operate this pellet appliance in a manner inconsistent with operating instructions in this manual Emissions Report Number 0061PM077E EPA Certific...

Page 4: ...on of such fuels can expose you to chemicals including carbon black which is known to the State of California to cause cancer and carbon monoxide which is known to the State of California to cause bir...

Page 5: ...ior to installation Installation MUST comply with local regional state and national codes and regulations Consult insurance carrier local building inspector fire officials or authorities having jurisd...

Page 6: ...lation to ensure maximum safety and benefit Follow pipe manufacturer instructions for installation and air clearance requirements C Tools And Supplies Needed Tools and building supplies normally requi...

Page 7: ...tion and copying this checklist for your file That this checklist remain visible at all times on the appliance until the installation is complete Electrical 120 VAC unswitched power provided to the ap...

Page 8: ...ure 8 1 Top View Figure 8 2 Top View with TPVNT 2 and 812 3570 Figure 8 4 Top view with TPVNT 2 and 811 0720 11 7 8 in 302mm 11 7 8 in 302mm 5 3 4 in 146mm 3 1 2 in 89mm 5 in 127mm 11 7 8 in 297mm 3 i...

Page 9: ...de View Figure 9 4 Side View with TPVNT 2 and 811 0720 28 1 2 in 724mm 24 in 610mm 23 5 8 in 600mm 15 1 2 in 394mm 9 1 2 in 241mm 28 5 8 in 727mm 27 in 686mm 24 1 2 in 622mm 22 7 8 in 581mm 22 7 8 in...

Page 10: ...vidual design preference C C A B D E F G G H H Horizontal Through the Wall Inches Millimeters A Back Wall to Appliance 2 51 B Side Wall to Appliance 6 152 Corner Installation Inches Millimeters C Wall...

Page 11: ...de of pipe shaded area to the wall thimble 152MM USA INSTALLATIONS A non combustible floor protection is recommended extending beneath the flue pipe when installed with horizontal venting or under the...

Page 12: ...ight 43 1092 n a n a B Width 38 965 n a n a C Depth n a n a 36 914 D To Side Wall 6 152 n a n a All minimums listed are to a combustible surface NOTE Illustrations reflect typical installations and ar...

Page 13: ...nd protruding parts of the structure P 12 in Clearance above roof line for vertical terminations All minimum clearances are listed with an Outside Air Kit OAK installed unless otherwise noted in table...

Page 14: ...t of the demands of the pellet appliance but consideration must be given to the total house demand House demand may consume the air needed for the appliance It may be necessary to add additional venti...

Page 15: ...through the chimney Install through the warm airspace enclosed by the building envelope This helps to produce more draft especially during lighting and die down of the fire Considerations for successf...

Page 16: ...until you reach your altitude above sea level 3 If you fall below the diagonal line 3 or 4 inch 76 to 102mm pipe may be used 4 If it is anywhere above the diagonal line a 4 inch 102mm diameter pipe i...

Page 17: ...ed for mobile home installations Must use 3 or 4 inch 76 102mm L or PL Listed pellet venting or Listed double wall pipe and a Quadra Fire Outside Air Kit in mobile homes NOTE In Canada where passage t...

Page 18: ...ean out Cover 24 in 610mm Minimum Ceiling Support 6 in 152mm Flue Connector 6 in 152mm Class A Chimney Connector Adapter 3 in to 6 in 76 152mm Top Vent Kit B Vertical into Existing Class A Chimney We...

Page 19: ...ace Concrete Cap 1 in 25mm clearance with firestop 6 in 152mm minimum Non combustible Hearth Pad Airtight clean out door Sheathing 2 in 51mm minimum Flashing 1 in 25mm clearance 1 in 25mm clearance wi...

Page 20: ...h slots in convection blower mount and ash box Figure 20 2 Push up and slide forward CAUTION Never draw outside combustion air from Wall floor or ceiling cavity Enclosed space such as an attic or gara...

Page 21: ...exhaust outlet Do not put silicone inside of pipe Figure 21 1 2 Slide the adapter onto the rear exhaust outlet and adjust the assembly to the appropriate position 3 Install the vent pipe into the ada...

Page 22: ...t for drywall or a 7 32 drill bit for plaster drill holes 3 Using a hammer tap in wall anchors 4 Route the wires through the opening in the base plate and hold the base against the wall while aligning...

Page 23: ...E Due to the abrasive nature of a pellet appliance fire the logs are not covered under warranty Any placement variation other than shown here can cause excessive heat and shall void the appliance warr...

Page 24: ...24 PART NUMBER 811 0872 Spark Arestor Cap Roof Flashing Storm Collar Joist Shield Firestop Double Wall Connector Pipe Figure 24 1 CAUTION THE STRUCTURAL INTEGRITY OF THE MOBILE HOME FLOOR WALL AND CEI...

Page 25: ...25 April 23 2019 7021 801B CASTILE FREESTANDING 8 Reference Materials A Service and Maintenance Log Date of Service Performed By Description of Service...

Page 26: ...26 April 23 2019 7021 801B CASTILE FREESTANDING Date of Service Performed By Description of Service...

Page 27: ...7050 144 Log Right Rear 7050 143 Collar Offset Top Vent 812 3570 Damper 3 Inch Tall Vertical Installs Only PEL DAMP3 Y Damper 4 Inch Tall Vertical Installs Only PEL DAMP4 Outside Air Kit Rear 811 0872...

Page 28: ...purchased installed _________________________________________________________________________ Serial Number ____________________________________ Location on appliance ___________________________ Deal...

Reviews: