background image


KPC-1900 User’s Manual 


KPC-1900 

19” Touch Panel PC 
with Intel

®

 Skylake S-Series Processors 

User’s Guide


Summary of Contents for KPC-1900 Series

Page 1: ...I KPC 1900 User s Manual KPC 1900 19 Touch Panel PC with Intel Skylake S Series Processors User s Guide...

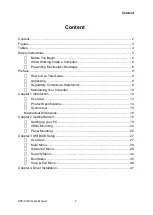
Page 2: ...npacking 9 Regulatory Compliance Statements 9 Maintaining Your Computer 10 Chapter 1 Introduction 13 Overview 13 Product Specifications 14 System tour 16 Mechanical Dimensions 18 Chapter 2 Getting Sta...

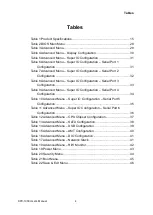
Page 3: ...ions 18 Figure 3 DP DVI D 19 Figure 4 Connect USB mouse keyboard 20 Figure 5 RJ45 connector 21 Figure 6 COM port 22 Figure 7 Turning on the system 23 Figure 8 VESA Mounting Hole Locations 24 Figure 9...

Page 4: ...on 33 Table 9 Advanced Menu Super IO Configuration Serial Port 4 Configuration 34 Table 10 Advanced Menu Super IO Configuration Serial Port 5 Configuration 35 Table 11 Advanced Menu Super IO Configura...

Page 5: ...e extreme caution when installing or removing components Refer to the installation instructions in this user s guide for precautions and procedures If you have any questions please contact our Post Sa...

Page 6: ...puter When you disconnect a cable pull on its connector or on its strain relief loop not on the cable itself Some cables have a connector with locking tabs If you are disconnecting this type of cable...

Page 7: ...shipping carton do not remove the component s antistatic packing material until you are ready to install the component in a computer Just before unwrapping the antistatic packaging be sure you are at...

Page 8: ...sitive components at an ESD workstation If possible use antistatic floor pads and workbench pads Handle components and boards with care Don t touch the components or contacts on a board Hold a board b...

Page 9: ...ass A devices FCC Compliance Statement for Class A Devices The product s described in this user s guide has been tested and found to comply with the limits for a Class A digital device pursuant to Par...

Page 10: ...period to bring it up to normal operating temperature before turning it on Failure to do so may cause damage to internal components particularly the hard disk drive Humidity High humidity can cause m...

Page 11: ...tage protection of surge protectors Line conditioners keep a system s AC power source voltage at a fairly constant level and therefore can handle brownouts Because of this added protection line condit...

Page 12: ...Preface 12 KPC 1900 User s Manual Laboratories UL safety approved...

Page 13: ...ockets for wireless storage or other function expansion including PCIe optional mPCIe mSATA and SATA slots sockets Checklist KPC 1900 Power Adapter Power Cord Driver CD Quick installation Guide Option...

Page 14: ...1x Line out on rear 1x Mic in on rear Ethernet 2x GbE LAN RJ 45 on rear 1x Intel I219 LM 1x Intel I210 AT USB 4x USB 3 0 Type A on rear 2x USB 2 0 Type A on rear Serial Ports 3x RS232 422 485 DB9 on r...

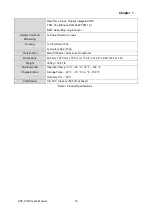
Page 15: ...n rear Cooling 1x CPU Smart Fan 1x System Smart Fan Construction Metal Chassis Aluminum Front Bezel Dimensions 448 mm x 373 mm x 72 5 mm 17 64 x 14 69 x 2 85 W x H x D Weight 7650 g 16 87 lb Environme...

Page 16: ...allows many devices to run simultaneously on a single computer with some peripheral acting as additional plug in sites or hubs Power Switch The power switch allows powering ON and OFF the system Ethe...

Page 17: ...ntially it is a cable that connects two devices producing an output image on a screen COM D Sub 9 pin connector for RS232 422 485 and RS232 connection Line Out Green The stereo headphone jack is used...

Page 18: ...Chapter 1 18 KPC 1900 User s Manual Mechanical Dimensions 448 x 373 x 72 5 mm W x H x D Figure 2 Mechanical Dimensions...

Page 19: ...pter 2 19 KPC 1900 User s Manual Chapter 2 Getting Started Setting up your PC Connecting the monitor Connect the DP DVI D cable from your display to the DP DVI D port Figure 3 DP DVI D DVI D DP DVI D...

Page 20: ...s not come with a keyboard and mouse but you can use any USB keyboard or mouse with your computer Figure 4 Connect USB mouse keyboard NOTE Using a third party USB mouse or keyboard may require softwar...

Page 21: ...r 2 21 KPC 1900 User s Manual Connecting to a network device Connect one end of a network cable to the LAN port on the system rear panel and the other end to a hub or switch Figure 5 RJ45 connector LA...

Page 22: ...RS485 Full Duplex RS485 1 DCD TX DATA TX 2 RXD RX N A RX 3 TXD TX DATA TX 4 DTR RX N A RX 5 GND GND GND GND 6 DSR N A N A N A 7 RTS N A N A N A 8 CTS N A N A N A 9 5V 5V 5V 5V COM4 COM6 RS232 Port DB...

Page 23: ...DC IN on the I O panel of the system 2 Connect the AC power cable to the power adapter 3 Connect the other end of the AC power cable to a corresponding AC power outlet 4 Press the power switch on the...

Page 24: ...FDMI 75 100 standard mounting holes as shown below Use 4 screws with the appropriate length for your mounting bracket Figure 8 VESA Mounting Hole Locations NOTE To fasten the metal shelf your monitor...

Page 25: ...l Mounting The Panel PC can be panel mounted and comes with brackets and screws for this purpose The required cutout for panel mounting and maximum panel thickness is shown below Figure 9 Panel Mount...

Page 26: ...do panel mounting Step 1 Remove 9 Bracket Opening Covers from the chassis with Phillips Screwdriver 3 on top edge 3 on bottom edge Step 2 Insert a Panel Mount Bracket into each Bracket Opening Step 3...

Page 27: ...se contact us AMI s ROM BIOS provides a built in Setup program which allows the user to modify the basic system configuration and hardware parameters The modified data will be stored in a battery back...

Page 28: ...BIOS Main Menu BIOS SETUP UTILITY M a i n A d v a n c e d P o w e r S e c u r i t y B o o t S a v e E x i t Product Information Select Screen Select Item Enter Select Change Opt F1 General Help F2 Pre...

Page 29: ...lues F3 Optimized Defaults F4 Save Reset ESC Exit Onboard LAN2 Controller Enabled Audio Controller Enabled Display Configuration Super IO Configuration CPU Chipset Configuration SATA Configuration USB...

Page 30: ...ight Control PWM 127 Version 2 17 1254 Copyright C 2016 American Megatrends Inc Primary Display Options Auto IGFX PEG PCIE UMA Frame Buffer Size Options 128MB 256MB 512MB DVMT Pre Allocated Options 32...

Page 31: ...ation Serial Port 1 Configuration BIOS SETUP UTILITY M a i n A d v a n c e d P o w e r S e c u r i t y B o o t S a v e E x i t Serial Port 1 Configuration Select Screen Select Item Enter Select Change...

Page 32: ...s F4 Save Reset ESC Exit Serial Port Enabled Device Settings IO 2F8h IRQ 3 Change Settings Auto Serial Port 2 Type RS232 Version 2 17 1254 Copyright C 2016 American Megatrends Inc Serial Port Options...

Page 33: ...s F4 Save Reset ESC Exit Serial Port Enabled Device Settings IO 3E8h IRQ 5 Change Settings Auto Serial Port 3 Type RS232 Version 2 17 1254 Copyright C 2016 American Megatrends Inc Serial Port Options...

Page 34: ...Item Enter Select Change Opt F1 General Help F2 Previous Values F3 Optimized Defaults F4 Save Reset ESC Exit Serial Port Enabled Device Settings IO 2E8h IRQ 5 Change Settings Auto Version 2 17 1254 Co...

Page 35: ...Item Enter Select Change Opt F1 General Help F2 Previous Values F3 Optimized Defaults F4 Save Reset ESC Exit Serial Port Enabled Device Settings IO 2F0h IRQ 5 Change Settings Auto Version 2 17 1254 C...

Page 36: ...Item Enter Select Change Opt F1 General Help F2 Previous Values F3 Optimized Defaults F4 Save Reset ESC Exit Serial Port Enabled Device Settings IO 2E0h IRQ 5 Change Settings Auto Version 2 17 1254 C...

Page 37: ...Enabled Active Processor Cores All Limit CPUID Maximum Disabled Execute Disable Bit Enabled Intel Virtualization Technology Disabled Intel TXT LT Support Disabled Version 2 17 1254 Copyright C 2016 A...

Page 38: ...A Controller s Enabled SATA Mode Selection AHCI Serial ATA Port 1 Empty Port 1 Enabled Serial ATA Port 2 Empty Port 2 Enabled Serial ATA Port 3 Empty Port 3 Enabled Serial ATA Port 4 Empty Port 4 Enab...

Page 39: ...ect Change Opt F1 General Help F2 Previous Values F3 Optimized Defaults F4 Save Reset ESC Exit USB Devices 1 Keyboard 1 Mouse 1 Point Legacy USB Support Enabled xHCI hand off Disabled USB Mass Storage...

Page 40: ...o o t S a v e E x i t AMT Configuration Select Screen Select Item Enter Select Change Opt F1 General Help F2 Previous Values F3 Optimized Defaults F4 Save Reset ESC Exit Intel AMT Enabled Un Configure...

Page 41: ...1 DIO_7 Value 1 Version 2 17 1254 Copyright C 2016 American Megatrends Inc User Configuration Options Enabled Disabled DIO_0 1 2 3 4 5 6 7 Options Output Low Output High Input Table 17 Advanced Menu...

Page 42: ...pt F1 General Help F2 Previous Values F3 Optimized Defaults F4 Save Reset ESC Exit CPU Warning Temperature Disabled CPU Temperature 56 C System Temperature 47 C CPU Fan Speed 1323 RPM SYS Fan Speed N...

Page 43: ...d Resume By PCI E Device Disabled Resume By Ring Device Disabled Resume By RTC Alarm Disabled Watchdog Timer Configuration Version 2 17 1254 Copyright C 2016 American Megatrends Inc ACPI Sleep State O...

Page 44: ...when entering Setup If ONLY the User s password is set then this is a power on password and must be entered to boot or enter Setup In Setup the User will have Administrator rights The password length...

Page 45: ...Values F3 Optimized Defaults F4 Save Reset ESC Exit Full Screen LOGO Display Disabled Setup Prompt Timeout 1 Bootup NumLock State On CSM Support Disabled Boot Option Filter UEFI only Boot Option Prio...

Page 46: ...etup without saving any changes Select this option only if you do not want to save the changes that you made to the Setup program If you made changes to fields other than system date system time and p...

Page 47: ...operating system and the necessary drivers to operate it After you have finished assembling your system and connected the appropriate power source power it up using the power supply and install the de...

Reviews: