background image

© Qube Engineering 2009

Qube’s AP1 LED Dash DIY Kit Supplemental Instructions Page 1

v1.0

Qube Engineering

21914 Palos Verdes Blvd

Torrance, CA 90503

818-271-QUBE (7823)

art@qube-engineering.com

© Qube Engineering 2009

Summary of Contents for AP1

Page 1: ...Engineering 2009 Qube s AP1 LED Dash DIY Kit Supplemental Instructions Page 1 v1 0 Qube Engineering 21914 Palos Verdes Blvd Torrance CA 90503 818 271 QUBE 7823 art qube engineering com Qube Engineerin...

Page 2: ...ental Instructions are intended for use solely with Qube s AP1 LED Dash Installation Instructions Please use this supplement as a direct replacement for steps 18 25 of Qube s AP1 LED Dash Installation...

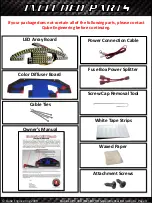
Page 3: ...er Connection Cable LED Array Board Cable Ties If your package does not contain all of the following parts please contact Qube Engineering before continuing Owner s Manual Fuse Box Power Splitter Scre...

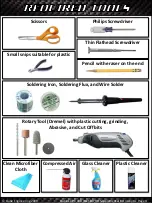
Page 4: ...fiber Cloth Small snips suitable for plastic Thin Flathead Screwdriver Philips Screwdriver Scissors Rotary Tool Dremel with plastic cutting grinding Abrasive and Cut Off bits Compressed Air Pencil wit...

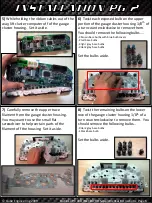
Page 5: ...white back cover onto the gauge cluster assembly Remove the back cover and set it aside 3 With the cluster computer exposed unplug the two 3 pin harnesses You should be able to do this by gently wigg...

Page 6: ...llowing bulbs 2 brown base bulbs with blue bulb covers 2 red base bulbs 3 light grey base bulbs 3 dark grey base bulbs Set the bulbs aside 7 Carefully remove the upper trace filament from the gauge cl...

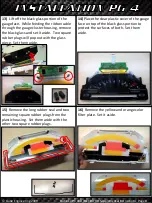
Page 7: ...ousing Set it aside 10 Turn the gauge cluster face up Remove and set aside the rubber pads from the tabs at the base of the gauge cluster 11 Undo the clips that hold the black plastic frame onto the g...

Page 8: ...set it aside Two square rubber plugs will pop out with the glass piece Set them aside 14 Place the clear plastic cover of the gauge face on top of the black glass portion to protect the surfaces of bo...

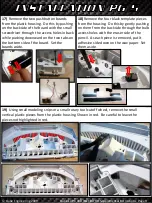
Page 9: ...ttom side of the board Set the boards aside 18 Remove the four black template pieces from the housing Do this by gently pushing on them from the backside through the bulb access holes with the eraser...

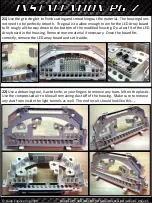
Page 10: ...ns Page 10 20 Using the rotary tool plastic cutting bit roughly remove the areas shown in red Be careful not to cut into the sides of the light tunnel areas Caution on the side of cutting less materia...

Page 11: ...ll the way down to the bottom of the modified housing Do a test fit of the LED Array board in the housing Remove more material if necessary Once the board fits correctly remove the LED array board and...

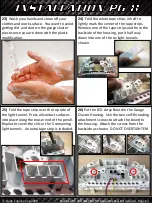
Page 12: ...othes and work surface You want to avoid getting dirt and dust on the gauge cluster pieces once you are done with the plastic modification 24 Fold the white tape strips in half to lightly mark the cen...

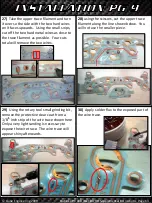
Page 13: ...lament as possible Four cuts total will remove the two wires 28 using the scissors cut the upper trace filament along the line shown below You will not use the smaller piece 29 Using the rotary tool s...

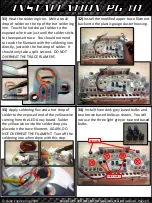
Page 14: ...should only take a split second DO NOT OVERHEAT THE TRACE FILAMENT 32 Install the modified upper trace filament back onto the plastic gauge cluster housing 33 Apply soldering flux and a hot drop of s...

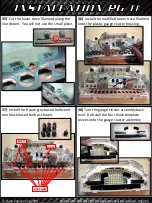
Page 15: ...own You will not use the small piece 36 Install the modified lower trace filament onto the plastic gauge cluster housing 37 Install the 9 dark grey based bulbs and one black based bulb as shown 38 Tur...

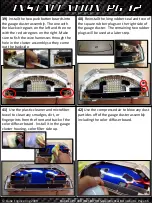
Page 16: ...so they come out the backside 40 Reinstall the long rubber seal and two of the square rubber plugs on the right side of the gauge cluster The remaining two rubber plugs will be used at a later step 4...

Page 17: ...lack glass piece The black glass piece should be held snugly in place between the square rubber pieces on the top and right side and plastic standoffs on the left and bottom side 45 Using the plastic...

Page 18: ...puter back onto the gauge cluster Make sure the yellow wire doesn t get pinched between the housing and the computer board Reattach the wire harness with the red wire to the female wire harness on the...

Page 19: ...ver to reattach two of the three screws that fasten the back cover in place The Screw from the middle of the lower portion of the gauge cluster is no longer used DO IT YOURSELF SUPPLEMENTAL INSTALLATI...

Reviews: