background image

727  Phillips Drive, City of Industr y, CA 91748     l     TEL:1-888-989-1189     l       FAX: 1-626-301-0588      l      www.istarusa.com

635

XEAL  

|

  Industrial 

Po

w

er

Network Storage

DAGE104UTL-NAS

DAGE208UTL-NAS

DAGE312UTL-NAS

User’s Manual

Summary of Contents for DAGE312UTL-NAS

Page 1: ...Phillips Drive City of Industry CA 91748 l TEL 1 888 989 1189 l FAX 1 626 301 0588 l www istarusa com 635 XEAL Industrial Power Network Storage DAGE104UTL NAS DAGE208UTL NAS DAGE312UTL NAS User s Man...

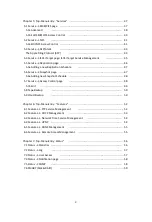
Page 2: ...Storage 16 3 1 Storage Speedy RAID 16 3 2 Basic Steps to Create a RAID 17 3 3 Storage iSCSI Initiator 20 3 4 Storage USB 1394 page 21 3 5 Storage Volume Group page 21 3 6 Storage Logical Volume page...

Page 3: ...ervice Snapshot page 47 5 6a Adding new Snapshot Schedule 48 5 7 Service Access Control page 48 5 7a Edit 49 5 8 Tape Backup 50 5 9 Cloud Backup 50 Chapter 6 Top Menu Entry Features 52 6 1 Features FT...

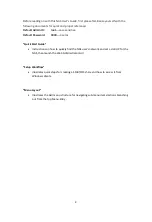
Page 4: ...0000 4 zeros Quick Start Guide Instructions on how to quickly find the NAS user s network and set a static IP for the NAS then launch the Web Administrator GUI Setup Workflow Illustrates quick steps...

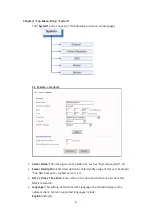
Page 5: ...as MyCompanyNAS etc Server Description Enter description to help identify usage of this unit Example The NAS backup for my SQL server etc Date Time Time Zone Enter the current date and time zone of wh...

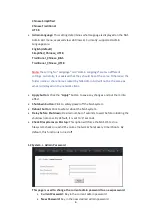
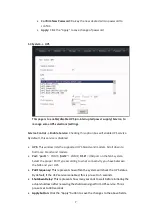
Page 6: ...layed on the network client Apply button Click the Apply button to save any changes and put them into effect Shutdown button Click to safely power off the NAS system Reboot button Click to safely rebo...

Page 7: ...models Scroll down to find more brands and models Port port 1 COM1 port2 COM2 USB USB port on the NAS system Select the proper Port Type according to what connectivity you have between the NAS and yo...

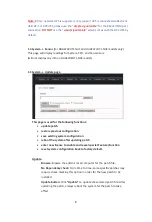
Page 8: ...ate page This page is used for the following functions update patch restore previous configuration save existing system configuration reboot the system after updating patch enter new license to enable...

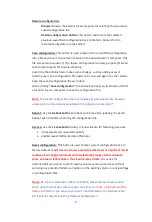
Page 9: ...ysical volume info because volume info is stored and associated with the physical volume itself Reboot Use the Reboot button to reboot each time after updating the patch Reboot each time after restori...

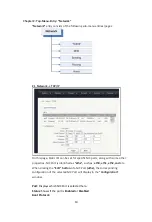
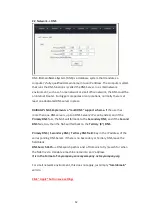
Page 10: ...ic NIC ports along with some other properties NIC Port is identified as ethx such as eth0 eth1 eth2 and etc When clicking the Edit button of a NIC Port ethx the corresponding configuration of the sele...

Page 11: ...s seldom used MTU Maximum Transmission Unit The default value is 1500 To enable Jumbo Frame refer to the actual Ethernet card being used for the proper MTU number Most of the Ethernet cards have 9000...

Page 12: ...e than one DNS servers up to 3 DNS Servers IPs can be listed and if the Primary DNS fails the NAS will fall back to the Secondary DNS and if the Second DNS fails too then the NAS will fall back to the...

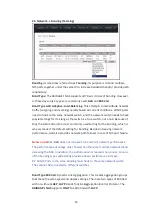
Page 13: ...used setting for the bonding which is why we made it the default setting for bonding Besides increasing network performance ALB also provides network path failover in case of NIC port failure Notes on...

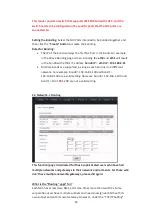
Page 14: ...168 2 21 Multiple bonds are supported as long as each bond is on a different network For example bond0 192 168 1 100 and bond1 192 168 2 100 are a valid setting However bond0 192 168 1 100 and bond1...

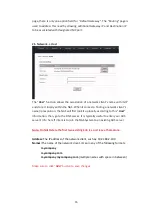
Page 15: ...ip resolution the NAS will first look it up locally according to this Host information then go to the DNS server It is typically useful to enter your ADS server s info here if intent is to join the N...

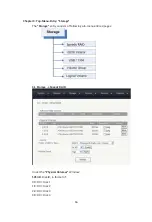
Page 16: ...ntry Storage The Storage entry consists of following sub menu entries pages 3 1 Storage Speedy RAID Under the Physical Volumes Window SCSI ID Disk ID in format of 0 0 0 0 Disk 1 1 0 0 0 Disk 2 2 0 0 0...

Page 17: ...el of 1 5 6 or 10 Supported RAID level is 0 1 5 6 or 10 Stripe Size The stripe size for the RAID can be anywhere from 4KB 1024KB Option is selected via the drop down menu The default size is 64KB Rebu...

Page 18: ...es window and have shown up in the Software RAID Volume Window Now under the Software RAID Volume window we have Volume SW RAID 0 if there are more than one SW RAID they will be SW RAID 1 SW RAID 2 so...

Page 19: ...button is clicked the selected RAID volume will be removed deleted Check button Select by check marking a RAID and then if the Check button is clicked the selected RAID volume will run consistency che...

Page 20: ...ion box Step 2 Key in the remote iSCSI Target s IP address in iSCSI Target Discovery IP Step 3 Key in the remote iSCSI Target port number if it is not the default 3260 Step 4 Click the Discover button...

Page 21: ...can disrupt the entire OS and all volumes Therefore the USB 1394 volume is defaulted to be FAT32 which in turn limits the volume size to a 2TB maximum USB 1394 volume is a logical volume therefore th...

Page 22: ...ze of an existing VG just simply add a new PV to the existing VG by check marking both the PV and VG and then clicking Add PV to VG Adding a PV to an existing VG is also called Linear RAID or Spanning...

Page 23: ...iSCSI target volumes from multiple NAS units with VMWare ESX then you might need to adjust the LUN on them so that no two iSCSI target volumes will have the same LUN Otherwise ESX will assign the exa...

Page 24: ...fo In the Modify Logical Volume window you can do Change the volume name Enter the new volume name replacing the old volume name Increase the volume size If the VG still has free available space then...

Page 25: ...the administrator to do following functions Create local users and local groups Join Windows Active Directory Service Server or PDC Join NIS server for Unix Linux NFS clients Join LDAP server for Uni...

Page 26: ...characters long 3 Re enter to confirm the password 4 Click Create 4 2 What is Home Home Directory Home Folder The Home option is used to create a sub folder under the designated XFS volume network sha...

Page 27: ...Home Folder There are two steps to creating the Home Folder and one step to assigning access permissions Step 1 Enable the Assign Home Directory option for the selected XFS volume in the Storage Logi...

Page 28: ...only has access rights to the user1 sub folder The access rights for user1 to other user s home folder can be granted by Service Access Control which will be discussed in a later section of this user...

Page 29: ...me in the Local group name field up to 31 characters long without any spaces in between and then click the Create button Adding Users to the Group Once the Group is created the administrator can start...

Page 30: ...ft Active Directory Service server 4 5a Workgroup If PDC or AD Servers are absent in your network or if you have PDC AD Server in your network but you don t plan to join the NAS to the domain for doma...

Page 31: ...not use the Domain option instead use the ADS option instead To join a PDC Enter the Domain Name Enter the PDC s IP address in the Controller field In the Admin Account field enter the Administrator...

Page 32: ...IP address of the ADS server Admin Count the administrator s ID it is normally the administrator but it could also be a user ID who has the administrator rights Password the password for the administr...

Page 33: ...the later on session Top Menu Entry Service for ACL 4 6 Account NIS NIS stands for Network Information Service It is a naming and administration system for smaller networks Using NIS each client or s...

Page 34: ...Service Check option box to enable LDAP service Server Either IP or Name of the LDAP server Base dn It is the LDAP Domain name if the Domain name is mycompany com then it is in the format of dc mycom...

Page 35: ...ta Check mark the option box to enable the Quota service Soft Limit with email notification Enter the for approaching Quota Full warning When the used capacity has reached the predefined here the syst...

Page 36: ...r group in the field Number of files _______ EA Click on User to fill the quota to each all users or Click on Group to fill the quota to each all groups If you are not using the Fill numbers at once t...

Page 37: ...s based systems All Logical Volumes created on the NAS are automatically enabled for SMB CIFS Service Enable SMB CIFS Service 1 Check Enable SMB CIFS Service option box 2 Click Apply to save changes N...

Page 38: ...e deleted files will be saved Note Even if recycle bin is enabled default recycle files will not be saved unless the proper command is entered To save files to users recycle bin manually enter Recycle...

Page 39: ...te audit log 1 Important Changes in settings will not be saved unless the Apply button is clicked 5 1b Edit CMB CIFS Access Control Path Path lists the full path location of a share Name The text box...

Page 40: ...with this format 0 followed by 3 numbers 0XXX The first X refers to the owner of the file directory The Second X refers to the group assigned to the file directory The third X refers to other users a...

Page 41: ...is submenu houses the settings to control client access via the NFS Protocol Enable Service This option enables NFS service Number of Daemons Enter the correct number of Daemons Shares Path shows the...

Page 42: ...an effect when the system is patched to support ACLs Safe for use by NFSv2 and NFSv3 clients Subtree check this option enables or disables subtree checking Although there are some security implication...

Page 43: ...This window displays all available users who can be granted access to the share To grant a user access click on their name and chose an option of Read Write Read Only or Deny To save change click add...

Page 44: ...with Limitsize This option limits each file to a 2GB maximum File Directory Permissions Set Sets default permissions for users accessing files via AFP Follow this format A code is used with this forma...

Page 45: ...sired user name Password Enter the desired password re enter in the second text box to confirm correct password Outgoing Use this feature for mutual CHAP authentication Add Saves changes of CHAP Add i...

Page 46: ...et Edit LUNS 1 Target shows iSCSI Target selected for editing 2 Options Grants permission to write or read only 3 Access Control Used to add delete initiators from the NAS 4 Volumes displays current L...

Page 47: ...Scheduling option 6 Enable the Delete files on Target that no longer exist in Source option 7 Enable the File Compression option if so desired 8 Enable the Full File Copy No Incremental Checks option...

Page 48: ...ption Enter a description for the snapshot schedule to aid in identification 4 Size Enter the desired snapshot size 5 Frequency Set the desired frequency of snapshots 6 Click Create to save changes an...

Page 49: ...to Search User Group Feature used to search for a specific user or group Permissions Used to set certain permissions granted to owner group others or sticky Apply to all sub directories and files Used...

Page 50: ...Select device where backup will be written Software Compression Enable this option to turn on software compression Hardware Compression Enable this option to turn on hardware compression Schedule Set...

Page 51: ...he browse list Delete deleted files Checking this option box deletes files that have been deleted Checkers Enter number of checkers to run in parallel Transfers Enter number of file transfers to run i...

Page 52: ...ent Enable Service This check option box enables FTP Service Create Home on User Login Enabling this feature automatically creates a home folder for the user Allow Anonymous Access Enabling this featu...

Page 53: ...s User on FTP Force Logins to use SSL Forces all logins to use SSL encryption Force Data to use SSL Forces all data to use SSL encryption Enable Disable FTP Shares Click the button to enable disable F...

Page 54: ...he NTP Server Add Remove NTP Clients 1 Enter IP address of client 2 Click add to add client click delete to remove client 3 Click the Sync Once button to sync NTP Service with the NTP Server 6 4 Featu...

Page 55: ...Features Remote Access Management This page displays the settings for configuring Remote Access Enable Web GUI Access Select this option box to enable web browser access to the Graphical User Interfac...

Page 56: ...u Entry Status Status entry consists of the following sub menu entries pages The Status menu shows an array of information to help ensure that your NAS system is running at an optimal level 7 1 Status...

Page 57: ...ownload Saves the entire log as a txt file Useful if contacting technical support Clear Warning Removes all outstanding warnings Remove Clears entire NAS log 7 3 Status User Access This page displays...

Page 58: ...TLS SSL Usually required if communicating with SMTP servers ie smtp google com or smtpauth secureserver net Note SMTP communications may not function without this setting Starttls Enabling this featur...

Page 59: ...T Disk RAID This page monitors each iSCSI connection The system will also occasionally check the SMART status of each iSCSI connection A properly functioning system will display Passed If an error is...

Page 60: ...60 To silence the alert select SMART Disk RAID under Status tab Click Clear Warning will stop beeping for 5 minutes and will start beeping again if hard drive SMART Error issues remain...

Reviews: