background image

Arleston 90 DF

Britain’s No.1 Range Cooker

USER GUIDE &  

INSTALLATION INSTRUCTIONS

Summary of Contents for Arleston 90 DF

Page 1: ...Arleston 90 DF Britain s No 1 Range Cooker USER GUIDE INSTALLATION INSTRUCTIONS...
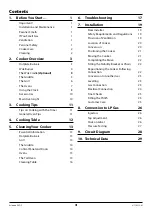
Page 2: ...sugar and serve immediately with cream or cr me fraiche FRUITY BAKED PUDDING Serves 4 6 Ingredients 3kg 6 lb skinned and boned loin of pork 2 x 70g packs prosciutto Grated zest of 2 lemons Bay leaves...

Page 3: ...tplate Burners 13 Grill 14 The Griddle 14 Control Panel and Doors 14 Ovens 15 The Tall Oven 15 Cleaning Table 16 6 Troubleshooting 17 7 Installation 19 Dear Installer 19 Safety Requirements and Regula...

Page 4: ...iv...

Page 5: ...an hour Before using the grill for the first time you should also turn on the grill and run for 30 minutes with the grill pan in position pushed fully back and the grill door open Make sure the room i...

Page 6: ...eyond the smoking point n n WARNING Unattended cooking on a hob with fat or oil can be dangerous and may result in fire n n NEVER leave a chip pan unattended Always heat fat slowly and watch as it hea...

Page 7: ...entral knobs indicates which burner that knob controls Each burner has a Flame Supervision Device FSD that prevents the flow of gas if the flame goes out When the igniter button is pressed in sparks w...

Page 8: ...and kettles with concave bases or down turned base rims should not be used Fig 2 5 Simmering aids such as asbestos or mesh mats are NOT recommended Fig 2 6 They will reduce burner performance and cou...

Page 9: ...t hand pan support front to back Fig 2 11 It is designed for cooking food on directly DO NOT use pans of any kind on it The griddle surface is non stick and metal cooking utensils e g spatulas will da...

Page 10: ...the grill pan in the grill chamber and preheat the appropriate part s of the grill for two minutes The grill trivet can be removed and the food placed on it while you are waiting for the grill to pre...

Page 11: ...e hot air continuously which means faster more even cooking The recommended cooking temperatures for fan ovens are generally lower than for non fan ovens Note Please remember that all cookers vary so...

Page 12: ...countdown from 00 01h to 23 59h at the end of which an alarm will sound 1 Press the mode M button once Fig 2 21 The bell symbol will flash on the display Select the desired countdown from 00 01h to 2...

Page 13: ...buttons Current time will be displayed along with the word AUTO Fig 2 28 3 Set the oven to the required cooking temperature 4 During the cook period the cook symbol is illuminated in the display 5 Wh...

Page 14: ...back Fig 2 34 Oven Shelves Right hand Tall Oven The tall oven is supplied with four flat cooking shelves Fig 2 35 and a plate warming shelf Fig 2 36 When using the tall oven you can cook on all shelve...

Page 15: ...ge of the oven s wire shelves Other containers should be placed centrally Keep all trays and containers away from the back of the oven as overbrowning of the food may occur For even browning the maxim...

Page 16: ...0 minutes according to size 2 3 hours 45 60 minutes 40 45 minutes 2 to 3 hours 20 30 minutes 15 20 minutes 15 20 minutes per 500g Steaks according to thickness Conventional Oven Temperature C Shelf Po...

Page 17: ...burner can also be taken apart for cleaning When reassembling the wok burner Fig 5 2 turn over the large base ring and find the D shaped area Fig 5 3 Turn the head until the D matches the one on the...

Page 18: ...any abrasive cleaners including cream cleaners For best results use a liquid detergent The same cleaner can also be used on the doors or alternatively using a soft cloth wrung out in clean hot soapy...

Page 19: ...panels are working effectively Removing the Panels to Clean the Enamel Interior Some of the lining panels can be removed for cleaning If you wish to clean the enamel interior of the oven you will need...

Page 20: ...Sides and plinth Painted surface Hot soapy water soft cloth Splashback rear grille Enamel or stainless steel Hot soapy water soft cloth Cream cleaner with care if necessary Control panel Paint enamel...

Page 21: ...en fan is noisy The note of the oven fan may change as the oven heats up this is perfectly normal The knobs get hot when I use the oven or the grill Can I avoid this Yes this is caused by heat rising...

Page 22: ...ty from a good electrical shop Ask for a 15W 230V lamp FOR OVENS It must be a special bulb heat resistant to 300 C Fig 6 1 Turn off the power at the circuit breaker Before removing the existing bulb t...

Page 23: ...permanent dwelling or BS5482 3 when the installation is in a boat The Gas Safety Installation and Use regulations The relevant Building IEE regulations In the Republic of Ireland The installation must...

Page 24: ...ollowing equipment to complete the cooker installation satisfactorily Stability bracket If the cooker is to be supplied with gas through a flexible hose a stability bracket or chain MUST be fitted The...

Page 25: ...nt Certain types of vinyl or laminate kitchen furniture are particularly prone to heat damage and discolouration We cannot accept responsibility for damage caused by normal use of the cooker to any ma...

Page 26: ...onnector must be secured with a suitable stability device Suitable stability devices are shown in Fig 7 7 Fig 7 8 and Fig 7 9 If you are using a stability chain Fig 7 7 then the chain should be kept a...

Page 27: ...standards The flexible hose not supplied with the cooker must be in accordance with the relevant standards Hoses may be purchased at most builders merchants The gas supply needs to terminate with a do...

Page 28: ...ic appliances may cause nuisance tripping so we recommend that the cooker is protected on an individual RCD Residual Current Device or RCBO Residual Current Breaker with Overload IF IN DOUBT PLEASE CO...

Page 29: ...he instructions and then turn on the ovens Check that the oven fans start to turn and that the ovens start to heat up Note The oven light bulb is not included in the guarantee Turn off the oven Fittin...

Page 30: ...is gas sound after completion n n DO NOT use reconditioned or unauthorised gas controls n n Disconnect from the electricity and gas supply before servicing n n Before electrical reconnection check th...

Page 31: ...one of the hotplate injectors not a wok burner Lift off a burner head Fit the pressure gauge to the jet Turn on and light one of the other burners Turn on and press in the control knob for the burner...

Page 32: ...in the circuit diagram are for single phase The ratings are for 230V 50Hz Code Description A1 Grill front switch A2 Grill energy regulator A3 Left hand grill elements A4 Right hand grill elements B1...

Page 33: ...internal 78 3 5kW 246g h internal 53 external 126 external 82 Large burner 40 3 0kW 134 3 0kW 210g h 87 Medium burner 32 1 7kW 109 1 7kW 119g h 68 Small burner 28 1 0kW 75 1 0kW 10g h 51 The valves in...

Page 34: ...30 Notes...

Page 35: ...those authorised to act on behalf of AGA Rangemaster Exceptions Items not included under the free 1 year warranty include pan supports griddles wok rings baking trays grill pans trivets filters light...

Page 36: ...ed Office Juno Drive Leamington Spa Warwickshire CV31 3RG Search Rangemaster UK Rangemaster continuously seeks improvements in specification design and production of products and thus alterations take...

Reviews: