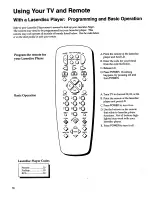
background image

Summary of Contents for G27347

Page 1: ...USER S GUIDE Important Information i Table ofConten s r 1 Quick Guide toYour _ 2 5 Using Your Remote 6 15 Adjusting Your IV 16 19 Using Advanced Features _20 27 References 28 37 o q_ 4 0 ...

Page 2: ...t bears the UL listing mark or if purchased and used in Canada the CSA certification mark If in doubt contact qualified service personnel FCC Regulations state that unauthorized changes or modifications to this equipment may void the user s authority to operate it CAUTION If fixed non moving images are left on the screen for long periods they may be permanently imprinted on the screen Such images ...

Page 3: ...Laserdisc Player With Audio Equipment 6 7 8 10 11 12 13 14 15 Adjusting YourTV Overall Picture 16 Picture Settings 17 Color Tint Brightness Sharpness Autocolor Picture Reset Sound Settings 18 19 Stereo Expanded Stereo SAP Tone Speakers Using Advanced Features PlacingChannels in Memory Autoprogram Naming the Channels Setting the Sleep Tuner Setting the Alarm Clock Watching Picture in Picture Select...

Page 4: ...ONS GUIDE Hook up any antennas cables or other equipment to your TV before you follow the steps below 2 Plug in the TV Plug the cord into the outlet matching the wide and the small end of the plug with the outlet 3 Put Batteries in the Remote A Pull off the cover of the battery compartment B Place the four AAA batteries as shown matching the and endof each battery in the compartment C Replace the ...

Page 5: ...s MENU PROG until the Setup menu is selected This menu is white B Press MOVE to highlight Autoprogram C Press MOVE to start placing channels in the TV s memory D Wait until TV has cycled through all the channels and returns to original channel 13 A Press MENU PROG until the Alarm menu is selected This menu is green B The Clock is autom_ticaUy highlighted the first time you set it If it is not pres...

Page 6: ...ns the TV on Sets the remote to control the TV Operates TV when remote is set to control theTV Operates the TV and advanced features Component Buttons Details are on pages 8 15 Menu Buttons See next page for details Picture in picture buttons Details are onpgges 7 and 24 25 t Controls components such as a VCR laserdisc player audio equipment and a cable box Changes the menus and features on the sc...

Page 7: ...olor background as shown at the left Menu Buttons These buttons are used with the TV s menus to adjust the features You can use the menu buttons on the remote or the front of the TV _ _ C cn_ ntw _ 0 _0 _0 0 _0 _0 _0 _0 0 _ oO 5 5A5 MENU CHV CH X VOL 0 0 Q 0 Moving through the Menus 1 Press MENU PROG on the remote or MENU Onthe front panel to move from menu to menu 2 Press MOVE A T on the remote o...

Page 8: ...EW Rewind Rewinds a tape or laserdisc Searches backward while tape or laserdisc is playing PLAY Playstape or laserdisc FF Fast Forward Fast forwards a tape or laserdisc Searches forward while tape or laserdisc is playing 6 REC Record Star_ recording onto tape STOP Stops tape or laserdisc PAUSE Pauses tape or laserdisc DISPLAY Shows displays on the screen Clears menus from the screen SKIP Commercia...

Page 9: ...CR CLEAR Clears menus and displays from the screen clears items from VCR timer programs and VCR s clock MENU PROG Program Shows menus on the screen and moves from menu to menu Sets VCR clock and programs timer on VCR RESET Returns the picture adjustments to the original settings MOVE and left and fight Moves left and fight on a menu line See Menu Basics on page 5 Changes a feature setting MOVE and...

Page 10: ...oes not work program VCR or VCR2 with a VCR code from the list below A Point the remote at the VCR and hold VCR B Enter the code for our brand from the code list below C Release VCR D Press POWER If nothing happens try pressing VCR and then POWER E Repeat A D with another code if the first one does not work or if a second VCR is connected Lloyd 15 Magnavox 08 29 Marantz 02 08 14 16 29 30 Marta 09 ...

Page 11: ...he chart below for your setting 1 Select the Setup Menu 13 A PressTV toset the remote to control the TV B Press MENU PROG to select the Setup menu This menu is white 2 Highlight VCRl Channel 13 A Press MOVE V down to highlightthe VCR 1 Channel B Press to highlight the channel 3 Enter channel number 13 A Enter channel 00 03 or 04 Choose your setting from the chart below Press CHANNEL down until Dis...

Page 12: ...u pressed VCR or VCR2 A Press VCR orVOR2 to set the remote to control the VCR B Press POWER A B C D E F G Press VCR or VCR2 to set the remote to control the VCR Tune the VCR to the channel you want to record using CHANNEL up and down or pressing two number buttons Press RECOR D to start recording Press TVNCR on the VCR Press TV toset the remote to control the TV Press CHANNEL up or down to change ...

Page 13: ...r Turn off the Satellite Receiver Satellite Receiver Codes Chaparral 80 8 Cheyenne 81 Drake 82 83 DSS _ _ 00 GE _ 00 General Instruments 92 93 94 ProScan 00 RCA 00 Realistic 84 Sierra I II lll 81 STS1 85 STS2 L 86 STS3 87 STS4 _88 Toshiba _ 89 Uniden 90 Video Cipher II 91 REC STOP PAUSE r i 1C_21 r _ I DISPLAY SKIP MUTE CHA_ PREVCH 0 40 7O INPtfl O 00 ANTENNAo CLEAR b e o RESET PiP SWAP A Point th...

Page 14: ... and then POWER E Repeat A D with another code if the first one does not work A Tune TV to channel 02 03 04 05 or 06 the cable box channel B Point remote at the cable box and press CABLE C Press POWER to turn it on D Press CHANNEL up or down to change channels on the cable box A Press CABLE B Press POWER to turn it off Cable Box Codes ABC _ _ 22 46 Anvision 0708 Cablestar 07 08 Eagle 08 Eastern In...

Page 15: ...3 04 05 or 06 Consult your cable company for more information 1 Select the Setup menu Controls Alarm 13 A Press iVto set the remote to control the TV B Press MENUopROG to select the Setup menu This menu is white 2 Highlight Cable Channel ontrols Alarm 13 A Press MOVE down to move down the menu until Cable Channelis highlighted B Press to underline the channel 3 Enter channel number Alarm Ad 13 A E...

Page 16: ... STOP PAUSE ri I r in DISPLAY C SKIP 10 2 0 30 0 INPUTo 0 0 ANTENNAo _CLEAR _ _RESET PiP SWAP _ q _ FREF ZE MOVE PIP MOVE A Point the remote at the laserdisc player and hold LD B Enter the code for your brand from the code list below C Release LD D Press POWER If nothing happens try pressing LD and then POWER A Tune TV to channel 00 03 or 04 B Point the remote at the laserdisc player and press LD ...

Page 17: ...FM 03 CD 07 Tape 06 Phono 05 Aux 04 po_ r_ VCR1 SATeCABLE TV VCR2eLD AUDIO 0 0 RL_V PLAY FF _ t C I_EC STOP PAUSE DISPLAY SKIP CHA_ PREVCH _0 20 _0 40 _0 oO _0 _0 _0 INPUTo 0 _O ANTENNAo CLEAR e_ o_ RESET PIP SWAP A Point the remote at the audio equipmentand hold AUDIO B Enter the code from the code list C Release AUDIO D Press POWER to turn it on If nothing happens try pressing AUDIO and then POW...

Page 18: ...e color levels 1 Select the Controls Menu Alarm Press MENUoPROG to select the Controls menu This menu is yel low 2 Highlight Picture Ad Press MOVE V down to high light Picture 3 Use MOVE and to adjust the Picture Press MOVE right to lighten the picture OR Press MOVE 1 left to darken the picture r Jill U _ _ _ Ilia 16 ...

Page 19: ... Press MOVE I_ or to adjust each item Press MOVE to Increase color richness Press MOVE to I ml Lower color to black and white Turn on to keep Color and Tint in proper balance each time you change channels Reset the picture back to the original settings Color Tint Give red tint to skin color Give green tint to skin color Bright Brightness Add more light to dark parts of Add more dark to light parts...

Page 20: ...tem you want to adjust 3 Use MOVE or to adjust each item Alarm Ad Press MOVE _ or toadjust each item Stereo SAP Tone On Sound is automatically reproduced in stereo or mono whichever the TV station is broadcasting On Sound is reproduced in another sound channel If nothing happens your broadcast may not have SAP High High pitched sounds are louder Off Sound is reproduced in mono Expanded Expanded st...

Page 21: ...rt below explains your options 1 Selectthe Setup Menu Controls Alarm Ad Press MENU PROG repeatedly to select the Setup menu This menu is white 2 Highligh t speakers Press MOVE down until Speakers is highlighted 3 Turn Speakers on or off Controls Alarm Press MOVE or to turn the speakers on or off Speakers On Off 19 ...

Page 22: ...gin these steps or you will not be able to add channels into B memory Press MENU PROG repeatedly to select the Setup Menu This menu is white C Press MOVE down to highlight Autoprogram D Press MOVE to start the TV adding all active channels into memory E Wait until the TV has cycled through all the channels and returns to the original channel 2 Add or delete channels Alarm Controls 13 13 A Press ME...

Page 23: ...ess MOVE V down to highlight Label C Press MOVE to Underline the channel number D Select the channel number with the number buttons E Press MOVE to underline the first character of the name F Choose the character using MOVE A Y up or down G Repeat E F to complete the naine H Press MOVE to move backward if you want to change an item 2 Erase a name itrols Ad 12 A Follow A and B above B Press MOVE un...

Page 24: ...e Controls menu and highlight Sleep Timer This menu is yellow B Press MOVE to enter the amount of time you want to watch TV before it shuts off Each press equals 15 minutes C Press MOVE to subtract time from the sleep timer 2 Add more time A When 0 01 appears on the screen the TV will shut off in one minute Press MOVE to add more time 22 3 Cancel the Tuner Alarm Ad A Press MENUoPROG to select the ...

Page 25: ...ight Alarm This menu is green B Press MOVE or to select On or Off 2 Set the Alarm Channel 12 34 AM 13 Alarm A Press MOVE down to highlight the Alarm Channel B Press MOVE to highlight the channel number C Enter the channel that you want the TV to turn on to with the number buttons 3 Set On and Off Times 12 34 AM 13 Alarm 12 34 AM 13 Alarm A Press MOVE down to highlight the On or Off Time B Press MO...

Page 26: ...ections Guide B Press TV to turn the TV on C Press CHANNEL up or down to select the channel you want to watch on the big picture D Turn on the VCR Laserdisc Player or Camcorder E Press PIP to put the small picture on the screen It is the same as the big picture F Press 00 to see the signal from the VCR Laserdisc Player or Camcorder connected to the video jacks TV VCR Laserdisc Player or Camcorder ...

Page 27: ...p the big picture with the little picture Press SWAP to switch the smaU picture with the big picture Freeze the small picture A Press FREEZE to stop action in the small picture B Press FREEZE again to return to an action picture Turn off Picture in Picture f__ OO _ F 1 5 O 20 30 0 0 _0 0 0 0 k Press PIP to turn off _icture in picture 25 ...

Page 28: ... deaf hearing impaired or anyone who Wants to watch _ program without sOund If you have turned Closed Captioning on and it does not appear on the screen it is not available on the channel you are watching This TV does not support the text mode Text information typically consists of program information weather bulletins local activities etc 1 Select the Controls Menu 2 Highlight Closed Captioning P...

Page 29: ...settdng as needed 1 Select the Setup menu Controls Alarm Ad 13 Press MENUopROG repeatedly to select the Setup menu This menu is white 2 Highlight Cable Air 3ontrols Alarm Ad 13 Press MOVE down to highlight Cable Air 3 Select Cable or Air Controls Alarm Ad 13 A Press MOVE or to select Cable or Air Select Cable if you have cable _Select Air if you have a home antenna con nected to your TV 27 ...

Page 30: ...from menu to menu CH and v VOL and Also VOL andVOL V Channel up and down Scans up and down through channels in the TV s memory Moves up and down menus i Volume upand down Raises and lowers sound Moves left and right on a menu line i Changes a features setting POWER and Not on all models Turns the TT_ on or off Same as VOL and buttons ...

Page 31: ...omponent is connected to the VIDEO jack on the back of the TV it is turned on and channel 00 is selected Alarm clock is set to turn on or off Details are on page 23 Sleep Timer is set to turn off the TV Details are on page 22 Picture in picture is turned on to channel 00 Details are on pages24 25 Sound level of the TV No signal is coming in on video input channel 00 There is no sound See MUTE butt...

Page 32: ... in the remote the right way See batteries on page 2 Unplug TV for a few minutes and then turn it on again Check antenna connections Check position of Cable Air feature See page 27 Try another channel Inactive channel may be tuned Make sure component connected to the VIDEO INPUT jacks is turned on if you choose channel 00 Make sure TVis tuned to the same channel as the switch on back of VCR if wat...

Page 33: ...ir feature to Cable for channels higher than 69 See page 27 Sound Noisy stereo reception Picture okay no sound Turn Stereo off The stereo broadcast may not be clear See page 18 Press VOLUME or MUTE to restore sound Make sure TV s speakers are on Details are on page 19 Picture okay sound poor Try another channel Try adjusting the Tone See page 18 Change Stereo to off The stereo broadcast may not be...

Page 34: ...nce Of purchase date or first rental What your warranty does not cover What to do with the Product Registration Card How state law relates to this warranty If yo u purchased your product outside the United States Customer instruction Your Owner s Manual clearlydescribes how to install adjust and operate your television Any additional information should be Obtained fron t your Dealer Installation a...

Page 35: ...ur TV cabinet Using these cleaners will permanently mar the surface of the cabinet Such damage is not covered under your purchase warranty I Order Form Book No 1512778A Part Cleaner Remote CRK74A2 Part Number Price Qty Total AH035 6 95 233064 39 95 Total S10 Minimum Order Sales Tax ii We are required by law to co lect the appropriate sales tax for each individual state county and locality to which...

Page 36: ...d Time and place your order using your Visa or MasterCard Use this number only to place an order for accessory items listed on this order form By Mail Detach the information at the left and mail the payment to Thomson Consumer Electronics Inc at Video Accessories PO Box 8419 Ronks PA 17573 Most orders are shipped LIPSwithin 72 hours If it is not possible to ship within 30 days we will notify you F...

Page 37: ...ors located on the back of tl_e TV for connecting antennas or other components Menu A listing of features controls and adjustments showfi on the TV screen that can be changed Mono Slang for monaural Sound comes through one channel On Screen Display See Display Outputs Located on back of the TV for connection of another component Signals are routed out of the TV into the other component Picture in ...

Page 38: ...Channel Number Display 29 CHANNEL Up Down Buttons Remote 4 5 6 TV 28 Channels Adding 20 Deleting 20 Naming 21 29 Placing in Memory 3 20 Checks and Adjustments 30 31 Cleaner 33 CLEAR Button 6 7 Clock 3 23 Closed Captioning 26 Codes Audio 15 Cable Box 12 Laserd_c Player 14 VCR 8 Color _ 17 Colors Menus 5 Commerical Skip 6 29 35 Button 6 Display 29 Component 35 Component Buttons 13 AUDIO CABLE LD VCR...

Page 39: ...e _ 32 Set Clock 3 Set Time 3 Setting Cable Air 27 Setting the Cable Channel 12 Setting the Sleep Timer 22 Setup Menu Autoprogram 3 20 35 Cable Air 27 Cable Channel 13 Channel Label 21 Channel Memory 3 20 Speakers 9 VCR 1 Channel 8 Sharpness 17 Signal 35 SKIP 6 35 Sleep Display 22 28 Sleep Timer 22 Sharpness 17 Sound 18 19 Source 35 Speakers i 19 Startup 2 3 Stereo 18_35 Stereo Display t 29 STOP B...

Page 40: ...the world Thomson collects and returns over 1 5 million pounds of glass and furnace dust to the glass making process annually Thomson has launched worldwLde energy savings programs which contribute to efforts to reduce air emissions from electrical generating facilities THE WATER Thomson recovers over 2 million pounds of fine glass particles from process water each year and recycles them back into...

Reviews: