background image

Television

User’s Guide

Changing Entertainment. Again.

Summary of Contents for J20F635

Page 1: ...Television User s Guide Changing Entertainment Again ...

Page 2: ...______________ Serial No ______________________________________________________________ Purchase Date _________________________________________________________ Dealer Address Phone _________________________________________________ Important Information WARNING To reduce the risk of fire or electric shock do not expose this product to rain or moisture This apparatus shall not be exposed to dripping ...

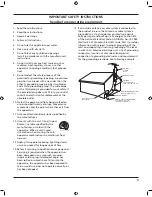
Page 3: ... grounding type plug has two blades and a third grounding prong The wide blade or the third prong is provided for your safety If the provided plug does not fit into your outlet consult an electrician for replacement of the obsolete outlet 10 Protect the power cord from being walked on or pinched particularly at plugs convenience receptacles and the point where they exit from the apparatus 11 Only u...

Page 4: ...16 Chapter 2 Using the Remote Control 17 Chapter 2 Using the Remote Control 17 Types of Remote Controls 17 Basic Remote Buttons CRK17TC1 CRK17TD1 17 Additional Remote Buttons CRK17TD1 18 Using the INPUT Button 19 Using the SYSTEM Button 19 ClonePRO Remote Buttons 20 Chapter 3 Using the Menu System 21 The Basic Menu System 21 Sound Menu 21 Picture Menu 21 Channel Guide Menu 21 Parental Control Menu...

Page 5: ...nterference Insert each cable firmly into the designated jack If you place components above the TV route all cables down the side of the back of the TV instead of straight down the middle of the TV If your antenna uses 300 ohm twin lead cables do not coil the cables Also keep the twin lead cables away from audio video cables Important Stand and Base Safety Information Choose the location for your T...

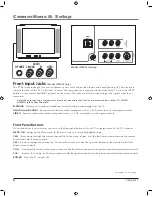
Page 6: ...me console VIDEO Receives video from another component such as a VCR camcorder or video game console MENU OK VOL CH CH VOL POWER READY ADVISORY WATCH WARNING VIEW MESSAGE STOP ALARM HEAR VOICE L MONO AUDIO VIDEO R H PHONE Front Panel Buttons If you cannot locate your remote you can use the front panel buttons of your TV to operate many of the TV s features MENU OK Brings up the Main menu In the me...

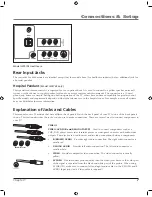
Page 7: ...ite part of the picture When using S VIDEO IN make sure to connect left and right audio cables to the L MONO and R AUDIO Input jacks an S Video cable is required Model J20F742 Healthcare S Video Jack Audio Video Jacks TV ANT Digital Audio Out Jack Phone Jacks Y PB PR S Video Jack Audio Video Jacks TV ANT Digital Audio Out Jack Phone Jacks Y PB PR S Video Jack Audio Video Jacks TV ANT Digital Audio...

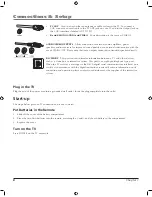
Page 8: ...and VIDEO Their description is the same as VIDEO 1 AUDIO VIDEO OUTPUTS Allow connection of external audio amplifiers power speakers audio receivers for improved sound quality or an external video monitor with the use of VIDEO OUT Please note that these outputs cannot drive standard speakers directly DSCI PORT This port is used to transfer information between a TV and other devices such as a clone b...

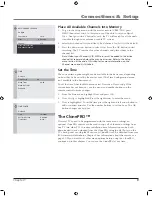
Page 9: ...Config If the current time has not been set use the arrow and number buttons on the remote control to make changes 1 From the Main menu highlight Time and press OK 2 Time Config is highlighted Press the right arrow to enter the menu 3 Time is highlighted To set the time press the right and left arrow button to add or subtract minutes Use the number buttons to set the hour The OK button changes am an...

Page 10: ...ods to adjust features on your TV The following pages detail how to use these controls to customize the functions of your TV Press MENU on the remote master remote for master menu basic remote for basic menu or on the front panel basic menu to bring up the Main menu To select a menu item Navigate with the arrows and then select OK Navigate with the arrows and then select with the right arrow butto...

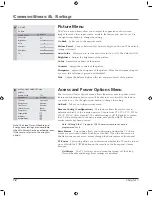
Page 11: ...able volume but not necessarily the minimum possible volume Maximum Volume Re scales the volume control slider so that the far right position is always the maximum allowable volume but not necessarily the maximum possible volume Auto Vol Volume Level Reduces volume blasts during commercial breaks Eliminates the need to constantly adjust volume control Set it On or Off The default is Off Audio Outp...

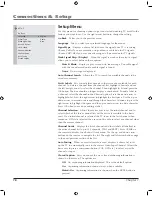
Page 12: ...functions basic users will be able to access Scroll to the feature you want to set Use the right arrow button to change the setting Go Back Takes you to the previous menu Remote Config Configuration This feature allows the master user to determine which TVs the remote operates Choose from TV1 TV2 TV3 TV1 2 TV1 3 TV2 3 All or Disabled The default setting is All If Disabled is chosen the TV will not r...

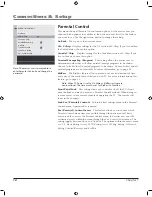
Page 13: ...Basic users can watch blocked programming by entering the system password This is the default setting Basic Basic users are able to enter the Parental Control menu but cannot change the password Basic users can watch blocked programming by entering the system password NoBasic Parental Control does not appear on the basic Main menu Basic users can watch blocked programming by entering the system pa...

Page 14: ... parents to set a certain amount of time every day of the week that a child can watch TV For more information on this feature go to page 30 Note When TV Power is set to On Always KidPass settings are nonfunctional The time must be set for KidPass to function Front Panel Lock This setting allows you to disable lock the TV s front panel buttons and may be used as a Parental Control method When doing...

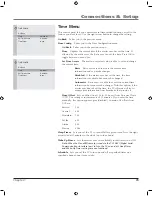
Page 15: ...option if the master user doesn t set the time the TV software will try to acquire time information from broadcasts that provide it Time Offset Sets an offset from 12 to 12 hours from Universal Time UCT The setting is in increments of 30 minutes If you enter the time manually this option appears gray disabled Common US offsets from UCT are Eastern 5 00 Central 6 00 Mountain 7 00 Pacific 8 00 Alaska...

Page 16: ... ascend or descend through the characters Continue to press the right arrow to highlight the space and the up or down arrow to add a character Press OK when you re done adding a label Channel Selection Allows the master user to set the initial channel and to select which of the three channel lists will be active accessible to the basic user If no initial channel is selected the TV tunes to the las...

Page 17: ...ight your choices and navigate the menu system Use the OK button to select your choice CC Closed Captioning Displays the Closed Caption Display Subsequent presses change the display mode CHAN Channel up or down Scans up and down through channels in the TV s memory CLEAR Clears menus and displays from the screen GO BACK Tunes the TV to the last selected channel or video input channel GUIDE Displays...

Page 18: ...he user to set a time for the TV to turn itself off SYSTEM Allows the remote to change between TV1 and TV2 mode It also allows access to system defined functionality when available See the description later in this chapter for more details VOL Volume up or down Decrease or increase the TV s volume unless Volume Hold is on and displays the Volume Control slider Go to Chapter 1 for more information o...

Page 19: ...r similar device the SYSTEM button allows you to access system programming or other special functionality through the DSCI jack On a master or basic remote the SYSTEM button can also allow independent remote control of two TVs Once you have specified TV1 or TV2 status for the TVs see the Access and Power Options menu on page 12 Follow these steps to tell the remote which TV you want to operate 1 On...

Page 20: ...Volume Hold MENU Displays the master main menu INFO Displays channel information OK Press to select a menu item that is highlighted CLEAR Removes any menu or display from the screen and returns you to TV viewing ClonePRO Remote Buttons The ClonePRO can be used as a master remote First press ON to turn the remote on Some of the buttons only apply when using the ClonePRO to download or upload inform...

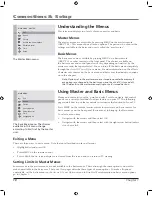
Page 21: ...o the previous menu Sound Type Plays the sound in Mono only Mono is displayed in the Channel banner Picture Menu The basic Picture menu items allow you to adjust the appearance of on screen images Go Back Takes you to the previous menu Picture Preset Choose between Soft Natural Bright or Personal The default setting is Natural Channel Guide Menu The basic Channel Guide menu is the same as the mast...

Page 22: ...l menu A password is required Note Parental Control Access is the master menu that controls which menus are available to the basic end user Chapter 1 has more details Time Menu The functions of the basic Time menu will depend on the options set by the Master user Go Back Takes you to the previous menu Time Displays the current time if the master user has set the time Sleep Timer Lets you select th...

Page 23: ...ger want your TV to function as a commercial one the steps below describe how to make it a non commercial TV Many features and options found in non commercial TVs are included for your use Make sure the TV is off Press VOL on the front of the TV and MENU on the master remote for a few seconds simultaneously The TV will turn on and activate the decommercialization sequence Note In the case of inadv...

Page 24: ... Info checkbox and the Channel Banner will not be displayed Mono 06 ABCDEF KidPass 2 24 Skip 0 30 Sleep 00 30 CC 07 18am X X Parental Controls and V Chip The choices in the USA V CHIP menu involve software inside your TV referred to as V Chip which allows you to block TV programs and movies based on violence sex or other content you may believe children should not view Once you block programs you ...

Page 25: ...ntain violence integral to the development of the plot character or theme intended for adult audiences Other Content Guidelines May contain graphic language and explicit portrayals of nudity and or sex 14 Viewers 14 and over Programming contains themes or content which may not be suitable for viewers under the age of 14 Parents are strongly cautioned to exercise discretion in permitting viewing by...

Page 26: ... the age of 8 who do not distinguish between reality and imagination G General Audience This program is suitable for audiences of all ages It contains no violence or any violence that it does contain is either minimal or is presented in a humorous manner as a caricature or in an unrealistic way USA V Chip TV Rating Limit The V Chip TV Rating Limit lets you decide which TV programs can and cannot b...

Page 27: ... to view for the selected rating and whether the status of the content theme is currently View V or Block B The V Chip Rating Screen The following is an example of where items are located within the TV RATING LIMIT screen Blocking Age Based Ratings You can automatically block all program ratings above a specified age based rating level To block programs with higher ratings 1 Press the up or down ar...

Page 28: ... The language for TV MA is blocked as well Notes Broadcasters are not required to provide content themes or age based ratings You must remember to activate Parental Controls for rating limits to take effect Viewing Specific Content Themes If you block specific content themes you have the option of going back and changing some of the content themes back to V View 1 Determine the content themes you wa...

Page 29: ... the MAIN MENU appears 2 Select Parental Control 3 Select USA V Chip 4 Select Movie Ratings Blocking Movie Ratings Once you are in the Movie Rating Limit menu follow the same steps described for blocking Canadian V Chip Ratings V Chip Exempt Program Block The Exempt Prgms option lets you decide if programs that the V Chip recognizes as unrated can be viewed Unrated TV programs may include news spo...

Page 30: ...ars enter the password used for Parental Control Notes If control has been turned off in the master menu Disallow Basic this feature will not be available to other users You can change settings in the Parental Control menu only when Lock Par Controls is in the unlocked position If you forget your password you can reset it Make sure the TV is off Simultaneously press and hold VOL on the TV s front ...

Page 31: ...ery is required in this mode If the unit is already in IR mode press OFF to speed the transition to DSCI mode Using the ClonePRO DSCI green buttons Comm Restores the TV to normal commercial operation essentially undoing the effect of the LEGACY and DECOM buttons Decom Decommercializes the TV to facilitate aftermarket resale Factory This button has no functionality with this product LEARN Begins th...

Page 32: ...me third party devices attached to the TV s DSCI port as part of a larger system may disable access to master menus even after they are disconnected To enable the master menus press Master OFF Turns the TV off and turns the ClonePRO off ON Turns the TV on and turns on the ClonePRO IR mode ready for subsequent buttons Note that the unit will automatically turn itself off 30 seconds after the last b...

Page 33: ...e ClonePRO to each subsequent TV and then in either DSCI or IR mode TEACH each TV monitoring the process on screen The settings learned by the ClonePRO remain indefinitely ready to TEACH the next TV until overwritten by a new LEARN operation General troubleshooting Problems with the DSCI mode Make sure the TV is plugged into a live electrical outlet Make sure the ClonePRO is plugged into the TV s D...

Page 34: ...sing Enabled Unplug the TV for two minutes and then plug it back in Turn the TV on and try again TV turns off unexpectedly KidPass might have been set Go to page 30 for instructions A Schedule Recurrence may have been set In the master menu system go to Time then Schedule Electronic protection circuit may have been activated because of a power surge Wait 30 seconds and then turn the TV on again If...

Page 35: ...teries in the remote You might need to reset the remote remove batteries and press the number 1 button for at least 60 seconds Release the 1 button and replace the batteries Operation of certain remote control buttons might be restricted by master menu settings Maybe remote is in wrong configuration TV1 or TV2 for that TV Check the Remote Config settings in the Access Power Options menu Problems wit...

Page 36: ...our RCA commerical distributor visit www rcacommercial com or call 1 800 333 7221 Caution Incorrect cleaning and sterilization of this product will result in cancellation of all warranty terms General Care and Cleaning CAUTION Turn OFF your TV before cleaning You can clean the TV as required using a soft lint free cloth Be sure to occasionally dust the ventilation slots in the cabinet to help assu...

Page 37: ...all 1 800 880 5966 Show the Authorized Service Center Representative your sales receipt or other evidence of purchase date or first rental What your warranty does not cover Customer instruction Your Owner s Manual clearly describes how to install adjust and operate your television Any additional information should be obtained from your distributor or sales representative Installation and related ad...

Page 38: ... PURPOSE ON THIS PRODUCT IS LIMITED TO THE APPLICABLE WARRANTY PERIOD SET FORTH ABOVE How state law relates to this warranty Some states do not allow the exclusion nor limitation of incidental or consequential damages or limitations on how long an implied warranty lasts so the above limitations or exclusions may not apply to you This warranty gives you specific legal rights and you also may have ot...

Page 39: ...pplicable we will ship a superseding model ANT200 VH913 Remote Control These are the remote controls that work with your TV Replacements or spares can be ordered as needed ClonePRO Clones settings for multiple TVs Replacements or spares can be ordered as needed 2 way Signal Splitter helps you connect to a second TV or VCR Amplified VHF UHF FM Antenna allows you to easily switch from the antenna sig...

Page 40: ...ation If this equipment does cause harmful interference to radio or television reception which can be determined by turning the equipment off and on the user is encouraged to try to correct the interference by one or more of the following measures 1 Reorient or relocate the receiving antenna 2 Increase the separation between the equipment and receiver 3 Connect the equipment into an outlet on a ci...

Reviews: