background image

USER’S MANUAL

29"

RLDED2952A

Summary of Contents for RLDED3916A

Page 1: ...USER S MANUAL 29 RLDED2952A ...

Page 2: ...taching or Removing the Stand Installing Batteries to the Remote Control Identifying Front and Rear Panel Connection Suggestion Main Unit Description Remote Control OSD Basic Adjustment How Do I Clean The TV Troubleshooting Specifications FCC Compliance Statement ...

Page 3: ... the receiver and the wall to permit ventilation Avoid excessively warm locations to prevent possible damage to the cabinet or premature component failure This TV can be connected to AC 100 240V 50 60Hz Do not install the TV in a location near heat sources such as radiators air ducts direct sunlight or in closed compartments and closed areas Do not cover the ventilation openings when using the TV ...

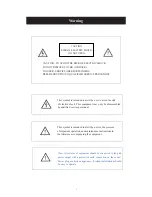
Page 4: ...nstructions in the literature accompanying the equipment CAUTION TO AVOID THE RISK OF ELECTRIC SHOCK DO NOT REMOVE COVER OR BACK NO USER SERVICEABLE PARTS INSIDE REFER SERVICING TO QUALIFIED SERVICE PERSONNEL CAUTION RISK OF ELECTRIC SHOCK DO NOT OPEN Class I structures of equipment should be connected to the grid power output with a protective earth connection on the socket Power plug as a broken...

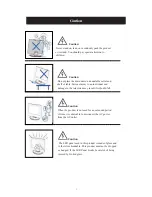
Page 5: ...drop or push objects into the television cabinet slots or openings Never spill any kind of liquid on the television receiver Caution Avoid exposing the main unit to direct sunlight and other sources of heat Do not stand the television receiver directly on other products which give off heat e g video cassette players and audio amplifiers Do not block the ventilation holes in the back cover Ventilat...

Page 6: ... injury to an individual and damage to the television may result if it should fall Caution When the product is not used for an extended period of time it is advisable to disconnect the AC power from the AC outlet Caution The LED panel used in this product is made of glass and is therefore breakable This product must not be dropped or banged If the LED Panel breaks be careful of being injured by br...

Page 7: ... grounding of the mast and supporting structure grounding of the lead in wire to an antenna discharge unit size of the grounding conductors location of antenna discharge unit connection to grounding electrodes and requirements of the grounding electrode Lightning Protection For added protection of the TV during a lightning storm or when it is left unattended or unused for long periods of time unpl...

Page 8: ...Attacthing or Removing the Stand 1 To attach the base place the display unit flat on a table 4 Afterwards attach the stand onto the bottom of the stand Screw in the 5 screws to secure the stand 7 ...

Page 9: ...te Only use AAA batteries Do not mix new and old batteries This may result in cracking or leakage that may pose a fire risk or lead to personal injury Inserting the batteries incorrectly may also result in cracking or leakage that may pose a fire risk or lead to personal injury Dispose the batteries in accordance with local laws and regulations Keep the batteries away from children and pets If the...

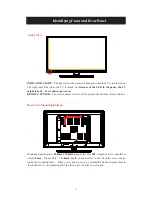
Page 10: ...ht take 10 12 seconds to power on REMOTE SENSOR The remote sensor receives all the commands from the remote control Mounting Specification 200mm x 100mm using screw size M4 Length of screw should not exceed 8mm Please Note The 8mm length of screw refers to how deep the screw can go inside the mounting holes When you re buying screws you should add the original 8mm to the thickness of your mounting...

Page 11: ... of your HDTV 3 Turn on the HDTV 4 Follow the first time on screen instructions Not all broadcasts are in High Definition HD Please refer to your local broadcasting stations for more information The HDTV s tuner is designed for HDTV therefore requires a stronger signal than normal TVs If you cannot achieve that signal level with your antenna or cable your HDTV might lose picture or sound Please No...

Page 12: ...io Cable Connect the white color connector to both your DVD player and YPbPr s white connector port on the back of your HDTV 6 Connect the red color connector to both your DVD player and YPbPr s red connector port on the back of your HDTV 7 Turn on the HDTV and your DVD player 8 Use the remote control s source button or the source button on the TV to switch to YPbPr Please Note Sometimes DVD playe...

Page 13: ...onnect the white color connector to both your Wii and AV s white connector port on the back side of your HDTV 4 Connect the red color connector to both your Wii and AV s red connector port on the back side of your HDTV 5 Turn on the HDTV and your Wii 6 Use the remote control s source button or the source button on the TV to switch to AV Please Note Make sure to read your Wii installation guide for...

Page 14: ...HDMI port on the back of your HDTV 3 Turn on the HDTV and your set top box 4 Use the remote control s source button or the source button on the TV to switch to HDMI Please Note Please reference the set top box s manual to make sure the set top box is configured to output correctly to the TV HDTV supports NEC s universal remote code Please look up NEC s codes in your universal remote s hand book 13...

Page 15: ...o 1360x768 at 60hz refresh rate 7 Press MENU to use the OSD s PICTURE option 8 Under the PICTURE option select PC Settings 9 Under PC Settings use AUTO ADJUST to adjust the screen Please Note For the best results please set your PC resolution to 1360x768 at 60 Hz Please refer to the PC or graphic card s manual for further instructions on how to set your resolution and refresh rate Please refer to ...

Page 16: ...e digital stream for your receiver to decode you must also configure the TV s OSD Sound Digital Audio Out function Make sure the option is on 5 1CH If your receiver is making static noises when receiving 5 1CH you must use the PCM option instead Please reference the receiver s manual as well to make sure the receiver is configured to receive signals correctly from the TV The TV s COAXIAL out for 5...

Page 17: ...f simulation signal of PC 10 PC AUDIO input terminal 11 RF antenna 12 USB input terminal Only be used to upgrade 16 VOL Increase volume if OSD is active functions as right in the menu in SOURCE menu functions as ENTER VOL Decrease volume if OSD is active functions as left in the menu CH Change channel up if OSD is active functions as up in the menu CH MENU Press to select the main menu SOURCE Sele...

Page 18: ... and switch to a channel using 0 9 Switch the program digit Switch back and front between the current and previous channels DISPLAY Display TV information EPG Enter electronic program guide AUTO Adjust the picture automatically in pc mode RED GREEN YELLOW CYAN This button is not available SLEEP Set the sleep timer SOURCE Press to change signal source ENTER Enter the selected option or perform the ...

Page 19: ... button to select Brightness and press the e f button to enter brightness adjustment menu to adjust brightness 3 Press c d button to select Contrast and press the e f button to enter contrast adjustment menu to adjust contrast 4 Press c d button to select Color and press the e f button to enter color adjustment menu to adjust color 5 Press c d button to select Tint and press the e f button to ente...

Page 20: ...u 1 Press d button to select Equalizer Settings and press the ENTER f button to enter sub menu a Press c d button to select Equalizer Mode Press e f button to select b Press c d button to select 150Hz Press e f button to select c Press c d button to select 500 Hz Press e f button to select d Press c d button to select 1K Hz Press e f button to select e Press c d button to select 5K Hz Press e f bu...

Page 21: ...o enter the OSD menu Then press e e f button to select the TIME menu 1 Press d button to select Sleep Timer and press the e f button to enter sleep timer adjustment menu to adjust sleep timer 2 Press c d button to select Time Zone and press the e f button to enter time zone adjustment menu to select the local time zone 3 Press c d button to select Daylight Saving Time and press the e f button to s...

Page 22: ...he ENTER f button to enter a Press c d button to select CC Mode the e f button to adjust b Press c d button to select Analog CC the e f button to adjust c Press c d button to select Digital CC the e f button to adjust d Press c d button to select Option the ENTER f button to enter sub menu Note The cǃd function it is only available in DTV Note The option is adjust the digital closed captioning set...

Page 23: ...ton to select FG Color the e f button to adjust g Press c d button to select BG Color the e f button to adjust h Press c d button to select FG Opacity the e f button to adjust i Press c d button to select BG Opacity the e f button to adjust Note All the option it is not available in Custom 5 Press c c d button to select Input Label and press the ENTER f button to enter sub menu Note The source lab...

Page 24: ...ub menu a Press c d button to select Menu Language and press the e f button to select language b Press c d button to select Go to next step and press the ENTER f button to enter next step a Press c d button to select Audio Only the e f button to select On or Off b Press c d button to select Blue Screen the e f button to select On or Off When select On only listen sound and the screen is black When...

Page 25: ...lect Time Format and press the e f button to select 12 hour or 24 hour f Press c d button to select Go to next step and press the ENTER f button to enter next step g Press c d button to select Air Cable and press the e f button to select Air or Cable h Press c d button to select Go to next step and press the ENTER f button to start auto scan Note Searching platform will take a long time Please be ...

Page 26: ...If the password is changed all of the passwords in the menu will be changed at the same time Note If you forget your password you can use 1470 to enter any menu locked 3 Press c d button to select System Lock and press the e f button to select On or Off 4 Press button to select Input Block then press ENTER f button to enter sub menu a Press c d button to select TV and press the e f button to selec...

Page 27: ... and press ENTER f button to enter sub menu Press c d button to select and press ĀENTERāto block or unblock b Press c d button to select MPAA and press the e f button to select Off G PG PG 13 R NC 17 X 6 Press c d button to select Canada Rating and press ENTER f button to enter sub menu a Press c d button to select Canada English and press the e f button to select Off C C8 G PG 14 18 b Press c d b...

Page 28: ... 2 Press c d button to select Auto Scan and press the ENTER f button e f ENTER to do auto scan 3 Press c d button to select Favorite and press the ENTER f button to enter 4 Press c d button to select Channel list and press the ENTER f button to enter 5 Press c d button to select Show Hide and press the ENTER f button to enter 6 Press c d button to select Channel Number and press the e f button to ...

Page 29: ... c d button to select Phase and press the e f button to adjust 5 Press c d button to select Auto and press the ENTER f button to do auto adjust Note The pictures in regard to function are provided for reference purposes only PC Setting Press the MENU button to enter the OSD menu Then press e f button to select the Setup menu And then press d button to select PC Setting and press the ENTER f button...

Page 30: ...nd possible permanent damage to the panel which will not be covered under the warranty with clean water and wipe again Wipe the display with a dry micro fiber cloth or 100 cotton cloth afterwards Please Note Make sure you wring the water out of the cloth before cleaning the bezel or remote in order to prevent water from penetrating into the electronics Cleaning the Screen 1 Use a 100 cotton cloth ...

Page 31: ... remote sensor is also housed in the same place as the power indicator light Please make sure there is line of sight from the remote control s front sensor to the remote sensor of the TV CANNOT RECEIVE SUFFICIENT CHANNELS THROUGH THE ATSC NTSC TUNER The TV s tuner signal must not be lower than 65 Change the direction of your antenna and rescan your channels If you have cable call up your cable com...

Page 32: ...If the TV is close to the wall try moving the TV to another room in your house to see if the problem still occurs PICTURE DOES NOT COVER THE ENTIRE SCREEN If you re using HDMI or a TV digital channel make sure you use the ASPECT button to switch to 16 9 format If you are using VGA use the AUTO ADJUST function to adjust to the screen Please Note If you are using regular analog TV AV or component in...

Page 33: ...ast practices it is possible some image distortions can occur TIPS FOR LETTERBOX CONTENT USERS Letterboxed Widescreen versions of DVD movies are most commonly formatted for standard 4 3 TVs The TV has the capability of expanding this content so the entire screen is filled at the expense of the image proportion To use this function press the aspect button on the remote control and cycle among the a...

Page 34: ...78 178 Degree Horizontal Vertical LampLifeofBacklight 30 000hrs TV DISPLAY Dimension 26 38 x 15 79 x 2 99 without stand Weight 10 45Ibs Power input AC 100 240V 60 50 Hz 3A Max Function 1 Video D 3 e c a l r e t n i e D 2 3 r e v o c e r e m a r F Noise reducing core technology 3D Aspect ratio Wide Normal Cinema Zoom a m m a G d e x i F a m m a G s e Y t s u j d a p m a L Picture mode s s e n p r a...

Page 35: ...ut format 1080i 720p 480p 480i Analog closed caption CC1 CC4 Text 1 Text 4 Digital closed caption Service 1 Service 6 5 I O 1 input x TV Tuner NTSC ATSC 1 input x AV 1 input x YPbPr audio shared with AV 3 inputs x HDMI HDCP optional HDCP audio shared with VGAAudio In 1 input x VGA 1 input x VGAAudio In 1 output x COAXIAL digital audio out 1 output x Audio Left Right out 1 output x Headphone out Th...

Page 36: ...icular installation If this equipment does cause harmful interference to radio or television reception which can be determined by turning the equipment off and on the user is encouraged to try to correct the interference by one or more of the following measures Reorient or relocate the receiving antenna Increase the separation between the equipment and the receiver Connect the equipment into an ou...

Page 37: ...MANUEL D UTILISATION 29 RLDED2952A ...

Page 38: ...nstallation des piles dans la télécommande Identification des panneaux avant et arrière Suggestion de connexion Description de l unité principale Télécommande Réglage de base de l écran Comment nettoyer le téléviseur Dépannage Spécifications Déclaration de conformité FCC Dépannage Table des matières ...

Page 39: ...r la ventilation x Evitez les endroits excessivement chauds pour éviter tout risque d endommager le châssis ou une défaillance prématuré d un composant x Cette TV peut être connectée sur secteur AC100 240V 50 60Hz x Ne pas installer la TV dans un endroit près de sources de la chaleur telles que le radiateur la conduite d air la lumière solaire directe ou dans des endroits fermés Ne pas couvrir les...

Page 40: ...ation accompagnant cet appareil PRECAUTION POUR EVITER LE RISQUE DE CHOC ELECTRIQUE NE PAS ENLEVEZ LE COUVERCLE OU DOS AUCUNE PARTIE UTILISATEUR SERVICEABLE A L INTERIEUR REFERENCEZ LA MAINTENANCE AU PERSONNEL DE MAINTENANCE QUALIFIE PRECAUTION RISQUE DE CHOC ELECTRIQUE NE PAS OUVRIR Les structures de classe I doivent tre reli es au r seau lectrique par une prise munie d une connexion la terre de ...

Page 41: ...la lumi re solaire et autres sources de chaleur Ne posez pas directement le t l viseur sur d autres appareils qui d gagent de la chaleur Tels que les magn toscopes les amplificateurs audio Ne pas bloquez les ouvertures d a ration l arri re de l appareil La ventilation est essentielle pour viter une d faillance des composants lectriques Ne pas craser le cordon d alimentation sous le t l viseur ou s...

Page 42: ...eur risque de tomber et peut provoquer des blessures graves et des dommages mat riels importants Précaution Lorsque le t l viseur n est pas utilis pour longtemps il est conseill de d connecter le cordon d alimentation de la prise secteur Précaution Le panneau LED utilis dans ce produit est fait de verre Par cons quent il peut se casser si le t l viseur tombe ou re oit des impacts Faites attention ...

Page 43: ...charge de l antenne la connexion aux électrodes de mise à la terre et les exigences concernant les électrodes de mise à la terre Protection contre la foudre Pour une meilleure protection de cet équipement durant un orage ou lorsque il est inutilisé pendant une longue période débranchez le de la prise murale et déconnectez l antenne ou le système de télévision par câble Lignes électriques Un systèm...

Page 44: ...age Fixation ou enlèvement du support 1 Pour fixer la base placez l unité d affichage plate sur une table Ensuite fixez le support au fond du support Vissez les 4 vis pour fixer le support 2 Pour retirer le support retirez les 5 vis présentes et le support se détache ...

Page 45: ...a de montage Spécification de montage 200 mm x 100 mm en utilisant une vis M4 La longueur de la vis ne doit pas dépasser 8mm Veuillez noter La longueur de 8mm de la vis se réfère à la profondeur de la vis dans les trous de montage Lorsque vous achetez des vis vous devez ajouter les 8mm initiaux à l épaisseur de votre plaque de montage afin d obtenir la longueur totale de la vis Installation des pi...

Page 46: ...quer des fissures ou des fuites qui pourraient poser un risque d incendie ou entraîner des blessures L insertion incorrecte des piles pourrait aussi entraîner des fissures ou des fuites qui pourraient poser un risque d incendie ou d entraîner des blessures Éliminez les piles conformément aux lois et règlements locaux Gardez les piles hors de portée des enfants et des animaux domestiques Si la télé...

Page 47: ...ions ne sont en Haute Définition HD Veuillez vous renseigner auprès de vos stations de d émission locales pour plus d informations Suggestions de connexion Le syntoniseur du téléviseur HD est conçu pour un téléviseur HD donc il nécessite un signal plus fort que les téléviseurs normaux Si vous ne pouvez pas atteindre ce niveau de signal avec votre antenne ou câble votre téléviseur HD pourrait perdr...

Page 48: ...c ble audio RCA Branchez le connecteur de couleur blanche la fois votre lecteur DVD et au port du connecteur blanc de l YPbPr l arri re de votre t l viseur HD 6 Branchez le connecteur de couleur rouge la fois votre lecteur DVD et au port du connecteur rouge de l YPbPr l arri re de votre t l viseur HD 7 Allumez le t l viseur HD et votre lecteur DVD 8 Utilisez le bouton source de la t l commande ou ...

Page 49: ... couleur blanche à la fois à votre Wii et au port du connecteur blanc de l AV à l arrière de votre téléviseur HD 4 Branchez le connecteur de couleur rouge à la fois à votre Wii et au port du connecteur rouge de l AV à l arrière de votre téléviseur HD 5 Allumez le téléviseur HD et votre console Wii 6 Utilisez le bouton source de la télécommande ou le bouton source de la TV pour passer à l AV Veuill...

Page 50: ...e téléviseur HD 3 Allumez le téléviseur HD et votre boîtier décodeur 4 Utilisez le bouton source de la télécommande ou le bouton source de la TV pour passer à HDMI Veuillez noter Consultez le manuel de référence du boîtier décodeur pour s assurer que le boîtier décodeur est lié correctement à la sortie du téléviseur HDTV prend en charge le code de la télécommande universelle NEC Veuillez consulter...

Page 51: ...nt de 60 Hz 7 Appuyez sur MENU pour utiliser l option IMAGE de l écran 8 Sous l option IMAGE sélectionnez Réglages ordinateur 9 Sous Réglages ordinateur utilisez le RÉGLAGE AUTOMATIQUE pour régler l écran Veuillez noter Pour les meilleurs résultats veuillez régler la résolution de votre ordinateur à 1360x768 à 60 Hz Veuillez consulter le manuel de l ordinateur ou le manuel de la carte graphique po...

Page 52: ...mérique pur vous devez également configurer la fonction audio OSD du téléviseur Sortie audio numérique Assurez vous que l option est activée à 5 1CH Si votre récepteur fait des bruits statiques lors de la réception du 5 1CH vous devez plutôt utiliser l option PCM Veuillez consulter le manuel du récepteur aussi pour s assurer que le récepteur est configuré pour recevoir correctement les signaux de ...

Page 53: ...PbPr et AV 3 Borne de sortie coaxiale 12 Borne d entrée USB Utilisée seulement pour la mise à niveau 16 1 VOL Pour baisser le volume 2 VOL Pour augmenter le volume 3 CH Permet d accéder à la chaîne précédente 4 CH Permet d accéder à la chaîne suivante 5 MENU Permet d afficher le Menu principal des réglages 6 SOURCE Permet de sélectionner la source d entrée 7 POWER Appuyez pour mettre en marche et ...

Page 54: ...du programme Alternez entre les cha nes actuelles et ant rieures DISPLAY AFFICHAGE Affichage des informations t l EPG GEP Acc dez au guide lectronique des programmes AUTO R glez automatiquement l image en mode PC RED GREEN YELLOW CYAN ROUGE VERT JAUNE CYAN Ce bouton n est pas disponible SLEEP VEILLE R glez la minuterie de veille SOURCE SOURCE Appuyez pour changer la source du signal ENTER ENTRÉE S...

Page 55: ...cc der au menu de r glage de la luminosit pour r gler la luminosit 3 Appuyez sur le bouton c d pour s lectionner Contrast Contraste puis appuyez sur le bouton e f pour acc der au menu de r glage du contraste pour r gler le contraste 4 Appuyez sur le bouton c d pour s lectionner Color Couleur puis appuyez sur le bouton e f pour acc der au menu de r glage de la couleur pour r gler la couleur 5 Appuy...

Page 56: ...e bouton e f pour s lectionner le menu SOUND AUDIO 1 Appuyez sur le bouton d pour s lectionner Param tres de l galiseur puis appuyez sur le bouton ENTER f pour acc der au sous menu a Appuyez sur le bouton c d pour s lectionner Equalizer Mode Mode galiseur Appuyez sur le bouton c d pour s lectionner b Appuyez sur le bouton c d pour s lectionner 150Hz Appuyez sur le bouton e f pour s lectionner c Ap...

Page 57: ...que Cela n est disponible qu en mode DTV 4 Appuyez sur le bouton c d pour s lectionner Digital Audio Output Sortie audio num rique puis appuyez sur le bouton e f pour r gler 5 Appuyez sur le bouton c d pour s lectionner AVL puis appuyez sur le bouton e f pour s lectionner On activer or Off d sactiver TIME MINUTERIE Appuyez sur le bouton MENU pour accéder au menu OSD Ensuite appuyez sur le bouton e...

Page 58: ...bouton ENTER f ENTRÉE f pour régler SETUP CONFIGURATION Appuyez sur le bouton MENU pour accéder au menu OSD Ensuite appuyez sur le bouton e f pour sélectionner le menu Setup Configuration 1 Appuyez sur le bouton d pour sélectionner OSD Language Langue OSD puis sur le bouton e f pour sélectionner la langue OSD que vous souhaitez 2 Appuyez sur le bouton c d pour sélectionner Transparent Transparence...

Page 59: ...puyez sur le bouton c d pour s lectionner Font Size Taille de la police puis appuyez sur le bouton e f pour r gler d Appuyez sur le bouton c d pour s lectionner Font Edge Style Style de bordure de police puis appuyez sur le bouton e f pour r gler e Appuyez sur le bouton c d pour s lectionner Font Edge Color Couleur de bordure de police puis appuyez sur le bouton e f pour r gler f Appuyez sur le bo...

Page 60: ...leu puis appuyez sur le bouton e f pour s lectionner On activer or Off d sactiver 7 Appuyez sur le bouton c d pour sélectionner Restore Default Restaurer la configuration par d faut puis sur ENTER f et s lectionnez par d faut 8 Appuyez sur le bouton c d pour sélectionner Setup wizard Assistant de configuration puis appuyez sur le bouton ENTER ENTR E pour acc der au sous menu Other puis appuyez sur...

Page 61: ...ne Fuseau horaire puis appuyez sur le bouton e f pour s lectionner d Appuyez sur le bouton c d pour sélectionner Daylight Saving Time Heure avanc e puis appuyez sur le bouton e f pour s lectionner On activer or Off d sactiver e Appuyez sur le bouton c d pour sélectionner Time Format Format de l heure puis appuyez sur le bouton c d pour s lectionner 12 hour 12 heures ou 24 hour 24 heures f Appuyez ...

Page 62: ...ER f ENTR E f pour lancer la recherche automatique Remarque La recherche prendra une longue p riode de temps Veuillez patienter LOCK VERROUILLAGE Appuyez sur le bouton MENU pour accéder au menu OSD Ensuite appuyez sur le bouton e e f pour sélectionner le menu Lock Verrouillage 1 Appuyez sur le bouton d pour s lectionner Enter Password Saisir mot de passe puis appuyez sur le bouton num rique de s l...

Page 63: ...outon c d pour s lectionner Input Block Verrouillages d entr e puis appuyez sur le bouton ENTER f ENTR E f pour acc der au sous menu a Appuyez sur le bouton c d pour sélectionner TV T l viseur puis appuyez sur le bouton e f pour s lectionner Block Bloquer or Unblock D bloquer b Appuyez sur le bouton c d pour sélectionner AV AV puis appuyez sur le bouton e f pour s lectionner Block Bloquer or Unblo...

Page 64: ... le bouton c d pour sélectionner MPAA MPAA puis appuyez sur le bouton e f pour s lectionner Off G PG PG 13 R NC 17 X 6 Appuyez sur le bouton c d pour s lectionner Canada Rating Classifications Canada puis appuyez sur le bouton ENTER f ENTR E f pour acc der au sous menu a Appuyez sur le bouton c d pour sélectionner Canada English Anglais du Canada puis appuyez sur le bouton e f pour s lectionner Of...

Page 65: ...s appuyez sur le bouton ENTER f ENTR E f le bouton e f pour s lectionner YES OUI puis sur ENTER pour effectuer la recherche automatique 3 Appuyez sur le bouton c d pour s lectionner Favorite Favori puis appuyez sur le bouton ENTER f ENTR E f pour y acc der 4 Appuyez sur le bouton c d pour s lectionner Channel list Liste des cha nes puis appuyez sur le bouton ENTER f ENTR E f pour y acc der 5 Appuy...

Page 66: ...s appuyez sur le bouton e f pour r gler 2 Appuyez sur le bouton c d pour s lectionner V Pos Position verticale puis appuyez sur le bouton e f pour r gler 3 Appuyez sur le bouton c d pour s lectionner Clock Horloge puis appuyez sur le bouton e f pour r gler 4 Appuyez sur le bouton c d pour s lectionner Phase Phase puis appuyez sur le bouton e f pour r gler 5 Appuyez sur le bouton c d pour s lection...

Page 67: ... permanents au panneau qui n est pas sous garantie avec de l eau propre et essuyez de nouveau Essuyez ensuite l cran avec un chiffon en microfibres ou 100 coton sec Veuillez noter Assurez vous que vous vous tordez le chiffon avant de nettoyer le cadran ou la t l commande afin d emp cher l eau de p n trer dans le circuit lectronique Nettoyage de l écran 1 Utilisez un chiffon en microfibres ou 100 c...

Page 68: ...la t l commande pour voir si elle fonctionne Pour des instructions de retrait des piles Le t l capteur du t l viseur est galement situ dans le m me endroit que la lampe t moin Veuillez vous assurer qu il existe une connexion directe entre le t l capteur avant de la t l commande et le t l capteur du t l viseur INCAPABLE DE RECEVOIR UN NOMBRE INSUFFISSANT DE CHA NES par le SYNTONISEUR ATSC NTSC Le s...

Page 69: ...MPAGN E D UN SON ANORMAL Cela pourrait tre le r sultat de l interf rence de grands appareils lectriques voitures motos ou les lampes fluorescentes Si le t l viseur est proche du mur essayez de le d placer dans une autre pi ce de votre maison pour voir si le probl me persiste L IMAGE NE COUVRE PAS TOUT L CRAN Si vous utilisez HDMI ou une cha ne de t l vision num rique assurez vous que vous utilisez...

Page 70: ...ines distorsions de l image se produisent CONSEILS POUR LES UTILISATEURS DU CONTENU DE L CRAN LARGE Les versions de films sur DVD Letterbox cran large sont le plus souvent format es pour les t l viseurs 4 3 standards La t l vision a la possibilit d tendre ce contenu de sorte que tout l cran soit rempli au d triment de la proportion de l image Pour utiliser cette fonction appuyez sur le bouton aspe...

Page 71: ...ement 178 178 degrés Horizontal Vertical Durée de vie du projecteur de fond 30 000 h AFFICHAGE TV Dimension 26 38 po x 15 79 po x 2 99 po sans support 26 38 po x 17 95 po x 8 11 po avec support Poids 10 45 lb Entrée d alimentation 100 CA 240 V 60 50 Hz 3 A max Fonction 1 Vidéo Non entrelacement 3D Rétablissement cadre 3 2 Technologie de base pour réduire le bruit 3D Format Large Normal Cinéma Zoom...

Page 72: ...us titrage numérique Service 1 Service 6 5 E S 1 entrée x Syntoniseur TV NTSC ATSC 1 entrée x AV 1 entrée x YPbPr audio partagé avec AV 3 entrées x HDMI HDCP en option HDCP audio partagée avec l entrée audio VGA 1 entrée x VGA 1 entrée x entrée audio VGA 1 entrée x sortie SPDIF audio numérique 1 entrée x sortie audio gauche droite 1 entrée x sortie casque Les spécifications du produit peuvent chan...

Page 73: ...ences n interviendront pas dans une installation particuli re Si cet quipement provoque effectivement des interf rences pr judiciables la r ception radiophonique ou t l visuelle ce que l on peut v rifier en teignant et en rallumant l appareil l utilisateur est invit essayer de les corriger en suivant l une des proc dures ci dessous R orienter ou d placer l antenne de r ception Augmenter la distanc...

Reviews: