background image

Summary of Contents for VR911HF

Page 1: ...vide o cassette recorde r user s guide VR911I IF ...

Page 2: ...back panel of your pr__cLqctfor it__s proper operating voll_ 0_ FC _ Regulations_state_that_una_hdl_i _d _anges or modifications to this equipment ma_ void th_ _tauthority to_erate it able ll V Install_rj_cLe_g_i_ed to call your attention to ALl icle820 40 of the National Ele_bCo_e Section 54 of the Canadian Electrical Code Part 1 which provide_i_elines for proper grounding and _ _particul ar spec...

Page 3: ...d Proscan TV Function Buttons 17 Playing aTape 17 Automatic Rewind 18 Tape Eject 18 StandardVHS Recording 18 Check the SafetyTab 18 Recording 19 Recording Features 20 D VHS Recording 20 Conditions for D VHS Recording 21 Express Recording XPR 2 I Timer Recording 22 Stopping aTimer Recording 23 Reviewing and Clearing Programs 23 Timer Recording Using a Digital Satellite Receiver 24 Conflicting Timer...

Page 4: ...ame Advance 37 Index Search 37 Go To Search 38 Tracking 39 Time Counter _ 39 On Screen Displays 40 Audio Set Up Features _ 4 I Reception 4 I Tape Playback 42 Connections 43 Connecting YourVCR _ 44 Choosing a VCR Connection 45 Advantages of Audio Video Cable Connections 45 Don t Forget About the Auto TV VCR Feature 45 Best Picture and Sound Quality 46 Very Good Picture and Sound Quality J 47 Good P...

Page 5: ...nty V V BUT WHAT IS D VHS D VHS short for DigitalVHS features new technology that lets you make high quality digital recordings from a DSS receiver or compatible component In fact you ll be hard pressed to tell the difference between the original satellite broadcast and a D VHS recording YourVCR can also record and play back standardVHS tapes To record or play back a D vHs tape theVCR must be conn...

Page 6: ...o a digital satellite receiver and TV This illustration shows a basic connection that allows you to watch television and satellite broadcasts and record in both standard VHS and D VHS formats Do not place the VCR on top of the digital satellite receiver Connect a coaxial cable from the cable or antenna lead to the VCR s IN FROM ANT jack Connect a second cable from the VCR s OUT TO TV jack to the s...

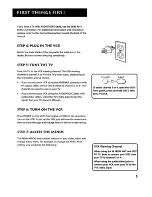
Page 7: ...ou connect your VCR using the AUDIO VIDEO jacks with audio video cables select the TV s video input to see the signal See your TV Owner s Manual i ii TV VCR EJECT To select channel 3 or 4 open the VCR s front panel press and hold EJECT then press TV VCR STEP 6 TURN ON THE VCR Press POWER on the VCR s front panel or VCR on the remote to turn on the VCR To set up the VCR you will need to understand ...

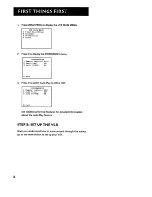
Page 8: ...ontroL VCR1 2 Auto PLay ON 3 Auto TV VCR ON 0 Exit 3 Press2 to switch Auto Play to ON or OFR PREFERENCES 1 Remote ControL VCR1 2 Auto PLay OFF 3 Auto TV VCR ON 0 Exit See Additional Set Up Features for detailed information about the Auto Play feature STEP 8 SET UP THE VCR Once you understand how to move around through the menus go to the next section to set up your VCR 6 ...

Page 9: ...y want to set up before you begin using yourVCR for the first time I Set upVCR Channel List Auto Channel I _i Search Set theTime and Date SETTING UP THE VCR _d Set the RemoteVCRI VCR2 feature Set the Auto Play feature Set the Auto TV VCR feature V V V V 7 ...

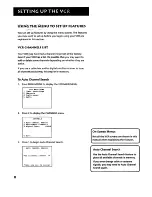
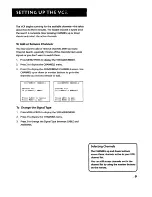
Page 10: ...vely this step isn t necessary To Auto Channel Search 1 Press MENUoPROG to display the VCR MAIN MENU VCR RAIN RENU 1 Timer Record4ngs 2 Channels 3 Preferences 4 Audio 2 Press2 to display the CHANNELS menu CHANNELS 1 Auto Channel Seerch 2 AddlRelove Channels 3 S_gnat TYpe CABLE 0 Exit 3 Press 1 to begin Auto Channel Search r On Screen Menus Not all the VCR screens are shown in this manual when expl...

Page 11: ... to display the ADD REMOVE CHANNELS screen Use CHANNEL up or down or number buttons to go to the channels you want to remove or add ADD REROVE CHANNELS Channel 115 is presently ADDED Press CLEAR to remove Press RENU to exit ADD REROVE CHANNELS Channel 115 is presently REROVED Press 1NFO to add Press RENU to exit To 1 2 3 Change the Signal Type Press MENUopROG to display the VCR MAIN MENU Press 2 t...

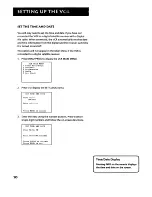
Page 12: ...nnected to a digital satellite receiver 1 PressMENU PROG to display the VCR MAIN MENU VCR RAIN MENU 1 Timer Recordings 2 ChanneLs 3 Preferences 4 Audio 5 Set CLock 2 Press 5 to display the SET CLOCK menu SET TIRE AND DATE Time hh mm Date I Press MENU to cancel Enter the data using the number buttons Press 0 before single digit numbers and follow the on screen directions SET TIRE AND DATE Time 12 3...

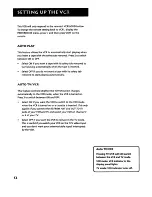
Page 13: ... ON 0 Exi t Now you are ready to select an item from the menu to set up REMOTE VCR1 VCR2 OPTION The VCR2oDVD button on the remote control lets you to control a second VCR If you have a second compatible VCR that you would like to operate as VCRI set this VCR to respond to the VCR2 DVD button Press 1 to select the Remote Control item Then press the VCR2eDVD button to change PREFERENCES Press VCR2 t...

Page 14: ...TV VC R This feature controls whether the TVNCR switch changes automatically to the VCR mode when the VCR is turned on Press3 to switch between ON and OFF Select ON if you want the VCR to switch to the VCR mode when the VCR isturned on or a cassette is inserted This only applies if you connect the IN FROM ANT and OUT TO TV jacks of your VCR and TV and watch your VCR on channel 3 or 4 of your 7_ Se...

Page 15: ...unctions playing a recorded tape and recording a program should do just that However there are other features that enhance the enjoyment of yourVCR but they aren t necessary to get you started If you want to learn more about yourVCR just keep reading V VCR BASICS V i to know in order to watch a movie or tape your favorite show _ i 13 ...

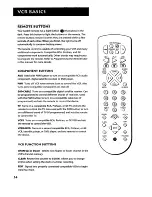
Page 16: ...ite receiver Can be programmed to control different brands of receivers Used with the PWR button to turn on a compatible cable box if programmed and sets the remote to control the device TV Turns on a compatible RCA ProScan or GE TV and sets the remote to control the TV Also used with the PWR button to turn on a different brand of TV if programmed and sets the remote to control the TV VCR1 Turns o...

Page 17: ...appears on the screen Then press the other two numbers PAUSE Pauses playback or recording Press PAUSE again to return to playback or recording PLAY Plays a tape PWR Turns off the VCR when the remote is set to control the VCR REC Starts VCR recording Also used for express recording REV Rewinds the tape when the VCR is stopped Searches backward through a tape during playback SEARCH Displays Index an...

Page 18: ...lect menu items or exit the menus MOVE arrow buttons Used to move the on screen highlight up down right or left PWR Turns the digital satellite receiver off TV VC R Switches the picture signal between the satellite receiver and the cable antenna system UNIVERSAL TV FUNCTION BU BIONS VCR sxr c_ _ o I_ SEARCH MUTE GO BACK INI_JTo 33 VCRo CLEAR SPEED EDrT ov A SLOW TRACKING These TV function buttons ...

Page 19: ...s Commercial Skip feature SLOW and Used with some RCA GE and ProScan TV menus to select and adjust features TV VCR Switches between different antenna leads if your TV has more than one PLAYING A TAPE 1 Tune the TV to your VCR viewing channel 3 4 or TV s video input 2 Insert a tape in the VCR Press FWD or REV to position the tape Press PLAY if necessary to begin tape play Press PAUSE for stop actio...

Page 20: ...CR and that the tape s safety tab is in place You cannot record on a tape with the safety tab removed Safety Tab If the safety tab is removed and you want to record over the tape simply cover the hole with vinyl tape TapeSpeeds Standard VHS Mode SP Standard Play Gives the best quality recording but fewer programs can be recorded on the tape Special effects such as pause slow motion picture search ...

Page 21: ...g features that are available to suit your needs Recording Features Recording explained in VCR Basics section Digital Recording D VHS mode Express Recording Timer Recording Timer Recording using a Digital Satellite Receiver 4 RECORDING V Broadcast Stereo or Second Audio Program SAP Audio Only Recording Copying and EditingTapes 19 ...

Page 22: ...riod of time This method works identically in both standard VHS and D VHS modes Timer Recording lets yoU automatically start and stop recording at a predetermined time You can program the VCR directly or use your digital satellite receiver s timers to record Satellite programming D VHS RECORDING Whenmakinga recorrding of a satellite broadcast you might find it easier to use the digital satellite r...

Page 23: ...of the program you are watching 1 Set the tape speed by pressing the SPEEDbutton on the remote 2 Press the RECORD button to begin recording 3 Repeatedly pressthe RECORD button to set up the recording duration REC Ch 13 0 01 23 SLP Rec Ch 13 Record Length 0 00 Press REC tO setlength Each time you press the RECORD button you increase the recording time 30 minutes Ul_ t0 4 h 6urs _ _ _ _ t _ k_ L_ l ...

Page 24: ...ram with the number buttons The data includes the channel number press INPUT to select the line _ inpu t or dL1 start time including AM or PM and end time The start date is automatically entered based on the VCR clock _ Boththe date and speed can be changed __ _ Timer Recording Information The clock must be set correctly which is automatic if your VCR is connected to a digital satellite receiver I...

Page 25: ...ront panel 2 Press STOR REVIEWING AND CLEARING PROGRAMS To review programs that you have already set up 1 Press2 when the VCR MAIN MENU is displayed to display the TIMER RECORDINGS menu TIMER RECORDINGS 1 Create a New Program 2 Review Existing Progs 0 Exit 2 Press 2 to display the Review Existing Progs screen Program 1 One Time Channel 104 CABLE Start Time 12 00 AR End Time 01 30 AM Start Date 10 ...

Page 26: ...ing analog allows you to set the recording speed standard play SP or super long play SLP If you choose digital make sure that a D VHS compatible videocassette is loaded in the VCR before the program is set to run The on screen preference you set in the timer analog or digital will automatically override the front panel D VHS setting for the particular event 5 When the sentence is complete select R...

Page 27: ...programs with the VCR this screen appears PROGRAMS OVERLAP VCR 1 2 3 4 5 6 7 8 SAT 1 2 3 4 5 6 7 8 Review programs and select one to delete Press MENU to exit If you don t change any of the programs the VCR will record the program with the earlier start time in its entirety ignoring the beginning of the second After the first program is complete the VCR will record what remains of the second unles...

Page 28: ...EREO MONO SAP feature for the type of audio you want to record See Other Features section AUDIO 1 Reception STEREO 2 Tape PLayback HZ FZ 0 Exit 7 Press RECORDto start recording 8 PressSTOP when you are finished RECORDING AUDIO ONLY You can record audio only from another audio source connected to the AUDIO IN R and L jacks on the front or back of the VCR This example uses the LINE 2 jacks on the VC...

Page 29: ...he VCRs using the diagram below 3 Tune the TV to the VCR viewing channel either 3 4 or TV s video input If you are using coaxial cables for the connection tune recording VCRto channel 3 or 4_the one selected on the playback VCR If you are using audio video cables select LINE on the recording VCR 5 Insert the tape you want to copy into playback VCR Insert a blank tape with its safety tab in place i...

Page 30: ... sure both VCRs are loaded with D VHS tapes For the playback VCR press and hold VCR1 on the remote then press the D VHS button on the VCR sfront panel The D VHS light will come on and dub will appear in the front panel display For the recording VCR press and hold VCR2 on the remote then press the D VHS button on the VCR s front panel The D VHS light will come on and dub will appear in the front pa...

Page 31: ...h as a television digital satellite receiver cable box laser disc player DVD player or RCA audio component Initially the remote is programmed to control an RCA GE or ProScanTV or digital satellite receiver You will need to program other manufacturer s brands V V PROGRAMMING THE REMOTE V I V 29 ...

Page 32: ...6_ Release TV and then press CHAN up or down If the TV responds to the remote commands the remote is programmed If the TV does not respond repeat these steps using the next code in the list OPERATE THE TV After you set up the remote see which buttons operate your TV 1 1_ oint the remote at the TV and press the TV button If the TV does not turn on press the TV button and then press the PWR button 2...

Page 33: ...Memorex 005 MGA 006 011 014 019 022 027 041 056 061 068 Mitsubishi 006 011 014 019 022 027 041 055 056 061 068 108 MTC 011 019 027 Multivision 081 NAD 018 023 NEC 011 014 019 027 038 084 Panasonic 012 013 038 086 111 Philco 006 007 010 011 013 016 019 027 033 035 037 038 043 087 089 Philips 002 006 007 010 011 013 016 033 035 037 038 043 066 073 Pioneer 011 027 045 062 093 113 Portland 011 019 027...

Page 34: ...o see if the audio component responds to the remote commands OPERATING THE AUXILIARY COMPONENT After you have programmed your remote see which buttons will operate your component 1 Point the remote at the component and press AUX If it does not turn on press AUX and then PWR 2 You may want to experiment to see which buttons will operate your component Try pressing buttons such as PLAY REV and FWD F...

Page 35: ...t code from the code list 5 Release the VCR2oDVD button and press PWR If the component turns off setup is complete NOte For DVD control the PLAY button functions as SELECT The MENU button brings up the DVD disc menu OPERATE TH E COMPONENT After you have set up your remote see which button will operate it 1 Point the remote at the component and press VCR2oDVD If it does not turn on press VCR2oDVD a...

Page 36: ...see which buttons will operate your cable box or digital satellite receiver Try pressing buttons such as CHAN up or down _ FI T I I Digital Satellite Receiver Codes RCA ProScan GE 000 _ Sony 095 Toshiba 096 Panasonic 097 Cable Box Codes ABC 022 046 053 054 Anvision 007 008 Cablestar 007 008 Diamond 056 Eagle 007 008 Eastern International 002 General Instrument 004 00S 015 023 024 025 030 036 046 H...

Page 37: ...FEATURES TO ENHANCE VCR OPERATION Picture Search Options Tracking Time Counter On Screen Displays Audio Reception AudioTape Playback V V V 16 V OTH ER FEATURES I 35 ...

Page 38: ...sual search occurs when the VCR is in play mode 1 Turn and hold the shuttle ring clockwise toward FWD to search forward 2 Turn and hold the shuttle ring counterclockwise toward REV to search in reverse 3 Release the shuttle ring to return to playback SLOW MOTION In standard VHS mode you can view a tape in slow motion from the play pause mode Slow motion works best for tapes recorded at the SP or S...

Page 39: ...Press PAUSE to freeze the action 2 Press F ADV each time you want to view a frame of the scene 3 Press PAUSE or PLAY to return to normal playback INDEX SEARCH In both standard VHS and DoVHS modes the VCR has a VHS Index Search System that automatically records an index mark on the tape every time you start a recording During playback you can locate the program you want to play by the number of ind...

Page 40: ...f a recorded segment of five minutes or less The first index mark on the tape when you start at the beginning of the tape INDEX SEARCH Searching for index number 12 Press STOP to cancel GO TO SEARCH In both standard VHS and D VHS modes the Go To search feature enables the VCR to quickly locate a counter reading anywhere on the tape 1 Press STOR 2 Press SEARCH on the remote until the GO TO SEARCH m...

Page 41: ... or eject the tape and reinsert it TIME COUNTER The time counter shows the actual time it takes to record a program or play back a segment of a recorded tape It helps locate the beginning or end of programs you taped The time counter resets to 0 00 00 whenever the tape is ejected from the VCR For example if you record a 30 minute program at the beginning of the tape and you want to go to the end o...

Page 42: ...u from accidently recording on screen displays while copying tapes 4 Press INFO to see all of the on screen displays again These on screen displays do not appear when the VCR is recording or playing back in D VHS mode Instead on screen displays are generated by the digital satellite receiver ON SCREEN DISPLAYS IN D VHS MODE 2 3 Stop Ch OS 0 30 00 11118 97 Tue 01 30PM SLP On screendisplay _imes dUO...

Page 43: ...TV programs are broadcast with stereo audio or a second audio program SAP which offers a second language The Reception feature lets you select the type of audio you want to record Press 1 to switch between Reception STEREO MONO and SAP Select STEREOfor normal or stereo broadcast TV recording When you press INFO the STEREO indicator appears on screen of channels broadcasting in stereo Select MONO i...

Page 44: ...enjoy Hi Fi sound connect your VCR to a stereo television or amplifier receiver using the audio video jacks The Tape Playback feature lets you select which audio you play back Select HI FI to play back sound recorded on the Hi Fi track and for normal use Select LINEAR to play back the sound recorded on the linear monaural track such as a second audio program SAP or a dubbed voice over Select MIX t...

Page 45: ...middle after you connect your components Try not to coil any twin lead cables and keep them away from the audio video cables as much as possible Make sure all antennas and cables are properly grounded Refer to the Safety Tips sheet packed with your unit V V V Protect Your Components from Overheating Do not block ventilation holes in any of the components Arrange the components so that air can circ...

Page 46: ... video jacks provide very good picture and sound quality and can be used if your TV has audio video input jacks These jacks must be used for stereo sound The VCR audio video jacks are color coded yellow for video red for right audio and white for left audio If your TV has only one input for audio mono you may need a Y adapter to hear sound from both channels 0 Audio Video Jack Digital Audio Video ...

Page 47: ...ng a simple coaxial cable connection gives you good picture quality If your television has audio video jacks I highly recommend using them to get even better picture quality and stereo sound when recording and playing back videotapes These connections give you more Convenient operation by not having to share the TV s antenna signal DON T FORGET ABOUT THE AUTO TV VCR FEATURE The TV VCR switch contr...

Page 48: ...he VCR s Preferences menu set the Auto TV VCR feature to OFF To watch VCR programming 1 Tune TVto LINE IN 2 2 Play a tape or change channels on the VCR s tuner To watch digital satellite system programming 1 Tune TV to S VIDEO INPUT 2 Tune digital satellite system to desired channel To watch antenna or cable programming 1 Tune TV to desired channel if you use a cable box tune TV to cable box outpu...

Page 49: ... or change channels on the VCR s tuner To watch digital satellite system programming 1 Tune TV to LINE IN 2 Press SAToCABLE on the remote 3 Tune digital satellite system to desired channel To watch antenna or cable programming 1 Tune TV to desired channel If you use a cable box tune TV to cable box output channel usually channel 3 or 4 2 Or use the VCR s tuner while the TV is tuned to LINE IN To r...

Page 50: ...lay a tape or change channels on the VCR stuner To watch digital satellite system programming 1 Turn digital satellite receiver on and tune TV to DSS output channel Check your receiver s user s guide for default output channels 2 Press SAT CABLE then tune digital satellite system to desired channel To watch antenna or cable programming Turn off VCR and digital satellite receiver 2 3 t 48 Press TV ...

Page 51: ...about theVCR including a description of the unit s controls and display You also will find aTroubleshootingTips section in this Appendix which might help to resolve some of those simple problems Finally this section contains your warranty information 49 ...

Page 52: ...the signal coming from the component connected to the audio video input jacks on the back of the VCR The rear input jacks are LINE 1 the front LINE 2 PAUSE Pauses action for viewing during playback Pauses recording to prevent recording of unwanted scenes PLAY Plays a tape POWER Turns the VCR on or off RECORD Starts VCR recording Also used for express recording Remote Sensor Receives signals from t...

Page 53: ...hannel number appears when the VCR is tuned to a channel The line indicator dL1 L1 or L2 appears when a line input is selected Status Indicators Show what the VCR is doing FF Fast forward PLAY Playback REC Record REW Rewind SLOW Slow motion SP or SLP Standard VHS tape speed times out after 3 seconds SRCH or SRCH Forward or reverse search STILL Play pause and frame advance TIMER Indicator Lights wh...

Page 54: ...able standard VHS recording from digital satellite source and to view digital recording or playback through the VCR s display connections AUDIO R and L and VIDEO OUT Jacks Sends signals from VCR to another component like a IV or VCR0when it is connected to these jacks DIGITAL A V Jack Sends and receives a digital satellite system signal or other compatible device Required connection for D VHS reco...

Page 55: ...controls a compatible TV PressTV to set remote to control the compatible TV Check to make sure there are no objects between the component and remote The batteries may need changing Reprogram remote after batteries have been changed Remove batteries and hold number button 1 for at least 60 seconds to drain the microprocessor inside the remote Release number 1 replace the batteries and if necessary ...

Page 56: ...er does not advance during unrecorded portions of tape When an unrecorded segment of tape is encountered the time counter will hold its count until recorded material is detected again A minus will appear in front of the time if you rewind the tape farther back than a counter reading of 0 00 00 Will not record or play Check to make sure there is a tape in the VCR Try ejecting and reinserting the ca...

Page 57: ...y Check to make sure the Auto Play ON OFF feature is set to ON CASSETTE Indicator flashes in display Check to make sure there is a cassette in the VCR when a timer recording is set Time counter disappears during searching This isnormal No stereo sound during playback standard VHS mode Check to make sure the Playback HI FI LINEAPJMIX feature is set to HI FI to hear stereo sound during playback Must...

Page 58: ...able channels AutoProgramming frequency synthesis 120V AC 60 Hz 22 watts 3 6 inches high 93 mm 15 inches wide 380 ram 12 4 inches deep 280 mm 8 4 pounds 3 8 kg 22 F to 149 F 130 Cto 65 C 41 Fto 104 F 5 C to 40 C Check your cable company s compatibility requirements CLEANING THE VCR Use a soft cloth or dusting attachment of your vacuum cleaner to dust your VCR Remove dust from the ventilation holes...

Page 59: ...b digital recordings D VHS Cassette Special tape formulation required for digital recordings r u _3 Accessory Order Form Description Remote Control CRKT0VBL2 5crew on antenna cable 3 ft VH81 Screw on antenna cable 6 ft VH82 Push on antenna cable 6 ft VH89 Stereo AN Cable 6 ft VH84 Digital AN Cable 240984 D VHS Cassette 240985 4 95 6 95 5 95 9 95 14 95 19 95 Qty Prices are subject to change without...

Page 60: ...i order will save you days your mailing label of waiting Name Street City State Apt Zip Please make sure that both sides of this form have been filled out completely Allow 4 weeks for delivery All accessories are subject to availability Prices are subject to change 58 United States and Canada Orders To place your order by phone have your Visa MasterCard or Discover Card ready and call the toll fre...

Page 61: ...our warranty does not cover Customer instruction Your Owner s Manual Clearly describes how to install adjust and operate your VCR Any additional information should be obtained from your Dealer Installation and related adjustments Signal reception problems not caused by your VCR Damage from misuse or neglect Cleaning of video audio heads Batteries A VCR that has been modified or incorporated into o...

Page 62: ...ton 14 23 38 39 Conflicting timers 25 Connections 43 48 Controls back panel 52 front panel 50 Copying and editing tapes 27 D D VHS Recording 20 21 28 Date and time setting 10 Displays on screen 40 51 E Editing 27 28 60 EJECTbutton 18 50 Eject tape 17 Express Recording 21 F F ADV button 15 37 FORWARD button 17 36 38 39 Frame advance 37 G GO BACK button 15 17 Go to search feature 38 GO TO SEARCHmenu...

Page 63: ...he menus 8 Signal type 9 Slow motion playback 36 Solving problems 53 Specifications 56 Speed 18 SPEED button 15 18 21 26 Status indicators 51 STOP button 15 17 18 26 38 39 50 T Tab safety 18 Tape eject 17 Tape playback 42 Tape playback HIFI LINEAR and MIX 42 Tape playing a 17 Tape speeds 18 Time and date setting 10 Time counter 39 Time counter display 51 Time display 51 TIME menu 10 TIMER indicato...

Page 64: ...y products to the Indianapolis address listed in this manual or on the carton This will only add delays in service for your product THOMSON CONSUMER ELECTRONICS 10330 North Meridian Street Indianapolis IN 46290 1997 Thomson Consumer Electronics Trademark s Registered Marca s Registrada s Printed in Japan TOCOM 15244160 QR14051 ...

Reviews: