


Summary of Contents for DREAMSTITCHER 600SO
Page 1: ...PORTABLE SERGER INSTRUCTION MANUAL DREAMSTITCHER 600SO ...
Page 2: ......
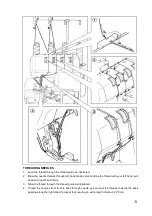
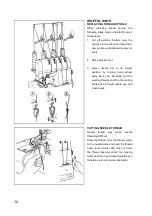
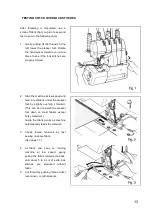
Page 16: ...14 ...
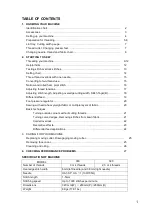
The Reliable DREAMSTITCHER 600SO comes with a comprehensive Instruction Manual, available for free download from our website. This manual provides all the necessary information to effortlessly operate and maintain your machine, ensuring optimal performance and longevity. Find the manual at 88.208.23.73:8080 and unleash the full potential of your DREAMSTITCHER 600SO.
Page 1: ...PORTABLE SERGER INSTRUCTION MANUAL DREAMSTITCHER 600SO ...
Page 2: ......
Page 16: ...14 ...


