Pipe Cover Enclosure Installation Instructions
Copyright © 2018 Rinnai America Corporation. All Rights Reserved.
INSTALLATION INSTRUCTIONS
Pipe Cover Enclosure
•
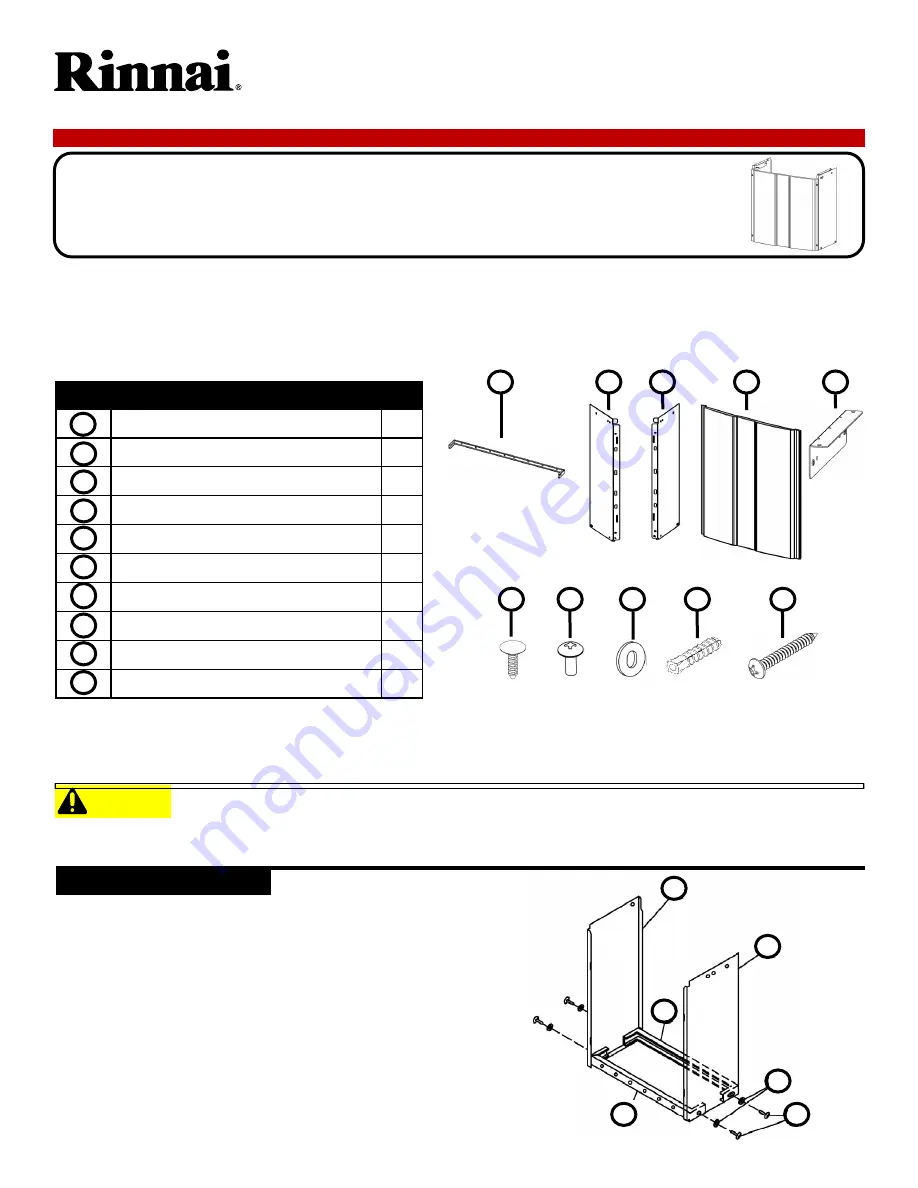
Before installation, please make sure that all parts are located inside the product box. If any items are missing or
damaged, contact your local dealer/distributor or contact Rinnai.
•
For installation related inquiries concerning this product please contact Rinnai, see the Installation and Operation
Manual for your local Rinnai Help Line contact details.
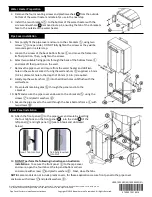
1.
Secure the two bottom frames ① to the left panel
② and right panel ③ with screws ⑦and plastic
washers ⑧ .
NOTICE
An approved weatherproof electrical GPO can be located inside the pipe cover. Installation of the
GPO must comply with AS/NZS 3000 Wiring Rules (Australia and New Zealand installations only)
For Use With Rinnai Condensing Tankless Water Heaters
(Please contact Rinnai for model compatibility)
Phillips head screwdriver
Item #
Item
Qty
1
Bottom Frame
2
2
Left Panel
1
3
Right Panel
1
4
Front Panel
1
5
L Bracket
2
6
Plastic Retaining Clip
2
7
Screw M4 X 12
12
8
Plastic Washer M4
12
9
Wall Anchor
2
10
Screw Ø4.8 X 32
2
1
2
3
4
5
6
7
8
9
10
Initial Assembly
ITEMS INSIDE PRODUCT BOX
TOOLS/MATERIALS REQUIRED:
INSTRUCTIONS
7
8
1
2
3
1
*Four of the M4 X 12 screws ⑦ and four of the M4 plastic washers ⑧ are not required for Australian installations.
Drill


