background image

is a registered Trademark of Roadstar S.A. - Switzerland   All rights reserved

Radio-Controlled FM Band PLL  Clock
Radio with Double Alarm

Instruction manual
Bedienungsanleitung
Manuel d’instructions
Manuale d’istruzioni

CLR-4200FR

Roadstar Management SA, via Passeggiata 7 CH 6883
NOVAZZANO (SWITZERLAND) www.roadstar.com

Specifications  subject  to  change  without  prior  notice.

Summary of Contents for CLR-4200FR

Page 1: ...ntrolled FM Band PLL Clock Radio with DoubleAlarm Instruction manual Bedienungsanleitung Manuel d instructions Manuale d istruzioni CLR 4200FR Roadstar Management SA via Passeggiata 7 CH 6883 NOVAZZANO SWITZERLAND www roadstar com Specifications subject to change without prior notice ...

Page 2: ... esta unidade é necessário ler com atençâo este manual de instruções pare que possa serusada apropriadamente mantenha o manualao seu alcance para outras informações Your new unit was manufactured and assembled under strict ROADSTAR quality control Thank you forpurchasing ourproduct foryour music enjoyment Before operating the unit please read this instruction manualcarefully Keepitalso handy for f...

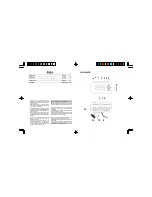
Page 3: ...tery from its compartment to avoid possible leaking CLR 4200FR RADIO CONTROLLED CLOCK RADIO WITH FM PLL TUNER TABLE OF CONTENTS LOCATION OF CONTROLS POWER SUPPLY ACPOWER SPECIFICATIONS LOCATION OF CONTROLS 1 OFF ON Switch Radio Alarm OFF 2 SLEEP SNOOZER DIMMER Button 3 MEM M Clock Adj NAP Button 4 Y M D TUNING Up button 5 CLOCK LCD Display 6 AC POWER CORD 7 VOLUME DOWN Button 8 VOLUME UP AUTO TOGG...

Page 4: ...free from obstacles area to ensure maximum reception of radio signal SETTINGTHE LCD DISPLAY USING THE RADIO SIGNAL 1 Connect the Power the unit start searching the Radio Controlled signal and you can see the Antenna tower icon flashing in the right side of the display The search signal stop automatically after 10 minutes but in case if fail in receiving is possible to set the clock manually by kee...

Page 5: ...EM 3 5 seconds to enter the memory of the radio station then press UP DOWN SETTING THE ALARM 1 2 BUZZER OR RADIO 1 In the normal Display mode press ALARM 1 10 or ALARM 2 11 button once and the display will show the ALARM TIME The AL icon indicates that the display is showing the ALARM TIME 2 To set the ALARM TIME press ALARM 1 10 or ALARM 2 11 button for 4 seconds and the HOUR digits will flash Pr...

Page 6: ... Y M D 4 to temporary display the Date or Month or Day CAREANDMAINTENANCE To prevent fire or shock hazard do not allow this clock radio to be exposed to rain or moisture 7 8 This clock radio should not be exposed to direct sunlight very high or low temperature moisture vibration or placed in a dusty environment Do not use abrasives benzine thinners or other solvents to clean the surfaces of the cl...

Page 7: ...bschaltung unterbricht die Hauptstromzufuhr des Geräts nicht Schalten Sie das System erst dann ein wenn Sie alle Verbindungen genau geprüft haben Stellen Sie das Gerät so auf dass immer eine ungestörte Frischluftzufuhr sichergestellt ist Stellen Sie das Gerät keinesfalls auf Teppiche und in die Nähe von Gardinenund bauen Sie es nicht in Bücherregale ein Setzen Sie das Gerät weder direkter Sonnenei...

Page 8: ...n frei von Hindernissen Bereich zu platzieren um eine maximale Aufnahme von Funksignals zu gewährleisten EINSTELLEN DER GENAUEN UHRZEIT MIT DEN FUNKSIGNAL 1 Schließen Sie die Macht die Einheit starten die Suche im Funksignal und SiekönnendenAntennenmast Symbolzublinken auf derrechtenSeitedes Displays Das Suchsignal automatisch stoppt nach 10 Minuten aber im Falle wenn in Empfangs ausfallen ist es ...

Page 9: ...ern Sie die Station EINSTELLUNG DER ALARM ALARM 1 2 1 In der normalen Anzeigemodus wird Presse ALARM 1 10 oder ALARM 2 11 einmalunddieAnzeigederAlarmzeitzuzeigen die AL zeigtan dass das Display die ALARM TIME 2 Um die Weckzeit einzustellen drücken Sie ALARM 1 10 oder ALARM 2 11 Taste für 4 Sekunden und die Stundenanzeige blinkt Drücken Sie UP DOWN 4 9 um die Stundenanzeige einzustellen 3 Um den Al...

Page 10: ...ses Weckradio nicht Regen oder Feuchtigkeit aus Dieses Weckradio sollte nicht dem direkten Sonnenlicht sehr hohen oder sehr niedrigen Temperaturen Feuchtigkeit oder Schwingungen ausgesetzt werden Stellen Sie es nicht in einer staubigen Umgebung auf Verwenden Sie keine scharfen Reinigungsmittel Benzin Verdünner oder andere Lösungsmittel um das Gehäuse des Weckradios zu reinigen Um es zu reinigen wi...

Page 11: ...dité ou à la pluie L interrupteur d allumage de cet appareil est monté sur des circuits secondaires et il ne débranche pas l appareil tout entier lorsqu on l éteint Mettez l appareil sous tension seulement après avoir vérifié que tous les raccordements soient corrects L appareil doit être gardé dans un endroit suffisamment ventilé Ne le gardez jamais par exemple près des rideaux sur un tapis ou da...

Page 12: ...ons de placer l antenne 15 dans une zone approprié libre des obstacles pour assurer une réception optimale du signal radio PROGRAMMATION DE L HORAIREAVEC SIGNAL RADIO Connectez l alimentation l unité commencer à chercher le signal radiocommandé et vous pouvez voir l icône de la tour d antenne à clignoter dans la partie droite de l écran Le signal de la recherche s arrête automatiquement après 10 m...

Page 13: ...DE REVEIL ALARME 1 2 1 Enmoded affichagenormal appuyezsurALARM1 10 ouALARM2 11 unefois etl afficheurindiquel heured alarme la icône AL indiqueque l écran affiche laALARME du TEMPS 2 Pour régler l heure d alarme appuyez sur ALARM 1 10 ou ALARM 2 bouton 11 pendant 4 secondes et les chiffres des heures clignotent Appuyez sur HAUT BAS 4 9 pour régler les chiffres des heures 3 pour régler les minutes A...

Page 14: ...r ce radio réveil ni à la pluie ni à l humidité L appareil ne devrait être exposé ni dans un endroit en plein soleil ni à des températures très élévées ou très basses ni à l humidité ni être sujet à des vibrations ni être placé dans un endroit poussiérex Pour nettoyer la surface de ce radio réveil n utiliser ni abrasifs ni benzine ni diluants ni tout autre solvant Si nécessaire la nettoyer avec un...

Page 15: ... non disconnette completamente l apparecchio quando viene spento Utilizzare l apparecchio solo dopo aver verificato che tutte le connessioni siano state eseguite correttamente Posizionare l apparecchio in un luogo sufficientemente ventilato Evitare di sistemarlo vicino a tende sul tappeto o all interno di un mobile quale ad esempio una libreria Non esporre l apparecchio alla luce diretta del sole ...

Page 16: ...gnale radio generato da DCF 77 di Francoforte in Germania Si consiglia di posizionare l antenna 15 in un iluogo doneo libero da ostacoli per garantire la massima ricezione del segnale radio IMPOSTAZIONEAUTOMATICADELL ORARIO 1 Collegare l alimentazione l apparecchio inizia la ricerca del segnale radiocontrollato e si può vedere l icona dell antenna torre lampeggiante sul lato destro del display Il ...

Page 17: ... MEM MEM tasto 16 fino a visualizzare il canale desiderato IMPOSTAZIONI ALLARMI 1 2 CICALINO O RADIO 1 Nella modalità di visualizzazione normale premere ALARM 1 10 o ALARM 2 11 tasto una volta e il display mostrerà l ora della sveglia l icona AL indica che il display sta visualizzando L ora di ALLARME 2 Per impostare l ora della sveglia premere ALARM 1 10 o ALARM 2 tasto 11 per 4 secondi e le cifr...

Page 18: ...on utilizzare abrasivi benzina diluenti o altri tipi di solventi per pulire la superficie della radiosveglia Per pulirla usare un panno morbido pulito e 31 32 inumidito con un sapone delicato non abrasivo Non tentare mai di inserire fili spine o altri oggetti nei fori di ventilazione o le aperture della radiosveglia Nota Quando si imposta l Orologio o la Sveglia ricordare che questa radiosveglia p...

Reviews: