AY-HR/JR/KR/LR/MR12B
Proximity Readers
Installation Manual
1
1.
Introduction
The AY-xR12B Series Proximity Readers (models AY-
HR12B/JR12B/KR12B/LR12B/MR12B) are RFID proximity card readers to
be installed for use with access control systems.
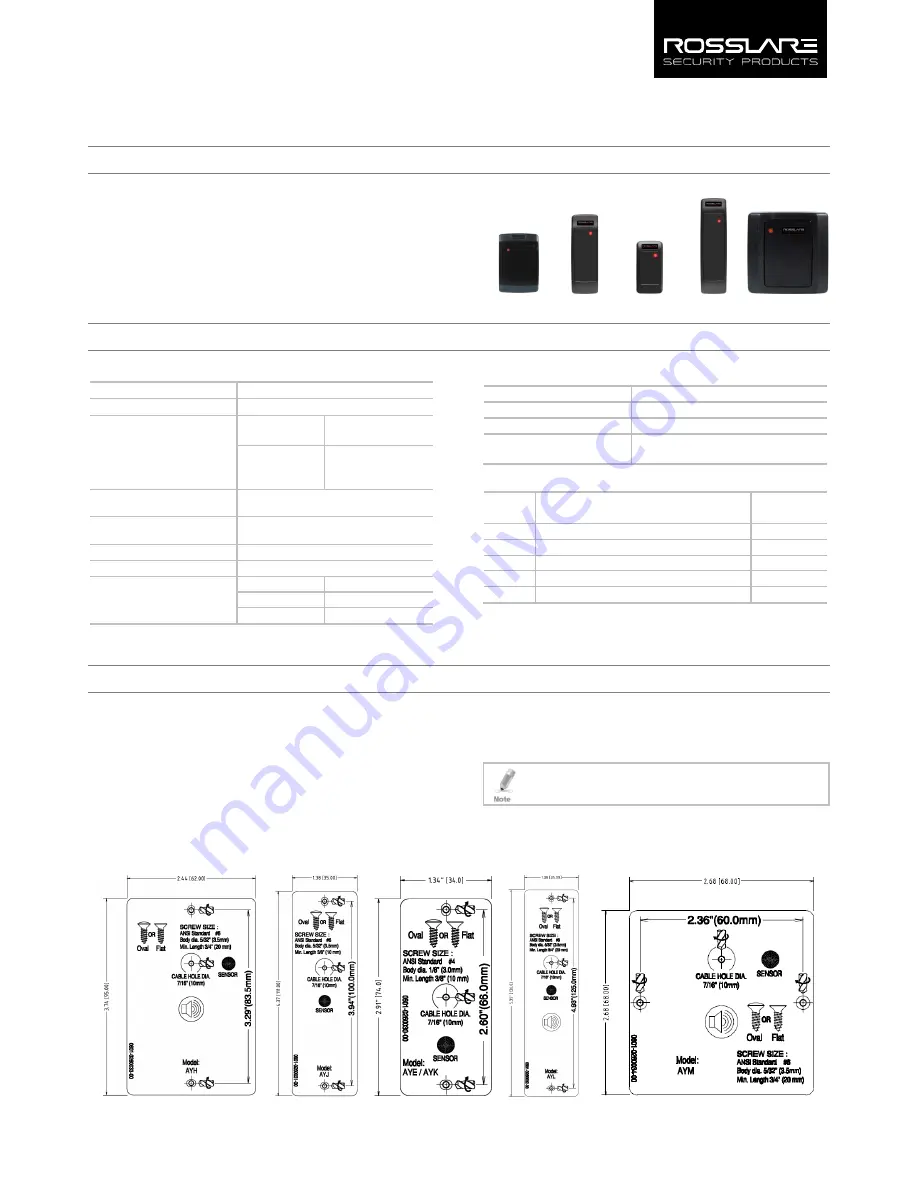
Figure 1: AY-xR12B Series
H
J
K
L
M
2.
Technical Specifications
2.1
Electrical Characteristics
Power Supply Type
Linear type (recommended)
Operating Voltage Range
5 to 16 VDC
Maximum Input Current
AY-KR12B
AY-JR12B
Standby: 35 mA
Read: 50 mA
AY-HR12B
AY-LR12B
AY-MR12B
Standby: 35 mA
Read: 100 mA
Tamper Output
Open collector, active low, max sink current
16 mA
Max Cable Distance to
Controller
150 meters (500 ft.)
RF Modulation
ASK
Output Format
Wiegand 26-Bit
Read Range (Max)*
AY-HR/LR12B
12 cm (4.7 in.)
AY-JR/MR12B
10 cm (3.9 in.)
AY-KR12B
8 cm (3.2 in.)
* Measured using a Rosslare proximity card or equivalent. Range also
depends on electrical environment and proximity to metal.
2.2
Environmental Characteristics
Operating Environment
Suitable for outdoor use (IP68)
Operating Temp. Range
-31°C to 63°C (-25°F to 145°F)
Operating Humidity Range
0 to 95% (non-condensing)
Regulatory Approvals
USA: UL 294 and FCC Part 15B
Europe: CE Listed
2.3
Physical Characteristics
Model Dimensions
(H x W x D)
Weight
AY-HR12B 109.91 x 74.91 x 15 mm (4.3 x 3.0 x 0.6 in.)
100 g (3.5 oz)
AY-JR12B 119.95 x 41.95 x 14 mm (4.7 x 1.7 x 0.6 in.)
88.5 g (3.1 oz)
AY-KR12B 79.91 x 39.91 x 12.8 mm (3.2 x 1.6 x 0.5 in.)
70.5 g (2.5 oz)
AY-LR12B 144.91 x 42.91 x 20 mm (5.7 x 1.7 x 0.8 in.)
116 g (4.1 oz)
AY-MR12B 88.91 x 88.91 x 15 mm (3.5 x 3.5 x 0.6 in.)
109 g (3.9 oz)
3.
Mounting Instructions
Mount the reader with the appropriate screws (not supplied) as
indicated on the template.
To mount the reader:
1.
Remove the snap-off cover to access the screw holes.
2.
Determine an appropriate mounting position for the reader.
3.
Peel off the back of the self-stick mounting label template included
with the unit and place at the desired mounting position.
4.
Using the template as a guide, drill two holes for mounting the
reader to the surface. The hole size is indicated on the mounting
template (Figure 2).
5.
Drill a 10-mm (
7
/
16
") hole for the cable. If mounting on metal,
place a grommet or electrical tape around the edge of the hole.
6.
Route the interface cable from the reader to the controller. A
linear type power supply is recommended.
The proximity reader can also be mounted using strong epoxy
glue. After application, the reader should be firmly held in
place until the glue dries.
Card readers are to be used with a listed access control unit whose power
supply is UL Listed Class 2 or equivalent.
Figure 2: Mounting Templates
H
J
K
L
M


