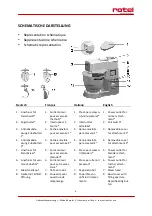
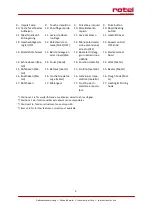
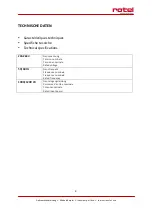
Rotel KITCHENMACHINE4473CH, Instructions For Use Manual
The Rotel KITCHENMACHINE4473CH is a versatile and efficient kitchen appliance that simplifies meal preparation. For detailed guidance on how to utilize its features and functions, simply download the Instructions For Use Manual for free from our website. Master your culinary skills with ease and convenience.
Share
Download

Reviews:
No comments
Related manuals for KITCHENMACHINE4473CH
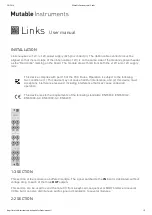
Links
Brand: Mutable Instruments Pages: 2

CBT-500FP - SmartPower Premier Blender/ Food Processor
Brand: Cuisinart Pages: 33

MFP6
Brand: Agu Pages: 88

0027 bross
Brand: eta Pages: 68

PROBAKER KM1B-70
Brand: Wilfa Pages: 116

Xeebra
Brand: EVS Pages: 64

KR 454
Brand: ECG Pages: 44

VWP-1060
Brand: Blackbox Pages: 40

AirAura X1
Brand: Wheatstone Corporation Pages: 143

HK8
Brand: H.Koenig Pages: 150

16271
Brand: Rosle Pages: 7

VEGA
Brand: Auralic Pages: 28

BabyGrow Elite
Brand: Ventray Pages: 10

KLFP6B
Brand: Magic Chef Pages: 20

912500
Brand: Taurus Pages: 11

LVM-110
Brand: TE Pages: 7

APM6800+
Brand: Harris Pages: 114

dbx ZonePRO 1260
Brand: Harman Pages: 56


