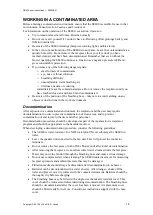
background image

SE400 user instructions 

— 600006 N 

Copyright © 2019 by The S.E.A. Group


Fan-supplied Positive-pressure Breath-responsive Respirator 


User Instructions 


600006 N 

July2019 

Summary of Contents for SE400

Page 1: ...SE400 user instructions 600006 N Copyright 2019 by The S E A Group 1 Fan supplied Positive pressure Breath responsive Respirator User Instructions 600006 N July2019 ...

Page 2: ...19 Battery charger BC3 22 Battery charger BC1 22 Dual battery adapter DB1 23 SE talk speaker unit 23 Back pack 24 Waist belt 24 SE SHIELD PROTECTIVE ENSEMBLES 25 Configurations 25 The SE Shield range 25 OPERATION 27 Visible and audible warnings 27 Warnings label on fan unit 27 Warnings during start up 28 Warnings during operation 29 Stand by mode 29 Demist mode 30 Menu mode 30 Self Test 30 DISASSE...

Page 3: ...r to the following user instructions for components and accessories of the SE400 Supplementary manual SE400 advanced functions 600007 SE shield Tychem F suits 100184 04 SE shield Tyvek and Tychem QC suits 100325 03 SE shield encapsulated suits 100292 02 Tychem F Hood 100259 04 Breathing hose cover HC TF 100257 03 Foam insert SEA FI 100287 03 GBCO 600010 Fit test adapter FTA 400 100288 03 Back pack...

Page 4: ... very deep breaths that momentarily exceed the delivery rate of the PAPR At these times the facepiece pressure becomes negative and inward leakage of contaminants can occur Because the SE400 FPBR is breath responsive continuous positive pressure can be maintained at peak inhalation airflows up to and exceeding 350 litres per minute Positive pressure reduces breathing resistance Because the air in ...

Page 5: ...00 1 Fan unit SE400AT 2 shown 2 Filtration media 3 Breathing hose 4 Facepiece 5 Demand valve 6 Battery 7 SE Talk speaker unit 8 Back pack 9 Prefilters and prefilter holders Features 1 ON OFF button 2 Status lights panel 3 Communication socket 4 Threaded connectors for filtration media 5 Threaded nuts for attachment to SE shield protective suits 6 Warning light ...

Page 6: ...n ignition in flammable or explosive atmospheres Do not use in flammable or explosive atmospheres Exposure to flame Do not use in contact with flame Do not use for fire fighting Dermal skin hazards Use in conjunction with personal protective ensembles that provide appropriate levels of protection against dermal hazard Failure to do so may result in personal injury even when the respirator is prope...

Page 7: ...e used in cases where a satisfactory facepiece fit cannot be achieved without them UNPACKING The following parts are included with the SE400 Fan unit Breathing hose and hose latch retainer Facepiece with demand valve and head harness Waist belt Prefilters and prefilter holders SE400 user instructions Cleaning tissues Up to two 2 batteries level of charge not assured Battery charger with power supp...

Page 8: ...1 To assess the suitability of the respirator for each person for use in real situations Due to natural variations in human facial features no one size or style of full facepiece can be guaranteed to fit everyone A QNFT properly conducted can be used to determine if the respirator is suitable for each user 2 If the respirator is found to be unsuitable to determine if the same respirator fitted wit...

Page 9: ...he Insert in accordance with its user instructions and don the facepiece as before 3 Enter the test atmosphere if required and connect the test instrument s sampling tube to the sampling port on the FTA 400 or test facepiece 4 Perform an appropriate QNFT exercise sequence and determine the fit factor i If the fit factor is 2000 or greater the respirator should be considered suitable for the user N...

Page 10: ...Facial hair can seriously compromise the face seal and result in reduced protection Note Before donning a respirator for the first time perform a facepiece fit test per section Facepiece Fitting applies to full facepieces only SEA recommends that each new unused respirator be tested for facepiece fit even if the user is experienced with the respirator Note Users who have been approved to use the S...

Page 11: ... the back of your head and stroke it down Clear any hair away from the face seal 8 Tighten the head harness straps in pairs by pulling the free ends backwards Start with the neck straps followed by the temple straps and finally the forehead strap For half facepiece only 9 Don the half mask so that the harness pad rests on the crown of the head 10 Release the snap catch at the back of the head adju...

Page 12: ...ce again that there is no hair under the face seal 13 Turn on the fan unit by pressing and releasing the button on the speaker unit Alternatively press and release the ON OFF button on the fan unit 14 Perform a User Seal Check by pressing and holding the SE Talk button for more than three seconds causing the SE400 to run at full fan speed Demist mode You should not feel any air leakage around the ...

Page 13: ...should not adjust each other s respirators checking for things like correct mask positioning strap tightness absence of hair in the face seal correct fitment of battery hose and hose cover filters and accessories etc Check that the fan unit is operating correctly by observing the status lights panel on the fan unit refer to section Operation for further details Warning If the facepiece has been pr...

Page 14: ...aminated environment the respirator and the user may require decontamination in order to prevent contamination of clean areas and to prevent contamination of and injury to the user and other personnel Decontamination procedures should be developed as part of the organisation s respirator program and should be appropriate to the hazards involved When developing a decontamination procedure consider ...

Page 15: ...ll parts are dry before storage STORAGE AND TRANSPORT The SE400 is designed to withstand harsh working conditions and inhospitable environments However proper storage and transport methods will prolong the life of the respirator and ensure it is always capable of optimum performance When storing or transporting the SE400 keep in mind the following points Store in clean and dry area Store in ambien...

Page 16: ... the facepiece pressure detection speech microphone and warning light to the fan unit The flexible hose is made from tough polyurethane The breathing hose should remain connected to the fan unit at all times The breathing hose model number is located on the attachment to the fan unit and is not visible when the hose is fitted to the fan unit SE shield breathing hose The SE shield breathing hose is...

Page 17: ...t all times other than for periodic thorough cleaning or if necessary for maintenance The demand valve model number is located on the outer surface of the housing Filtration media HE filters particle filters High Efficiency HE filters in USA and particle filters Class P3 including P1 and P2 in other countries protect against all types of airborne particles such as dust oil mist smoke aerosols bact...

Page 18: ... media each filter should have the same part number and age To fit threaded filtration media Note Method for SE400AT 2 is shown For SE46 use the same method but with three filtration media 1 Check that the filtration media are of the correct type and class if unsure check with supervisor 2 Check that the model number on the filtration media is correct and that the use by date has not expired 3 Whe...

Page 19: ... battery configuration the battery is fitted directly to the SE400 fan unit Dual battery configuration The Dual Battery Adapter is used to provide dual battery configuration for the SE400 giving it extended operating time See section Dual Battery Adapter Battery operating time The operating time of the SE400 when fitted with fully charged battery or batteries greatly depends on the workload of the...

Page 20: ...charge indefinitely Periodic recharging is recommended to maintain full charge Never allow a battery to become fully flat whilst in storage A fully discharged battery may suffer permanent degradation over time Ideally batteries should be stored in the temperature range 10 to 25 C 50 to 77 F to minimise degradation during long term storage Batteries in long term storage should be recharged at least...

Page 21: ... the locking tongue 4 Hook the battery onto the fan unit The two posts on the fan unit should engage with the sockets on the battery 5 Swing the battery into place and release the locking tongue 6 Push the locking slide back into place 7 Check that the battery is securely fastened To remove the battery from the fan unit 1 Withdraw the locking slide 2 Press the locking tongue releasing the battery ...

Page 22: ...cator lights Light Status What to do STEADY ORANGE Battery charging normally Wait until charged FLASHING ORANGE Battery temperature too high or too low to commence charging Wait Charger will automatically wait until temperature normalises FLASHING ORANGE RED Battery charge too low to commence charging normally Charger trying to recover battery Wait Charger will trickle charge until normal charge c...

Page 23: ...a microphone mounted inside the respirator It connects directly to the fan unit The SE Talk is normally mounted on a shoulder strap of the back pack When the SE400 is used without a back pack the SE Talk may be attached to a shirt pocket or mounted on the SE400 waist belt using the SE Talk belt attachment HSE The SE Talk has a single multi function control for adjusting the speaker output level Th...

Page 24: ... the SE400 fan unit on the waist The fan unit may be positioned on either side of the waist A waist belt extender WB EX is available for larger waist sizes To attach the fan unit to a harness 1 Slide the clip on the fan unit down over the centre of the attachment on the harness until it snaps home Standard waist belt is shown but the method applies to all types of harness To remove the fan unit fr...

Page 25: ...s high level of breathing protection Configurations SE shield suits should always be used with the SE shield breathing hose H20 P or H3 E Do not use the SE shield breathing hose without an SE shield suit fitted SE shield suits should always be used with dual batteries with the dual battery adapter DB1 and back pack BP2 The SE Shield range SE Shield Tychem F Disposable light weight single use suit ...

Page 26: ... outer gloves Suitable for domestic preparedness applications with high permeation resistance to war agents such as mustard gas and Sarin SE Shield VPS Reusable vapour protective encapsulated suit Suit material Trelleborg Trellchem VPS is a combination chloroprene rubber coated fabric on the outside and a polymer barrier laminate on the inside Impact and chemical resistant transparent PVC visor In...

Page 27: ...unit for more information on the warnings Buzzer The fan unit has a warning buzzer which sounds during many warning conditions Status lights panel The fan unit has a panel of five status lights which provide additional information about the warning conditions Warnings label on fan unit The SE400 fan unit is fitted with a label which summarises the warning conditions likely to be encountered during...

Page 28: ... or replace with fully charged battery GAS FILT MSK BATT PWR PWR flashing GREEN steady BATT indicator MOTOR DOES NOT START Battery is FLAT Recharge battery or replace with fully charged battery If the SE400 is functioning normally the PWR status light will be steady green Lights Status Condition What to do GAS FILT MSK BATT PWR PWR steady GREEN All functions normal Work normally Put on the respira...

Page 29: ...th a fully charged one GREEN GAS FILT MSK BATT PWR BATT steady RED PWR steady GREEN Continuous buzzer Very low battery power Approx 2 minutes of operation left Move quickly to safe area Recharge battery or replace with a fully charged one GREEN GAS FILT MSK BATT PWR BATT steady RED PWR flashing GREEN MOTOR SHUTS DOWN Battery is FLAT Keep respirator on your face Move immediately to safe area These ...

Page 30: ...e performed A Self Test should be performed before first use of the respirator and after any maintenance work has been done Periodic Self Tests can be scheduled to suit the organisation s respirator program To perform a Self Test 1 The SE400 must be complete including filtration media Ensure that air can flow freely from the facepiece 2 With the SE400 off enter menu mode by pressing and holding th...

Page 31: ...tact the vendor S E A or a technician trained in maintenance of the SE400 Note When the Self Test encounters a fault often it will not complete the remaining tests in the cycle The lights stay on for one minute or until the ON OFF button is pressed Note If the battery is in poor condition the Self Test may abort and shut the SE400 down In such cases the battery should be checked Consult section Ba...

Page 32: ...nnect the SE Talk from the fan unit 1 Turn the collar on the plug anti clockwise to unlock it 2 Pull the plug from the socket To connect the SE Talk speaker to the fan unit 1 Insert the SE Talk plug into the fan unit socket being sure to align the mating tongue and groove 2 Turn the collar on the plug clockwise to lock it 3 Turn the SE Talk to minimum level fully anti clockwise ...

Page 33: ... the lower part of the hose fitting towards the demand valve causing the tabs to release 3 Pull the hose away from the demand facepiece To attach the breathing hose to the facepiece 1 Hook the bottom part of the hose fitting inside the demand valve opening 2 Insert the tabs on the hose fitting inside the facepiece adapter You may need to guide the tabs 3 Push the hose fitting in until the tabs sna...

Page 34: ...efully swing the hose attachment away from the fan unit Disconnect the microphone plug from inside the fan unit opening To attach the breathing hose to the fan unit 1 Insert the microphone plug into its jack inside the flow chamber of the fan unit 2 Hook the two pins on the hose fitting into the hinge slots on the fan unit 3 Swing the hose fitting into place and lock into place with the clip 4 Fit...

Page 35: ...o the facepiece Do not remove the demand valve before washing 1 Detach the breathing hose from the facepiece See section Disassembly and Reassembly 2 Wash the facepiece in lukewarm water with a mild detergent If necessary use a soft brush Do not use abrasive materials Take great care not to scratch the visor as this can impair vision 3 Alternatively the facepiece can be placed in a protective bag ...

Page 36: ...emperature preferably overnight 7 Inspect both exhalation valve seats They must be clean dry and free of dust There should be no scratches or other damage on the seats If damaged replace the demand valve 8 Inspect the exhalation valves They too must be undamaged clean dry and free of dust If damaged replace the exhalation valves 9 Fit each exhalation valve to its seat by pressing the slots in the ...

Page 37: ... seating surface in the facepiece are clean and free of defects 5 Place the demand valve over its attachment position in the facepiece Snap the housing into the latch at the base of the facepiece 6 Check that the membrane perimeter is seated properly in the facepiece receptacle 7 With the palms of both hands push the demand valve into the receptacle starting at the bottom and rolling towards the t...

Page 38: ...ng evenly on both sides at once checking regularly that the centre marks remain aligned 5 When the visor is fully inserted check that the mask is not distorted If necessary adjust the positioning of the visor in the facepiece 6 Fit the two visor frame halves fit the screws and tighten taking care not to over tighten Check that the facepiece lip sits evenly in the frame right around the visor other...

Page 39: ... not for RF3 FP C VP Hard coated polycarbonate visor not for RF3 FP C VHC Triplex laminated glass visor not for RF3 FP C VLG Disposable visor covers pkt 10 VC Silicone head harness full facepiece FHS Natural rubber head harness full facepiece FHN Cloth head harness full facepiece FHC Single strap head harness half facepiece HH H SS Cradle head harness half facepiece HH H CR Valve discs for orinasa...

Page 40: ...aptor b Blockage in the mask pressure hose system Remove the breathing hose from the fan unit and the demand valve Remove the demand valve from the adaptor Check all openings in the pressure hose system Check that the holes in the diaphragm and housing line up Blow carefully with the breath in the pressure hose connection in the lower end of the breathing hose For more information see section on c...

Page 41: ...2 F SE DATA SE Data is a comprehensive personal protection management tool designed to help organisations develop and implement a company wide personal protections program It includes an extensive database of hazardous materials IMPORTANT WARRANTY INFORMATION The warranty on the SE400 respirator is NULL AND VOID if The respirator is operated at any time without filtration media correctly attached ...

Page 42: ...Donnison Street GOSFORD NSW 2250 Australia Phone 61 2 4321 5000 Fax 61 2 4325 4145 Email contact workcover nsw gov au Office Hours 8 30am 5 00pm Monday to Friday Postal Address WorkCover NSW Locked Bag 2906 Lisarow NSW 2252 WorkCover Publications Order Line 1300 799 003 For address telephone or fax details of all WorkCover offices Visit http www workcover nsw gov au Contacting us electronically Em...

Page 43: ...mity to the Essential Health and Safety Requirements of PPE Regulation EU 2016 425 The CE marking is as follows The manufacturer s Declaration of Conformity can be found at www sea com au seshield docs std_se400_eu_doc_0656 pdf Phone 1 800 CDC INFO 1 800 232 4636 Outside the U S 513 533 8328 TTY 1 888 232 6348 Customer Service Representatives are available 24 hours day 7 days week in both English ...

Page 44: ...6 0 370 69 34 40 Fax 46 0 320 179 79 Email sea europe theseagroup com Safety Equipment Australia Pty Ltd A B N 29 002 727 586 Unit 35 1 Jubilee Avenue Warriewood NSW 2102 Australia Mail Private Bag Mona Vale NSW 2103 Australia Telephone 61 0 2 9910 7500 Fax 61 0 2 9979 5364 Email sea australia theseagroup com Tychem F Tychem QC and Tyvek are registered trademarks of the Du Pont Corporation Copyrig...

Reviews: