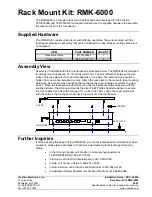
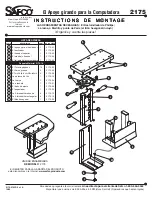
Swivel-Mount CPU Holder
A S
A S
A S
A S
A S S E M B L
S E M B L
S E M B L
S E M B L
S E M B L Y
Y
Y
Y
Y
I N S T R U C T I O N S
I N S T R U C T I O N S
I N S T R U C T I O N S
I N S T R U C T I O N S
I N S T R U C T I O N S
2175-37MP: 1 of 6;
12/05
Safco Consumer Hot Line
1-800-664-0042
available Monday-Friday 8:00 AM to 4:30 PM (Central Time) (English-speaking operators)
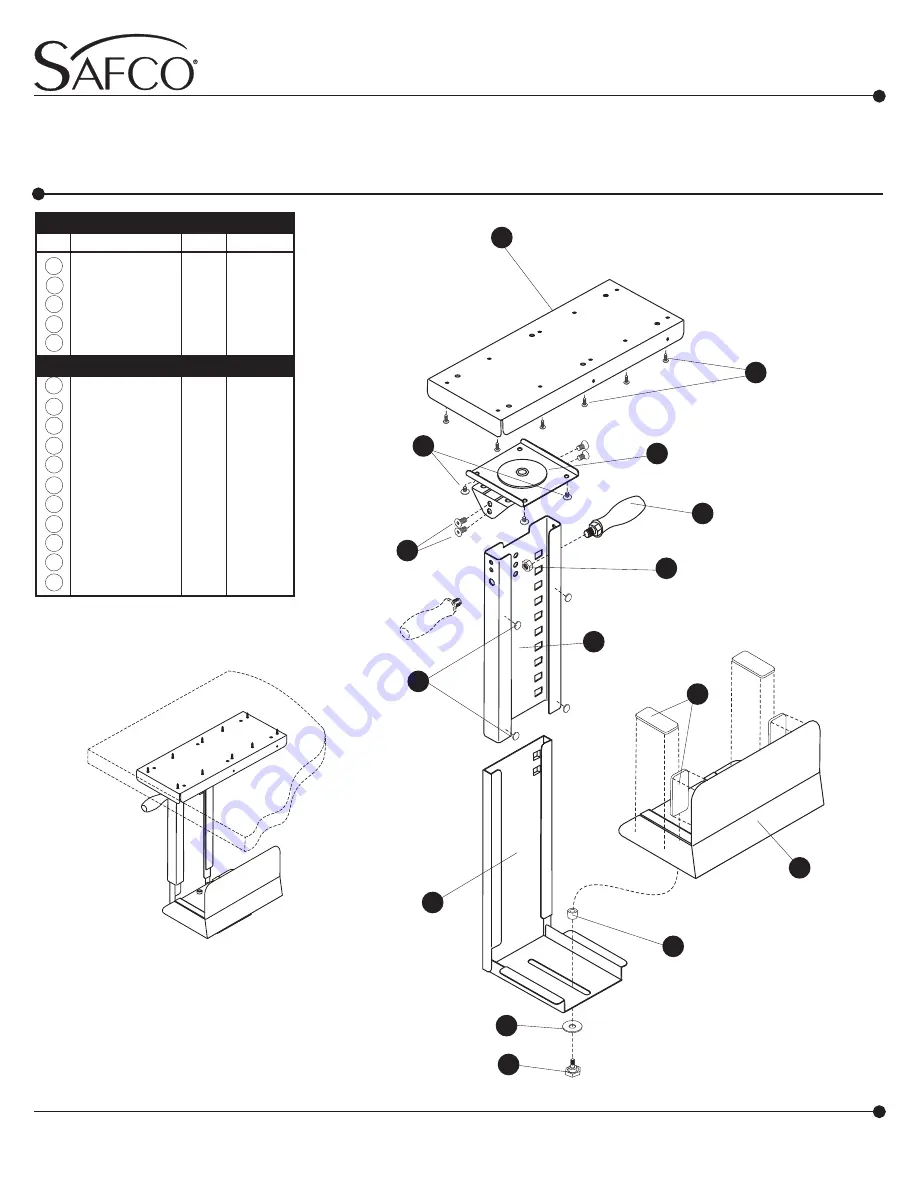
Slide Support
1
2175-01
Slider
1
2175-02
Upper Bracket
1
2175-03
Lower Bracket
1
2175-04
CPU Stop
1
2175-05
Small Screw
10
2175-22
Large Bolt
4
2175-23
Socket Screw
4
2175-28
Handle
1
2175-10
Nut
1
2175-24
Washer
1
2175-31
Knob
1
2175-26
Spacer
1
2175-32
Round Pad
4
2175-12
Rectangular Pad
4
2175-13
Allen Wrench
1
2175-33
A
B
C
D
E
F
G
H
I
J
K
L
M
N
O
P
CODE
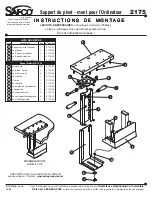
PARTS LIST
PARTS LIST
PARTS LIST
PARTS LIST
PARTS LIST
DESCRIPTION
QTY
.
PART NO.
New Hope, MN 55428
www.safcoproducts.com
an LDI Company
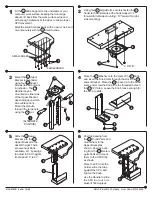
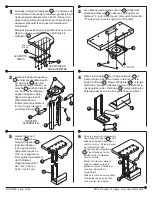
TOOLS REQUIRED:
Phillips Screwdriver; Awl, or Hammer and Nail (Allen Wrench included)
Sort and count your parts before assembling!
2175
ASSEMBLED UNIT
MODEL 2175
Hardware Pack 2175-19
I
H
J
D
E
F
K
C
B
A
G
L
M
N
O
PRODUCT WARRANTY CARD
is available online at:
www.safcoproducts.com