background image

S401 Quick Start Guide

V1.1

Summary of Contents for S401

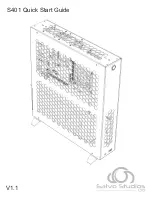
Page 1: ...S401 Quick Start Guide V1 1 ...

Page 2: ...2 Note 60mm x 60mm x15mm fans are recommended A single 60mm x 60mm x 25mm fan may be used on the bottom mounts but doing so will interfere with two 2 5 drive mounts and one 3 5 drive mount 60mm Fans Optional ...

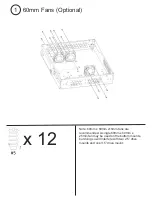
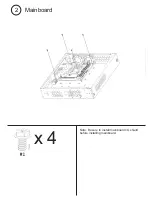
Page 3: ...x 4 Note Be sure to install mainboard I O shield before installing mainboard 2 Mainboard ...

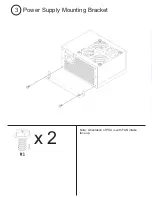
Page 4: ...x 2 Note Orientation of PSU is with FAN intake face up 3 Power Supply Mounting Bracket ...

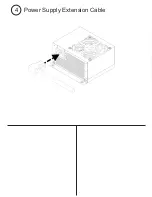
Page 5: ...4 Power Supply Extension Cable ...

Page 6: ...el button If you find the C14 connector makes contact with the front button you may choose to install the front button spacer black acrylic ring Simply remove the front panel button by unscrewing the nut on the back then insert the spacer on the outside of the case and thread the button wires back through both the spacer and the mounting hole Re install the nut for the front panel button The spacer...

Page 7: ...x 4 6a Note Up to four 2 5 drives can be installed Use holes labeled S 1 S 2 S 3 and S 4 2 5 Drive Install ...

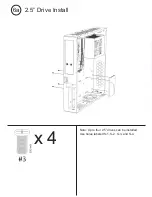
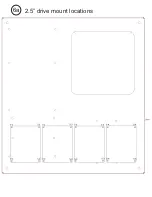
Page 8: ...6a 2 5 drive mount locations ...

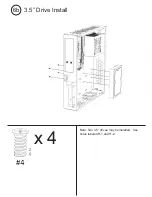
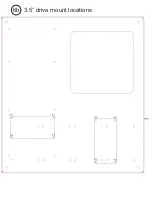
Page 9: ...x 4 6b Note Two 3 5 drives may be installed Use holes labeled H 1 and H 2 3 5 Drive Install ...

Page 10: ...6b 3 5 drive mount locations ...

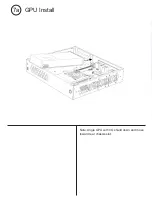
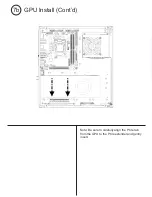
Page 11: ...7a Note Angle GPU with I O shield down and move toward rear chassis slot GPU Install ...

Page 12: ...7b Note Be sure to carefully align the PCIe tab from the GPU to the PCIe extender and gently insert GPU Install Cont d ...

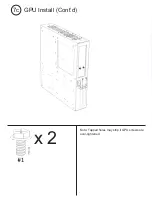
Page 13: ...x 2 7c Note Tapped holes may strip if GPU screws are over tightened GPU Install Cont d ...

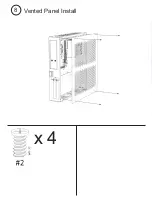
Page 14: ...x 4 8 Vented Panel Install ...

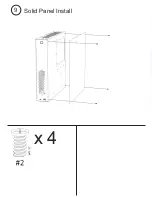
Page 15: ...x 4 9 Solid Panel Install ...

Page 16: ...f the stand ensures the key fastener aligns with the keyhole on the chassis Also stands may be installed on either end of the chassis depending on desired orientation vertically If using horizontal orientation skip to step 11 Stands ...

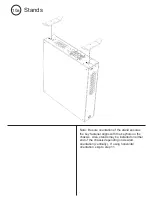
Page 17: ...x 2 10b Stands Cont d ...

Page 18: ...ned the handle needs to be rotated 180 degrees Note Like the stands the handle may be installed on either of two surfaces of the case If you are using the stands the handle must be installed on the opposite side of the case as the stands Handle Optional Accessory ...

Page 19: ...x 2 11b Handle Cont d ...

Reviews: