background image

All manuals and user guides at all-guides.com

all-guides.com

Summary of Contents for Hi8 SCL860

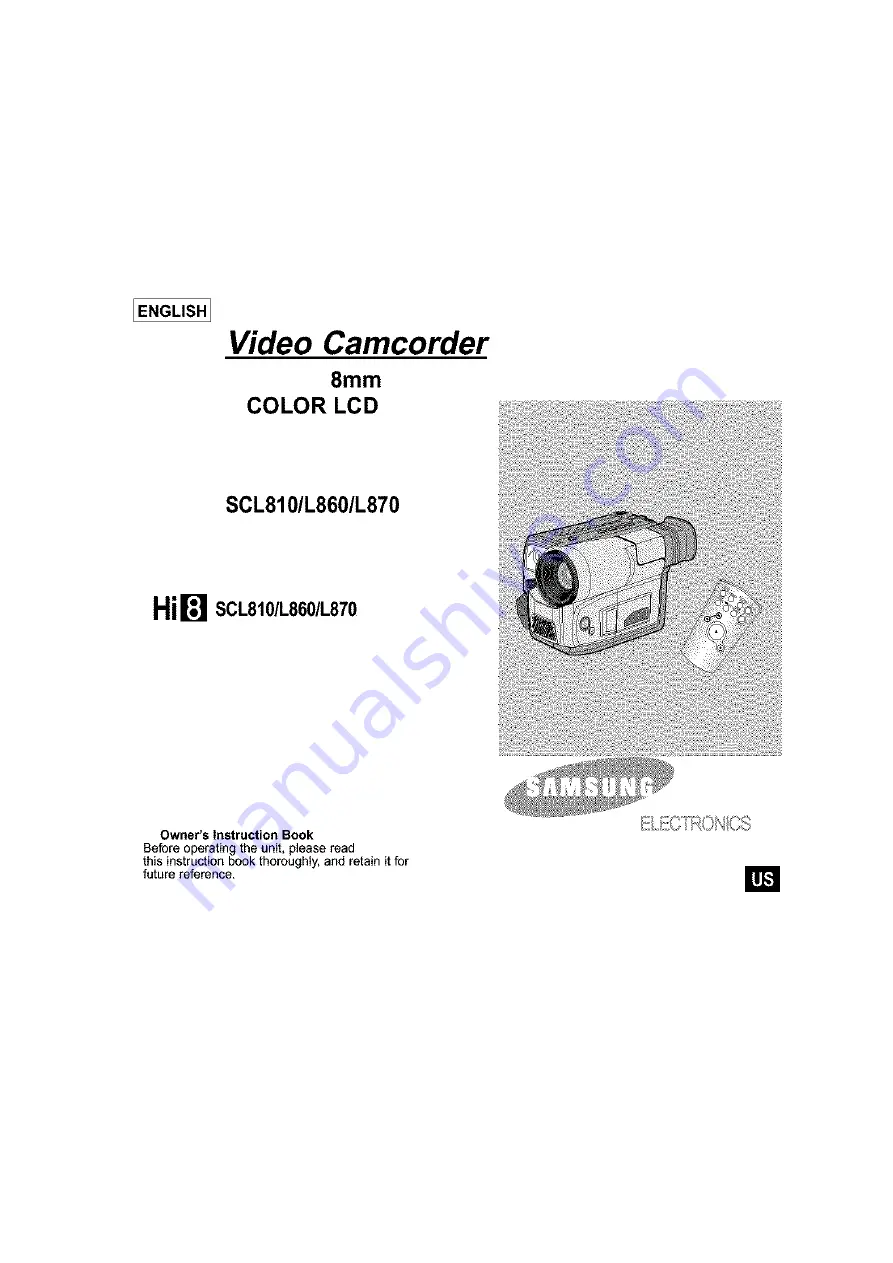
Page 1: ... SCL810 L860 L870 Hi SCL810 L860 L870 Owner s Instruction Book Before operating the unit please read this instruction book thoroughly and retain it for future reference El All manuals and user guides at all guides com a l l g u i d e s c o m ...

Page 2: ...y Level Display 25 Inserting andEjecting a Cassette 26 Makin_ Your First Recording 27 Hints TorStable Image Recording 29 Recording wit_ LCD Mooi or 29 Recording with Viewfinder 29 Adustingajthe LCD 30 Adjustin_ Focus of the VIEWFINDER 31 Playingr_ack a tape on the LCD 32 Ad usting the LCD daring PLAY 33 Controlling the Sound from the Speaker 33 Viewing a Still Picture 33 Picture Search 33 Zooming ...

Page 3: ... Lighting Techniques 56 To watch with LCD 57 To watch with TV monitor 57 Various Functions in PLAYER mode 59 Adjusting the LCD 60 Setting the Speaker ON OFF 60 DSE in PLAYER mode 60 Multi Playback Using the PAL60System 61 Installing USB Media 2 0 Program 63 Cleaning and Takingcare of the Camcorder 66 Cleaning theViewfinder 66 Cleaning the LCD Panel 66 Cleaning the Video Heads 66 Storing the Camcor...

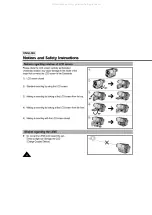
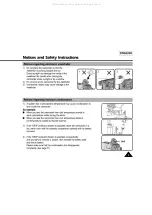
Page 4: ...e Camcorder 1 LCDscreenclosed 2 Standard recordingby using the LCDscreen 3 Makinga recordingby looking at the LCDscreenfrom the top 4 Makinga recordingby looking at the LCDscreenfrom the front 5 Makinga recordingwith the LCD screenclosed 1 2 4 96 5 t Donot let the LENSpoint towardthe sun Directsunlightcan damagethe CCD ChargeCoupledDevice A All manuals and user guides at all guides com ...

Page 5: ... for example When you take the camcorder from cold temperature outside to warm temperature inside during the winter When you take the camcorder from cool temperature inside to hot temperature outside during the summer 2 If the DEW protectionfeatureis activated leavethe camcorderin a dry warm roomwith the cassettecompartmentopened and the battery removed 3 If the DEW protection feature is activated...

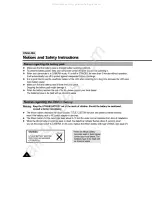
Page 6: ...eachesthe end of its life pleasecontactyour localdealer The batterieshave to bedealt with as chemicalwaste Warning Keepthe LITHIUMBATTERYout of the reachof children Should the battery be swallowed consulta doctorimmediately t The lithiumbattery maintainsthe dock function TITLE CUSTOMfunctionand presetcontentsmemory even if the battery packor AC poweradapteris removed t The lithiumbattery for the c...

Page 7: ...rddirection It isvery importantto adjust the handstrap for better recording see page 20 Do not insert your handin the handstrapforcibly the bucklemay bedamaged Toensure normal recordingand clear picture clean the video heads Whenplayingbackthe pictures if they are noisy or hardlyvisible the video headsmaybe dirty If this happens cleanthe video headswith a dry type cassettecleaner Do not use a wet ...

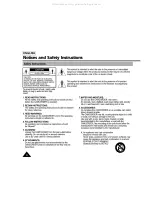
Page 8: ...erating and maintenance instructions should be followed 5 CLEANING Unplug this CAMCORDER from the wall outlet before cleaning Do not use liquid or aerosol cleaners Use a dry cloth used for dusting cabinets 6 ATTACHMENTS Do not use attachments not recommended by the CAMCORDER productmanufacturer as they may be hazardous A 7 WATER AND MOISTURE Do not use this CAMCORDER near water forexample near a b...

Page 9: ...having a third grounding pin If you are unable to insert the plug fully into the outlet try reversing the plug If the plug still fails to fit contact your electrician to replace your outlet Do not defeat the safety purpose of the polarized plug 12 POWER CORD PROTECTION Power supplycords should be routed so that they are not likely to be walked on or pinched by items placed upon or against them pay...

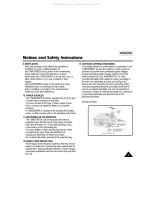
Page 10: ...expose you to dangerous voltage or other hazards Refer all servicing to qualified service personnel 19 DAMAGE REQUIRING SERVICE Unplug this CAMCORDER from the wail outlet and refer servicingto qualified service personne under the following conditions a When the power supply cord or plug is damaged b If any liquidhas been spilled onto or objects have fallen into the CAMCORDER c If the CAMCORDER has...

Page 11: ...ular specifies that the cable ground sha_lbe connected to the grounding system of the building as close to the point of cable entry as practical USER INSTALLER CAUTION Your authority to operate this FCC certified equipment could be voided if you make changes or modifications not expressly approved by this party responsible for compliance to part 15 FCC rules A All manuals and user guides at all gu...

Page 12: ... befilmed see page42 The DiS compensatesfor unstableimagescausedby handshake particularlyat high magnification see page39 Zooming is a recording echniqaetha le s you chanqethe size of the sabjec in the picture Formore professionaIrecordings usethe zoomfunction see page34 Zooms more than 22x are performeddigitally see page 35 The macrofunction allowsyouto record yoursubject at dose range Youhaveto ...

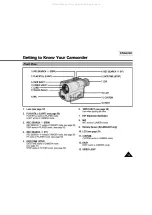
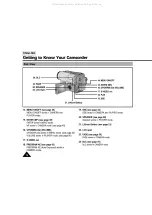
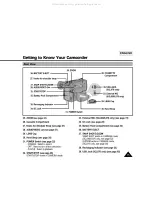
Page 13: ...ANDBYmode seepage 28 REW works in PLAYER mode see page 59 4 REC SEARCH _ FF REC SEARCH _ worksin STANDBYmode seepage 28 FF works in PLAYER mode see page 59 5 DATE TIME STOP DATE TIME works in CAMERA mode see page 47 STOP works in PLAYER mode see page 58 6 TAPE EJECT see page 26 Use when ejectingthe tape 7 EVF Electronic Viewfinder 8 MIC MIC works in CAMERA mode g Remote Sensor SCL860 L870 only 10 ...

Page 14: ...rks in CAMERA mode see page 40 16 UP DOWNdial VOLUME UP DOWNdial works inMENU mode see page 30 VOLUMEworks in PLAYERmode see page60 17 S VIDEOout 18 PROGRAMAE see page 42 PROGRAMAE AutoExposure worksin CAMERA mode A 19 DSE seepage 44 DSEworksin CAMERAand PLAYERmode 20 SPEAKER see page 60 Speakerworksin PLAYERmode 21 Lithium Battery see page 21 22 LCD open 23 FADE see page 50 FADE works in CAMERA m...

Page 15: ... Select to turn off the camcorder PLAYER Select to playback 32 START STOP see page 28 START STOP works in CAMERA mode 31 POWER Switch 39 USB JACK SCL870 only SCL860 L870 only S Cap 30 Hand Strap 33 External MIC SCLS60 L870 only see page 72 34 DC Jack see page 22 35 Battery Pack Compartment see page 23 36 BATTERY EJECT 37 SNAP SHOT D ZOOM SNAP SHOT works in CAMERA mode SCL860 L870 only see page 52 ...

Page 16: ...ctivated C Battery level see page 25 Indicates the power left in the battery d Manual Focus see page 40 Indicates manual focus is on Auto Focus is not displayed e BLC see page 41 Indicates BLC is activated f ProgramAE see page42 IndicatesProgramAE mode is activated _ _ _ _ _7 g Self recordwaitingtimer SCL860 L870only see page19 Indicates10secondtimer h Self recordrecordingtimer SCL860 L870 only se...

Page 17: ...ounter Indicates amount of the tape used p Operation mode Indicatesthe operation mode is activated The operation modes are STBY REC STOP PLAY _ FF m m REW EJECT q Hi8 see page 58 nd cates you are us ng H8 tape when recording or playing back r DEW _ condensation see page 71 Moni ors the moisture condensation s Digital zoom see page 35 ndicates d g ta zoomis achvated t Snap Shot see page 52 Indicate...

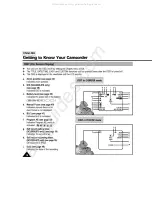
Page 18: ... page19 SCL860 L870only LithiumBattery for Clock TYPE CR2025 see page21 9 Software CD SCL870only 10 USBCable SCL870only 11 USBAUDIO Cable SCL870 only 12 S VIDEOcable see page 58 A _ AC Power Adapter AD44 00038A 4 AUD ON DEO Cable AD39 40200A 7 Remote ConttoZ AD59 00062A 10 USB Cable AD39_30073A 12 V_DEO cane AC3E_42001Z 2 AC cor_ AD39 00028A 5 Shoulder Strap AD63_30202A 8 Lffhium Batteries AD43 10...

Page 19: ... or replacethis battery when Youpurchasethecamcorder The remotecontroldoesn t work Insert LithiumBattery followingthe and markings Be carefu not to reversethe polarityof the battery The Self Timer function on the remote control allows you to start and stop recording automatically recordingyourself Twooptionsare available WNT 10S SELF 30S wait 10 seconds foUowedby 30secondsof recording WNT f0S SELF...

Page 20: ...s START STOPagain when youwish to stop recording Note Whenrecordingwith the timer youcan press START STOPbuttonagain to cancelthe function It isvery important to adjustthe handstrapfor better recording Thehand strapenablesyou to Holdthe camcorderin a stable comfortableposition Pressthe Zoom and the red Recordbuttonwithout having to changethe positionof your hand 1 Pullopenthe Hand Strap coverand r...

Page 21: ...on from the time of installation 4 When the lithium battery becomes weak or dead the date time indicator flashes for about 5 seconds when you set the power switch GoCAMERA When this occurs replace the lithium battery with type CR2025 1 Takeoat the holder fromthe lithiumbattery compartment 2 Insertthe _ side of the lithium batterytoward the bottom of the holder 3 Reinsertthe holder intothe lithium ...

Page 22: ...the DC cableto DC jack of the camcorder 4 To set the camcorderto the CAMERAmode a Holddown the tab of the powerswitch and push the switchto CAMERAmode b Makesure that the LensCap isopen c Open the LCD monitor and make sure that the imageappearsin the LCDmonitor The LCD monitor isturned onautomaticaltywhen it s opened more than 30 degrees Note if the adapter is used next to a TV or the camcorder it...

Page 23: ...ing Blinkingonce a second indicates lessthan 50 hasbeencharged Blinkingtwice a second indicates 50 75 has beenrecharged Blinkingthree timesa second Indicates75 100 has been recharged Blinkingstops and stays on Recharginghas beencompleted On for a secondand off for a second Indicatesthere is an error Resetthe battery packand DC cable 5 If rechargingis completed separatethe camcorder AC poweradapter...

Page 24: ...ous recording times given in the table are approximate Actual recording time depends on usage Notes The battery packshould be rechargedin a room temperaturethat is between0 C 32 F and 40 C 104 F It should neverbecharged ina room temperaturethat isbelow 0 C 32 F The lifeand capacity of the battery packwill be reducedif it is used in temperaturesbelow0 C evenwhen it is fully recharged The lifeand ca...

Page 25: ...ecomesvery shortin a cold environment The continuousrecordingtime in the operating instructionsis measuredunder the conditionof usinga fully chargedbattery packat 25 C 77 F As the environmentaltemperatureand conditionsmaybe differentwhen you actuallyuse the camcorder the remainingbattery timemay not bethe same as the approximatecontinuous recordingtimesgiven in these instructions A charge markis p...

Page 26: ... protectiontab towardthe top 2 Press the PUSHmark untilthe compartmentclicks into place Note Whenyou have recordeda cassettethat you wishto keep you can protectitfrom being accidentallyerased a Recording Impossible Protection Push the red tab on the cassetteto cover uptheopening b Recording possible If you nolongerwish to keep the recordingon the cassette push the red tab backso that it no longerc...

Page 27: ... red tab of the cassetteisopened STANDBYwill not be displayed Did youopenthe LENSCAP Make sure the imageyouwant to record appearsin the LCD monitor Make sure the battery leveIindicatesthatthere is enough remainingpowerfor recording see page25 We recommendthat beginners whoare usingthe camcorderfor the first time switchthe EASYmodeon see page37 a Tostart recording press the red START STOPbutton Rec...

Page 28: ... withthe RECSEARCH _ G function in STANDBYmode REC SEARCH G allowsyou to reverseand REC SEARCH _ allows youto forward for as long as youkeep pressing REC SEARCH_ _ t If you pressthe RECSEARCH _ button briefly in STANDBYmode your camcorderwill play backin reversefor 3 secondsand returnto the originalposition aatomatica ly A All manuals and user guides at all guides com ...

Page 29: ...a watI or on a tablefor greater stability Do not forgetto breathegently 5 Use the LCDframe as a guide to determinethe horizontalplane 6 Wheneverpossible usea tripod 1 Hold the camcorderfirmly with the handstrap see page20 2 Placeyour right elbowagainstyour side 3 Placeyour left handunder the camcorderto support it Do not touch the built in microphone 4 Choose a comfortable stable position forthe s...

Page 30: ... peace 2 Set the powerswitchto CAMERAmode seepage 22 3 Open the LCD monitor then the LCDwill turn on 4 Press the MENU ON OFFbutton the MENUlist will be displayed 5 Turnthe UP DOWNdial to LCD ADJUST 6 Press ENTER The LCD ADJUST MENU will be displayed 7 Turnthe UP DOWNdial to adjust the LCD brightness 8 Press ENTER The cursorwill moveto the nextitem A _15 OFF ZOOM OFF P_P OFF OISP_Ay ON WHITE_AL AUT...

Page 31: ... 11 Pressthe MENU ON OFFbuttonto end the setting Notes If you don t press a button within 30seconds the setting will disappear The MENU ON OFFfunctionwill not operate in EASY mode ENGLISH 1 Use the focusadjustmentknobof the VIEWFINDERto focus the picture A All manuals and user guides at all guides com a l l g u i d e s c o m ...

Page 32: ...the angle of the LCDmonitor and set the brightnessor the color if necessary 4 Pressthe REW buttonto rewindthe tape to the beginning To stop REWIND pressthe STOP button Camcorderstopsautomaticallyafter rewinding 5 Press the IHI PLAY STILL button to start playback You can see the video you recorded on the LCD To stop the PLAY operation press the STOP button Note You can a so monitor the picture on a...

Page 33: ...ff 4 If the speaker does not work properly check the following Is the LCD monitor closed Is the volume adjusted to a low level Is the speaker off see page 60 Notes Lower the volume if vibration from the built in speaker causes screen disturbance Volume display will automatically disappear 2 seconds after adjusting PLAY STILL Press IHI PLAY STILL button during playback To resume playback press the ...

Page 34: ...or differentshots pleasenote that overuse of the zoomfeaturecan lead to unprofessional lookingresults and a reductionof battery packusagetime 1 Move the zoom lever a little for a gradual zoom move it further for a high speed zoom Your zooming is monitored on the OSD 2 T Telephoto side Subjectappearscloser 3 W Wideangle side Subjectappearsfurther away Note MACRO If you cannotget a sharpfocus in tel...

Page 35: ...MERAmode see page22 Open the LCD monitor and adjust the LCDmonitor so as to see comfortably 2 Make sure thatthe DIGITALZOOM featureison see page 36 3 When youmovetheZOOM leverto the T side the picturewill be enlarged within 22x minimumto 880x maximumZOOM This is the DIGITALZOOMboundary m_ H880 _shows the digital zoom area shows the optical zoom area 4 If youdo not wantto use theDIGITALZOOM set the...

Page 36: ...i_ii_i _ _i _ _ LPIP OFF J DISPLAY ON WHITE 8AL AUTO WL REMOCON ON NEXT MENU 1 LCZI AD JUST _lS F_ D _i_ M_ i i_ii_ii_ii_i _ _i _ ii_ I ISPLA ON WHITE BAL_ _____UTO WL REMOCON _ _ ON N T_ MENU 1 Set the powerswitchto CAMERAmode 2 PressD ZOOMON OFF button The DIGITALZOOM indicatorswill bedisplayedonthe screen and DIGITAL ZOOM function will operate 3 Todeactivate the DIGITAL ZOOMfunction pressthe D ...

Page 37: ...rstarts to run The word EASY will appearon the LCD at the same time However the Date Timewill only be seen if it has been previously set DiS _ wilt be displayedon SCL860 L870only _ F STB_ XXXXX EASY JAN 31 3 Pressthe START STOPbuttonto start recording Recordingwill begin usingthe basic automatic environmentsettings 4 Pressingthe EASY buttonagain turns the EASY modeoff The camera will returnto the ...

Page 38: ...N WHITE 3AL AUTO WL REMOCON ON NEXT MENU MENU CLOCK SET TITLE SET T_TLE OFF D_ITLE COLOR WHITE E_Whee the CUSTOMSET is set as follows r CUSTOM SETTING D_S ON Pip ON DZOOM ON _HrTEBA_ rNDooa_Pressingthe CUSTOMbutton DATE TIM DATEYFIME TITLE C2_TINUE displays P G M DSE SELECT S_FA kEX_T MENU J 880x 0 0003 SEPIA CUSTOM CONGRATULATIONS TLE Aoj CON rINUE JAN 12003 7 Pressthe START STOPbuttonto start re...

Page 39: ... CAMERAmode Seepage22 Open the LCD monitorand adjust itto see comfortably 2 Pressthe MENU ON OFFbutton The MENU listwill appear 3 Turnthe UP DOWNdial to DIS D_S OFF DZOOM OFF p_F OFF D_SF LAy ON WHITE BAL AUTO WL REMOCON ON NEXT MEN_J 4 Press ENTER The DIS settingwillchange 5 Pressthe MENU ON OFFbuttonto end the setting Whenthe DIS isset the DIS mark _ will be displayedon the OSD Notes 1 Itis reco...

Page 40: ... with camcorders we recommend that you use the Auto Focus mode In the followingsituations you should obtainbetter results by adjusting the focus manually a A picturecontainingseveralobjects some close to the camcorder others furtheraway b A personenvelopedin fog or surroundedby snow c Very shiny or glossy surfaceslike a car d Peopleor objects movingconstantlyor quicklylike an athleteor crowd 1 Set...

Page 41: ...ect is placed in frontof a window Theperson to be recordedis wearingwhite or shiny clothesand is placedagainsta bright background the person sface is too dark to distinguishtheir features Thesubject is outdoorsand the backgroundis overcast Thelight sourcesare too bright Thesubject is againsta snowy background f Setthe powerswitchto CAMERAmode see page22 2 Press BLC button Normal BLC Normal BLC enh...

Page 42: ...en imagewith very little blur 3 PORTRAIT mode _ Forfocusingonthe backgroundof the subject the backgroundbeing out of focus The PORTRAITmodeis most effectivewhen used outdoors The shutter speedautomaticallyvariesfrom 1 60to 1 1000 second dependingonthe picture 4 SPOTLIGHTmode _ To record correctlywhenthere is only light on the subjectand notthe restof the picture The shutter speedis 1 60 second 5 S...

Page 43: ...lthe appropriate symbolisdisplayed No Display FullAuto mode Notes The AE modechosenwillbe recordedonthe tape Toend the I_AEfunction pressthe AE buttononce or severaltimes until the FtAEIcon is no longerdisplayed The AE functionwill not operatein EASY mode The BLC functionwill not operatein AE mode A All manuals and user guides at all guides com ...

Page 44: ...y 4 SEPIA This modegives the imagea SEPIA effect 5 B W Black White This modeallowsthe imageto be recorded in black and white 6 NEG Negative This mode allowsimagesto be recordedby reflectingthe color of the image 7 MIRROR This mode cuts the imagein half using the mirroreffect 8 ART Adds a paint likeeffect calledsolarization to the image 9 MOSAIC This modegives the imagea checkereddesign 10 16 9 WlD...

Page 45: ...the desired mode is displayed 4 Pressthe START STOP button to start recording 5 To exit the DSE functions press the DSE buttononce or several times until noDSE mode is displayedon the LCD IHOS T Notes it isrecommendedthat youset the DSE modein STBYmode DSE functionswill not operatein EASY or CUSTOMmode SL All manuals and user guides at all guides com ...

Page 46: ...2 Set the power switch to CAMERA mode see page 22 3 Press the MENU ON OFF button then the MENU list will appean 4 Turn the UP DOWNdial until CLOCK SET is highlighted 5 Press ENTER CLOCKSETTING is possiblewhenthe DATEandTIME appear BLINKINGindicatesthe possiblechangesfor thesetting The year will be the first to blink 6 Turn the UP DOWNdial to set the desired year A MENU I j PIP OFF DISP AY ON WHITE...

Page 47: ...ME 2 Set the powerswitchto CAMERAmode see page22 Open the LCD monitor and adjust itto see comfortably 3 Press the DATE TIMEbuttonthe requirednumberof times To recordthe date only pressthe DATE TIMEbuttononce To recordthe date and time press the DATE TIMEbuttontwice 4 Press theSTART STOPbuttonto record the DATE TIMEon your recording Notes If your date and timesettings are not maintainedin the camco...

Page 48: ...age is ENGLISH Youcan changethe language 1 Makesure that youhave installedthe LITHIUMBATTERYor havethe AC adapterattached see page21 2 Setthe powerswitchto CAMERA mode see page22 Open the LCDmonitor and adjust itto see comfortably 3 PresstheMENUON OFFbutton TheMENUlistwillappear 4 Turn the UP DOWNdial until TITLESET is highlighted 5 Press ENTER A list of available languages will appear A LANGUAG S...

Page 49: ... sure that you have selected a TITLE from the TITLE list 1 Set powerswitchto CAMERAmode Open the LCDmonitor and adjust it to see comfortably 2 Press MENU 3 Turnthe UP DOWNdial untiITITLE _ OFFis highlighted 4 Press ENTERto choosebetweenOFF AUTO 10Sand CONTINUE 5 Press START STOPbuttonto record the title with your picture If you wantto changeTITLErecordingtime selecttitle recordingtime OFF AUTO lOS...

Page 50: ...TART STOPbutton and at the same time release the FADEbutton Recordingstarts and the pictureand soundgradually appear fadein 3 When youwish to stop recording holddown the FADEbutton The pictureand soundgradually disappear fadeout 4 When the picturehasdisappeared pressthe START STOPbuttonto stop recording a FADEOUT Approx 4 seconds b FADEIN Approx 4 seconds Press the FADE button a FADEOUT Gradualdis...

Page 51: ...should appear 6 Check which part youare recordingon the PIPscreen and turn the Zoom buttonto T positionto activatethe DIGITALZOOM mode Start recordingby pressingthe START STOPbutton when the portion youwant to recordappears 7 SettingPIR _ONto OFF in the MENUwillmake the small screendisappearand switchthe PIPmode off Notes When youuse the PIPfunction whilemakinga recording the PIP screenwill be rec...

Page 52: ...ethe imagewill be blurred 3 After the SNAPSHOTbutton has beenpressed your camcorderwiIIrecord the still imagefor 6 seconds then automaticallyreturnto STANDBYmode Youcan checkthe remainingtime for SNAPSHOT recordingby lookingat the timedisplayedonthe screen To stop SNAPSHOTrecording pressthe SNAPSHOTbutton again Notes If the carncorder is knocked or shaken while taking a SNAP SHOT the image may be ...

Page 53: ...ing to the indoor ambience OUTDOOR _ ControlsWHITEBALANCEaccordingto the outdoorambience 1 Setthe powerswitchto CAMERA mode 2 Pressthe MENU ON OFF button then the MENU listwill appear 3 Turnthe UP DOWNdial antil WHITE BAL AUTOis highlighted 4 PressENTER Yoacan set itto INDOORor OUTDOOR by pressingthe ENTERbutton MENU LCD ADJUST DIS OFF ZOOM OFF 5 Pressthe MENU ON OFF buttonto exit the WHITEBALANCE...

Page 54: ...witchis set to OFE 1 Set the power switch to CAMERA mode 2 Press the MENU ON OFF button then the MENU list will appear 3 Turnthe UP DOWNdial so that DEMOis higMighted I M NU DIS OFF DZOOM OFF PIP OFF DISpLAy ON WHITE BAL AUTO WL REMOCON ON EXIT MENU 4 PressENTERto selectON Demonstrationwill start 5 Set the POWER switch to OFF to end the Demonstration Note The MENU ON OFFfunctionwill not operatein ...

Page 55: ...tecolor 6 Press ENTER 7 Pressthe MENU ON OFFbuttonto end setting Thetitleand Date timewill appearinthe color you chose I MENU 1 DIS OFF DZOOM OFF PIP OFF DISPLAy ON WHITE BAL AUTO WL REMOCON ON NEXT MENU MENLI CUSTOM SET CLOCK SET _TITLE SET T TLE OFF WHITE C RESET 000 00 DEMO OFF DATEJ TITk_ COLOR SELECT iT_IWHrTE YELLOW CYAN MAGENTA RED GREEN 13LUE EXIT MENU I _TErrlT N COLOR SELECT MAGENTA RED ...

Page 56: ... dayin the middleof the afternoon On a gloomyday an hourafterthe sunrise Officewith fluorescentlighting near to a window On a sunny day an hourbefore the sunset Departmentstorecounter Room lit bytwo 30W fluorescentlights Arcadeat night Candlelight 100 000 100 000 35 000 2 000 1 000 1 000 500to 700 3O0 150to 200 10to 15 ND filter recommended Normal recording Video light recommended Video light requ...

Page 57: ...viewtapes indoors To play a tape back theTV mustfeaturea compatiblecolor system see page 67 Use the AudioNideo cable suppliedwith yourcamcorder The yellowplug Video The white plug Audio L Youcan connectyour camcorderto a TV through a VCR Set the input selectoron theVCR to UNE The yellowplug Video The white plug Audio L Toviewthe cassetteon the televisionscreen selectthe channel reservedfor yourVCR...

Page 58: ...he camcorder Set the power switch to PLAYER mode 3 Insert a tape you want to see Make sure that STOP is displayed 4 Pressthe INI PLAY STILL button The pictureyou recordedappearson the TV after 2 to 3 seconds Press STOP to stopplaying If the tape reaches its end during playback the tape will rewindautomatically PLAYER Notes Vibration from the built in speaker can cause picture distortion It is best...

Page 59: ... The ZERO RETURNfunction worksin STOPof PLAYERmode 4 Youcan Fast Forwardor Rewindto 0 00 00 automatically 1 Set the powerswitchto PLAYERmode Makesure that STOPisdisplayed 2 Press the ZERO RETURNbutton Z RETURNis displayed FFor REWworks automatically Notes The ZERO RETURNbuttondoes notwork when theTAPECOUNTERreads0 O0 00 Set the COUNTERRESET to C RESET0 00 00 in MENU modeat the start of the cassett...

Page 60: ...tonagain to endthe SPEAKERsetting MENU DISP_Y ON _LCON_OFF WLREMOCONON CRESET 0_00 EXIT MENU DISP_Y ON _LCON_OFF WLREMOCONON CRESET 0_00 EXIT NENU Speakervolumecan becontrolled by turning the MENUdial during playback Note Whenthe MENU listis on volumewill not be changed The procedurefor usingDSE in PLAYERmode is the same as the procedurefor using DSE in CAMERAmode except that the powerswitch mustb...

Page 61: ...hen the MENU listwill appear 4 Turnthe UP DOWNdial to PALCONV OFF 5 Press ENTER then itwill change to PALCONV PAL60 Now youcan seethe picture by pressingthe PLAY button 6 Press MENU ON OFFbuttonto end setting Notes 1 This Camcordercan not record usingthe PAL60 system 2 Whenan NTSCtape is being played back the pictureon the PALmonitor screenmay shrink in the Vertical direction 3 Ifthe signalrecorde...

Page 62: ...order CPU Intel PentiumIP processorcompatib eor better Operatingsystem Windows 98 98SEIME 2OOOIXP RAM 64 MBor more CD ROM 4x CD ROMdrive VIDEO 65 000 coloror bettervideo displaycard AvailableUSB port HardDisc 4GB 8GB recommended InteP Pentium II_M is a trademark of the Intel Corporation Windows is a registered trademark of the MicrosofP Corporation All other brands and names are property of their ...

Page 63: ...ase disconnectit in advance This explanationis basedon Windows 98SE OS 1 The installprogramautomaticallyoperatewhen the CD is inserted into CD ROM If the installprogramdoes not operate please doubleclick InstalLexein CD ROMDrive 2 Click _ito installthe program 3 Followthe instructionto install A All manuals and user guides at all guides com ...

Page 64: ...new hardware and install a driver automatically 7 If the driveris installed the install is completed 8 ExecuteUSB Media 2 0 player on the Windows wall paper 6 USB Media 2 0 User s Manual is includedon the accompanying CD in Adobe s PortableDocument Format PDF The user s manual can be viewed using Acrobat Reader software which is also includedon the CD The Acrobat Reader is a freeware product of Ad...

Page 65: ...In this case however a noise may be produced depending on the PC If you disconnect the USB cable from the PC or the camcorder while transferring the data transmission will stop and the data may be damaged If you connect the USB cable to a PC via a USB HUB or simultaneously connect the USB cable along with other USB devices the camcorder may not work properly In this case remove the other USB devic...

Page 66: ...y bedirty a NormalPicture b c Noisy Picture If this happens cleanthe video heads with a dry type cassettecleaner 1 Setthe powerswitchto PLAYERmode 2 insert the cleaningtape 3 Pressthe IHI PLAY STILL button 4 Pressthe STOP buttonafter about 30seconds Check the qua ty of the p cture us nga vdeo cassette if it is still bad repeatthe operation If the problem continues contactyour local authorizedservi...

Page 67: ...hat uses 100V to 240V 50 60 Hz Use a commerciallyavailableAC plug adapter if necessary dependingon the powerused Youcanview your recordingon the LCDor viewfinder However to view a recordingona televisionor to make a copyto a video cassetterecorder the televisionor VCRmust be NTSCor PAL60 Playermodeonly compatibleand have the appropriate audio videojacks A All manuals and user guides at all guides ...

Page 68: ...re a new one TAPE END no the tape reached its end Change to a new one TAPE slow there is no tape in the camcorder Insert a tape the tape is protected If you want to record PROTECTION slow from recording release the protection D EMG slow the camcorder has some 1 Eject the tape C EMG mechanical fault 2 Set to OFF R EMG 3 Detach the battery L EMG 4 Reattach the battery Please contact your local autho...

Page 69: ... STANDBY off automatically for more than 5 minutes without using ib see page 28 The battery pack is fully used up see page 25 The battery pack is The atmospheric temperature is too low see page 25 quickly exhausted The battery pack has not been charged fully see page 23 The battery pack is completely dead and cannot be recharged Use another battery pack You cannot eject the The battery pack is ful...

Page 70: ... see page30 The image in the viewfinderis The viewfinderlens hasnot beenadjusted blurred Turn theviewfinderfocus ring until the screencomes into sharpfocus see page31 The tape does not movewhen Set the POWERswitchto PLAYER you pressthe Play Fast Youhave reachedthe beginningor end of the cassette Forwardor Rewind buttons The picturedoes notappear in The LCD monitoris opened the viewfinder There is ...

Page 71: ...f there ismoisture insidethe camcorder DEW J_ is displayed If this happens noneof the functionsexcept cassetteejectionwill work Open the cassettecompartmentand removethe batteryfor at leasttwo hoursin a warm dry room Pleasefollow this procedurewhen the DEW protectionfeatureis unexpectedlyactivatedand youwant to override it Pleasemake sure that the condensationhas disappearedcompletely 1 Takethe ba...

Page 72: ...tio 22x Focal length f 3 6 79 2 mm F 1 6 Filterdiameter 46 mm Focussystem inner Macro Auto wide macro Min Illumination 0 3 lux visible __ _ i_ _ AI Size Pic cell Method Video out Audioout Power requirements Power consumption Recording LCD ON Built in mic Built in speaker Operating temperature Dimension WxHxD Weight 2 5 inch 12k TFT Mini jack 1Vp p 75 ohms Unbalanced Mini jack 7 7dBs imp less than ...

Page 73: ... i i i i i i i i i i iiii DATE 46 DATE TIME 46 DC CABLE 22 DEMO 54 DEW 71 DIGITAL ZOOM 35 DIMENSIONS 72 DIS 39 DISPLAY 16 DSE 44 i iiiiii I _ iiiii i i_iii_iiii ili i i ii i _i i _iiii i i i _ iii i i i i_ i EASY 37 EJECT 26 ENTER 30 EXTERNAL MIC 72 FADE IN 50 FADE OUT 50 FAR 40 FF FAST FORWARD 59 FILTER DIAMETER 72 FOCAL LENGTH 72 ii i if i il i ili i i ii _i iii_ i Jil i_ IG i_ ii i _i ill _ ii ...

Page 74: ...TION 72 TIME 46 POWER REQUIREMENT 72 TITLE 48 POWER SWITCH 22 TROUBLESHOOTING 69 PROGRAM AE 42 TV MONITOR 57 RECHARGING 23 REC SEARCH 28 REMOTE CONTROL 19 REW REWIND 59 i ii iiil i ii i ii i i if iif ill _ _ ii iii_ i _ii _ iil ii ii i i ii i SAFETY INSTRUCTIONS 4 SAND SNOW MODE 42 SELF 30S 19 SELF END 19 SELF DIAGNOSES 68 SELF RECORD 19 SELF TIMER 19 SEPIA 44 SHOULDER STRAP 21 VIDEO 57 VIDEO HEAD...

Page 75: ...to the authorizedservice center EXCLUSIONS WHAT IS NOT COVERED This warranty does not cover damagedue to accident fire flood and or other acts of God misuse incorrect line voltage improperinstallation improperor unauthorizedrepairs commercialuse or damagethat occurs in shipping Exterior and interiorfinish lamps and glass are not covered underthis warranty Customeradjustmentswhich are explainedin t...

Page 76: ...tronics America Inc 400 VaUey Road Suite 201 Mount Arlington NJ 07856 Tel 1 800 SAMSUNG 1 800 726 7864 SamsungElectronics InternetHome Page http h vww sa msangusa com AD68 00607B All manuals and user guides at all guides com a l l g u i d e s c o m ...

Reviews: