background image

Summary of Contents for LN32A300U

Page 1: ...omer Service 55 Standish Court Mississauga Ontario L5R 4B2 Canada CANADA 1 800 SAMSUNG 726 7864 www samsung com ca Samsung Electronique Canada Inc Service a la Clientele 55 Standish Court Mississauga...

Page 2: ...rs for licensed contents No rights are granted for commercial use The license does not cover any product unit other than this product unit and the license does not extend to any unlicensed product uni...

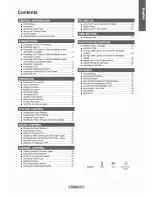
Page 3: ...ations 59 Viewingthe Display 15 Dimensions 60 Viewingthe Menus 15 Usingthe TOOLSButton 16 Memorizing the Channels 16 ToSelectthe Source ToEditthe InputSourceName 18 Set TopBox wa DVl 8 Sonnecting a DV...

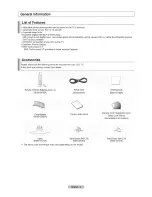
Page 4: ...Excellent Picture Quality SRS TruSurround XT SRS TruSurround XT provides a virtual surround system Accessories Please make sure the following items are included with your LCD TV If any items are missi...

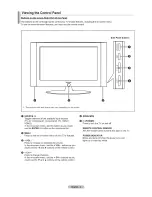
Page 5: ...on screen menu use this button as you would use the ENTER _ button on the remote control O MENU Press to see an on screen menu of your TV s features O VOL Press to increase or decrease the volume In t...

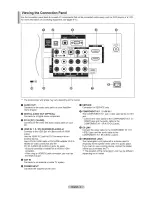
Page 6: ...ion and the DVI IN HDMI2 R AUDIO L jacks for audio No sound connection is needed for an HDMI to HDMI connection When using an HDMI DVI cable connection you must use the HDMI IN2 jack 0 ANT IN Connects...

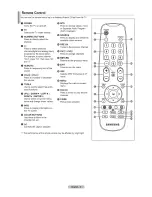
Page 7: ...the volume 0 TOOLS Use to quickly select frequently used functions O UPA DOWNer LEFT4 RIGHT _ ENTER_ Use to select on screen menu items and change menu values O INFO Press to display information on th...

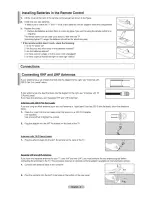
Page 8: ...diagram to the right see Antennas with 300 O Flat Twin Leads below If your antenna has one lead that looks like the diagram to the right see Antennas with 75 O Round Leads If you have two antennas see...

Page 9: ...is connected to the ANT IN terminal on your cable box Thisterminalmightbe labeled ANTIN VHFIN orsimply IN 2 Connect this cable to a two way splitter Incoming cable 3 Connect an RF cable between the O...

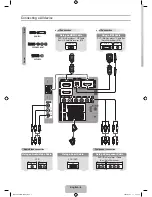
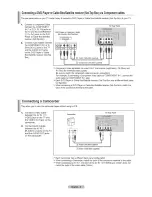
Page 10: ...coding feature installed Each DVD Player or Cable Box Satellite receiver Set Top Box has a different back panel configuration Connecting a OVOPlayer or CableBo Satellite receiver Set TopBox via DVI Th...

Page 11: ...o connections For example if connecting a Component video cable to COMPONENT IN I connect the audio cable to COMPONENT IN 1 also Each DVD Player or Cable Box Satellite receiver Set Top Box has a diffe...

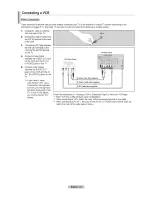
Page 12: ...Y VIDEO jack on the TV 5 Connect Audio Cables between the AUDIO OUT jacks on the VCR and the AV IN 1 R AUDIO L jacks on the TV If you have a mono non stereo VCR use a Y connector not supplied to hook...

Page 13: ...ying a DTV air signal the TV will send out 5 1 chan nel sound to the Home theater receiver When the source is a digital component such as a DVD and isconnected to the TV via HDMI only 2 channel sound...

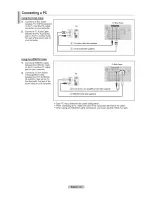
Page 14: ...VI Cable 1 Connect a HDMI DVI cable between the HDMI IN 2 jack on the TV and the PC output jack on your computer 2 Connect a 3 5 mm Stereo mini plug 2RCA Cable between the DVl IN HDMI2 R AUDIO L jack...

Page 15: ...t is accidentally set to Store Demo mode and you want to return to Home Use Standard Press the Volume button on the TV When the volume OSD is displayed press and hold the MENU button on the TV for 5 s...

Page 16: ...to reset this feature 1 Press the MENU button to display the menu Press the A or T button to select Setup then press the ENTER _ button 2 Press the ENTER _ button again to select Plug Play For further...

Page 17: ...sing the MUTE button At any time you can cut off the sound using the MUTE button 1 Press MUTE button and the sound cuts off _ is displayed on the screen 2 To turn mute off press the MUTE button again...

Page 18: ...nnels are memorized use the CH _ or CH _ button to scan through the channels This eliminates the need to change channels by entering the channel digits There are three steps for memorizing channels se...

Page 19: ...t the correct analog signal cable system source among STD HRC and IRC Press the ENTER _ button If you have Digital cable TV select the cable system signal source for both Analog and Digital _ STD HRC...

Page 20: ...ly those external devices that are connected to the TV ssthe OO C u to o he o oo T 6 To Edit the input Source Name Name the device connected to the input jacks to make your input source selection easi...

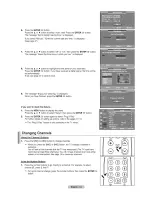
Page 21: ...ture mode follow the Changing the Picture Standard instructions numbers I and 2 2 Press the A or v button to select Backlight Contrast Brightness Sharpness Color or Tint then press the ENTER C button...

Page 22: ...you have connected to an input of the TV Settin_qthe Screen Size Occasionally you may want to change the size of the image on your screen Your TV comes with six screen size options each designed to wo...

Page 23: ...then press the ENTER button You can initialize the setting HD High Definition 16 9 I080i 1920xi080 720p 1280x720 Settings can be adjusted and stored for each external device you have connected to an i...

Page 24: ...th 1 Follow the Activating Picture Options instructions numbers 1 and 2 Refer to page 20 2 Press the A or T button to select HDMI Black Level then press the ENTER _ button 3 Press the A or T button to...

Page 25: ...NU button to display the menu Press the ENTER _ button to select Picture Press the A or T button to select Reset then press the ENTER _ button Press the A or T button to select OK or Cancel then press...

Page 26: ...2 Press the A or T button to select Sound Mode 3 Press the _1or _ buttonto select the required option 4 Press the EXIT or TOOLS button to exit Customizing the Sound The sound settings can be adjusted...

Page 27: ...gitaI TV transmission system is capable of simultaneous transmission of many audio tracks for example simultaneous translations of the program into foreign languages The availability of these addition...

Page 28: ...tereo Choose for channels that are broadcasting in stereo SAP Choose to listen to the Separate Audio program which is usually a foreign language translation _ Multi TrackSound is availableonly in Anal...

Page 29: ...aker is set to Off Sound menus except Multi Track Options cannot be adjusted The VOL _ VOL _ and MUTE buttons do not operate when the TV Speaker is set to Off _ Tv s internal Speakers Audio Out Optica...

Page 30: ...el then press the ENTER c_ button 2_ Press the A or T button to select Clear Scrambled Channel then press the ENTER _ button It searches scrambled channels which are to be removed from the list _To st...

Page 31: ...T button to select a channel to delete then press the ENTER _ button Press the A or T button to select Delete then press the ENTER _ button to delete the channel The 0 mark will disappear 5_ Press th...

Page 32: ...or V button to select Favorite then press the ENTER button The symbol will be highlighted and the channel will be set as a Favorite Tocancel your Favorite channel selection press the ENTER Q_ button u...

Page 33: ...2 Press the A or T button to select Channel List then press the ENTER _ button 3 Press the A or T button to select All Added or Favorite then pressthe ENTER _ button 4_ Press the A or T button to sel...

Page 34: ...ton Press the A or T button to select a letter a number or a blank Results in this sequence A Z 0 9 blank Press the _ button to switch to the next field which will be selected Select a second letter o...

Page 35: ...fine tuned channels Only analog TV channels can be fine tuned Checking the Digital Signal Strength Unlike analog channels which can vary in reception quality from snowy to clear digital HDTV channels...

Page 36: ...gs dialog box the correct value is 60 or 60 Hz Otherwise just click OK and exit the dialog box Display Modes If the signal from the system equals the standard signal mode the screen is adjusted automa...

Page 37: ...the required option 4 Press the EXtT or TOOLS button to exit Ad_ the Screen ualit The purpose of the picture quality adjustment is to remove or reduce picture noise If the noise is not removed by fine...

Page 38: ...r T button to adjust the V Position _ or _ button to adjust the H Position ENTER C_ button the EXIT button to exit Initializin the Screen Position Coarse and Fine You can replace all image settings wi...

Page 39: ...2 Press the ENTER _ button to select Clock 3 Press the ENTER _ button to select Clock Mode Press the A or V button to select Manual then press the ENTER _ button 4 Press the A or V button to select C...

Page 40: ...button to select Auto then press the ENTER _ button 4 Press the A or T button to select Time Zone then press the ENTER _ button Press the A or T button to highlight the time zone for your local area...

Page 41: ...Timer then press the ENTER _ button 3_ Press the A or T button to adjust Minute then press the ENTER E_ button Setting the Timer sets the Activation to On automatically To cancel the set sleep timer P...

Page 42: ...hannel Repeat Select Once Everyday Mon Fri Mort Sat Sat Sun or Manual When Manual is selected Dressthe _ button to select the desired day of theweek Press the ENTER _ button over the desired day and t...

Page 43: ...2 Press the A or T button to select V Chip then press the ENTER _ button The message Enter PIN will appear Enter your 4 digit PIN number _The default PIN number of a new TV set is 0 0 0 0 3_ The V Chi...

Page 44: ...ing the A or _r button will alternate between On and Off Press the ENTER button Press the EXIT button to exit How to Set _ Restrictions Using the TV Parental Guidelines First set up a personal identif...

Page 45: ...tically be blocked Similarly if you block the TV G category then all the categories in the young adult group will be blocked TV G TV PG TV 14 and TV MA The sub ratings D L S V work together similarly...

Page 46: ...AA Rating then press the ENTER C button 4 The MPAA Rating screen will appear Repeatedly press the A or _ button to select a particular MPAA category Pressing the A or T button will cycle through the M...

Page 47: ...NTER _ button to activate the restriction selected The _ symbol is indicated Press the EXIT button to exit Allow all Press to unlock all TV ratings Block all Press to lock all TV ratings C Programming...

Page 48: ...estriction Press the ENTER _ button to activate the restriction selected The _ symbol is indicated Press the EXIT button to exit Allow all Press to unlock all TV ratings Block all Press to lock all TV...

Page 49: ...adcasting station _The default menu name and Downloadable US rating changes depending on the downloaded information _ Even if you set the On screen display to your desired language the Downloadable U...

Page 50: ...the EXIT button to exit The default is CCI CCI The Primary Synchronous Caption Service These are captions in the primary language that must be in sync with the sounu preferably matched to a specific...

Page 51: ...ER _ button Press the EXIT button to exit _The availability of captions depends on the program being broadcast Default means to follow the standard set by the broadcaster _ Foreground and Background c...

Page 52: ...essed When no sound is output from the TV because the Volume has been reduced to minimum with the VOL _ button When the TV is turned off by Sleep Timer function Using the Energy Saving Feature This fe...

Page 53: ...SW upgrade then press the ENTER _3_button 4 Press the ENTER _ button The message Scanning for USB It may take up to 30 seconds is displayed 5 The message Upgrade version XXXX to version XXXX The syste...

Page 54: ...smission window Check the battery terminals Check signal cable message Ensure that the signal cable is firmly connected to the PC source Not Supported Mode message Check the maximum resolution and con...

Page 55: ...thin the following frequency domain Horizontal frequency kHz 30 _60 Vertical frequency Hz 60 _75 PC Maximum refresh rate 1360 X 768 at 60 Hz Image is not centered o_ he screen Adjust the horizontal an...

Page 56: ...roove of the stand Assemble the LCD TV stand by aligning the triangle figures indicated by the arrow marks 2 Place the Guide Stand onto the stand which is assembled in step1 and fasten it using the th...

Page 57: ...e iLand T buttons to select a save mode from either Position 1 Position 2 or Position 3 in order to save the current position To not save the current position press the RETURN button _When selecting a...

Page 58: ...Do not use screws longer than the standard dimension as they may cause damage to the inside of the TV set _ For wall mounts that do not comply with the VESA standard screw specifications the length of...

Page 59: ...manufacturer Refer to the manual provided with the Kensington Lock for proper use The locking device has to be 3urchased separately __4_ Cable Figure 2 Figure 1 Optional The location of the Kensington...

Page 60: ...hase these additionally Remove the screws from the center back of the TV put the screws into the clamps and then fasten the screws onto the TV again Screws may not be supplied with the product In this...

Page 61: ...h stand 13 5 kg 29 8 tbs Without stand 11 1 kg 24 5 Ibs Environmental Considerations Operating Temperature Operating Humidity Storage Temperature Storage Humidit_ 50 F to 104 F t0 C to 40 C 10 to 80 n...

Page 62: ...VIEW SIDE VIEW 3 2 r REAR VIEW NOTE All drawings are not necessarily to scale Some dimensions are subject to change without prior notice Refer to the dimensions prior to performing installation of you...

Reviews: