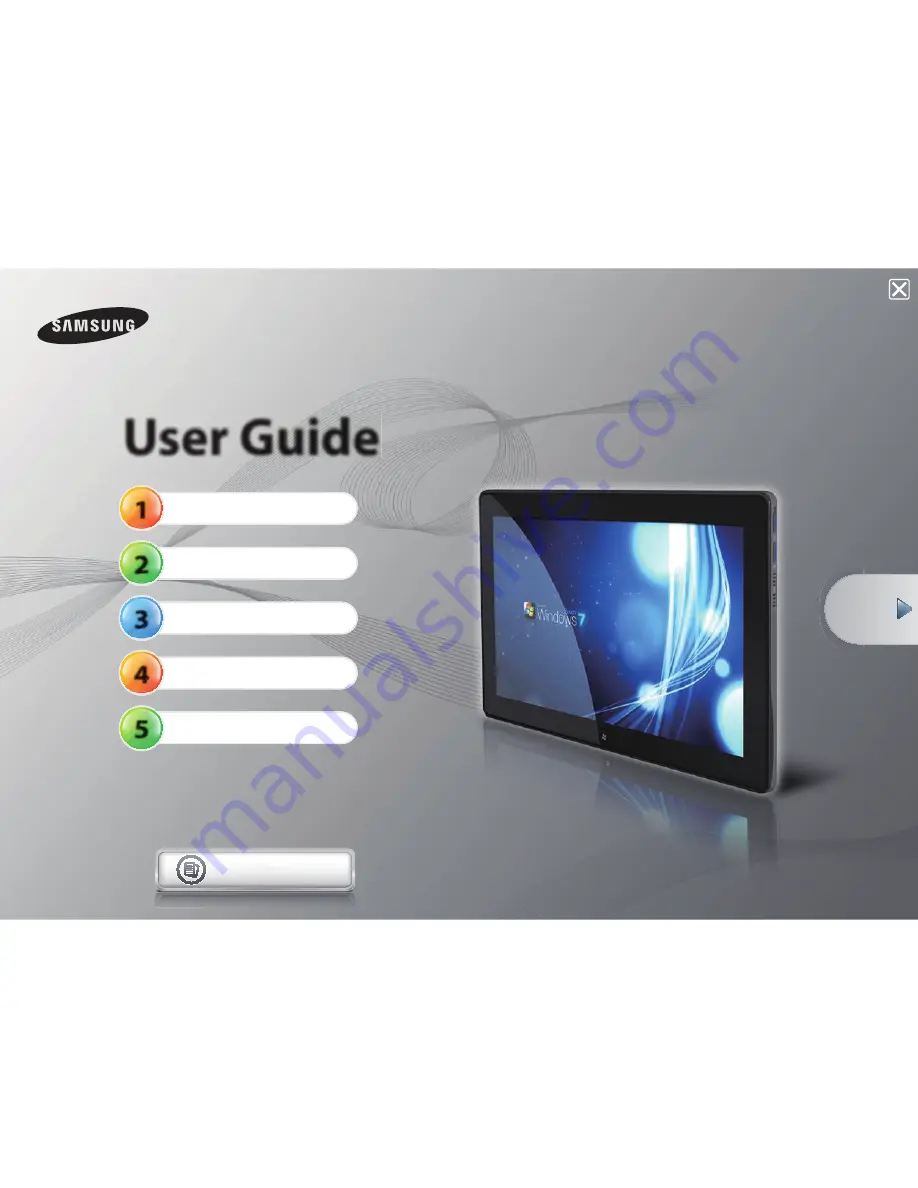
background image

1

2

3

4

5

  User Guide

Getting Started

Using the Computer

Settings and Upgrade

Backup / Restore

Appendix

Contents

Start

Summary of Contents for Nike Tab

Page 1: ...1 2 3 4 5 User Guide Getting Started Using the Computer Settings and Upgrade Backup Restore Appendix Contents Start ...

Page 2: ...n models only 46 Using the camera 48 Keyboard Optional 50 Micro SD Card Slot Optional 52 Connecting an External Display Device 57 Connecting an External Digital Device 58 Adjusting the Volume 60 Wired Network Optional 63 Wireless Network Optional 67 Using the Slate PC Dock Optional Chapter 3 Settings and Upgrade 71 LCD Brightness Control 73 Easy Settings Optional 74 BIOS Setup 76 Changing the Boot...

Page 3: ...Before You Start 3 Safety Precautions 6 Proper Posture During Computer Use 21 Overview 24 Turning the Computer On and Off 28 Chapter 1 Getting Started ...

Page 4: ... of the touch screen This manual has been written for the Windows 7 operating system The descriptions and figures may differ depending on the installed operating system The User guide supplied with this computer may vary depending on your model Using the software The software described in the main text can be launched using the following menu path Start All Programs Start All Programs Samsung When...

Page 5: ...t notice due to improving the performance of the product Samsung Electronics shall not be liable for any data loss Please take care to avoid losing any important data and backup your data to prevent any such data loss Precautions for Operating System Support If a problem occurs because of the reinstallation of other operating systems OS or a previous version of an OS pre installed on this computer...

Page 6: ... calculation E g For a 80GB HDD Windows represents the capacity as 74 5GB 80x1 000x1 000x1 000 byte 1 024x1 024x1 024 byte 74 505GB In addition the capacity representation in Windows may be even smaller because some programs such as Recovery Solution may reside in a hidden area of the HDD About Memory Capacity Representation The memory capacity reported in Windows is less than the actual capacity ...

Page 7: ...tion for a long time This increases the risk that a malfunction or damage to the product will occur Avoid exposing any part of your body to the heat from the computer vent or AC adapter for a long time when the computer is on Exposing a part of your body close to the heat from the vent or AC adapter for long periods of time may cause a burn Avoid blocking the vent at the bottom or side of the comp...

Page 8: ...bend the power cord excessively or do not place a heavy object over the power cord It is especially important to keep the power cord out of reach of infants and pets If the cord is damaged it may cause electric shock or fire Power Related The power plug and wall outlet figures may differ depending on the country specifications and the product model Do not touch the main plug or power cord with wet...

Page 9: ...lean so that they are not covered with dust Failure to do so may result in fire AC Adapter Usage Precautions Connect the power cord to the AC adapter firmly Otherwise there is a danger of fire due to an incomplete contact Use only the AC adapter supplied with the product Using another adapter may cause the screen to flicker Do not place heavy objects or step onto the power cord or AC adapter to av...

Page 10: ... Precautions Do not use the computer in a badly ventilated location such as on bedding on a pillow or cushion etc and do not use it in a location such as room with floor heating as it may cause the computer to overheat Take care that the computer vents on the side or the bottom are not blocked especially in these environments If the vents are blocked the computer may overheat and it may cause a co...

Page 11: ...t the product or battery or put the product or battery into a fire Do not put or use the product or battery in a hot location such as a sauna inside a vehicle exposed to the heat and so on There is a danger of an explosion or fire Take care not to allow metal objects such as a key or clip to touch the battery terminal metal parts If a metal object touches the battery terminals it may cause excessi...

Page 12: ...cted to the computer before cleaning it If your notebook is external removable battery type remove the external battery There is a danger of electric shock or damage to the product Do not connect a phone line connected to a digital phone to the modem There is a danger of a electric shock fire or damage to the product Donotplaceanycontainerfilledwithwateror chemicalsoverornearthecomputer If water o...

Page 13: ...re disassembling the computer If there is a modem disconnect the phone line If your notebook is external removable battery type remove the external battery Failure to do so may cause electric shock Avoid direct sunlight when the computer is in an air tight location such as inside a vehicle There is a danger of a fire hazard The computer may overheat and also present opportunity to thieves Do not u...

Page 14: ...nt away from the other objects Security and Movement Related Follow the instructions for the relevant location e g airplane hospital etc when using a wireless communication device wireless LAN Bluetooth etc Avoid exposing a drive to magnetic fields Security devices with magnetic fields in clude airport walk through devices and se curity wands The airport security devices that check car ry on lugga...

Page 15: ...osal method may differ depending on your country and region Dispose of the used battery in an appropriate way Do not throw or disassemble the battery and do not put it into water This may cause an injury fire or explosion Use only a battery authorized by Samsung Electronics Failure to do so may cause an explosion Avoid contact with metal objects such as car keys or clips when keeping or carrying a...

Page 16: ...ature increases there is a danger of burning yourself Connect only permitted devices to the connectors or ports of the computer Failure to do so may cause electric shock and fire Close the LCD panel only after checking if the notebook computer is turned off The temperature may rise and it may cause overheating and deformation of the product Do not press the Eject Button while the Floppy Disk CD RO...

Page 17: ...n when cleaning the product and only use the computer when it is completely dried Failure to do so may cause electric shock or fire Emergency disk eject method using paperclip should not be used while the disk is in motion Make sure to use the emergency disk eject method only when the Optical Disk Drive has stopped There is a danger of injury Do not place your face close to the Optical Disk Drive ...

Page 18: ...nect a device that is not manufactured or authorized by Samsung Electronics enquire at your service center before connecting the device There is a danger of damaging the product Security and Movement Related When moving the product turn the power off and separate all connected cables first The product might be damaged or users may trip over the cables For long periods of not using the notebook com...

Page 19: ...elf The data may be lost when an external impact is applied to the disk while disassembling or assembling the computer The data may be lost when the computer is turned off or reset by a power failure while the hard disk drive is operating The data may be lost and irrecoverable due to a computer virus infection The data may be lost if the power is turned off while running a program Sudden impact or...

Page 20: ... power outlet If the plug pins are not inserted into the center of the holes the plug pins are only inserted up to half their length In this case reconnect the power plug You have to insert the power plug into the outlet when the power indicator LED of the power outlet is lit green If the power is connected properly the power indicator LED remains green Otherwise the power indicator LED is turned ...

Page 21: ...port of the computer Auto Adapter In flight Cigar Socket Cigar Plug DC Plug When using the Airplane Charging Converter Depending on the airplane you have to use the auto adapter and charging converter Connect the airplane charging converter optional to the auto adapter optional and then insert the airplane power input jack into the power outlet Charging Converter 1 Connect this end to the auto ada...

Page 22: ...er Posture Adjust the heights of desks and chairs appropriate to your height The heights are to be adjusted so that your arm forms a right angle when you place your hand over the keyboard while sitting down on a chair Adjust the height of chair so that your heel is comfortably placed on the floor Do not use the computer while you are lying down but only while you are sitting down Do not use the co...

Page 23: ...before using the computer When entering contents printed on a paper into the computer use a static paper holder so that the height of the paper is almost equal to that of the monitor Hand Position Keep your arm at a right angle as shown by the figure Keep the line from your elbow to your hand straight Do not place your palm over the keyboard while typing Do not hold the mouse with excessive force ...

Page 24: ... and driver updates without your intervention Please check the equalizer default setting before first usage Use Time Break Time Take a break for 10 minutes or more after a 50 minute period when working for more than one hour Illumination Do not use the computer in dark locations The illumination level for computer use must be as bright so for reading a book Indirect illumination is recommended Use...

Page 25: ...mination around the PC If the ambient illumination decreases the touch screen brightness is set to low Conversely if the ambient illumination increases the touch screen brightness is set to high 3 Touch Screen The screen images are displayed here This works as a touch screen in models that support touch screens Optional 4 Home button You can switch to Windows Desktop mode or touch mode Press the b...

Page 26: ...n LED Turns the computer on and off When the computer is on the power button LED is lit 2 Rotation Lock Locks the screen rotation so that the screen does not automatically rotate according to the orientation function of the product 3 SIM Card Slot Optional This slot is for SIM cards ...

Page 27: ...ck This is the jack for connecting an ear set or headset 3 Volume Control Button Controls the volume 4 Micro Digital Video Audio Port Micro HDMI Optional This is the port for a micro HDMI You can enjoy digital video and audio by connecting the computer to a TV You can connect a VGA adapter optional 5 DC Jack A jack to connect the AC adapter that supplies power to the computer ...

Page 28: ... PC Dock Port Optional This port is for external devices Slate PC Dock optional Rear View 1 1 Camera Optional Using this camera you can take still pictures and record video If you replace the bottom of the product the model name serial number and some logos etched into the bottom of the product will no longer be there For more information talk to a service engineer Overview ...

Page 29: ... to turn the computer on 3 Power button LED is lit while the computer is turned on LED Entering Sleep mode When the computer is turned on press the computer s power button once briefly If the computer enters power saving mode the power button LED blinks blue To wake the computer up briefly press the Power button of the computer again ...

Page 30: ...utton to turn the computer on 2 If the Windows logon screen appears select the account for which you will configure the Touch Logon function and check the Enable Touch Logon option 3 If you touch the Windows logon password the Tablet PC input panel appears If the Tablet PC input panel does not appear press the keyboard icon at the bottom left of the screen z x 4 Touch the corresponding buttons in ...

Page 31: ...en touch Next z x 7 Set the Touch Logon password Touch the 4 digits to be used as the password When you have finished entering the password press Next z x 8 Re enter the Touch Logon password Touch the password digits again When you have finished entering the password press Next 9 The Touch Logon setting has been completed You can now use the Touch Logon function when you logon next Turning the Com...

Page 32: ...function by touching the background of your choice and click Next The touch logon settings have been completed Using the Touch Logon Logging on to the Windows logon screen by touch 1 Press the power button to turn the computer on 2 If the Windows logon screen appears press the account which you want to log into by touch 3 Touch Unlock at the bottom of the screen and then drag it to the top of the ...

Page 33: ...g the Touch Logon function Using the Touch Logon Options you can enable disable and configure the Touch Logon function 1 Click Start All Programs Samsung Touch Logon Touch Logon Options 2 After launching the Touch Logon Options you can configure disable or change the Touch Logon function If you register remove or change the Windows password in the User Accounts item in the Control Panel the Touch ...

Page 34: ...tem Therefore some descriptions and figures may differ from your operating system But as the usage is similar to other Windows operating systems you can use these descriptions for reference Click Start Shut down mode to shutdown the computer 1 2 If the computer cannot be shut down due to a system error press and hold the power button for at least 4 seconds to shut it down by force Please note that...

Page 35: ...ch screen models only 43 Using the Touch Supporter For Windows 7 touch screen models only 44 Using the camera 46 Keyboard Optional 48 Micro SD Card Slot Optional 50 Connecting an External Display Device 52 Connecting an External Digital Device 57 Adjusting the Volume 58 Wired Network Optional 60 Wireless Network Optional 63 Using the Slate PC Dock Optional 67 Chapter 2 Using the computer ...

Page 36: ...a malfunction take care not to touch the screen with this kind of object Using the Touch Screen This function is provided by touch screen models running Windows 7 and will only work for some applications In addition note that the supported functions are dependant on the application You can use the digitizer pen optional as you use your fingers The descriptions here are for using your fingers Learn...

Page 37: ...ap with another finger while holding down the first finger A pop up menu appears This is equivalent to right clicking a mouse Moving finger scroll Move your finger up and down left or right to move on the screen accordingly This is the scroll function of the mouse This operation may perform a different function depending on the application program Drag two fingers apart together zoom in zoom out Dra...

Page 38: ... Pen and Touch Flicks tab and select Practice using flicks to learn about the various touch operations Using the Touch Screen For Windows 7 touch screen models only Using the digitizer pen optional If a digitizer pen is supplied with the product you can operate the computer with the pen instead of your fingers You can use the digitizer pen as you would use your fingers Digitizer pen structure and ...

Page 39: ...the screen with the digitizer pen while holding down the pen button This performs the right click function Pen eraser Erases letters with the top end of the digitizer Pen This performs the function of an eraser Replacing the pen tip If the pen tip is damaged you can replace the pen tip as follows 1 Hold the pen tip by inserting it into the hole of the ring and remove the tip by pulling it out 2 In...

Page 40: ...n the operating system and may not be available in some operating systems The following descriptions assume the Windows 7 operating system 1 Click Start Control Panel Hardware and Sound Tablet PC Settings Display Calibrate 2 Select the screen type to calibrate If the Calibration screen appears touch the point represented by the mark and then remove your finger The mark appears sequentially from th...

Page 41: ...ansing solution or cloth containing abrasives may damage the touch screen Do not apply a severe impact to the touch screen or press the screen with a sharp object such as a ball point pen This may damage the touch screen If your finger only touches the touch screen slightly your touch may not be recognized If you wish to use a pen please use the provided digitizer pen optional Otherwise the comput...

Page 42: ...th your finger the appears on the Notepad with the cursor 3 If you touch the with your finger the Tablet PC Input Panel appears Tools Close Writing Pad Mode Touch keyboard If you touch the touch screen with your finger the Tablet PC Input Panel tab appears with the cursor at the bottom left on the Desktop If you touch the Tablet PC Input Panel tab the Tablet PC Input Panel appears If the Tablet PC...

Page 43: ...responding keys on the screen Entering letters with the writing pad hand writing input mode In the touch screen you can enter letters by directly writing letters with your finger on the writing pad input panel 1 In the Tablet PC input panel touch the writing pad icon 2 Write a letter in the input area of the writing pad in the touch screen and wait for a moment Then the letter is converted to the ...

Page 44: ...ograms Samsung Play Touch and select Touch Launcher to launch it 1 2 3 4 6 5 7 No Function Description 1 Power Option Shows the remaining battery charge and the currently configured battery mode 2 Wi Fi Shows the Wi Fi connection status If the computer is connected to Wi Fi the connected AP name is displayed 3 ToDo Things to do Creates Displays the ToDo list You can create a list of things to do 4...

Page 45: ...it the Touch Supporter click or touch the screen with three fingers again No Function Description 1 Hot key Multiple selection This performs the same function as the Ctrl key If you touch the multiple selection function the indicator is lit When the multiple selection is activated and you touch files with your finger one by one all touched files are selected Copy Copies the selected item Cut Cuts ...

Page 46: ... Click the Numeric Pad The Numeric Pad appears on the screen 2 If you touch the buttons of the Numeric Pad the corresponding numbers or symbols are entered on the screen Switches the mode between the numeric and the direction key input modes To select direction key input mode touch To select numeric key input mode touch ...

Page 47: ...u can conveniently take a picture or record a video using touch operations Using the Camera program Click the Touch Launcher and launch the Camera Select the front or rear camera Exit Minimize Select camera mode camera video Select the resolution View the captured picture or video Take a picture or make a recording Open the folder to save the file with Explorer z x c ...

Page 48: ...deo 4 You can view the picture or recorded video through the Preview function or the Open the saved folder with Explorer You can record up to 20 minutes of video If the free space of the computer reaches 500MB video recording is stopped When you take a picture Do not take a picture or record a video without the consent of the person you are recording Do not take a picture or record a video when it...

Page 49: ...oard mouse etc without a cable connection The Bluetooth supporting function is only available between devices a computer cell phone PDA printer etc and the connection may be restricted according to the profile of the corresponding device The keyboard is optional and may not be provided depending on the model 1 Remove the battery compartment cover at the back of the computer 2 Install the battery a...

Page 50: ...ard Optional 5 Select the keyboard to be connected and click Next 6 Enter the number displayed on the screen and press Enter This will connect the keyboard When the keyboard is connected the blue Bluetooth LED of the keyboard is turned off ...

Page 51: ...ed Since a card may fall out and become lost when you move the computer store it separately The figures used for the description are of a representative model Therefore the figures may differ from the real ones These descriptions are written based on Windows 7 the latest operating system Therefore some descriptions and figures may differ from your operating system But as the usage is similar to ot...

Page 52: ...format the card before using it Formatting a card deletes all data saved on the card If the card includes data backup the data before formatting it 1 Click Start Computer 2 Right click over a card drive with the touchpad and select Format 3 Click Start to the formatting To use a card to exchange data with a digital device such as a digital camera formatting the data using the digital device is rec...

Page 53: ...er visual quality Before you start check the port and cable of the external display device and then connect the display device to the computer Due to restrictions of the operating system the DualView function is not supported for Windows 7 Starter About the connection cable Users should additionally purchase the necessary connection cables Analog Monitor RGB Cable HDMI to micro HDMI Cable Connecti...

Page 54: ...power cord of the connected monitor TV or projector and turn the power on 4 Launch the Easy Settings click Display Display Settings and select a mode z x To use the function the Easy Settings must be installed Alternatively to set up dual view Open the Display Settings window in the Control Panel select Monitor 2 and select the Expand to fit to this monitor checkbox to set dual view For more detai...

Page 55: ...rchase the HDMI to micro HDMI cable 1 Connect the HDMI to micro HDMI cable to the HDMI port of the TV External Monitor TV Projector HDMI to micro HDMI This is only supported for models that support a TV output port HDMI When a TV provides more than one HDMI port connect the computer to the DVI IN port When connecting the computer to a TV switch the external input mode of the TV to HDMI 2 Launch th...

Page 56: ...aphics card You can view the graphics card type by selecting Device Manager Display adapters and then clicking the symbol The screen images and terms may differ from actual product depending on the computer model and driver version For Intel graphics cards 1 Right click over the Desktop and select Graphics Properties If a window appears where you can select the mode select Basic Mode and click OK ...

Page 57: ...ect Playback Devices Alternatively click the Control Panel Hardware and Sound Sound 2 Change the setting to Digital Audio HDMI HDMI Device or Digital Output Device click Set Default and click OK HDMI Output Device may not appear on the playback device list depending on the computer model In this case turn on the TV connect the TV to the computer using a HDMI cable and then switch to HDMI or LCD HD...

Page 58: ... disk so that you can copy or move the files on the device 1 Connect the USB port of the notebook computer and the USB port of the digital device such as a camera using the USB cable Both the computer and the digital device must be turned on You have to additionally purchase the USB cable necessary to connect the computer and the device Camera Camcorder 2 The Auto run window appears Click Open fol...

Page 59: ... below These descriptions are written based on Windows 7 the latest operating system Therefore some descriptions and figures may differ from your operating system But as the usage is similar to other Windows operating systems you can use these descriptions for reference 1 Connect a microphone to the microphone jack You can also use the internal MIC 2 Right click over the Volume icon on the taskbar...

Page 60: ...erties 3 Select the SoundAlive tab and select one of the modes Basic Mode Music Select this mode to listen to music Movie Select this mode to watch a movie Speech Emphasizes voice over other sounds Silver Silver mode is for people who have difficulty in hearing Advanced Mode Finely tuned 25 presets are arranged on a square according to their relative sound characteristics User Mode You can control...

Page 61: ... may differ from your operating system But as the usage is similar to other Windows operating systems you can use these descriptions for reference To use a wired network you have to connect the Slate PC Dock The Slate PC Dock is optional and may not be provided depending on the model 1 Connect the Slate PC Dock to the Slate PC Dock port of the computer 2 Connect the LAN cable to the LAN cable port...

Page 62: ...ng on your computer s Network Device 5 Select Internet Protocol Version 4 TCP IPv4 from the list of Network Components and click Properties The Network Component name may differ depending on the Operating System Installed To add a network component click Install in the screen shown in the figure above You can add clients services and protocols Wired Network Optional ...

Page 63: ...xits Sleep hibernation mode a message appears informing you of a connection to a 10Mbps 100Mbps wired LAN This happens because when the computer exits standby hibernate mode restoring the network takes about 3 seconds When the network is restored it operates at 100Mbps 1Gbps When system is running on battery some time it takes about 20sec after inserting LAN cable to be able to connect to internet...

Reviews: