background image

PDP-TELEVISION
(P

LASMA

D

ISPLAY

P

ANEL

)

Owner’s Instructions

Before operating the unit,

please read this manual thoroughly,

and retain it for future reference.

Register your product at www.samsung.com/global/register

This device is a Class B digital apparatus.

ON-SCREEN MENUS

P

icture

I

n

P

icture

(PIP)

Energy Saving

TELETEXT

(Option)

SRS TruSurroundXT

D

igital

N

atural

I

mage

e

ngine

Summary of Contents for PS-42Q7HD

Page 1: ...please read this manual thoroughly and retain it for future reference Register your product at www samsung com global register This device is a Class B digital apparatus ON SCREEN MENUS Picture In Picture PIP Energy Saving TELETEXT Option SRS TruSurroundXT Digital Natural Image engine ...

Page 2: ...mance of the product Avoid operating the TV at temperatures below 5 C 41 F A still image displayed too long may cause permanent damage to the PDP Panel Watching the PDP TV in 4 3 format for a long period of time may leave traces of borders displayed on the left right and centre of the screen caused by the difference of light emission on the screen Playing a DVD or a game console may cause similar ...

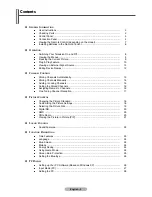
Page 3: ...lly 13 Storing Channels Manually 14 Adding Locking Channels 15 Sorting the Stored Channels 16 Assigning Names to Channels 16 Fine Tuning Channel Reception 17 PICTURE CONTROL Changing the Picture Standard 18 Customizing the Picture Settings 18 Selecting the Picture Size 19 Digital NR 20 SMD 20 DNIe Demo 20 Viewing the Picture in Picture PIP 21 SOUND CONTROL Sound Features 22 FUNCTION DESCRIPTION Ti...

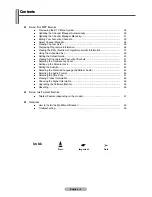
Page 4: ...sing the Scheduled List 39 Setting the Default Guide 40 Viewing All Channels and Favourite Channels 41 Adjusting the Translucency Level 42 Setting up the Parental Lock 43 Setting the Subtitle 44 Selecting the Preferred Language Subtitle or Audio 45 Selecting the Audio Format 46 Selecting the Time Zone 47 Viewing Product Information 48 Checking the Signal Information 48 Upgrading the Software Optio...

Page 5: ... the and buttons on the remote control ˆ ENTER Press to confirm a selection Ø Power button Press to turn the TV on and off Power Indicator Power Off Blue Power On Off Remote Control Sensor Aim the remote control towards this spot on the TV Speaker The product colour and shape may vary depending on the model Connection Panel Side Panel or continued Œ S Video or Video Audio L R Video S Video or Vide...

Page 6: ... source such as Audio equipment PC IN AUDIO Connect to the video and audio output jack on your PC Connecting External A V Devices Connect RCA cable to an appropriate external A V device such as VCR DVD or Camcorder Connect RCA audio cables to R AUDIO L on the rear of your set and the other ends to corresponding audio out connectors on the A V device COMPONENT IN 1 COMPONENT IN 2 Video Y PB PR and ...

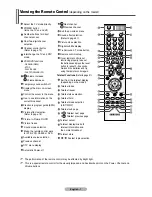
Page 7: ... page 18 Picture In Picture On Off Picture freeze Sound mode selection Make the remote control work for STB VCR CABLE or DVD Available source selection Previous channel DTV menu display Automatic Power off Next channel Previous channel Exit the on screen menu Sound effect selection Refer to page 21 Picture size selection Digital subtitle display TruSurround XT mode button Remote control setup If y...

Page 8: ...the mains lead into an appropriate socket The main voltage is indicated on the rear of the television and the frequency is 50 or 60Hz 2 Press the Power button On Off on the front of the television or press the POWER button on the remote control to switch the television on The programme that you were watching last is re selected automatically If you have not yet stored any channels no clear picture...

Page 9: ...items in the menu Press the ENTER button to enter items in the menu 4 Press the œ button to change the selected items Press the MENU button to return to the previous menu 5 Press the EXIT button to exit from the menu Freezing the Current Picture You can freeze the picture when watching a television programme simply by pressing the STILL button To return to normal viewing press it again This functi...

Page 10: ...morizing all of the available channels Press the ENTER button to set the clock 4 Press the œ or button to select the hour or minute Set these by pressing the or button You can enter the hours or minutes by using the numeric buttons on the remote control When the television is initially powered on several basic customer settings proceed automatically and subsequently The following settings are avai...

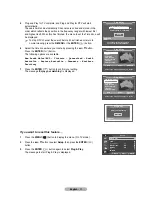
Page 11: ...zone where you locate by pressing the or button Press the ENTER button The following options are available New South Wales ACT Victoria Queensland South Australia Western Australia Tasmania Northern Territory 7 Press the ENTER button to confirm your setting The message Enjoy your watching is displayed If you want to reset this feature 1 Press the MENU button to display the menu On TV mode 2 Press ...

Page 12: ...play the menu 2 Press the ENTER button 3 Press the or button to select Edit Name then press theENTER button 4 Press the or button to select the external source to be edited then press the ENTER button 5 Select the required device by pressing or then press the ENTER button Available device names VCR DVD D VHS Cable STB HD STB Satellite STB AV Receiver DVD Receiver Game Camcorder DVD Combo DHR DVD H...

Page 13: ...n Country Australia Auto Store Manual Store Channel Manager Sort Name Fine Tune TV Enter Return Auto Store P 1 C 40 MHz 0 Start 1 Press the MENU button to display the menu 2 Press the or button to select Channel then press the ENTER button 3 Press the or button to select Auto Store then press the ENTER button 4 Press the ENTER button again to start the search The search will end automatically To s...

Page 14: ... not know the channel numbers Press the or button to start the search The tuner scans the frequency range until the first channel or the channel that you selected is received on the screen Store When you store the channel and associated programme number Set to OK by pressing the ENTER button Channel mode P Programme mode When completing tuning the broadcasting stations in your area have been assig...

Page 15: ...on to select Child Lock then press the ENTER button 7 Select On by pressing the or buttons then press the ENTER button 8 Press the or buttons to select the Channel Manager then press the ENTER button 9 Move to the field by pressing the œ buttons select a channel to be locked and press the ENTER button If you press the ENTER button again the symbol next to the channel disappears and the channel loc...

Page 16: ...R button 3 Press the or button to select Name then press the ENTER button 4 Press the or button to select the channel to be assigned to a new name then press the ENTER button 5 Press the or button to select a letter A Z a number 0 9 or a symbol Move on to the previous or next letter by pressing the œ or button then press the ENTER button 6 Repeat steps 4 to 5 for each channel to be assigned to a n...

Page 17: ...ing the or button Press the ENTER button 5 Press the EXIT button to exit Fine Tune Store will change the colour of the Channel OSD On Screen Display from White to Red and add the mark Fine Tuning Channel Reception If the reception is clear you do not have to fine tune the channel as this is done automatically during the search and store operation If the signal is weak or distorted you may have to ...

Page 18: ...Colour PC Mode Press the œ or button until you reach the optimal setting Colour Tone Cool 2 Cool 1 Normal Warm 1 Warm 2 Reset You can return to the factory defaults picture settings The reset function is set for each picture mode and colour tone 1 Press the MENU button to display the menu 2 Press the or button to select Picture then press the ENTER button 3 Press the ENTER button twice 4 Select th...

Page 19: ... picture to 4 3 normal mode 5 Press the EXIT button to exit You can change the picture size simply by pressing the P SIZE button on the remote control If you change the picture size when PIP is On PIP will automatically be turned Off Depending on the input source the picture size options may vary The items available may differ depending on the selected mode Positioning and Sizing the screen using ...

Page 20: ...ng scenes SMD is applicable only to PAL and SECAM system SMD is not available in PC mode DNIe Demo On Off This TV includes the DNIe function so as to provide a high visual quality If you set DNIe Demo to On you can view an applied DNIe and a normal pic ture on the screen for demonstration purposes Using this function you can view the difference in the visual quality DNIeTM Digital Natural Image en...

Page 21: ...s the ENTER button 3 Press the or button to select PIP then press the ENTER button 4 Select the required option by pressing the or button then press the ENTER button Available options PIP On Off Source Position Programme 5 When you are satisfied with your setting press the ENTER button 6 Press the EXIT button to exit Picture Move Enter Return Mode Dynamic Size 16 9 Digital NR On SMD On DNIe Demo O...

Page 22: ...ers It is fully compatible with all multichannel formats You can select these options simply by pressing the SRS button on the remote control TruSurround XT SRS and Symbol are trademarks of SRS Labs Inc TruSurround XT technology is incorporated under license from SRS Labs Inc Auto Volume On Off Each broadcasting station has its own signal conditions and so it is not easy to adjust the volume every...

Page 23: ... SLEEP button on the remote control If the sleep timer is not yet set Off is displayed If it is already set the remaining time before which the television switches to standby mode is displayed On Timer Off Timer You can set the On Off timers so that the television will switch on or off automatically at the time you select You must set the clock first On Timer Select Hour Minute Programme or Volume...

Page 24: ...ximum power saving mode regardless of the surrounding illumination Language Blue Screen Melody Energy Saving Setup Move Enter Return Plug Play Language English Time Game Mode Off Blue Screen Off Melody Off PC More TV 1 Press the MENU button to display the menu 2 Press the or button to select Setup then press the ENTER button 3 Press the or button to select Game Mode then press the ENTER button 4 S...

Page 25: ...r pixel shift All White This function helps remove after images on the screen by changing the colour of pixels to white Use this function when there are remaining after images or symbols on the screen especially when you displayed a still image on the screen for a long time Signal Pattern This function helps remove after images on the screen by moving all the pixels on the PDP according to a patte...

Page 26: ...ence to the Display Modes Table Set the Vertical Frequency and Horizontal Frequency individually if you can do so instead of setting the Screen refresh rate 5 Click on OK to close the window then Click on OK button to the Display Properties window Automatic re booting may commence at this moment Setting up Your PC Software Based on Windows XP Setting the Blue Eye You can set the power of Blue LED ...

Page 27: ...50 48 077 46 875 31 020 37 684 48 363 56 476 57 672 60 023 44 772 47 712 Vertical polarity P N N N P N N N P P N P P P P P N N N P P N P 640 x 350 720 x 400 640 x 480 800 x 600 848 x 480 1024 x 768 1280 x 720 1360 x 768 Resolution Dot X Line N Negative P Positive The interlace mode is not supported The television might operate abnormally if a non standard video format is selected 480i p 576i p 720...

Page 28: ...select Coarse or Fine then press the ENTER button 2 Press the œ or button to adjust the screen quality vertical stripes may appear or the picture may be blurry Press the ENTER button Position Adjust the PC s screen positioning if it does not fit the TV screen 1 Adjust the position by pressing the œ button 2 Press the ENTER button Auto Adjustment Auto adjustment allows the PC screen of set to self ...

Page 29: ... English Audio Format MPEG Move Enter Exit Channel Press ENTER to change the channel settings Auto Store Manual Store Edit Favourite Channels Channel Manager Move Enter Exit System Press ENTER to view the system options Product Information Signal Information Time Zone Software Upgrade Reset Move Enter Exit Guide Now Next Guide Full Guide Scheduled List Default Guide Now Next Full Guide Preference ...

Page 30: ...shed press the ENTER button with STOP selected 5 Press the D MENU button to return to the previous menu or press the EXIT button to return to normal viewing If the signal status is poor the No Service found Check the aerial connection message is displayed Channel Press ENTER to change the channel settings Auto Store Manual Store Edit Favourite Channels Channel Manager Move Enter Exit Channel Press...

Page 31: ...nel list when the broadcaster adds new Services or if you move the TV to a new location Updating the Channel Manager Manually 1 Press the D MENU button to display the DTV menu 2 Press the or button to select Channel Press the ENTER button The options available in the Channel group are displayed 3 Press the or button to select Manual Store 4 To Then Move to Channel Frequency or Bandwidth œ or butto...

Page 32: ...the channel will be added to the favourite channel list To undo press the ENTER again Select All Select all channels currently displayed Select None Deselect all selected channels Preview Displays a currently selected channel s The Favorite Channels settings have been completed 8 Press the D MENU button to return to the previous menu or press the EXIT button to return to normal viewing Channel Pre...

Page 33: ...ourite channel list press the red button To remove all channels press the green button Edit Favourite Channels The list of favourite channels is shown above Highlight a channel and choose an option 800 RaiDue 801 RaiTre 802 RaiUno Move Return Add Move Preview Delete Edit Favourite Channels Press ENTER to add the channel to the favourites List 800 RaiDue 801 RaiTre 802 RaiUno Move Select Return Sel...

Page 34: ...g the or button 2 Press the green button A icon is displayed on the left side of the channel name 3 Press the or button to select the channel that you want to move and press the green or ENTER button The channel is moved to its new position Preview 1 In the Edit Favourite Channels menu select the channel to be previewed by pressing the or button 2 Press the yellow button The selected channel is di...

Page 35: ... Press the D MENU or EXIT button to return to normal viewing 1 Press the CH MGR button The channel manager is displayed 2 To toggle between your favourite channels and all channels use the yellow button Your favourite channels are only displayed if they were previously set in the Edit Favourite Channels menu refer to page 32 34 3 Move to the channel of your choice by pressing the œ or button 4 To ...

Page 36: ... programme may be displayed Displaying Programme Information 14 30 Sat 1 Sep Exit INFO 70 7 HD Digital All Channels NO Information A 1 While viewing a programme press the INFO button The programme information is displayed 2 To exit from banner information press the INFO button ...

Page 37: ... Now Next Guide For the six channels indicated in the left hand column displays the Current programme and the Next programme information Full Guide Displays the programme information as time ordered hour segments Two hours of programme information is displayed which may be scrolled forwards or backwards in time 1 Press the D MENU button The options available in the Guide group are displayed 2 Pres...

Page 38: ...ll between channels move to a channel using the or button To display page by page use the P or P button Display the Now Next Guide and the Full Guide Display the Favourites list and the All Channels manager Scrolls backwards quickly 2 hours Scrolls forward quickly 2 hours Exit the guide Watch a programme in the EPG list View programme information Press the red button Press the red button again to ...

Page 39: ... pressing the or button 4 Press the ENTER button The selected guide menu is displayed 5 Press the red button The channel will be switched to the scheduled program 6 Press the ENTER button to move to an item and adjust with œ or number button Channel Set the channel Time Set the time Date Set Year Month and Day Frequency Set the frequency 7 After setting the schedule Press the red button The schedu...

Page 40: ...will be displayed 6 Press the D MENU button to return to the previous menu or press the EXIT button to return to normal viewing You can select these options by simply pressing the GUIDE button on the remote control You can preset the default guide style Setting the Default Guide Guide Press ENTER to choose the default Guide style Now Next Guide Full Guide Scheduled List Default Guide Full Guide Mo...

Page 41: ...t up The favourites list is empty Would you like to choose your favourites now message is displayed Select Yes The Favourite Channels menu is displayed If you select No all channels will remain unchanged To edit the favourite channels refer to page 32 34 for more details 9 Press the D MENU button to return to the previous menu or press the EXIT button to return to normal viewing All Channels is th...

Page 42: ...y level Parental Lock Move Enter Return High Medium Low Opaque 1 Press the D MENU button to display the DTV menu 2 Press the or button to select Preference The options available in the Preference group are displayed 3 Press the ENTER button 4 Select to the Translucency Level by pressing the ENTER button The options of the selected menu available are displayed 5 Select the required option by pressi...

Page 43: ...he PIN code Parental Rating No Block Change PIN Move Enter Return Change PIN Enter a new PIN code Enter New PIN Enter PIN Return 0 9 1 Press the D MENU button to display the DTV menu 2 Press the or button to select Preference The options available in the Preference group are displayed 3 Press the ENTER button 4 Press the or button to select Parental Lock Press the ENTER button The Enter PIN is dis...

Page 44: ...y pressing the or button Press the ENTER button 6 Press the D MENU button to return to the previous menu or press the EXIT button to return to normal viewing Change PIN Enter the new PIN code again to confirm Confirm New PIN Enter PIN Return 0 9 Change PIN Enter the new PIN code again to confirm Confirm New PIN Enter PIN Return 0 9 You PIN code has been changed successfully OK You can activate or ...

Page 45: ... to the previous menu or press the EXIT button to return to normal viewing While viewing a programme the subtitle can be selected While viewing a programme audio languages can be selected You can change the default value for subtitle and audio languages Displays the language information for the incoming stream Selecting the Preferred Language Subtitle or Audio Feature Press ENTER to view the featu...

Page 46: ...Select the required option by pressing the or button and press the ENTER button to change the setting 6 Press the D MENU button to return to the previous menu or press the EXIT button to return to normal viewing Feature Press ENTER to select preferable audio format between MPEG and Dolby Digital Subtitle On Subtltle Language Audio Language English Audio Format MPEG Move Enter Return Feature Press ...

Page 47: ...Product Information Signal Information Time Zone Software Upgrade Reset Move Enter Exit Guide Press ENTER to display the Electronic Programme Guide Options Now Next Guide Full Guide Scheduled List Default Guide Full Guide Move Enter Exit System Press ENTER to select your Time Zone Product Information Signal Information Time Zone Software Upgrade Reset Move Enter Return Time Zone Select the Time Zo...

Page 48: ...he Product Information menu is selected 4 Press the ENTER button The Product Information menu is selected Product Name Software Version 5 Press the D MENU button to return to the previous menu or press the EXIT button to return to normal viewing 1 Press the D MENU button to display the DTV menu 2 Press the or button to select System Press the ENTER button The options available in the System group ...

Page 49: ...System group are displayed 3 Press the or button to select Software Upgrade and press the ENTER button The software upgrade information is displayed 4 To switch to an alternative version press the red button Press the blue button to reset activate the upgrade and restart 5 Press the D MENU button to return to the previous menu or press the EXIT button to return to normal viewing Software Upgrade T...

Page 50: ...ed that a reset is performed only when serious problems are experienced Return System Press ENTER to view the system options Product Information Signal Information Time Zone Software Upgrade Reset Move Enter Exit 1 Press the D MENU button to display the DTV menu 2 Press the or button to select System Press the ENTER button The options available in the System group are displayed 3 Press the or butt...

Page 51: ...ically To resume press it again size Press to display the double size letters in the upper half of the screen For lower half of the screen press it again To display normal screen press it once again store Used to store the teletext pages mode Press to select the teletext mode LIST FLOF If you press it in the LIST mode it switches into the List save mode In the List save mode you can save teletext ...

Page 52: ...ndications D Date and time E Text F Status information FASTEXT information Teletext information is often divided between several pages displayed in sequence which can be accessed by Entering the page number Selecting a title in a list Selecting a coloured heading FASTEXT system Press the TV DTV button to exit from the teletext display Teletext Feature depending on the model ...

Page 53: ...ptive Screws Wall Mount Bracket ASSY HINGE RIGHT Separate ASSY HINGE into Left and Right ASSY HINGE LEFT 1 The wall mount bracket is delivered separately Please tighten the captive screw in the direction of the arrow after assembling the bracket Install the Wall Mount Bracket after the screws are securely inserted into the wall Instructions on Securing the SET to the Wall Mount Bracket The exterio...

Page 54: ...w Refer to the illustration on the right 3 The angle can be adjusted from 0 to 15 by 2 Hold onto the middle of the PDP to adjust the angle not the sides of the PDP Connecting External Devices to the PDP To connect external devices such as a DVD or a Home Theater System to the PDP please refer to following instructions 1 Be sure to remove the safety pins underneath the PDP If the safety pins are no...

Page 55: ...rrect Sound and picture interference Try to identify the electrical appliance that is affecting the television then move it further away Plug the television into a different mains socket Blurred or snowy picture distorted sound Check the direction location and connections of your aerial This interference often occurs due to the use of an indoor aerial Remote control malfunctions Replace the remote...

Page 56: ...This page is intentionally left blank ...

Page 57: ...This page is intentionally left blank ...

Page 58: ... 603 800 810 5858 010 6475 1880 2862 6001 3030 8282 1600 1100 11 0800 112 8888 0120 327 527 1800 88 9999 1800 10 SAMSUNG 7267864 1800 SAMSUNG 7267864 0860 7267864 SAMSUNG 0800 329 999 1800 29 3232 02 689 3232 800SAMSUNG 7267864 1 800 588 889 Web Site www samsung com au www samsung com cn www samsung com hk www samsung com in www samsung com id www samsung com jp www samsung com my www samsung com ...

Reviews: