background image

VIDEO

CASSETTE RECORDER

SV-3000DS SV-919D
SV-2000DS SV-929D

SV-717D
SV-718D

Instruction Manual

www.samsungvcr.com

PAL

PAL NTSC

01823M SV-919_HACO-GB1  4/1/03 6:12 PM  Page 1

Summary of Contents for SV-2000DS

Page 1: ...VIDEO CASSETTE RECORDER SV 3000DS SV 919D SV 2000DS SV 929D SV 717D SV 718D Instruction Manual www samsungvcr com PAL PAL NTSC 01823M SV 919_HACO GB1 4 1 03 6 12 PM Page 1 ...

Page 2: ...otecting a Recorded Cassette 24 Recording a Programme Immediately 24 Recording a Programme with Automatic Stop 25 Using the Timer Programming Feature 26 Checking a Preset Recording 27 Cancelling a Preset Recording 27 GB 2 About this manual Thank you for purchasing a Samsung Video Cassette Recorder VCR Your Owner s Instructions contain much valuable information on setting up and using your VCR Plea...

Page 3: ...icture Control 29 Selecting the Colour Mode 30 Selecting the Audio Mute Mode SV 919D SV 929D SV 717D SV 718D Only 30 Selecting the Audio Output Mode SV 3000DS SV 2000DS only 31 SEARCHING FOR A SEQUENCE Playing a Cassette in Slow Motion SV 3000DS SV 2000DS SV 919D SV 929D Only 32 Playing a Sequence Frame by Frame 32 Picture Search Fast Forward Rewind 33 Playing a Sequence at Variable Speeds 33 Sear...

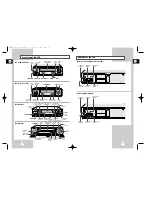
Page 4: ...TANDBY ON PROG REC STOP PLAY REW F F VIDEO AUDIO LINE IN 2 VIDEO CASSETTE COMPARTMENT STOP BUTTON EJECT BUTTON RECORD BUTTON PLAY BUTTON SHUTTLE RING STANDBY ON BUTTON LINE IN 2 VIDEO INPUT SOCKET PROGRAMME SELECTION BUTTONS LINE IN 2 AUDIO INPUT SOCKET LINE IN 2 VIDEO INPUT SOCKET LINE IN 2 AUDIO INPUT SOCKET VIDEO CASSETTE COMPARTMENT STOP BUTTON REW BUTTON F F BUTTON RECORD BUTTON EJECT BUTTON ...

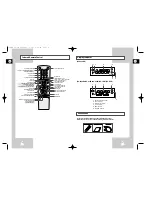
Page 5: ...N INDEX BUTTON FRAME ADVANCE BUTTON TUNER LINE IN 1 LINE IN 2 SELECTION REPEAT SELECTION BUTTON PROGRAMME SELECTION TRACKING BUTTONS DISPLAY BUTTON PLAY PAUSE STILL BUTTON FAST FORWARD FORWARD SEARCH BUTTON MENU BUTTON MENU SELECTION UP BUTTON MENU SELECTION BUTTON OK BUTTON TIMER BUTTON VCR STANDBY ON BUTTON SLOW BUTTON SV 3000DS SV 2000DS SV 919D SV 929D ONLY SHUTTLE BUTTON V LOCK BUTTON CLEAR A...

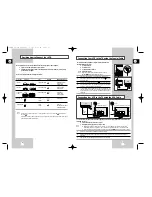
Page 6: ... before connecting the cables 1 Connect the coaxial cable as indicated in the above section 2 Connect one end of the RCA Audio Video cable to the Video output and Audio output socket on the rear of the VCR 3 Plug the other end into the appropriate connector on the television 4 TV TV 3 Aerial SV 3000DS SV 2000DS SV 919D SV 929D SV 717D SV 718D TV LINE IN 1 VIDEO AUDIO LINE OUT TV LINE IN 1 VIDEO AU...

Page 7: ... On completion press MENU twice to exit the menu AUTO SET UP PLEASE WAIT 60 I I END MENU CLOCK TUE 12 00 1 JAN 2002 END MENU 2 Connecting Other Equipment to Your VCR You can connect other audio and or video equipment to your VCR in different ways The following illustrations give a few examples of the connection possibilities The RCA input output connectors on the front of the VCR are used for equi...

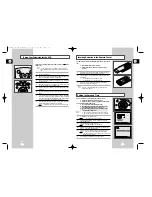
Page 8: ...rtment cover on the rear of the remote control 2 Insert two AA R6 or equivalent batteries taking care to respect the polarities on the battery with on the remote control on the battery with on the remote control 3 Replace the cover by aligning it with the base of the remote control and pushing it back into place Do not mix different battery types manganese and alkaline for example Inserting Batter...

Page 9: ...n is selected 5 Press the button to select G or K 6 On completion press MENU twice to exit the menu Selecting the RF OUT Sound Mode GB 16 Displaying Hiding On Screen Information Choosing Your Language You can change the language in which information is displayed on the screen 1 Press MENU on the remote control Result The programming menu is displayed 2 Press the corresponding or buttons to select ...

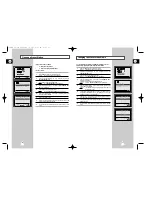
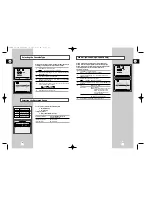
Page 10: ...ss the MENU button three times to exit the menu INSTALL AUTO SET UP MANUAL SET UP TV SYSTEM G VCR OUTPUT CH CH36 END MENU TV STATION TABLE PR CH 1 002 2 3 4 5 SWAPPING OK DELETE CLR RST MENU MANUAL TUNING PR 1 CH MFT MEMORY OK END MENU GB 18 Presetting the Stations Automatically You do not need to preset the stations if you have already set them automatically see Plug Auto Set Up on page 13 Your V...

Page 11: ...menu INSTALLATION PROG OPTIONS INSTALL CLOCK BONUS LANG INSTALL OK END MENU INSTALL AUTO SET UP MANUAL SET UP TV SYSTEM G VCR OUTPUT CH CH36 END MENU TV STATION TABLE PR CH 1 002 2 3 4 5 SWAPPING OK MENU TV STATION TABLE PR CH 1 2 3 002 4 5 SWAPPING OK MENU GB 20 If you have stored a TV station That you do not require At the wrong programme position you can cancel it 1 Press the MENU button on the...

Page 12: ...PTIONS OSD ON TAPE SELECT E180 COLOUR SYSTEM AUTO IPC ON END MENU SPEED DUB TV VCR TIMER USER SET PROG OPTIONS INSTALL CLOCK BONUS LANG OPTIONS OK END MENU NICAM SV 3000DS SV 2000DS only NICAM programmes are divided into 3 types NICAM Stereo NICAM Mono and Bilingual transmission in another language NICAM programmes are always accompanied by a standard mono sound broadcast and you can select the de...

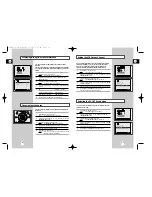
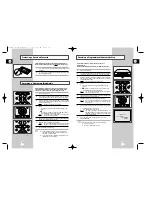
Page 13: ...UT REPEAT VOL PROG TRK AUDIO DISP SELECT 4 4 Recording a Programme Immediately Protecting a Recorded Cassette Video cassettes have a safety tab to prevent accidental erasure When this tab has been removed you cannot record on the tape 1 If you wish to protect a cassette break off the tab using a small screwdriver 2 To re record over a protected cassette safety tab broken cover the hole with adhesi...

Page 14: ...e cassette Auto Tape Speed Select The VCR s Auto Tape Speed Select function compares the duration of the timer recording to the actual recording time remaining on the tape loaded If there is insufficient tape to complete a timer recording in AUTO mode the VCR automatically switches to LP mode to record the whole programme E g If there is a one hour AUTO mode timer recording to be started but only ...

Page 15: ...IONS OSD ON TAPE SELECT E180 COLOUR SYSTEM AUTO IPC ON END MENU USER SET PROG OPTIONS INSTALL CLOCK BONUS LANG OPTIONS OK END MENU This function allows you to play back any pre recorded cassette 1 Switch on both the television and your VCR 2 Insert the video cassette to be played If the safety tab on the cassette is intact press ll Otherwise the cassette is played automatically When a cassette is ...

Page 16: ... selected by the VCR B W Black and White 6 On completion press MENU twice to exit the menu OPTIONS OSD ON TAPE SELECT E180 COLOUR SYSTEM AUTO IPC ON END MENU USER SET PROG OPTIONS INSTALL CLOCK BONUS LANG OPTIONS OK END MENU When monitoring a TV programme or playing back a Hi Fi recorded video tape press the AUDIO button to select a desired sound output As the AUDIO button is pressed the sound out...

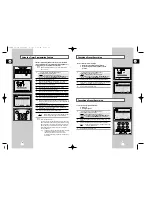
Page 17: ...the Cassette Video heads You can Stop the cassette at a given frame image Advance one frame at a time No sound is heard when playing back frame by frame 1 Press II to start playing the cassette II to stop the tape at a given frame F ADV to advance frame by frame 2 To return to normal playback press II When you have been using the Frame by Frame function for more than about five minutes the VCR wil...

Page 18: ...EPEAT PLAY OFF NO OF INTERVAL REPEAT 5 END MENU BONUS EASY OPERATION PROG OPTIONS INSTALL CLOCK BONUS LANG BONUS OK END MENU EASY OPERATION PROG OPTIONS INSTALL CLOCK BONUS LANG BONUS OK END MENU GB 34 Searching for a Specific Sequence Each time you record a cassette on this VCR an index is automatically marked on the tape when recording starts The Search function allows you to fast forward or rew...

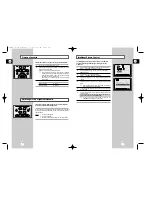
Page 19: ...stem VCR camcorder or sound system EJECT STANDBY ON PROG VIDEO AUDIO LINE IN 2 LINE IN 2 VIDEO L AUDIO R STANDBY ON EJECT 1 1 3 3 1 3 GB 36 Using the Tape Counter The tape counter Indicates the elapsed time in the play and record modes hours minutes and seconds Is reset when a cassette is inserted in the VCR Allows you to find the beginning of a sequence easily If the remaining time is to be calcu...

Page 20: ...EC down for a while to start recording on your VCR 7 When you have finished recording press on both VCRs If you wish to view the cassette being copied Your VCR must be connected as usual to the television see page 11 for further details Using the Assemble Edit Function Recording from Another VCR or Camcorder OK REC MENU OK REC MENU 2 6 7 F ADV GB 38 With the Audio Dubbing function you erase the pr...

Page 21: ...SON 13 14 24 PANASONIC 08 23 to 27 TOSHIBA 07 16 to 19 21 Result If your television is compatible with the remote control it will switch off It is now programmed to operate with the remote control If several codes are indicated for your television brand try each one in turn until you find one that works When you change the batteries in the remote control you must reprogramme the code following the...

Page 22: ...ollowing instructions Tuning Your Television for the VCR page 14 6 If the problem still exists repeat steps 1 to 5 moving several more channels away from the original setting If you are unable to solve the problem after reading the above instructions note The model and serial number on the rear of your VCR The warranty information A clear description of the problem Then contact your nearest SAMSUN...

Page 23: ...CIR 069 E69 UHF 855 25 CCIR 071 X V L 69 25 CCIR 072 Y V L 76 25 CCIR 073 Z V L 83 25 CCIR 074 Z 1 V L 90 25 CCIR 075 Z 2 V L 97 25 CCIR 101 S01 V L 105 25 CCIR 102 S02 V L 112 25 CCIR 103 S03 V L 119 25 CCIR 104 S04 V L 126 25 CCIR 105 S05 V L 133 25 CCIR 106 S06 V L 140 25 CCIR 107 S07 V H 147 25 CCIR 108 S08 V H 154 25 CCIR 109 S09 V H 161 25 CCIR 110 S10 V H 168 25 CCIR 111 S11 V H 231 25 CCIR...

Reviews: