Assembly Instructions for Model: VMXA1
Thank you for choosing a Sanus Systems VisionMount™ Model: VMXA1. The VMXA1 is 8″ [203 mm] longer and replaces the Center
Plate provided with the VMPL3. The VMXA1 is designed to hold up to 280 lbs [127 kg].
Sanus Systems
2221 Hwy 36 West, Saint Paul, MN 55113 08.02.06 (100042)
Customer Service: 800.359.5520. See complementary Sanus products at www.sanus.com
Step 1: Configure Wall Plate Assembly
NOTE: VMXA1 replaces the standard Center Plate in the Wall Plate Assembly (A) provided with the VMPL3. These instructions
replace Step 7: Configure Wall Plate Assembly, of the Assembly Instructions for Model: VMPL3.
Using the VMXA1, the Wall Plate Assembly (
A
) can be adjusted in width from 35″ to 50″ [889 mm to 1270 mm]. Determine how wide you
want the Wall Plate Assembly based on the following criteria:
•
Width of television (Wall Plate Assembly should be configured so the total width is less than the overall width of your television)
•
Width of Hole Pattern on television (Wall Plate Assembly should be wider than the horizontal distance between threaded inserts on the
back of your TV by at least 2″ [50.8 mm])
•
Stud Spacing (Sanus recommends attaching Wall Plate Assembly to three studs for televisions over 125 lbs. [56.7 Kg])
To adjust the width of the Wall Plate Assembly (A) using the VMXA1:
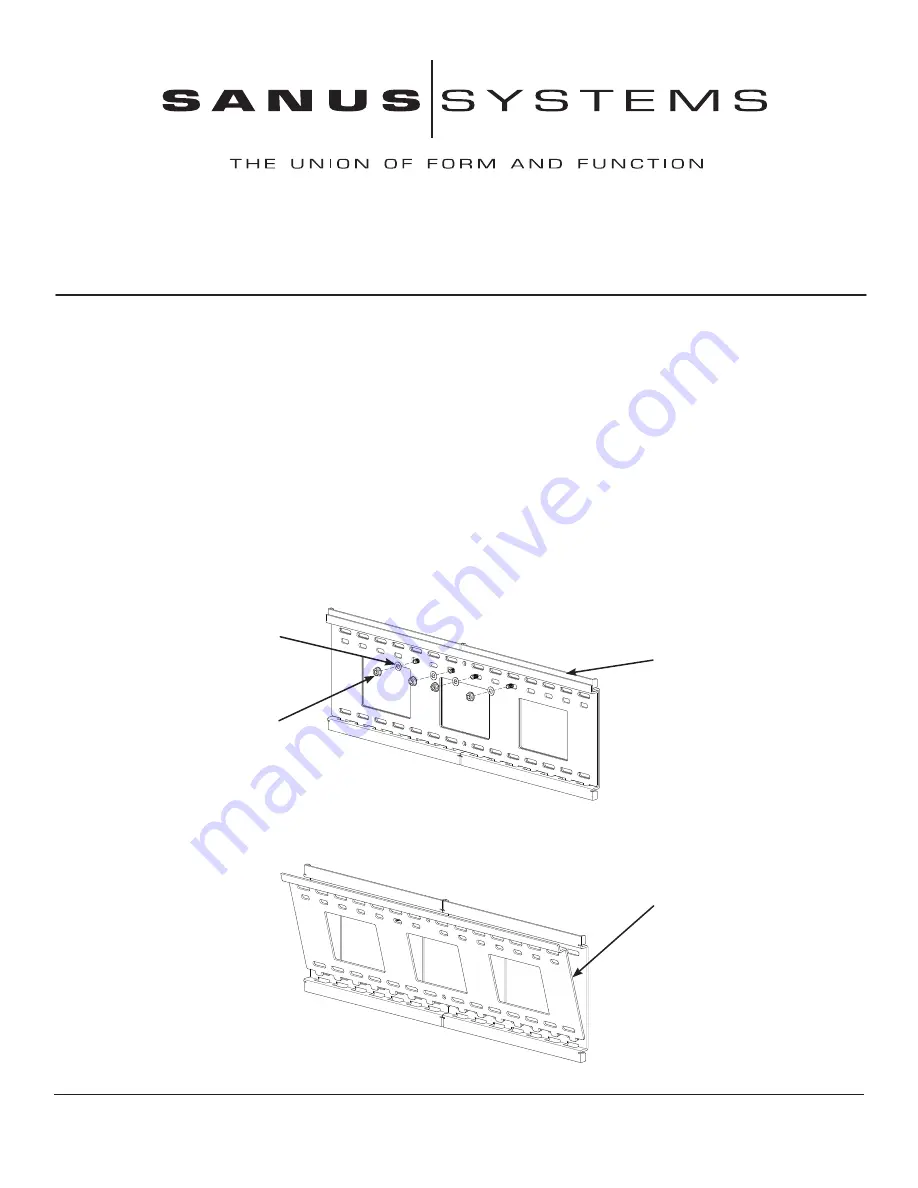
Remove each Flange Nut and Nylon Washer from the Wall Plate Assembly (
A
) as shown in Diagram 1A.
Diagram 1A
Flange
Nut
Wall Plate
Assembly (A)
Nylon
Washer
Remove the Center Plate of the Wall Plate Assembly (
A
) as shown in Diagram 1B.
Diagram 1B
Center
Plate


