®
Multipurpose Housing
OPU-3 P
opu3p_en 08/08
The OPU-3 P multipurpose housing is designed for indoor installation. It can accommodate
alarm control panels, expanders with or without power supply unit, and other modules
manufactured by the SATEL Company. In order to use devices with power supply, you need
to purchase and install a suitable transformer (two transformer types are supported: 230 V/18
V AC, capacity 40 VA, and 230 V/20 V, capacity 60 VA).
The housing is made of white polystyrene. Its design, both modern and discreet, enables it to
be used in public and living spaces. Fastening of its cover with four screws from the front,
without hinges, facilitates access to the interior of the housing. The housing base can be built
into the wall, thus making the cover only visible from the outside.
The housing has two tamper contacts which react to opening the cover and pulling off the
housing from its mounting surface. Space is provided inside for a 12 V/7 Ah or 12 V/17 Ah
battery. A special metal plate protects the battery against sliding out during installation.
Furthermore, additional holders make it possible to secure the battery to the housing with
a binding clip. Two plastic inserts with holes spaced suitably for plastic plugs fastening the
electronics boards enable several modules to be installed inside the housing, e.g. the control
panel and a few expanders without power supply. Its fastening enables the upper insert to be
swung aside after its right- or left-hand side is released at catches. This feature ensures
access to the board mounted on the lower insert. A special holder for GSM antenna enables
a communication module to be installed without any need to place the antenna outside the
housing.
1. Housing installation
A plastic bag, containing two tamper contacts, expansion plugs, two cables for transformer
connection and two extra screws, is provided inside the housing. As the housing is protected
for the time of transportation, it must be preliminarily prepared before the security alarm
system devices can be installed.
1. Unscrew the two bolts fastening the metal plate which protects the battery against sliding
out. Normally, the plate should be immobilized by means of the screws securing the
housing to the surface.
2. Remove the first plastic insert, which is catch-mounted.
3. Remove the two screws which fasten the second (lower) insert and remove it from the
housing.
4. Pull the cables through holes in the housing base and secure the base to the mounting
surface with four screws. Fasten the battery protecting plate under the two lower screws.
Using another screw, attach to the surface (above the transformer place) the tamper
element, which should break off in case of an attempt to detach the housing from the
mounting surface.
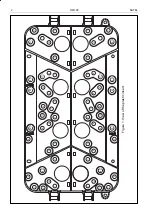
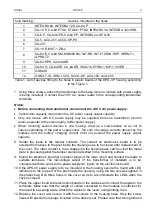
5. Arrange the layout of modules (see Figure 1 and Table 1) and insert the plastic plugs for
fastening the electronics boards in their respective holes (make sure that the plugs do not
slide out). It is recommended to place the board with power supply on the lower insert,
tightly fastened to the base.
6. Using four screws, fasten the lower insert to the base (two extra screws are provided in
the plastic bag).


