background image

S1483

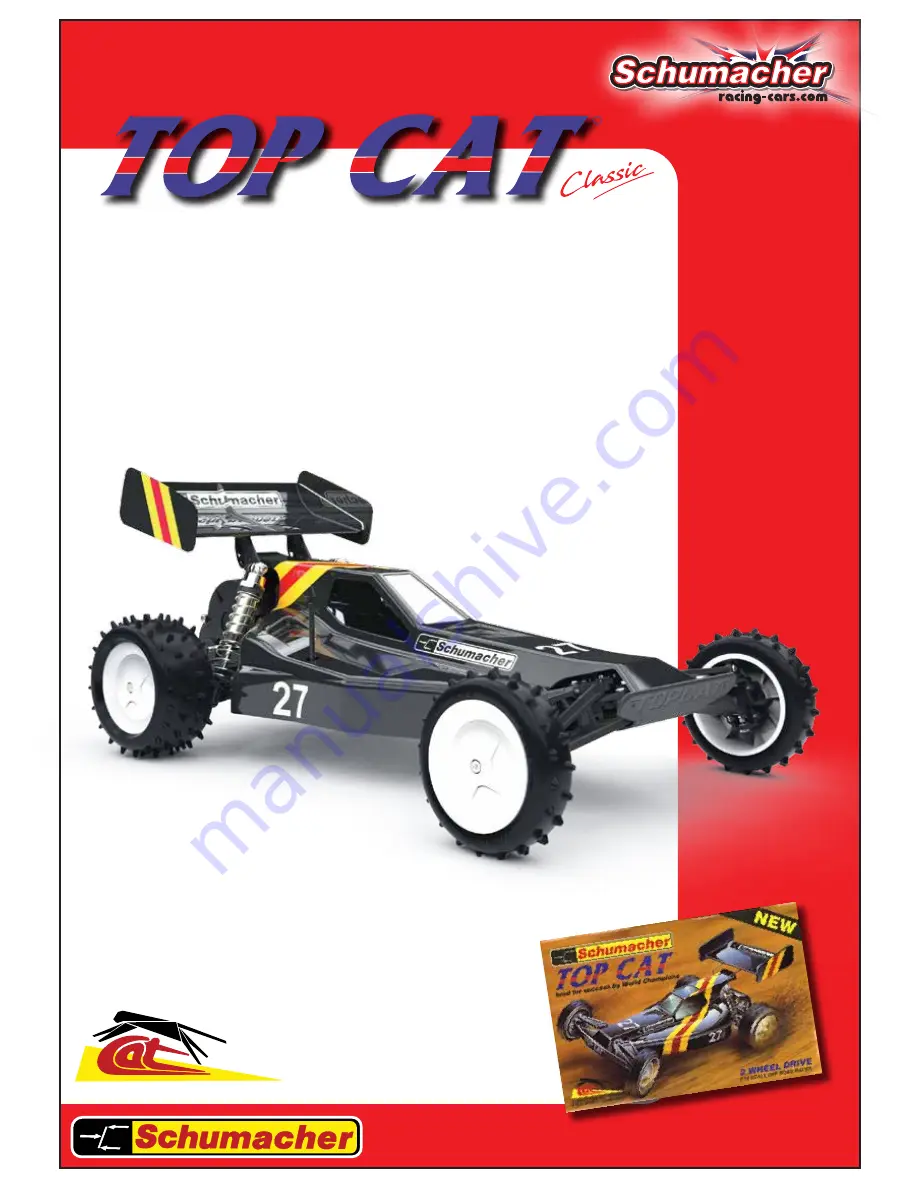
Instruction Manual

COMPETITION ALL TERRAIN

2 WHEEL DRIVE


1/10 SCALE OFF-ROAD RACER

71-73 Tenter Road

Moulton Park

Northampton

NN3 6AX

U.K.

Bred For Success By World Champions

Summary of Contents for TOP CAT

Page 1: ...S1483 Instruction Manual COMPETITION ALL TERRAIN 2 WHEEL DRIVE 1 10 SCALE OFF ROAD RACER 71 73 Tenter Road Moulton Park Northampton NN3 6AX U K Bred For Success By World Champions...

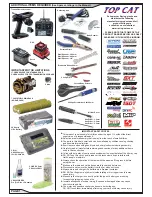
Page 2: ...ion In line with our policy of continuous development the exact details of the kit may vary DO NOT use this car on public roads or in places where it can interfere with traffic people or animals Alway...

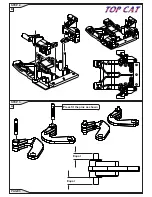
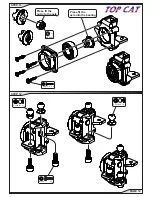
Page 3: ...e clip x 2 Black O ring x 2 No4 x 3 8 x 4 A STEP 1 PAGE 2 STEP 2...

Page 4: ...Equal Equal Press fit the pins as shown STEP 2 PAGE 3 STEP 3 B A...

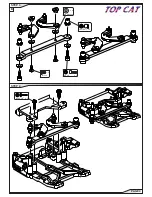
Page 5: ...M3 x 6 x 2 No4 x 3 8 x 2 Pivot Ball x 2 M3 Washer x 4 M3 x 8 x 2 B STEP 3 PAGE 4 STEP 4...

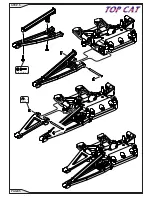
Page 6: ...e clip x 4 No2 x 5 16 x 2 STEP 5 PAGE 5...

Page 7: ...e clip x 4 No2 x 5 16 x 2 STEP 6 PAGE 6...

Page 8: ...M3 x 12 x 3 Press fit the pins as shown 2 0 X 7 8 x 2 M3 Nut x 3 Super Glue Super Glue Super Glue Super Glue STEP 7 PAGE 7 STEP 8 A...

Page 9: ...Pivot Ball x 2 M3 x 8 x 2 e clip x 2 B STEP 8 PAGE 8...

Page 10: ...M3 x 8 x 3 Pivot Ball x 1 Pivot Ball x 2 No2 x 3 8 x 4 M3 Nyloc x 1 Press fit the nut into the axle Press fit the axle into the bearing STEP 9 PAGE 9 STEP 10...

Page 11: ...No2 x 3 8 x 4 Pivot Ball x 2 M3 x 8 x 3 Pivot Ball x 1 M3 Nyloc x 1 Press fit the nut into the axle Press fit the axle into the bearing STEP 11 PAGE 10 STEP 12...

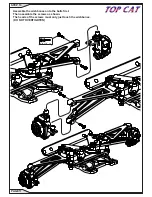
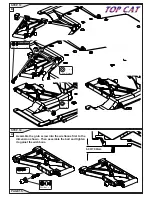
Page 12: ...No2 x 3 8 x 4 Assemble the wishbones onto the balls first Then assemble the screws as shown The heads of the screws must only just touch the wishbones DO NOT OVERTIGHTEN STEP 13 PAGE 11...

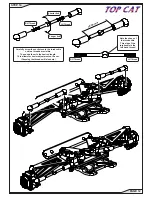
Page 13: ...LH Thread RH Thread LH Thread RH Thread Longer link Shorter link Carefully screw the sockets onto the turnbuckle until no threads are visible Then undo them to the desired length This allows for easi...

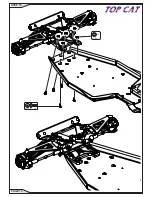
Page 14: ...M3 x 8 x 5 M3 Nut x 5 STEP 15 PAGE 13...

Page 15: ...for now M3 x 12 x 1 1 6 mm Washer x 2 No4 x 3 4 x 2 Pivot Ball x 1 Assemble the grub screw into the wishbone first to the dimension shown Then assemble the ball and tighten it against the wishbone A...

Page 16: ...the grub screw into the wishbone first to the dimension shown Then assemble the ball and tighten it against the wishbone M3 x 12 x 1 Pivot Ball x 1 1 6 mm Washer x 1 M3 Nyloc x 1 M3 x 16 x 1 STEP 17...

Page 17: ...1 6 mm Washer x 1 M3 Nyloc x 1 M3 x 16 x 1 Now tighten these two screws B STEP 18 PAGE 16...

Page 18: ...ll grooved washer Big grooved washer Small grooved washer Big grooved washer Disc springs IMPORTANT DIFF SETTING Tighten screw to flatten the disk springs then undo 1 4 turn IMPORTANT Ensure the washe...

Page 19: ...rawings below shows the assembly procedure of all universal joints driveshafts axles and diff outputs NOTE Warming the plastic parts will help make the assembly easier Large Hole Small Hole Small Hole...

Page 20: ...ORTANT Use the same assembly procedure as shown on page 18 STEP 22 A IMPORTANT To adjust the diff setting when assembled place an allen key into the screw head slot and turn the output on the opposite...

Page 21: ...No2 x 3 8 x 2 No2 x 3 16 x 4 No4 x 3 8 x 2 STEP 25 PAGE 20 STEP 26...

Page 22: ...lloy 48dp 21T U3422 Pinion Hard Alloy 48dp 22T U3423 Pinion Hard Alloy 48dp 23T U3424 Pinion Hard Alloy 48dp 24T U3425 Pinion Hard Alloy 48dp 25T ELECTRIC OFF ROAD CARS K178 TOP CAT KIT CHASSIS PARTS...

Page 23: ...er Softshell Black L 44inch G339M Jacket 3 Layer Softshell Black M 41inch G339S Jacket 3 Layer Softshell Black S 38inch G339XL Jacket 3 Layer Softshell Black XL 46inch G339XS Jacket 3 Layer Softshell...

Page 24: ...SK 100124 PC1080 Dual Charger SK 100131 D100 v2 AC DC Dual Balance Charger SK 100134 B6 nano Charger SK 200008 SKY RC 15V 4A AC Adapter CHARGERS AND DISCHARGERS Cont SK 200013 01 eFuel 30A 540W Power...

Page 25: ...R GLUE Perfect Super Glue for Rubber Tyres U4831 Aerial Tube Cap Black 6pk TOOLS AM110114 Allen Wrench 1 5x45mm AM110115 Allen Wrench 1 5x120mm AM110120 Allen Wrench 2 0x120mm AM110124 Allen Wrench 2...

Page 26: ...gger Rib 1 10 Silver pr U6817 Mini Pin 1 Rear 1 10 Yellow pr U6819 Mini Pin 1 Rear 1 10 Blue pr U6820 Mini Pin 1 Rear 1 10 Silver pr U6821 Mini Pin 2 Front 1 10 Yellow pr U6824 Mini Dart 1 10 Front 2W...

Page 27: ...No2 x 3 8 x 2 No4 x 3 8 x 2 No2 x 3 16 x 4 STEP 27 PAGE 26 STEP 28...

Page 28: ...e eccentrics to adjust the tension of the belt Turn the eccentric in the direction shown to tighten the belt Ensure both eccentrics are set the same The eccentric position shown is fully loose Tighter...

Page 29: ...No4 x 1 2 x 2 No4 x 3 8 x 2 No4 x 3 8 x 4 STEP 30 PAGE 28...

Page 30: ...edure as shown on page 18 STEP 22 A The nut is a tight fit Ensure it is pressed in fully The bearings are a tight fit Ensure they are pressed in fully M3 Nyloc Steel x 1 Pivot Ball x 1 M3 x 10 x 1 8 x...

Page 31: ...17 50mm e clip x 2 Pivot Ball x 1 M3 x 16 x 1 A STEP 33 PAGE 30...

Page 32: ...as shown on page 18 STEP 22 A The bearings are a tight fit Ensure they are pressed in fully The nut is a tight fit Ensure it is pressed in fully M3 Nyloc Steel x 1 M3 x 10 x 1 Pivot Ball x 1 8 x 16 x...

Page 33: ...e clip x 2 Pivot Ball x 1 M3 x 16 x 1 1 7 5 0 m m B STEP 35 PAGE 32 STEP 36...

Page 34: ...No4 x 3 8 x 2 M3 x 16 x 2 M3 Nut x 2 No4 x 1 2 x 4 STEP 37 PAGE 33 B STEP 37 A...

Page 35: ...ct the correct horn for your servo Servo NOT included Screw supplied with servo Set the position of the servo horn as shown IMPORTANT Make sure the servo is set to neutral before starting this step ST...

Page 36: ...No4 x 3 8 x 2 M3 Washer x 2 M3 x 3 x 1 Now tighten these two nuts and screws STEP 39 PAGE 35...

Page 37: ...e groove Make two shocks the same Grip shaft here when using regular pliers Be careful not to damage the polished shock rod 30 00m m 30 00m m SHOCK OIL e clip x 2 OIL SHOCK OIL SHOCK OIL SHOCK White W...

Page 38: ...own slowly and let the air bubbles rise to the top of the shock body before you continue Start with the 2mm spacer only Additional spacers may be added later Shock Shaft Pliers AM190031B Multi Shock C...

Page 39: ...sure the circlip is properly located in the groove Make two shocks the same Be careful not to damage the polished shock rod 22 00m m 22 00m m e clip x 2 OIL SHOCK OIL SHOCK OIL SHOCK OIL SHOCK Red O r...

Page 40: ...lacing the excess oil Fit the shock cap Shock should move up and down with smooth action Start with the 4mm spacer only Additional spacers may be added later Shock Shaft Pliers AM190031B Multi Shock C...

Page 41: ...ing screws and nuts to just remove clearance then undo them all 1 2 a turn This is to ensure the fixings do not affect the suspension movement Shock Bush x 2 White Washer 0 80 mm x 2 M3 Nyloc Steel x...

Page 42: ...Adjust the gear mesh as close as possible without binding Then tighten the screws Pinion NOT included Motor NOT included M3 Washer x 2 M3 x 8 x 2 No4 x 3 4 x 2 STEP 46 PAGE 41 B STEP 47 A...

Page 43: ...Step 48A and step 49A are for mounting shorty lipos Step 48B and step 49B are for mounting stick lipos M3 x 8 x 2 M3 x 8 x 1 B STEP 47 PAGE 42 STEP 48 A STEP 48 B...

Page 44: ...s 8 0 mm The kit contains regular and LCG LiPo posts The regualr posts are for Historic NiMh packs Without end caps and 2S shorty LiPo s The short Posts are for LCG LiPo s LCG LiPo Posts Regular LiPo...

Page 45: ...assembled Trim sticky foam pads to the wing as shown No4 x 3 8 x 1 1 5 x 11 8 x 2 Cut out the wing as shown before assembly IMPORTANT Drill or ream two 7 00mm holes for the wing mount buttons A STEP 5...

Page 46: ...Cut out the body as shown before assembly IMPORTANT Drill or ream a hole for the aerial post in the body Velcro Velcro A STEP 51 PAGE 45 B STEP 52...

Page 47: ...n damage to the wheel or axle IMPORTANT Ensure the drive dogs engage correctly and push the parts together firmly Make sure the driveshafts do not get pushed out of the bearings when pushing the parts...

Page 48: ...STEP 53 PAGE 47 B...
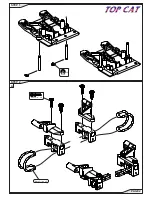
Page 49: ...n Conversion TOPCAT U7599 Alloy Front Rocker Conversion TOPCAT U7315 Titanium Turnbuckle 35mm Silver pr U7318 Titanium Turnbuckle 53mm Silver pr U7424 Alloy Lightweight LiPo Nut pr U7419 Titanium M4 x...

Page 50: ...m Large X Large XX Large XXX Large Schumacher Arrows Hoody G348XS G348S G348M G348L G348XL G348XXL G348XXXL Small Medium Large X Large XX Large Schumacher Arrows Zipped Hoody G349S G349M G349L G349XL...

Reviews: