background image

Summary of Contents for Craftsman 917.299852

Page 1: ...ing This Eqmpment RRFTSMRN 5 0 HP 17INCH TINE WIDTH REAR TINE TILLER WITH COUNTER ROTATING TINES Assembly Operation Customer Responsibilities Service and Adjustment Repair Parts ii iii ii ill m Sears...

Page 2: ...precautions when leaving the ma chine unattended Disengage the tines shift into neutral and stop the engine Before cleaning repairing or inspecting shut off the engineand make certain all moving parts...

Page 3: ...ntained lubricated and tuned up accordingto the operating and maintenance instructions in the owner s manual Sears will repair free of charge any defect in material or workmanship This Warranty does n...

Page 4: ...d Drive 16 Cooling System 14 Controls Choke 9 Throttle 9 Drive Tines 9 Cultivating 12 Customer Responsibilities Air Cleaner 14 Cooling System 14 Finish 15 Maintenance Schedule t3 Muffler L I _ 15 Oil...

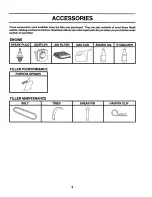
Page 5: ...ts Catalog and Service Centers Most Sears Stores can order repair parts for you when you providethe model number of your tiller ENGINE SPARK PLUG MUFFLER AIR FILTER IIIIII I GAS CAN ii iii ENGINE OIL...

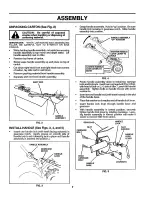
Page 6: ...and left hand L H sides ofyour tiller are determinedfromthe operator spositionwhile standing behind tiller LEFT FRONT RIGHT OPERATOR S POSITION FIG 1 i i rIIIIII CONTENTS OF HARDWARE PACK 2 Handle Loc...

Page 7: ...id in keeping lock in place untilhandle assembly is lowered into position HANDLE ASSEMBLY Grasp handle assembly Holdin up position Be sure handle lockremains in geamase notch Slide handle assembly int...

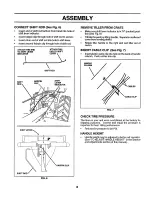
Page 8: ...e sure shift lever indicator is in N neutral posi tion See Fig 6 Tilt tiller forward by lifting handle Separate cardboard cover from leveling shield Rotate tiller handle to the right and pull tiller o...

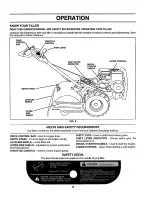
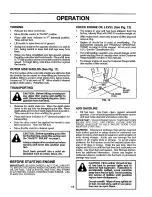
Page 9: ...REMENTS Our tillers conform to the safety standards of the American National Standards Institute DRIVE CONTROL BAR Used to engage tines DEPTH STAKE Controls depth at whichtillerwill dig LEVELING SHIEL...

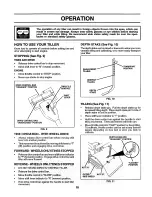
Page 10: ...ntrol bar FORWARD WHEELS ONLY TINES STOPPED Release drivecontrol bar and move shift lever indicator to F forward position Engage drive control bar and tiller will move forward REVERSE WHEELS ONLY TINE...

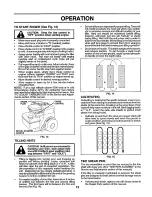
Page 11: ...ROVED CLEAN COVERED CONTA NERS USE CLEAN FILL FUNNELS CHECK ENGINE OIL LEVEL See Fig 12 The engine in your unit has been shipped from the factory already filledwith SAE 30 summer weight oil With engin...

Page 12: ...visableto tillthe Soilat the endof the growing season to further condition the soil For easier handlingof your tiller leave about 8 inches of untilled soil between the first and second tilling passes...

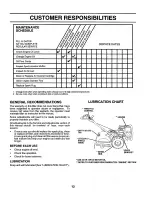
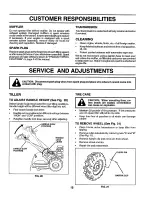
Page 13: ...ue from the warranty the operator must maintain tille r as instructed in this manual Some adjustments wilt need to be made periodically to properly maintain your tiller All adjustments in the Service...

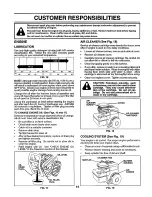
Page 14: ...ication SG Be sure tiller is on level surface Oil will drain more freely when warm Catch oil in a suitable container Remove drain plug Tip tiller forward to drain oil After oil has drained completely...

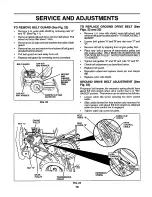
Page 15: ...covered to keep water out Water inenginecan result in a shortened engine life AND ADJUSTMENTS i i ii ii i lUlll JJ i ii i iJ J ii i i i _ AUTION Disconnect spark plug wires from spark plug and place...

Page 16: ...sonuts C and Remove old belt by slipping from engine pulley first Place new belt in groove of transmission pulley and into engine pulley BELT MUST BE IN GROOVE ON TOP OF IDLER PULLEY NOTE POSITION OF...

Page 17: ...eplaced NEW TiNE WORN TiNE I FIG 24 To maintain the superb tilling performance of this machine the tines should be checked for sharpness wear and bending particularlythetines which are next to the tra...

Page 18: ...rol cable is adjusted properly see above With engine off turn idle needle valve in clockwise closing it finger tight and then turn valve out counter clockwise 1 1 2 turns FINAL SETTING Start engine an...

Page 19: ...Drain the fuel tank Start the engine and let it run until the fuel lines and carburetor are empty Never use engine or carburetor cleaner products inthe fuel tank or permanent damage may occur Use fre...

Page 20: ...buretor out of adjustment t 2 4 5 6 7 8 9 1 Fillfuel tank See 3 0START ENGtNE in Operationsect on Waitseveralminutesbefore attempt ng to start Replaceair cleanercartridge Drainfue tank andcarburetor a...

Page 21: ...7 19131611 109228X Handle Shift Grommet Rubber Rod Shift Bolt Carriage 3 8 16 x I Gr 5 Lock Handle Nut Centerlock 3 8 16 Washer 13 32 x t x 11 Ga Lever Lock Handle KEY NO 21 22 23 24 25 26 27 28 29 3O...

Page 22: ...sher Lock 1 4 Nut Hex 114 20 Screw Set Hex 5 16 18 x 3 8 Spacer Split 0 327 x 0 42 x 2 68 Washer 11 32x 11 16x 16Ga Sheave Transmission Nut Hex 5 16 18 Spacer Split 0 327 x 0 42 x 1 75 Key Square 3 16...

Page 23: ...a Bolt Hex 5 16 18 x 3 4 Bracket Reinforcment Bolt Hex 5 16 18 x 2 Counter Weight R H Washer Lock 3 8 Nut He 3 8 16 Bolt Hex 5 16 18x 1 1 2 Clip Hairpin Rivet Drilled 23 KEY NO 13 14 15 I PART NO 5015...

Page 24: ...KEY PART NO NO 26 102128X 27 102100X 28 106390X 29 102134X 30 124458 31 102t06X 32 106388X 33 102121X 34 102112X 35 102101X 36 137300 37 4422J 38 137301 39 105345X 40 105346X 41 8358J 42 4220R 43 1061...

Page 25: ...Hex 5 16 18 Washer Lock 5 16 Bolt Carriage 5 16 18 x 1 1 4 Bracket ShieldTine Shield Side Outer R H Nut Hex 1 4 20 Washer Lock 1 4 Bott Carriage 1 4 20 x 1 1 4 Gr 5 KEY PART DESCRIPTION NO NO 19 1027...

Page 26: ...7 DESCRIPTION Tine Outer L H Pin Shear Tine Inner L H Clip Hairpin Assembly Hub and Plate L H Nut Hex 3 8 24 Washer Lock 3 8 KEY PART DESCRIPTION NO NO 8 74610616 Bolt Hex 3 8 24x 1 9 4460J Tine Outer...

Page 27: ...IR PARTS 5 HP 17 TILLER MODEL NUMBER 917 299852 ENGINE BRIGGS STRATTON MODEL NUMBER 135202 TYPE NO 0145 01 H 307 613 15 10 529 528 14 7 k REQUIRES SPECLALTOOLS TO INSTALL SEE REPAIR INSTRUCTION MANUAL...

Page 28: ...REPAIR PARTS 5 HP 17 TILLER MODEL NUMBER 917 299852 ENGINE BRIGGS STRATTON MODEL NUMBER 135202 TYPE NO 0145 0i _ i 118 124 J 394 432 _ 433 611 m _969 467 8 Ol 2 7 621 224 204 223 28...

Page 29: ...17 299852 ENGINE BRIGGS STRATTON MODEL NUMBER 135202 TYPE NO 0145 01 334 200 3o REQUIRES SPECIAL TOOLS TO INSTALL SEE REPAIR INSTRUCTION MANUAL 23 7a 2_ 37 307 332 121 CARBURETOR OVERHAUL KIT 191 163...

Page 30: ...Rewind Starter Pulley Rewind Starter Spring Rewind Starter Rope Rewind Starter Cut to Required Length Insert Starter Handle Handle Rewind Starter Screw Housing Mounting Washer Washer Screen Rotating...

Page 31: ...ex Head Shoulder Pin Cotter Retainer E Ring Crank Governor Switch Stop Washer Throttle Shaft Foam Elbow Spark Plug KEY PART NO NO DESCRIPTION 676 679 680 741 851 869 870 871 916 966 967 968 969 971 98...

Page 32: ...may be ordered from any Sears Roebuck and Co Service Center and most Retail Stores WHEN ORDERING REPAIR PARTS ALWAYS GIVE THE FOLLOW ING INFORMATION PRODUCT REAR TINE TILLER MODEL NUMBER 917 299852 EN...

Reviews: