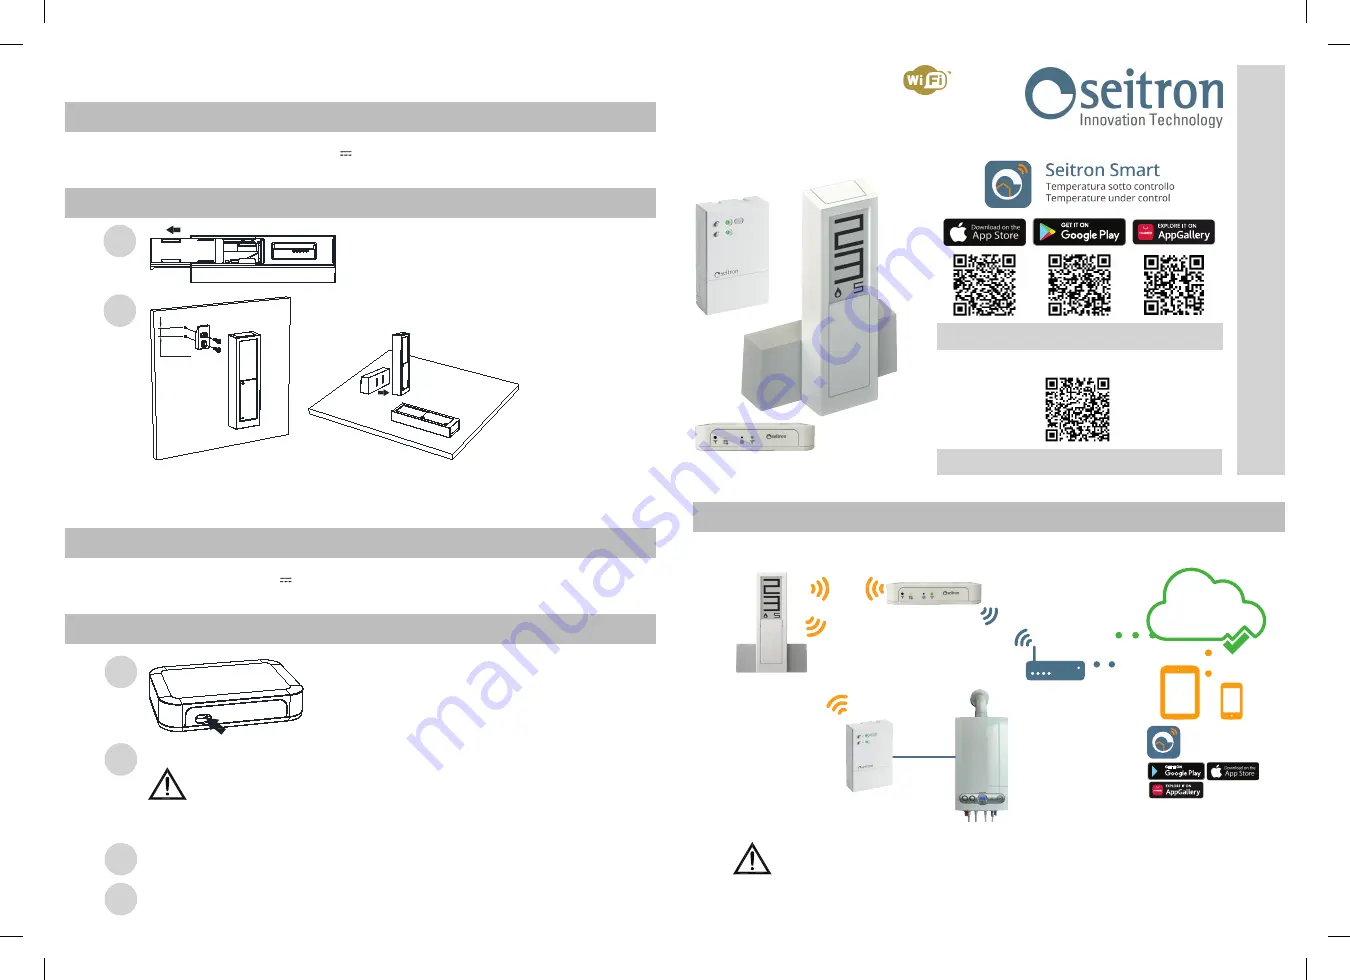
LOGIC SYSTEM DIAGRAM
Quick guide
HYGGE HOME
Programmable thermostat radio controlled Kit
Weekly programmable
INSTALLATION
INSTALLATION
Take off the battery compartment cover and correctly insert
the featured batteries (
according to the correct polarity
).
The Hygge programmable thermostat can be installed on a wall or it can be
put on a flat horizontal surface (e.g. a table) with or without the provided
magnetic stand.
Connect the provided power adapter, on the back of the device.
The IoT Gateway is only used stable on a flat surface.
WARNING
Before placing the device on its final position, make sure that the WiFi signal is present and that the device
receives the radio signals transmitted by the Hygge programmable thermostat correctly.
2
Download the
Seitron Smart app
.
3
Start the App, sign in
as a new user and make the Login by entering your email and password.
Then complete the configuration of the IOT GATEWAY.
Hygge
Hygge Way
230Vac
DRR32M
230Vac
CLOUD
ROUTER
WARNING
THE DEVICES
INSIDE THIS KIT
ARE FACTORY PRE-MATCHED
: ONCE THE MECHANICAL
INSTALLATION IS COMPLETE, THEY ARE READY TO USE.
Temperature under control
Seitron Smart
TECHNICAL FEATURES
Power supply:
Battery 2x1.5V
size AAA.
Software class:
A
Size:
78x125x30,5 mm (LxHxD)
Thermoregulation class:
I
ELECTRONIC PROGRAMMABLE THERMOSTAT HYGGE
GATEWAY HYGGE WAY
TECHNICAL FEATURES
Power supply:
5V
through power grid plug
Software class:
A
Size:
78x125x30,5 mm (LxHxD)
16mm
1
2
1
WIST02960ESE 035449 281020
App Android and iOS for Smartphone
Go to www.seitron.com and download the complete manual
4