background image

R

ı

semcom


Designer - Developer - Producer

www.tfsem.com

TF - Smart Veranda & Carport Assembly

Please Read Before Installat on

Summary of Contents for Transpaforza Canopies Smart Veranda & Carport

Page 1: ...R ısemcom Designer Developer Producer www tfsem com TF Smart Veranda Carport Assembly Please Read Before Installat on ...

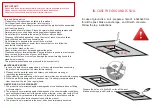
Page 2: ...n roof can damage the carport mak ng t unsafe to stand below or nearby Th s product was des gned and produced to be a carport only 40 cm 40 cm 40 cm Concrete MAINTENANCE NOTES 1 In case of a defect ve or damaged part or for any other quest ons concern ng the product please contact the manufacturer d rectly 2 Please have the parts l st and part numbers on hand when order ng or request ng replacemen...

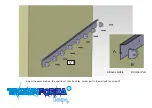
Page 3: ...R Adjust the eaves profile w th a sp r t level then fix all the holder part to the wall w th the screw V1 A B A Eaves profile B Holder Part V1 ...

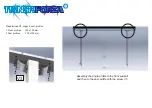
Page 4: ...R Preparat ons Of support post profiles 1 Front profiles 100 x100 mm 2 Post profiles 100 x100 mm Assembly the angle profile to the front support and then to the post profile w th the screw V3 V3 ...

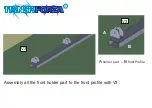
Page 5: ...R Assembly all the front holder part to the front profile w th V3 A B A holder part B front Profile V3 V3 ...

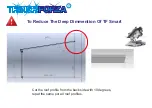
Page 6: ...R To Reduce The Deep D mment on Of TF Smart Cut the roof profile from the back s de w th 10 degrees repat the same por all roof profiles ...

Page 7: ...mum 20 cm Open a hole in the floor 20 cm with bit dirl 15mm and screw V6 to the ground Screw the foot bases to the post profile with screw V 16 IN CASE THE GROUND IS SOIL In case of ground s a so l prepare a hole of 40x40x40 cm for all the post Make a anchorage and fill w th concrete Follow the top nstract ons V6 V16 V8 ...

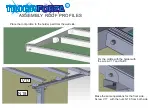
Page 8: ...ES R Place the roof profile to the holder part from the wall s de F x the profile w th the holder w th the screw V 17 and Nut18 Make the same operat ons for the front s de Screw V17 w th the nuts N 18 from both s de N18 V17 ...

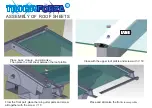
Page 9: ...l con ze Then place the roof sheet between the roof profile Close w th the upper roof profile and screw w th V 19 From the front part place the ra n gutter parts and screw all together w th the screw V 10 Place and s l con ze the front closure profile V 19 ...

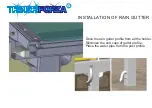
Page 10: ...R Dr ve the ra n gutter profile from all the holder S l con ze the end cups of gutter profile Place the water p pe from the post profile INSTALLATION OF RAIN GUTTER ...

Reviews: