background image

This document has been published to be used for
after sales service only.
The contents are subject to change without notice.

Parts marked with “

“ are important for maintaining the safety of the set. 

Be sure to replace these parts with specified ones for maintaining the safety and performance of the set.

SHARP CORPORATION

SERVICE HANDBOOK

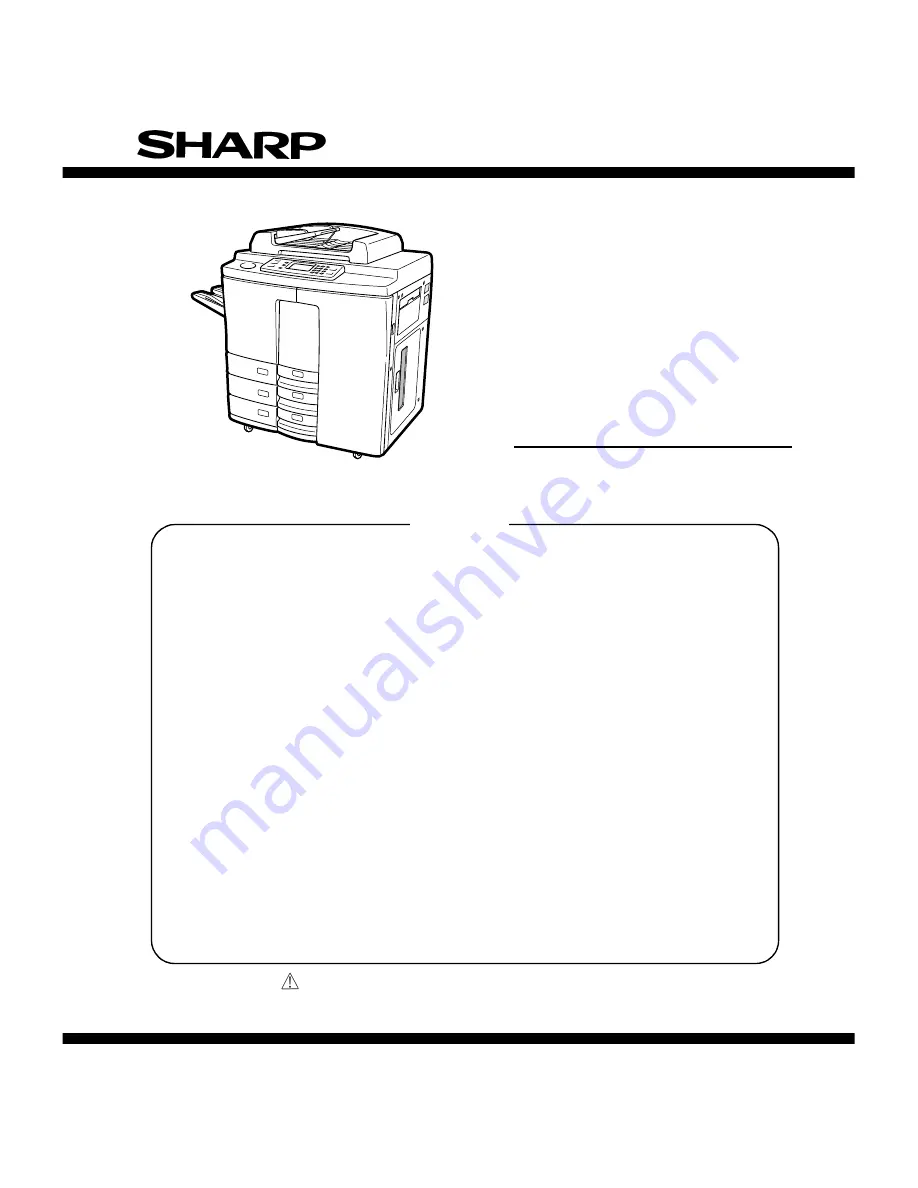
DIGITAL COPIER

MODEL

AR-650

[ 1 ]  ADJUSTMENT . . . . . . . . . . . . . . . . . . . . . . . . . . . . . . . . . . . . . 1 - 1

[ 2 ]  PERIODICAL MAINTENANCE . . . . . . . . . . . . . . . . . . . . . . . . . 2 - 1

[ 3 ]  PRECAUTIONS FOR STRONG AND HANDLING SUPPLIES  . .  3 - 1

[ 4 ]  TROUBLESHOOTING  . . . . . . . . . . . . . . . . . . . . . . . . . . . . . . . 4 - 1

[ 5 ]  INSTALLATION INSTRUCTIONS

FOR FIRMWARE UPDATE THROUGH PC  . . . . . . . . . . . . . . . 5 - 1

[ 6 ]  MANUAL FOR FIRMWARE DOWNLOAD. . . . . . . . . . . . . . . . . 6 - 1

[ 7 ]  HARNESS WIRING DIAGRAMS. . . . . . . . . . . . . . . . . . . . . . . . 7 - 1

CODE : 00ZAR650//H1E

CONTENTS

Summary of Contents for AR-650

Page 1: ...e parts with specified ones for maintaining the safety and performance of the set SHARP CORPORATION SERVICE HANDBOOK DIGITAL COPIER MODEL AR 650 1 ADJUSTMENT 1 1 2 PERIODICAL MAINTENANCE 2 1 3 PRECAUTIONS FOR STRONG AND HANDLING SUPPLIES 3 1 4 TROUBLESHOOTING 4 1 5 INSTALLATION INSTRUCTIONS FOR FIRMWARE UPDATE THROUGH PC 5 1 6 MANUAL FOR FIRMWARE DOWNLOAD 6 1 7 HARNESS WIRING DIAGRAMS 7 1 CODE 00Z...

Page 2: ...during service Be sure not to touch high temperature sections such as the exposure lamp the fuser unit the damp heater and their periphery Be sure not to touch high voltage sections such as the chargers the transfer belt and the high voltage transformer Be sure not to touch rotating operating sections such as gears belts pulleys fan etc When servicing the machines with the main switch turned on be...

Page 3: ...rong places 7 Basically the machine should not be operated with any parts removed or disassembled 8 Precautions Against Static Electricity The PC board must be stored in an anti electrostatic bag and handled carefully using a wrist band because the ICs on it may become damaged due to static electricity Caution Before using the wrist band pull out the power cord plug of the copier and make sure tha...

Page 4: ...STMENT 2 PERIODICAL MAINTENANCE 3 PRECAUTIONS FOR STORING HANDLING SUPPLIES 4 TROUBLESHOOTING 5 INSTALLATION INSTRUCTIONS FOR FIRMWARE UPDATE THROUGH PC 6 MANUAL FOR FIRMWARE DOWNLOAD 7 HARNESSWIRING DIAGRAMS ...

Page 5: ...on 1 56 1 10 High Voltage Adjustment 1 57 1 11 Installation of Carriage Drive Wire 1 62 1 11 1 Wire tension adjustment 1 62 1 11 2 Adjustment of carriage 1 and carriage 2 1 62 1 11 3 Carriage drive wire assembling 1 63 1 12 Lens Unit 1 65 1 12 1 Adjusting the lens magnification 1 66 1 13 Adjusting Horizontal Deviation Caused by Paper Feed 1 68 1 14 Changing the Paper Size 1 69 1 14 1 LCF paper siz...

Page 6: ...or 400k 2 14 2 5 Jig List 2 15 3 PRECAUTIONS FOR STORING AND HANDLING SUPPLIES 3 1 3 1 Precautions for Storing Supplies 3 1 3 2 Checking and Cleaning the OPC Drum 3 1 3 3 Checking and Cleaning the Drum Cleaning Blade Transfer Belt Cleaning Blade 3 2 3 4 Checking and Cleaning the Heat Roller Cleaning Roller 1 2 3 4 3 3 3 5 Checking and Cleaning the Upper and Lower Heat Rollers 3 3 3 6 Checking and ...

Page 7: ...king 5 6 5 3 3 Using New Connection 5 8 5 4 Installation of FTP Server 5 12 6 MANUAL FOR FIRMWARE DOWNLOAD 6 1 3 9 Mode operation 6 1 6 1 Outline 6 1 6 2 Preparation of PC 6 1 6 2 1 Software Installation 6 1 6 2 2 Preparation of Updated Files 6 2 6 2 3 Connection between Copier and PC 6 3 6 3 Download Operation 6 4 6 4 Screen Details 6 10 7 HARNESS WIRING DIAGRAMS 7 1 7 1 AC Wire Harness 7 1 7 2 D...

Page 8: ...E32 During middle cassette feed E33 During lower cassette feed PFP transport jam inside the PFP E34 During upper cassette feed E35 During middle cassette feed E36 During lower cassette feed Copier front cover is opened during copying Exit jam processing cover is opened during copying ADU RGT non arrival ADU transport TR1 non arrival ADU transport TR2 non arrival PFP upper cassette RGT non arrival ...

Page 9: ...is abnormal LCF tray is abnormal Peak detection error Home switch does not turn OFF Home switch does not turn ON Scanner disconnection detection Charger cleaning operation error Transfer belt operation error Drum thermistor disconnection Brush motor lock error Auger motor lock error Abnormal thermistor or heater disconnection at power ON Warming up mode after disconnection judgment or abnormal the...

Page 10: ...canning tap amount measurement error Primary scanning inter page compensation error Laser initialize time out error Transport motor is abnormal Exit motor is abnormal Tray elevation motor is abnormal Alignment motor is abnormal Staple motor is abnormal Staple unit shift motor is abnormal Stacking sensor is abnormal Backup RAM data is abnormal Saddle thrust motor is abnormal Saddle front staple mot...

Page 11: ... duplex or two sided duplex the install the Duplexer message is displayed and printing is not possible If the mode other than the above the Duplexer is not used is selected the operation can be normally accepted 3 During C15 16 17 error codes If a cassette in which an error has occurred is selected The Add Paper message is displayed even if the sheet is set and copying can be performed when anothe...

Page 12: ...ze code 0 Non select 1 A5 R 2 ST R 3 LT 4 A4 5 B5 R 6 LT R 7 A4 R 8 OTHER UNIV 9 B5 A FOL COM B LG C B4 D LD E A3 F 13 LG G 8 5 8 5 C Sort mode Staple mode 0 Non select 1 Group 2 Sort 7 Staple Front 8 Staple 2 places 9 Staple Rear A Saddle stetch D DF mode 0 Not used 1 AUTO FEED SADF 2 STACK FEED E APS AMS mode 0 Non select 1 APS 2 AMS F Duplex mode 0 Non select 1 Book 2 Two sided Single sided 4 T...

Page 13: ... 4 PWR 0 5 PWR 0 8 PWR 9 START PWR 6 START PWR All LEDs on the control panel are lit and all pixels on the LCD light and go out Input output signals are checked Test print Adjustment of items System switchover and setting of each priority mode PM counter etc Printing of 05 08 code data lists Mode for executing auto toner adjustment and drum counter clear C or 0 9 0 9 0 9 0 9 0 9 PWR OFF PWR OFF 10...

Page 14: ...0 1 All the displays on the control panel lit 0 3 0 5 0 8 Setting mode Adjustment mode Test mode 1 When the copier is in the adjustment mode which you entered by turning the power switch ON while pressing keys 0 and 5 simultaneously pressing keys 0 and 9 simultaneously will set the copier to the standby mode In this standby mode only can the adjustment mode be accessed repeatedly by simply enterin...

Page 15: ...ON PFP M tray up SW ON PFP L tray up SW ON Exit switch ON Manual feed paper width switch 3 OFF LCF switch Disconnection ADU end switch ON Toner full switch ON Manual feed paper width switch 2 OFF LCF tray down key OFF ADU aligning switch ON PFP upper cassette SW ON Manual feed paper width switch 1 OFF Manual feed switch OFF ADU side switch ON PFP middle cassette SW ON ADU connection Disconnection ...

Page 16: ...ADF exit sensor ON Main charger cleaning switch OFF Toner supply cover switch Open Transfer belt contact switch OFF ADF connection Disconnection APS sensor 4 OFF ADF timing sensor ON Exit cover switch Open Toner empty switch OFF Transfer belt separation switch OFF Scanner home SW OFF ADF aligning sensor ON Icon Key Auto toner sensor connection Disconnection APS sensor 1 OFF ADF cover Open Icons on...

Page 17: ...l counter counts 2 219 Reversal fan ON OFF 3 220 ADU transport clutch ON OFF 3 221 ADU aligning clutch ON OFF 3 222 ADU feed clutch ON OFF 3 223 ADU stack clutch ON OFF 3 226 PFP upper feed clutch ON OFF 3 227 PFP middle feed clutch ON OFF 3 228 PFP lower feed clutch ON OFF 3 229 PFP upper aligning feed clutch ON OFF 3 230 PFP middle aligning feed clutch ON OFF 3 231 PFP lower aligning feed clutch...

Page 18: ...3 266 SLG PC board cooling fan motor 3 ON OFF 3 270 LCF feed motor ON OFF 3 271 LCF tray motor UP DOWN 2 272 ADU side guide motor ON reciprocating 2 273 ADU end guide motor ON reciprocating 2 274 ADU exit switching gate solenoid ON OFF 3 275 ADU paper holding gate solenoid ON OFF 2 277 ADU reverse clutch ON OFF 3 278 PFP upper tray motor UP DOWN 2 279 PFP middle tray motor UP DOWN 2 280 PFP lower ...

Page 19: ...p code START Operation OFF 0 9 Warm up 0 3 PWR START Group 2 0 3 PWR Code START Operation One way C Test mode standby 0 9 Warm up Group 3 0 9 0 3 PWR Code START Operation ON START Operation OFF C Test mode standby Warm up Group 4 0 3 PWR Code START PWR OFF ...

Page 20: ...arm up Operation Test print START Code 0 4 PWR Note Though errors are displayed when it occurs recovery is not carried out This is recovered by turning the power OFF then ON again Code ASIC Test pattern type Remarks 111 SH Primary scanning 33 gradations error diffusion 113 SH Secondary scanning 33 gradations error diffusion 142 POPS 2 dots grid pattern 10mm Pitch ...

Page 21: ...for measurement Adjust Photo by measuring the grid voltage output 210 1 Charge corona grid voltage adjustment Copier 93 0 255 6 Output is NOT available for measurement Set Text to the value set in code 210 0 210 2 Charge corona grid voltage adjustment Copier 93 0 255 6 Output is NOT available for measurement Set Photo to the value set in code 210 0 212 Charge corona grid voltage adjustment Printer...

Page 22: ...setting 80 95 All 1 0 2 6 335 3 Scanner acceleration curve setting 96 103 All 1 0 2 6 335 4 Scanner acceleration curve setting 104 190 All 1 0 2 6 335 5 Scanner acceleration curve setting 191 400 All 1 0 2 6 Key in code 335 press the START key key in the Sub code then press the START key Key in the value press the SET key to store or the CELAR key to reset A value of 2 or 4 indicates an error in t...

Page 23: ...ine 1 step is equal to approxi mately 1mm change Test copy can be made in 05 test mode The higher the value the more the original is fed towards the exit side of the machine 1 step is equal to approxi mately 1mm change Test copy cannot be made in 05 test mode Press 09 to enter normal copy mode and toggle back to 05 mode to adjust Perform RADF EEPROM Initialization when EEPROM RADF logic PWA or sen...

Page 24: ...djustment Printer 0 0 255 1 442 Bypass registration adjustment Image on the All 8 0 15 1 drum to the paper s leading edge 443 LCC registration adjustment Image on the All 15 0 40 1 drum to the paper s leading edge Test copy available while in the 05 Mode Always perform code 411 first then set the value of code 410 to the value set in code 411 When the value is increased by 1 the image on the drum ...

Page 25: ...at the main registration roller Paper length 229mm and less Key in Code 456 press the START key key in the Sub Code then press the START key Key in the value press SET key to store or the CLEAR key to reset 457 LCF paper alignment paper buckle at the All 16 0 31 1 main registration roller 458 Manual feed paper alignment paper buckle All 14 0 31 1 amount at he main registration roller 459 PFP upper...

Page 26: ... EMPTY condition LCF and Drawers Increasing the value by 1 increases the aligning paper buckle by 0 9mm Increasing the value by 1 increases the aligning paper buckle by 0 9mm In stacking of only a few sheets in the case of the following values only the end guide is moved towards the pickup roller compared with the standard pickup roller position If the paper is a large size than the standard one o...

Page 27: ...tor speed fine adjustment Copier 128 0 255 1 486 Fuser drive motor speed fine adjustment Printer 128 0 255 487 Transfer belt drive motor speed fine adjustment Copier 128 0 255 1 488 Transfer belt drive motor speed fine adjustment Printer 132 0 255 489 Pedestal drive motor speed fine adjustment Copier 128 0 255 1 490 Pedestal drive motor speed fine adjustment Printer 128 0 255 Perform the manual ad...

Page 28: ...510 Manual exposure fine adjustment for the Copier 12 0 255 1 darker setting Text 512 Automatic exposure fine adjustment Copier 128 0 255 1 Photo 514 Automatic exposure fine adjustment Copier 128 0 255 1 Text Photo 515 Automatic exposure fine adjustment Copier 128 0 255 1 Text Key in the value press the SET key to store or the CLEAR key to reset 580 Image mode automatic gamma adjustment for Copier...

Page 29: ...imum level do not enter values other than 1 for the right hand digit Left hand digit 1st digit entered 0 Default value is used 1 9 Increasing the value setting enhances the image sharpness Do not set to values other than these 1 11 21 31 41 51 61 71 81 91 Right hand digit 2nd digit entered 2 Photo fixed at the optimum level do not enter values other than 2 for the right hand digit Left hand digit ...

Page 30: ...ust C or CANCEL START Digital keys Code 0 5 PWR Group 3 0 9 Exit START Digital keys Code 0 5 PWR SET or INT Setting cannot be changed Group 4 0 9 Exit Automatic Adjustment START Digital keys Code 0 5 PWR Group 5 0 9 Exit E S Test print START When the output pattern selection is 1 Digital keys Adjust SET or INT Memorize Digital keys Outoput pattern selection Cassette keys Cassette selection 0 5 PWR...

Page 31: ...gle item Digital keys Code 0 5 PWR C To correct FC key is used for input Group 7 0 9 Exit UP or DOWN Adjust SET or INT Set to memory E S Test copy START C To correct Digital keys Enter setting item value START CANCEL CANCEL or C When there are multiple setting items for a single item Digital keys Code 0 5 PWR RESET To correct Group 8 0 9 Exit SET or INT Memorize START C Stop START Digital keys Cod...

Page 32: ...NT Set to memory C To correct Digital keys or Selectable icons Set or change a value START CANCEL Digital keys Code 0 8 PWR Group 2 0 9 Exit SET or INT Adjustment value cannot be changed START Digital keys Code 0 8 PWR Group 3 0 9 Exit Digital keys 1st setting SET or INT Set to memory C To correct START Digital keys Code 0 8 PWR START Digital keys 2nd setting CANCEL ...

Page 33: ...rgy Star Compliance 3 15 min 10 70 min 17 180 min 4 20 min 11 80 min 18 210 min 20 Others 5 25 min 12 90 min 19 240 min 6 30 min 13 100 min 20 Disabled 209 Timer for Print job start up All 1 1 10 1 to 10 Set number X 15 seconds 1 time from copy mode 220 Message display language All 0 0 2 1 priority 223 Copy or Printer priority All 0 0 1 1 mode 224 Bypass paper size selection All 0 255 Undefined 1 ...

Page 34: ...counter All 0 0 99999999 371 PFP lower counter All 0 0 99999999 372 Duplexer counter All 0 0 99999999 374 RADF original counter All 0 0 99999999 375 Copy job counter All 0 0 99999999 376 Pint job counter All 0 0 99999999 When setting the Universal paper size remember that the size entered here will limit the maximum size paper the customer can load in a drawer when the Universal paper size is sele...

Page 35: ...em with the HDD occurs an error is recorded in the memory at code 390 When too many errors occur it is then necessary to replace the HDD When there is a problem communicating to the HDD through the machine interfaces an error is recorded in memory in code When this occurs often the machine interface cables and PWA s that provide communications to the HDD must be checked and replaced as necessary 0...

Page 36: ...Disabled 1 Enabled 0 Non standard Machine will not stop and prompt operator to select copy size when non standard originals are used 1 Standard Machine will stop and prompt operator to select copy size when non standard originals are used 0 Disabled 1 Enabled 0 LT A4 1 LCC 2 Upper drawer 3 Middle drawer 4 Lower drawer 0 OFF 1 Normal 3 Extended when 1 is set a paper source becomes empty and the sam...

Page 37: ...een the FROM on the SYS Board and MROM on the LGC Board is wrong this code should be used for preventing operation error Note Production before March 2000 Default 0 Old version Production after April 2000 Default 1 New version 0 Automatic exposure 1 Manual exposure 0 Text Photo 1 Photo 2 Text 0 Disabled 1 Enabled How to set the Electronic Access Codes is provided in the separate operators manual t...

Page 38: ...0 HDD formatting Hard Disk All 2 4 1 Drive Perform the formatting when the HDD is replaced or the data has been corrupted 691 HDD Type display All 0 3 2 08 MODE IMAGE ALLOWABLE PROCE CODE NAME MODE DEFAULT INPUT CONTENTS DURE MODE VALUES GROUP 0 Disabled 1 Enabled 0 Enabled 1 Disabled 0 All menu operations allowed 1 All menu operations prohibited 2 Sheet cassette selectable 0 Disabled 1 Enabled 0 ...

Page 39: ...Mode 08 449 Due to the error of an optical component such as the galvanomirror or an error caused by the passing time of the housing if the beam positioning adjustment is not finished correctly an temporary coun termeasure will be brought about and a mode in which printing can continue to operate be applied if the HSYNK is not taken printing is impossible If there is an error in the galvanomirror ...

Page 40: ... To correct C R 8 START PWR E S Memorizing E S Memorizing ID code Counter value 7 digits 0525 displayed displayed Input an ID code of four figures ex 0525 C1 HELP START Warm up displayed Input next ID Up to 120 ID codes can be registered Procedure to change ID codes C2 C To cancel START Warm up HELP To skip COPY START Warm up START Warm up C2 R 8 START PWR E S Memorizing E S Memorizing START Warm ...

Page 41: ...wer switch ON while pressing 0 and 8 keys simultaneously 2 Make sure that the display indicates the system mode enter the code 690 and press the START key 3 Next input 2 and press the INT key 4 Wait appears on the display 5 When wait disappears turn the power switch OFF ...

Page 42: ... Indicates the control data value of the auto toner sensor output Use the Up Down icon to change the numerical values B The above display indicates an output voltage of 2 30V C Indicates the latest adjustment value The drum developer unit etc are operating at this time 4 After approximately two minutes the B on the message display will automatically start changing 230 128 200 TEST MODE WAIT A3 128...

Page 43: ...onship between the icon and the numerical values in A and B is as shown below Key used A value B value Up icon Increase Increase Down icon Decrease Decrease 8 Press the SET icon or the INTERRUPT key The drum developer unit etc will stop operating and the following will be displayed 0 9 SET or INT 100 TEST MODE READY A3 A 100 A4 1 9 Simultaneously press 0 and 9 to exit the adjustment mode ...

Page 44: ...t position 411 410 c Secondary scanning reproduction ratio Transfer belt speed adjustment Printer 488 d Secondary scanning position Laser write start position 443 444 442 3 Scanner unit adjustment a Image distortion b Primary scanning reproduction ratio Polygonal motor 600 dpi PPC 405 c Primary scanning position CCD primary scanning deviation 306 d Secondary scanning reproduction ratio Scanner sec...

Page 45: ...splay message 100 100 A3 A XXX 0 5 PWR START ENERGY SAVER Test copy If the test print does not satisfy the specifi cations return to and repeat the adjustment 0 9 Digital Keys Digital Keys Enter code ZZZ YYY 100 A3 A 100 A3 A 100 A3 A A3 Enter adjustment value used to correct value Values ZZZ are stored in BC RAM in place of YYY 1 Adjustment mode canceled 1 Code becomes xxx according to the entere...

Page 46: ... used for the Duplexer LCF and manual feed Note When frequent paper jams occur near the aligning roller caused by using special thin paper other than that specified the aligning value can be changed reduced as a measure However when the aligning value is reduced excessively this may cause the deviation of leading edge registra tion Therefore make sure that no deviation occurs while adjusting the v...

Page 47: ...5 mm adjust using the following steps 1 401 START Set the value INT key or LCD SET icon Carry out the same in the following 1 E S 1 An increase in the value makes the reproduction scale distance A longer 0 05mm STEP Notes 1 Before making a test print make sure that 100 A is appeared on the top of the message display after the SET icon or the INT key is pressed and then make a test print 2 The effe...

Page 48: ...et the value SET INT 1 E S 1 An increase in the value makes the distance B longer in increments of 0 0423 mm step 2 0 5 PWR ON 410 START Value set in 1 SET INT PWR OFF Notes 1 Before making a test print make sure that 100 A is appeared on the top of the message display after the SET icon or the INT key is pressed and then make a test print or turn PWR OFF 2 The effective adjustment value is within...

Page 49: ...owing steps to make the adjustment 1 488 START Set the value SET or INT 1 E S 1 An increase in the value makes the reproduction scale distance A longer in increments of 0 25mm step Notes 1 Before making a test print make sure that 100 A is appeared on the top of the message display after the SET icon or the INT key is pressed and then make a test print 2 The effective adjustment value is within th...

Page 50: ...the blank space distance B shorter in increments of 0 5 mm STEP Print movement direction B Notes 1 Before making a test print make sure that 100 A is appeared on the top of the message display after the SET icon or the INT key is pressed and then make a test print 2 The effective adjustment value is within the range 1 to 15 The default adjustment value is 8 The adjustment range is 0 to 40 for code...

Page 51: ... the mirror 2 adjustment screw CW Step 2 In case of C Loosen the mirror 1 adjustment screw CCW In case of D Thighten the mirror 1 adjustment screw CW 3 Coat with screw lock after the image dis tortion adjustment Image Direction of the copy paper movement Direction of the copy paper movement Step 1 Step 2 A B C D Step 1 Step 2 Coat so that screw periphery rises up slightly Detailed View of Screw Lo...

Page 52: ...the front side 2 In case of A Move the stopper holder in the direc tion indicated by In case of B Move the stopper holder in the direc tion indicated by Paper Image A B Direction of the copy paper movement Direction of the copy paper movement Note Each can contains 1kg agent so you should divide up the amount into smaller containers for easy operation Part Name BOND 1401E Screw locking agent ...

Page 53: ...the scale is 200 0 5 mm 1 405 START Adjust by digital keys SET INT E S 1 Test copy An increase in the value corresponds to an increase in the division of the reproduction scale in increments of 0 1mm step Notes 1 Before making a test print make sure that 100 A is appeared on the top of the message dispaly after the SET icon or the INT key is pressed and then make a test copy 2 The effective adjust...

Page 54: ...distance A which should be 100 1 mm from the position copied to the edge of the paper using the following steps 1 306 START Adjust by digital keys SET INT E S 1 Test copy When the value increases the image moves toward front side of the paper in increments of 0 169 mm step Notes 1 Before making a test copy make sure that 100 A is appeared on the top of the message display after the SET icon or the...

Page 55: ...t by digital keys SET INT E S 1 Test copy When the value increases reproduction ratio decreases intervals of the scale become nar rower in increments of 0 1mm step Notes 1 Before making a test copy make sure that 100 A is appeared on the top of the message display after the SET icon or the INT key is pressed and then make a test print 2 The effective adjustment value is within the range 0 to 255 T...

Page 56: ...djust so that the scale on the copied paper starts from the 2 mm 0 5 mm position 1 305 START Adjust by digital keys SET or INT E S 1 Test copy When the value increases the image moves to the leading edge in increments of 0 22 mm STEP Notes 1 Before making a test copy make sure that 100 A is appeared on the top of the message display unit after the SET icon or the INT key is pressed and then make a...

Page 57: ...d exactly at 3 0 5 mm 1 430 START Adjust by digital keys SET or INT E S 1 Test copy When the value increases the image moves to the leading edge 0 0423 mm STEP Notes 1 Before making a test copy make sure that 100 A is appeared on the top of the message display after the SET icon or the INT key is pressed and then make a test copy 2 The effective adjustment value is within the range 0 to 255 The de...

Page 58: ...ffective adjustment value is within the range 0 to 255 The default adjustment value is 0 Copy movement direction 2mm g Bottom margin Follow the procedure below to make a test copy 0 5 PWR ON C E S 1 Make an A4 LT 100 test copy from LCF with the ADF open 2 Follow the procedure below to adjust so that the blank space at the trailing edge of the copy is adjusted exactly to 2 mm 0 5 mm 1 433 START Adj...

Page 59: ...s while comparing the image obtained in the test copy with the currently entered allowable values Keys used in operation Display messages 100 100 A3 A XXX 0 5 PWR START SET or INTERRUPT ENERGY SAVER Test copy Return to and repeat adjustment procedure 0 9 Digital Keys Digital Keys Enter code ZZZ YYY C 100 A3 A 100 A3 A 100 A3 A A3 Enter adjustment value use to correct value Values ZZZ are stored in...

Page 60: ... on the power switch with 0 5 2 Select A3 or LD paper for the output paper size 3 Press the 2 key and then ENERGY SAVER key One copy of the 33 gradation pattern is outputted 4 Confirm that there is no blank or line on the gradation pattern outputted in the above step 3 and the density changes gradually If there is any problem in the gradation pattern repeat the step 3 to output a gradation pattern...

Page 61: ...ct the casette 2 ENERGY SAVER Prints out the 33 gradation pattern Place the original C 100 A 100 580 100 A A Exit the adjustment mode Ends the adjustment Clear the adjustment error Return to to repeat adjustment TEST MODE WAIT WARMING UP COPYING TEST MODE WAIT TEST MODE 100 580 TEST MODE ERROR Normal Warming up Abnormal Clear using C key 1 1 ...

Page 62: ... 5 PWR START SET or INTERRUPT ENERGY SAVER Test copy Return to and repeat adjustment procedure 0 9 Digital Keys Digital Keys Enter code ZZZ YYY C 100 A3 A 100 A3 A A3 Enter adjustment value use to correct value Values ZZZ are stored in BC RAM in place of YYY 1 Exit the adjustment mode 1 The code XXX entered with digital keys is displayed Code No TEST MODE TEST MODE TEST MODE COPYING Entered adjust...

Page 63: ...Text 0 Default used same as set value 5 1 to 9 Slope correction The larger the setting the darker the image becomes Input procedure of the adjustment value is same as the 1 6 image density adjustment 1 9 Data Correction If the user wants to change the gamma curve adjust the gamma slope correction in adjustment mode 05 ...

Page 64: ...djustment Method Change the output by changing the bit states Input the BIT value of 210 0 2 3 3 1 4 4 4 5 1 1 1 Code 210 0 210 1 210 2 212 Mode PPC PPC PPC PRINT TEXT PHOTO Text Photo 720 5V Item Main charger grid voltage Developer bias output Image Mode Adjustment Value Adjustment Method Change the output by changing the bit states Input the BIT value of 205 0 2 3 3 4 4 4 5 Code 205 0 205 1 205 ...

Page 65: ... supply using the door switch jig and then make adjustment 2 Developer bias 1 Set the developer unit 2 Connect the digital tester as follows However a digital tester with an input resistance of 10 MΩ must be used Setting range 1000 VDC terminal Connect to upper magnet roller shaft on developer unit front side terminal Fix to frame earth 3 Start up the power supply using the door switch jig and mak...

Page 66: ...satisfies the value indicated in the table If you switch to another adjustment mode go to 0 9 Digital Keys Enter code 1 Exit adjustment mode 1 Code No Display Messages TEST MODE 100 A4 A TEST MODE YYY ZZZ A4 XXX TEST MODE Current adjustment value 2 Operation procedure Be sure to set the drum counter 08 401 to 0 when you have replaced the drum with a new one Regarding the main charger grid and deve...

Page 67: ...output voltage adjustment value 1 256 5V Up Down icon Adjust the Z Z Z value so that the adjustment value of the digital tester satisfies the value indicated in the table If you switch to another adjustment mode go to 0 9 Digital Keys Enter code START Digital Keys Enter code value after hyphen 1 Exit adjustment mode 1 100 A4 A TEST MODE YYY ZZZ Z Z Z A4 XXX TEST MODE Current adjustment value Value...

Page 68: ...alue after hyphen 1 Exit adjustment mode 1 100 A4 A TEST MODE YYY ZZZ Z Z Z A4 XXX TEST MODE Current adjustment value Value after hyphen 0 1 2 100 0 A4 A Code No Display messages TEST MODE A4 XXX TEST MODE Precautions During Developer Bias Adjustment If the entire image is foggy in spite of appropriate main charger grid voltage or toner density adjust the developer bias on the control panel lower ...

Page 69: ... 1 11 2 Adjustment of carriage 1 and carriage 2 1 Loosen the screws fixing carriage 1 2 screws front rear 1 screw each and 2 2 screws in front to the wire 2 While pressing carriage 2 against the feed side frame both A B tighten the screws fixing carriage 2 front side 3 Also while pressing carriages 1 and 2 against the feed side frame C D tighten the screws fixing carriage 1 Carriage 1 Carriage 2 F...

Page 70: ...e 2 Wind the wire to the each front and rear side pulleys Winding turns are 2 and 3 4 turns on the opposite to the boss side outside of the pulley 4 and 3 4 turn on the boss side inside After winding secure the wire with the wire holder jig Wire winding pulley Spherical terminal Hook Pulley Rear Spherical terminal Spherical terminal Pulley Front Boss Boss Spherical terminals Rear Wire winding pull...

Page 71: ...inding Wind the wire tightly to make it come into close contact with the pulley Wind the wire taking care not to leave any gap between the wraps 2 When the wire holder jig is installed do not slide or loosen the wound wire In full contact Example Front side Spherical terminal Pulley Wire holder jig Front side Rear side Wire holder jig ...

Page 72: ...t the lens unit Replace the entire unit with a new one Notes 1 Do not touch the screws paint lock 6pcs indicated with arrows below when replacing the lens unit 2 Take sufficient care when handling the unit not to hold the adjustment area Rear side Front side ...

Page 73: ...below to make adjustment so that the distance between each mark of both scales becomes equal Notes 3 After adjusting the lens magnification be sure to adjust the deviation in the CCD primary scanning direction Procedure 1 Remove the original glass lens cover 11 screws damp heater unit and lens shield bracket 2 screws 2 Screw in the 2 lens magnification adjustment pins into the oblong holes on the ...

Page 74: ... mm 0 3 1 6 mm 0 4 2 1 mm 0 5 2 6 mm 0 6 3 2 mm 0 7 3 7 mm 0 8 4 2 mm 0 9 4 8 mm 1 0 5 3 mm Notes 5 If the finer adjustment than that in the above is required refer to Polygonal motor 600 dpi PPC Adjutment 5 Re attach the lens cover and original glass make a copy and check the reproduction ratio 6 Tighten the 2 lens unit screws to fix in place 7 Remove the pins for adjusting the lens magnification...

Page 75: ...he rear side direction of arrow A When the center of the image moves to the front side Move the guide to the front side direction of arrow B Manual feed LCF feed Pedestal cassette feed Direction of paper move ment Center Front Direction of paper move ment Center Front Cassette guide A B B A A B Front side guide Rear side also shift in the same direction ...

Page 76: ...unit 2 Attach the stay guides to match the size of the paper used Note In case of B5 size The bracket must be fastened onto the LCF door cover by 2 screws only in the case of B5 size Bracket B5 LT A4 A4 LT B5 B5 LT A4 A4 LT B5 3 Change the cassette size on the control panel For details refer to the setting mode 08 item ...

Page 77: ...for each on the front and rear sides and fix the cassette side walls with the screws matched to the paper size marked on the cassette guide 3 Remove the back plate 1 screw and fix the back plate with the screws matched to the pa per size marked on the base frame 4 Slide the cassette size label on the right front of the cassette to upward to remove it 5 The cassette size label should be folded to d...

Page 78: ...usting screw B Duplexer horizontal deviation adjustment When the image on the double sided copy de viates horizontally even after adjustment A 1 Loosen the 2 screws for fixing the stack guide unit If the paper drifts toward either the front or the rear side move the stack guide unit toward the opposite side by the amount of the paper drift using the scales on the unit as a guide 2 After adjustment...

Page 79: ...y wider than that of other feeding operation 2mm exterior from both edges of the paper Depending on the mode the timing to switch the width guide position changes Thus make copies using always the above mode and procedure described in Supplementary of C to make precise horizontal deviation adjustment Expanded sectionl figure of sensor and lever from the paper feed direction OK Expanded sectionl fi...

Page 80: ...led first and the dowels on the rear side should be aligned Note Adjust the front rear side gears with the central gear The spring clutch may lock when the gear is operated So push the projection of the clutch unit to turn the gear 2 Align the projection on the clutch unit of the holding gate and fasten with an E ring as shown figure Note When it is fixed by an E ring be sure to check that the hol...

Page 81: ...pen the bypass feed unit Check below while it is opened 1 While the solenoid of the clutch unit is attracted armature is pushed turn the gear a limited small amount release the armature 2 Turn the gear in the direction A in the figure till the holding gate is stopped 3 When the holding gate is stopped check that B face and C or D face are roughly parallel B face flat face of holding gate C face en...

Page 82: ...r which is covering the feed unit two screws Replace it inside the copier 2 Start Duplex copying with the left front cover of the copier opened by using the door switch jig 3 Check the turning of the shaft S shown on the left side below figure of the ADU When shaft S turns two times e Normal When shaft S does not turn at all or only once e Poor turning Note1 To connect with the shaft S and the hol...

Page 83: ...r Pressure Normally the heat roller pressure need not be adjusted However it must be carried out when wrinkles frequently appear on copies made on plain paper Procedure 1 Make an A3 size copy entirely black with the ADF open 2 Turn the power switch OFF after copying is finished 3 Quickly open the front cover and draw out the belt transport unit 4 Insert the copy made in 1 into the fuser inlet guid...

Page 84: ...essure of the heat rollers by inserting spacers in the pressure springs 3 Carry out both 1 and 2 Perform this procedure in order 1 to 3 while confirming the effect and adverse influence of the adjust ment Procedure 1 Increase the preset temperature of the heat roller surface Change the heat roller preset temperature when the copier is ready by code 411 in setting mode 08 The default is 8 200 C and...

Page 85: ... means that the current force of 100kg can be increased to 115kg when a total of six spacers three on each side are inserted Notes 1 The spacers must be inserted under the spring as shown in the figure below 2 The same number of spacers must be inserted at the front and rear sides Skew occurs when a different number of spacers are inserted on the front and rear sides 3 Do not insert four or more s...

Page 86: ...g troubles occur Stain on the back side of the paper Fuser inlet jam Wrinkled paper 1 Move the screw fixing position to the oblong hole to make adjustment using the stamped mark as a guide Stamped mark Inlet guide 2 Adjust the gap between the inlet guide and the lower heat roller 0 4 gap 1 7 0 4 G a p 1 7 Lower heat roller Inlet guide ...

Page 87: ...e the test original face up in the tray press PRINT to make a copy Check that the copy isn t skew 3 If there is a skew loosen the two screws on right left hinges and adjust the position of RIGHT HINGE Repeat the procedure until the skew is rectified Note After the adjustment tighten the two screws of LEFT and RIGHT HINGE without fail LEFT HINGE Clockwise rotation CW CCW CW Counterclockwise rotatio...

Page 88: ...he test original on the original feed tray with the center line side facing up and align the side guides to the sides of the original 3 Press the START key to make a copy Fold the copy in half and check that the center line is in the center of the copy If it is not adjust the original feed tray until the center line is copied in the center After adjustment tighten the two screws securely to fasten...

Page 89: ...ent is completed press the 0 and 9 keys simultaneously to go into the normal copy mode 1 22 4 Adjustment of leading edge position for ADF at the Time of Reversing If the original fed from the ADF has not stopped in the preset position after reversing make adjustment using the following procedure 1 While pressing the 0 and 5 keys on the copier s control panel simultaneously turn on the power switch...

Page 90: ...agnetic catches adsorb to the metal plate in the state where the spacers L R and glass are in contact and then secure the belt unit with fixing screws Space between each spacer and the glass face shall be 0 5mm or less Glass face Fixing screws Metal plate Spacer R Spacer L Fixing screws Metal plate Magnetic catches ...

Page 91: ...eed roller the difference by the side of the front and rear is 0 2mm or less Adjust the gap between the separation mylar and the feed roller in the thrust direction by sliding the bracket to right and left so that the gap becomes 0 3mm or more see the view from B Bracket Screw Feed roller Separation plate A Screw Screw B Separation mylar 0 3 or more View from A 0 6 0 2 0 3 or more View from B deta...

Page 92: ...sary to initialize the EEPROM and adjust the sensor by adjustment mode 05 If the initialization and or adjustment is not performed errors paper jam etc may occur 2 Test mode The independent test modes below can be performed by test mode output check 03 Refer to the Service Manual for the PPC Pick up roller rotation Aligning roller rotation Transport belt rotation CW Transport belt rotation CCW Rev...

Page 93: ...1 23 Fine Adjustment of Binding Position Folding Position By moving the paper positioning plate up or down fine adjustment of the binding position folding position can be made Adjustment Code 05 Code 468 0 2 Increasing the adjustment value shifts the binding position folding position towards the right hand page by 0 25mm for each step Decreasing the adjustment value shifts the binding position fol...

Page 94: ...e height of the gap between the glass and the RADF 1 Adjustment screws If they are turned counterclockwise the gap becomes narrower The adjustment screws are on the right hinge and the left hinge 2 places 2 The gap arrow A of the adjustment value is 0 0 5mm Adjustment screw DF spacer Original glass DF spacer ...

Page 95: ...id able to be pulled in electrically 2 Install BRKT SOL RVS so that the flapper rubber can contact with the flapper lever 3 Fix BRKT SOL RVS with the screw 4 With the solenoid pulled confirm that there is no gap between the flapper rubber and the flapper lever Flapper rubber Flapper lever Plunger BRKT SOL RVS Screw ...

Page 96: ... 1 Remove the lower exit cover 4 screws 2 Remove the rear E ring and slide the bearing to the inside of the frame 3 Slide the exit roller to the rear and the bearing to the inside of the frame and remove the exit roller while pulling out the exit roller rear side Exit cover E ring Exit roller 4 Install RING EXIT 24 UR 2 pieces to the exit roller groove from the front side Note The exit roller has ...

Page 97: ...er to the figure on the right 1 pusher 2 gears GEAR WHITE 1 E ring GEAR BLACK 1 E ring PUSHER 2 screws SHAFT TRAY COLLER COLLER Notes When attaching the SHAFT TRAY Pay attention to whether it is facing the front or the rear see below When attaching the gear be careful to the direction of the gears See below both should face in the same direction A A B Rear Front B ...

Page 98: ...riving section gear pulley timing belt etc In principle replace those parts at this time 3 Check to see if there is any damage or peeling of adhered parts tape Mylar sheet etc Replace any affected parts if necessary 4 Check that if all the switches and sensors operate properly Replace them if they are not operating properly 5 Clean the inside of the machine thoroughly Note Before inspecting and ov...

Page 99: ...e filter for exit fan 400 P61 I11 13 Glass or A 14 Glass holder or A 15 Mirror 1 16 Mirror 2 17 Mirror 3 Scanner 18 Reflector 19 Lens 20 Exposure lamp 21 Copy area indicator 21 1 Shading glass P44 I7 22 Automatic paper size detector 23 Slide sheet front rear or A 24 Air filter 5 25 Case 6 26 Charger wire 400 6 P46 I16 Charger 27 Terminal contact 28 Charger wire cleaner 400 P46 I9 29 Grid 400 P46 I...

Page 100: ...law 400 9 P32 I20 72 Lower separation claw 9 73 Cleaning roller 1 400 10 P33 I7 74 Cleaning roller 2 400 10 P33 I5 Fuser unit 75 Cleaning roller 3 400 10 P33 I16 75 1 Cleaning roller 4 400 10 P32 I37 76 Upper and lower thermistors A 77 Heat roller entrance guide A 78 Heat roller exit guide A 79 Paper dust recovery bracket 80 Exit roller A 81 Heat roller cleaning roller drive SI gear 82 Cleaning ro...

Page 101: ...aces 54 PFP drive gear tooth faces W 55 GCB bush and plastic bush L 98 ADF pick up roller 400 P81 I18 99 ADF feed roller 400 P81 I14 100 ADF separation pad 400 P81 I53 101 Transport belt 400 P84 I22 102 ADF aligning roller A ADF 103 ADF reversal roller A 104 ADF empty sensor 105 ADF aligning sensor 106 ADF size sensor 107 Exit sensor 108 ADF timing sensor 109 Transport belt cleaning brush 56 LCF p...

Page 102: ...2 19 6 9 2 16 17 1 10 11 23 14 60 59 61 57 58 56 51 49 51 50 50 49 48 48 48 94 92 97 13 91 72 70 77 75 90 93 93 93 49 50 93 88 89 2 75 1 89 1 21 1 8 1 84 87 8 44 43 42 52 62 62 62 31 34 35 33 30 4 5 76 69 74 73 82 79 71 78 80 85 86 83 27 29 22 22 25 26 28 32 51 8 2 89 4 ...

Page 103: ...MAINTENANCE 2 6 Rear drive system 38 36 37 3 54 54 54 54 54 54 96 12 81 63 63 46 ...

Page 104: ...2 7 MAINTENANCE ADF front sectional view 100 104 109 105 106 102 108 99 101 103 107 98 ...

Page 105: ...um Refer to section 3 2 Checking and Cleaning the OPC Drum 5 Air filter Duct filter Replace the air filter if it is heavily dirty 6 Charger wire and case Use a cloth which should be soaked in water and then wrung lightly to clean those 7 Developer material After replacing the developer material be sure to adjust the corresponding auto toner sensor 8 Upper and lower heat rollers Refer to section 3 ...

Page 106: ...r transport auger drive section Apply white grease to the used toner transport auger drive section shown by arrow 53 W 14 PFP LCF manual separation rollers Apply Alvania No 2 to the separation roller boss Arbor cover spring Separation roller Apply Alvania No 2 one large drop each to the 3 grooves of the metal boss ...

Page 107: ... Alvania No 2 using the following steps Oil Seal 1 Push in a new oil seal parallel to the mount ing hole section of the developer frame or outside of the nozzle mixer Pay attention to the direction in which the oil seal is attached See figure on right 2 Apply an even coat of grease to the inside of the oil seal Amount About two small drops 3 Wipe off any grease exuded from the in side 66 W 69 W 69...

Page 108: ...7 Checking and Replacing the Transfer Belt Power Supply Roller 19 Transport belt cleaning brush Refer to section 3 8 Checking and Replacing the Transport Belt Cleaning Brush 20 Slit glass on the main unit Remove the slit glass and clean the front and back sides Mixer shaft Bearing 1 Press in 2 Bring down Slit grass Surface to be cleaned front back side 21 Transfer belt cleaning blade Refer to sect...

Page 109: ...ay damage the toner adhesion amount sensor Also wipe the window of the toner adhesion amount sensor with a cotton wool bud or tissue If the window of the toner adhesion amount sensor is dirty the sensor may no longer function prop erly Drum shaft bearing Ground wire Connection to earth Next wipe the inner diameter of the drum shaft bearing with a cloth If toner adheres to the inner diameter you ma...

Page 110: ...irt and toner from the duct 1 2 A 4 The new duct cover is attached using the procedure opposite to that in 3 At this time be careful to how you turn the harness of B The projecting area of the duct should be slid into the developer unit groove arrow 3 24 Paper feeding related rollers Refer to this illustration when servicing the paper feeding related rollers Be especially careful of the roller ori...

Page 111: ... charger K BASE PAD CH M 1 12 Drum separation claw K CLAW DRUM 2 13 Ozone filter K FILTER OZON 1 14 Charger wire for main charger WIRE CH 060 398 1 15 Upper heat roller separation claw SCRAPER 212 6 16 Toner filter developer unit FILTER DEV F300 1 17 Grid for main charger GRID 154 1 18 Heat roller upper AR650 HR U 1 19 Heat roller lower AR650 HR L 1 20 Transfer belt power supply roller AR650 CR TR...

Page 112: ...2 15 MAINTENANCE Name Parts List Page Item Door switch jig 201 2 Lens adjustment jig 201 3 Wire holder jig 201 1 2 5 Jig List ...

Page 113: ... storing copy paper in places where it may be subjected to high humidity After a package is opened be sure to place and store it in a storage bag 3 2 Checking and Cleaning the OPC Drum 1 Use of Gloves If fingerprints or oil adhere to the drum surface the characteristics of the photosensitive drum may degrade affecting the quality of the copy image So do not touch the drum surface with your bare ha...

Page 114: ...y will have an adverse effect on the drum 5 Scratches on OPC Drum Surface If the surface is scratched in such a way that the aluminum substrate is exposed black spots or streaks will be produced on the copy images In addition the cleaning blade will be damaged so replacement with a new drum will be necessary 6 Collecting Used OPC Drums Regarding the recovery and disposal of used OPC drums we recom...

Page 115: ...ub against the roller because the thin Teflon layer coated on the aluminum substrate is easily damaged and if damaged will result in defective drum cleaning B Lower Heat Roller 1 Do not leave oil fingerprints etc on the lower heat roller 2 Checking 1 Check for stain and damage on the heat roller and clean or replace if necessary 2 Clean the separation claws and check for chipped claws 3 Check the ...

Page 116: ...ol or other organic solvents 4 Do not apply external pressure that might scratch the transfer belt 3 7 Checking and Replacing Transfer Belt Power Supply Roller 1 Handling Precautions 1 Do not touch the charger roller surface with your bare hands 2 Be carefull not to scratch or hit on to the charger roller surface 3 8 Checking and Replacing Transfer Belt Cleaning Brush 1 Handling Precautions 1 Do n...

Page 117: ...3 5 SUPPLIES 3 9 Replacement of maintenance parts 1 DRUM UNIT 1 UNPLUG 2 OPEN 1 2 3 3 REMOVE 1 1 1 2 21 4 DISCONNECT 6 REMOVE 5 REMOVE 1 2 19 7 REMOVE 18 8 DISCONNECT ...

Page 118: ...SUPPLIES 3 6 9 REMOVE 1 1 2 10 REMOVE 11 TURN OVER 13 REMOVE 15 REMOVE 14 REMOVE 12 REMOVE 16 INSTALL 2 2 1 ...

Page 119: ...3 7 SUPPLIES 18 INSTALL 2 1 19 INSTALL 2 1 20 CONNECT 21 INSTALL 2 2 2 1 22 CLOSE 1 3 2 23 INSTALL 17 CONNECT ...

Page 120: ...3 Press the START key The message display will change as shown below 100 2 ARE YOU SURE CANCEL INITIALIZE 4 Press the INITIALIZE key The message display will return to 100 TEST MODE K 100 K TEST MODE 5 Turn off the power switch and then turn it on again The message display will change as shown below 100 1 LT READY 3 OPEN 2 1 2 UNPLUG 1 REMOVE 9 CAUTION The fuser unit and its environment may be ver...

Page 121: ...3 9 SUPPLIES 5 DISCONNECT 2 3 1 12 6 REMOVE 7 REMOVE 11 2 3 1 12 INSTALL 11 INSTALL 10 INSTALL 9 REPLACE 2 1 10 8 REMOVE ...

Page 122: ...SUPPLIES 3 10 13 CONNECT 15 CLOSE 2 1 14 CLOSE 1 2 16 TURN ON 17 PRESS 18 END ...

Page 123: ...3 11 SUPPLIES 3 CHARGER UNIT 1 REMOVE 6 2 UNPLUG 3 OPEN 1 2 3 4 REMOVE 1 1 1 2 8 5 REMOVE 7 INSTALL 8 INSTALL 2 2 2 1 6 REPLACE 2 1 ...

Page 124: ...12 1 3 2 9 CLOSE 10 TURN ON 11 PRESS 12 END 4 FUSER UNIT 1 REMOVE 2 REMOVE 3 UNPLUG 4 OPEN 1 2 CAUTION The fuser unit and its environment may be very hot So perform replacement only after it has cooled down enough ...

Page 125: ...3 13 SUPPLIES 5 OPEN 2 1 6 DISCONNECT 7 REMOVE 2 1 9 8 REPLACE 2 1 9 INSTALL 1 2 10 CONNECT 11 CLOSE 1 2 12 CLOSE 2 1 ...

Page 126: ...SUPPLIES 3 14 13 TURN ON 14 PRESS 15 END 5 DEVELOP UNIT 1 REMOVE 3 2 3 5 4 2 REMOVE 3 INSTALL 4 FILL 5 INSTALL 10 ...

Page 127: ...3 15 SUPPLIES 7 OPEN 1 3 2 6 UNPLUG 8 REMOVE 12 1 1 1 2 9 DISCONNECT 10 REPLACE 1 4 3 2 11 CONNECT 12 INSTALL 2 2 2 1 13 CLOSE 3 2 1 ...

Page 128: ...TART key The copier will start operating to perform automatic adjust ment 230 1 TEST MODE WAIT 3 About 2 minutes later the automatic adjustment has been completed The copier will stop oper ating If the ERROR message is displayed call for service 4 Press the SET key The message display will re turn to 100 TEST MODE K 100 K TEST MODE 5 Turn off the power switch and then turn it on again The message ...

Page 129: ... for breaks and short circuits Check the SDV board for breaks and short circuits Check the SLG board for breaks and short circuits Replace the SDV board Replace the SLG board C28 Is a loud sound emitted after the carriage bumps into the home position Yes Cause The home switch does not turn ON Make sure that the switch connector is connected Check the circuits on the SLG and SDV boards for troubles...

Page 130: ...d for breaks and short circuits Check the SLG board for breaks and short circuits Replace the lens unit Replace the SLG board No Check the lamp connectors for disconnection Check the thermostat to see if it has blown Check electrical continuity of the lamp Check SLG board connector pins J9 22 23 24 25 and 26 for disconnection and the harness for breaks and short circuits Check the SLG board for br...

Page 131: ...mal 1 Check the main charger Is the main charger disconnected 2 Check the cleaning motor Is the motor operating 3 Replace the LGC board C37 Transfer belt operation abnormal 1 Check the transfer belt Are the connectors disconnected Are the contact switche and separation switche normal 2 Replace the LGC board ...

Page 132: ...ater lamp connector disconnected Is the thermostat blown Is the SSR connector disconnected Are the SSR and switching power supplies damaged 3 Check the LGC board Is connector J326 disconnected Check the circuits for open or short circuits or other troubles Replace the LGC board 4 Reset the status counter Carry out the following after you have repaired the location where error C41 occurred Turn the...

Page 133: ...nnected Is the sub end section thermistor firmly contacting the heat roller Is the sub end section thermistor harness broken 2 Check the LGC board Is connector J326 disconnected Check the circuits for breaks short circuits or other troubles Replace the LGC board 3 Reset the status counter Reset status counter 8 to 0 by following the same procedure for error C41 C46 Lower heat roller themistor abno...

Page 134: ...pen or short circuits 6 Check the connectors leading up to the PPC board for disconnected pins and the harness for open circuits 7 Replace the IPC board 8 Replace the LGC board C59 Communication error between M CPU and L CPU 1 Check the harness between the LGC board and the laser unit for disconnection and open circuits 2 Check mainly the IC circuits on the LGC board for open or short circuits 3 R...

Page 135: ...nly IC4 IC5 and CN7 on the LGC board for open or short circuits 4 Replace the exit sensor 5 Replace the LGC board 6 Initialize the ADF EEPROM and perform automatic sensor adjustment C76 Transmission time out error C77 Transmission buffer full C78 ADF power ON I F error C79 Reception time out error 1 Check the harness between the ADF control PC board and the scanner control PC board for disconnecti...

Page 136: ...l curled or folded too much Yes Flatten and reset the original No Are different size originals placed together Yes Set only same size originals Two or more originals are fed simultaneously Have too many originals been placed Yes Reset the originals No Is the original curled or folded too much Yes Flatten and reset the original No Are different size originals placed together Yes Set only same size ...

Page 137: ...o Is the gap between the aligning plate and feed roller too small Yes Adjust the gap No Is the transporting force of the pick up roller and feed rollers insufficient Yes Replace the rollers The original stop skewed on the original glass Is the aligning roller dirty Yes Clean the roller No Is the transport belt dirty Yes Clean the belt No Is the ADF correctly installed No Properly install the ADF i...

Page 138: ...pplied to CN2 No Check the main unit Yes Is the voltage across TP26 and TP43 5V DC No Check or replace the control board Yes Is the voltage measured at EMP SNS TP30 5V when there is no paper No Check or replace the empty sensor Yes Check or replace the control board Motor error Is a normal load placed on the motor shaft No Reduce the mechanical load on the motor by adjusting the drive system Remov...

Page 139: ... SIZE SNS2 TP29 5V when there is paper No Check or replace size sensor 2 Yes Is the original slipping off the aligning roller No Check or replace the control board Yes Clean or replace the aligning roller Check and adjust the roller pressure Error of the STOP position of original s leading edge Is the voltage measured at REG SNS TP25 5V when there is paper No Check or replace the aligning sensor Y...

Page 140: ...ttern around the PFC microcomputer IC21 for open or short circuits Replace the PFC microcomputer or LGC board if this trouble occurs frequently CD1 Fur brush motor lock error 1 Check whether the fur brush has become locked mechanically Are there any foreign objects Are there any toner clumps in the transport section 2 Check whether connectors on the LGC board are come off or the pins disconnected ...

Page 141: ...d POL boards for open or short circuits Replace the POL board Replace the PLG board Yes Check the pattern on the PLG board for open or short circuits Replace the PLG board CA2 HSYNC is abnormal Is the harness between the PLG and the HSYNC boards open circuited Is the connector between the PLG and HSYNC boards disconnected Yes Replace the harness and re connect the connector No Replace the PLG boar...

Page 142: ...d are the harnesses open circuited or connectors disconnected Yes Replace the harness es and re connect the connector s No Replace the PLG board Replace the unit CA9 Image data transmission error SYS board Is the harness between the PLG board and the SYS board open circuited or connector dis connected Yes Replace the harness and re connect the connector No Replace the PLG board Replace the SYS boa...

Page 143: ... gears of feed roller 2 Yes Is the shutter close detection switch MS4 normal No Replace the switch Yes Replace the finisher controller board Procedure 2 Is the feed motor 2 M8 operating in reverse at the specified timing No Replace the transport motor or finisher controller board Yes Is the shutter correctly coupled to the shutter upper lower bars No Couple properly Yes Try turning the feed roller...

Page 144: ...orrect the mechanical mechanism Yes Replace the finisher controller board CB2 Delivery motor is abnormal Procedure 1 Try rotating the exit motor by hand Does it operate smoothly No Correct the mechanical mechanism Yes Is the delivery motor clock sensor PI10 normal No Replace the sensor Yes Is the voltage across J11 4 and 5 on the finisher controller board 24V when the delivery motor operates No Re...

Page 145: ...ery motor M2 operating in reverse at the specified timing No Replace the motor Yes Replace the finisher controller board Procedure 3 Try turning the delivery motor in the reverse by hand Does the swing guide move up and down No Correct the swing mechanism Yes Is swing guide open sensor PI18 normal No Replace the sensor Yes Is the delivery motor M2 operating in reverse at the specified timing No Re...

Page 146: ...ressed No Correct the mechanical mechanism Yes Replace the finisher controller board CB3 Tray lift motor is abnormal Procedure 1 Is the tray home position sensor PI8 normal No Replace the sensor Yes Is the tray lift mechanism normal No Correct the mechanism Yes Is 24V DC being supplied to the tray lift motor M5 from the finisher controller during tray drive No Replace the finisher controller board...

Page 147: ...or mal No Correct the wiring Yes Replace the finisher controller board Procedure 3 Is the tray elevated No Is power being supplied to the motor from the finisher controller board during tray elevation No Replace the finisher controller board Yes Is there a trouble on the tray elevation mechanism No Replace the tray lift motor M5 Yes Correct the tray elevation mechanism Yes Are tray lift motor cloc...

Page 148: ... a mechanical object caught on the alignment plate movement path Yes Correct the mechanical mechanism No Does replacement of the alignment motor M3 rectify the trouble No Replace the finisher controller board Yes END CB5 Stapler motor is abnormal Is the wiring between the stapler and the finisher controller board normal No Correct the wiring Yes Does replacement of the stapler rectify the trouble ...

Page 149: ...m No Does replacement of the stapler shift motor M4 rectify the trouble No Replace the finisher controller board Yes END CB7 Hight sensor is abnormal Procedure 1 Does turning the copier s power switch OFF then ON again rectify the trouble Yes END No Is the wiring between the finisher controller board and the sensor normal No Correct the wiring Yes Is the voltage across J6 2 and J6 4 on the finishe...

Page 150: ...normal No Correct the wiring Yes Replace the height sensor Procedure 3 Does re adjusting by the DIP switches rectify the trouble Yes END No Is the wiring between the finisher controller board and the sensor normal No Correct the wiring Yes Is the voltage across J6 2 and J6 4 on the finisher controller board 5V DC No Replace the finisher controller board Yes Replace the height sensor CB8 Backup RAM...

Page 151: ...late motor M8S rectify the problem No Replace the saddle stitcher controller board Yes END CBA CBB Saddle stitcher front rear stitcher motor is abnormal Are the front or rear stitcher and receptacles installed properly No Install them correctly Yes Are the stitching home position switches MS7S MS5S on the front or rear stitchers normal No Replace the front or rear stitcher Yes Is the front or rear...

Page 152: ...Yes Does replacement of the alignment motor M5S rectify the trouble No Replace the saddle stitcher controller board Yes END CBD Saddle stitcher guide motor is abnormal Is the guide plate home position sensor PI13S normal No Replace the sensor Yes Is the guide motor M3S operating at the fixed timing Yes Replace the saddle stitcher controller board No Is the guide plate drive mechanism normal No Cor...

Page 153: ...or M2S rectify the trouble No Replace the saddle stitcher controller board Yes END CBF Saddle stitcher paper positioning plate is abnormal Is the paper positioning plate home position sensor PI7S normal No Replace the sensor Yes Is the paper positioning plate operating at the specified timing Yes Replace the saddle stitcher controller board No Is the paper positioning plate drive mechanism normal ...

Page 154: ...le stitcher controller board correctly connected to the ground No Replace the saddle stitcher controller board Yes END Procedure 2 Is the connector of the paper pushing plate home position sensor PI14S or the connector of the saddle stich controller board connected No Connect it Yes Is the connector between the sensor and the stitcher open circuited No Connect it Yes Is DC5V from J9 10 of the sadd...

Page 155: ...Microswitch error Procedure 1 Check the switch actuator in the entrance door Are the switch and the sensor being moved correctly No Correct the mechanism Yes Check the entrance door switch Is the switch normal No Replace the switch Yes Measure J10 8 voltage on the saddle stitcher controller board when the entrance door is open Is there 5V being supplied Yes The sensor is broken so replace it No Me...

Page 156: ...nt door open Is 5V being supplied Yes The sensor is broken so replace it No Replace the saddle stitcher controller board Procedure 3 Check the switch actuator of the exit door Are the switch and the sensor being working properly No Correct the mechanism Yes Check the exit door switch Is the switch normal No Replace the switch Yes Measure J11 9 voltage access of the saddle stitcher with the exit do...

Page 157: ... power switch of the copier Yes END No Is the wiring between the finisher controller board and the saddle stitcher board normal No Correct it Yes Measure the voltage between J3 2 on the finisher controller board and J3 1 Is it DC 24V No Replace the finisher controller board Yes Replace the saddle stitcher controller board ...

Page 158: ...Is the swing motor M7 rotating in reverse at the fixed timing No Replace the motor Yes END Procedure 2 Is the safety zone switch MS3 working normally No Replace the switch Yes Is the safety zone switch MS3 correctly pressed No Correct the mechanism Yes Is the swing guide closing detection switch 2 MS6 working normally No Replace the switch Yes Is the swing guide closing detection switch 2 MS6 corr...

Page 159: ...isher controller PC board 24V when the swing motor is rotating No Replace the finisher controller PC board Yes Is the harness connecting the motor and finisher controller PC board open or short circuited No Replace the sensor Yes Is the swing motor M7 rotating in reverse at the fixed timing Yes Replace the harness No Replace the motor Procedure 3 ...

Page 160: ...ard open or short circuited Yes Replace the harness No Is the horizontal registration mechanism normal No Correct the mechanism Yes Is the problem solved by replacing the horizontal registration motor M2P Yes END No Is the problem solved by replacing the punch motor Yes END No Is the problem solved by replacing the punch driver board Yes END No Replace the finisher controller PC board CC5 Horizont...

Page 161: ...sor PI3P and finisher controller PC board open or short circuited Yes Replace the harness No Is the punching mechanism normal No Correct the mechanism Yes Is the problem solved by replacing the punch motor M1P Yes END No Is the problem solved by replacing the punch driver board Yes END No Replace the finisher controller PC board CC6 Punch motor is abnormal ...

Page 162: ...e self diagnostics code default Execute self diagnostics 04 113 test print of secondary scanning 33 gradations A correct image is printed out Replace the sensor and perform image quality maintenance forced execution confirmation described later Incorrect image image no output uneven etc Is the developer unit firmly locked Yes No Lock the developer unit and perform image quality maintenance forced ...

Page 163: ...agnostics 05 296 sensor light intensity adjustment result 255 Yes No Replace the sensor and LGC board and perform image quality maintenance forced execution confirmation described later Is the sensor window dirty No Yes Clean the sensor window and perform image quality maintenance forced execution confirmation described later Is the center of the drum scratched or dirty No Yes Replace the drum and...

Page 164: ...ing 0 Value of self diagnostics 08 802 0 control enabled Value of self diagnostics 08 803 0 startup number of copies 0 Self diagnostics 04 113 A4 size specification Confirmation After the test print READY is displayed and the engine stops Judgment value of 05 291 is other than 2 or 4 and value of 08 800 0 Yes No GOOD NO GOOD Restore self diagnostics 08 803 2 startup number of copies 2k END ...

Page 165: ...re Requirements for PC Microsoft Windows95 Virtual Modem FTP Server tools Ex War FTP Daemon Serial Cable PC and System board are connected with the following cross line cable DTE DTE connections D SUB 9 PIN RS 232C 1 CD 1 CD 2 RXD 2 RXD 3 TXD 3 TXD 4 DTR 4 DTR 5 GND 5 GND 6 DSR 6 DSR 7 RTS 7 RTS 8 CTS 8 CTS 9 CI 9 CI Protocol specifications between PC and system board SPEED 115200bps DATA BITS 8 B...

Page 166: ...ocol It is necessary to use a dial up networking and use a virtual modem First install the virtual modem The virtual modem can be downloaded from the following web site URL http www kevin wells com net mdmcbx4 inf After download set up the modem as follows Click Start button point at Settings and then click Control Panel Click on Modems 5 2 ...

Page 167: ...d Button and open Install New Modem wizard And then check Don t detect my modem I will select it from a list and click Next button Click Have Disk button and then select a folder download file is stored in 5 3 ...

Page 168: ...Select Direct Connection and then click Next button Select Communications Port COM1 and then click Next button 5 4 ...

Page 169: ...Click Finish button then Virtual Modem installation is completed 5 5 ...

Page 170: ...twork password at startup and if Network Neighborhood icon appears on Windows desktop your network is already set up In this case you can skip this section In Network dialog box click Configuration tab Confirm that Dial Up Adapter and TCP IP are displayed If your PC does not have Dial Up Adapter then click Add button 5 6 ...

Page 171: ...t in Manufactures list box and select Dial Up Adapter in Network Adapters list box and then click OK button When you click OK button Windows automatically set up the TCP IP Protocol components with dial Up Adapter 5 7 ...

Page 172: ...Connection Double click My Computer If Dial Up Networking icon is not in the window click Add Remove Programs in Control Panel Otherwise skip to the next step to create a connection Double click Dial Up Networking 5 8 ...

Page 173: ...me for the computer you are dialing Select Direct Connection for Select a modem and click Configure button Click General tab in Direct Connection Properties box select 115200 for Maximum speed check Only connect at this speed 5 9 ...

Page 174: ... are not selected and click Advanced button Confirm that all check boxes in Advanced Connection Settings dialog box is not selected click OK button and then return to Make New Connection dialog box After returning to Make New Connection dialog box click Next button 5 10 ...

Page 175: ... 39 for Telephone number To change Country code click the arrow next to the country and select a country you want After that click Next button Click Finish button then Make New Connection is completed 5 11 ...

Page 176: ...emon can be downloaded from the following web site URL http www jgaa com downloadpage htm Download the file ward165 exe from the above site and execute it Some files are created and then execute Setup exe Create the C WEBSHARE FTPROOT folder After that execute war ftpd exe in war ftpd folder Select Properties Security Edit User 5 12 ...

Page 177: ...Click Add button and key in dppc for New name Key in dppc for New Password and Verify Password and click OK button Select dppc and click File Access Click Add button 5 13 ...

Page 178: ...are Double click Ftproot and click OK button Change Read Write Delete Execute List Create and Remove from Gray Check to Black Check Check Root Home and Recursive in Special box as follows And then click Apply and OK 5 14 ...

Page 179: ...To make the connection ONLINE mode click button before firmware downloading 5 15 ...

Page 180: ... Mode Then you can update system software data and or UI data through the PC 6 2 Preparation of PC To update the firmware of copier the following preparations are necessary 6 2 1 Software Installation Virtual modem and War FTP Daemon have to be installed in your PC Please refer to Installation Instructions for Firmware Update through PC And also War FTP Daemon has to be ONLINE mode 6 1 ...

Page 181: ...older of the PC And also the files must be named as follows Folders New files for update Kind of date File name Program date sysfirm tz Fixed UI data uidataf tz Common UI data uidata0 tz 1st language UI data uidata1 tz 2nd language UI data uidata2 tz 3rd language UI data uidata3 tz 6 2 ...

Page 182: ...6 2 3 Connection between copier and PC Connect MMF FSMS port of the copier and serial communication port of PC specified by the setup of virtual modem using a crossing cable 6 3 ...

Page 183: ...lowing messages are displayed on the copier control panel Firmware Version Up Mode Make a connection from PC 3 Serial connection is made by dial up from PC Refer to Installation Instructions for Firmware Update through PC about procedures for dial up network connection Key in 39 for Phone number 6 4 ...

Page 184: ...re and UI data before updating to new one To return to previous screen depress HELP again Firmware Version Up Mode Target 1 Established serial connection with PC target version code 1 005 101 U 2 004 001 0 3 005 002 0 4 006 001 3 5 006 001 7 6 006 003 11 The number of target provides with following information 1 Program data 2 Fixed UI data 3 Common UI data 4 1st language UI data 5 2nd language UI...

Page 185: ... a target area A selected number is displayed at target area Press INTERRUPT to input The relation of target area number and firmware data is as follows 1 Only Program data 2 Fixed UI data 3 Common UI data 4 1st language UI data 5 2nd language UI data 6 3rd language UI data 1 All data 1 2 3 4 5 and 6 2 All UI data 2 3 4 5 and 6 3 All language UI data 4 5 and 6 6 Depress START key and copier starts...

Page 186: ...eading a file Target Version 1 installing Displaying current data area being loaded 7 The following screen will be displayed after firmware data is updated In the case of 1 6 If you want to update other area continuously press START key and repeat the operation from step 5 After finished turn off the power or depress CLEAR key Firmware Version Up Mode Target 1 Firmware version up completed Version...

Page 187: ...to cancel after start of elimination process of flash ROM Firmware Version Up Mode Target 1 Program canceled 9 When failing in update the following error message is displayed If the error occurs Recovery Mode starts automatically when you turns on the power next time See 10 Recovery mode Firmware Version Up Mode Target 1 Failed to install a new firmware file read error ERROR MESSAGE file read erro...

Page 188: ...sion Up Mode Recovery mode target 3 6 failed make a connection from PC Connect with dial up network See procedure 3 and the display changes as follows Firmware Version Up Mode Target 3 Recovery mode target 3 6 failed Press START key to install new firmware Further procedure is the same as normal sequence 6 9 ...

Page 189: ...th PC Press START key to install new firmware Power On Change the number by pressing key Press Ten Key Press START Key Press CLEAR Key 2 1 Connected Firmware Version Up Mode Cannot connect with PC Failed to install a new firmware Connection Failure 1 2 Press CLEAR Key Firmware Version Up Mode Target 1 Program canceled Power Off Updated data version number Target 1 Target 6 Target 1 6 10 ...

Page 190: ... flags Press Start Key 4 3 Successful Failed Press CLEAR Key 1 2 Press Ten Key Firmware Version Up Mode Target 1 Firmware version up completed Version 001 003 Press START key to continue 3 Firmware Version Up Mode Target 1 Press START key to install new firmware Please select a target with DIGITAL keys Press START Key Press CLEAR Key Successful 2 Press START key Press CLEAR key 2 1 Updated data ve...

Page 191: ...ion up completed Target Version 1 001 2 002 3 002 4 003 5 003 6 003 Message will change as follows reading a file checking a read file checking the device setting NvRAM flags erasing the device writing to the device verifying the device cleaning NvRAM flags Displaying current data area being Updated data version numbers 2 Press CLEAR key Firmware Version Up Mode Target 1 Program canceled Target Ve...

Page 192: ...ce erase error device write error verify error cannot set NvRAM flags Power Off In the case of 1 3 4 Failed Firmware Version Up Mode Target 1 Failed to install a new firmware file read error Target Version ERROR MESSAGE file read error file information error unfit device device erase error device write error verify error cannot set NvRAM flags Power Off Error occurrence area 6 13 ...

Page 193: ... Noise filter 1 1 2 2 4 4 3 Noise filter 1 2 4 3 3 TERMINAL BLOCK TERMINAL BLOCK BROWN BROWN BROWN BROWN BROWN BROWN BROWN BROWN BROWN BROWN BROWN BROWN BROWN BROWN BROWN BROWN BROWN BROWN BROWN BROWN BROWN GREEN GREEN GREEN GREEN GREEN BLUE BLUE OUTLET OUTLET INTLET Fuse Fuse BULE BULE BULE BULE BULE BULE BULE BULE BULE BULE BULE BULE BULE BULE Q Q Q C A A C E MAIN SW DOOR SW HTR SW Damp heater U...

Page 194: ......

Page 195: ...MEMO ...

Page 196: ...MEMO ...

Page 197: ...MEMO ...

Page 198: ...MEMO ...

Page 199: ...MEMO ...

Page 200: ...January Printed in Japan N COPYRIGHT 2001 BY SHARP CORPORATION All rights reserved Printed in Japan No part of this publication may be reproduced stored in a retrieval system or transmitted in any form or by any means electronic mechanical photocopying recording or otherwise without prior written permission of the publisher ...

Reviews: