background image

MODEL

FO-781

OPERATION MANUAL

FACSIMILE

  1. Installation   
  2. Sending Documents     
  3. Receiving Documents   
  4. Making Copies    
  5. Making Telephone Calls    
  6. Answering Machine Connection    
  7. Special Functions
  8. Option Settings 
  9. Printing Reports and Lists
10. Maintenance    
11. Troubleshooting

Summary of Contents for FO-781

Page 1: ...IMILE 1 Installation 2 Sending Documents 3 Receiving Documents 4 Making Copies 5 Making Telephone Calls 6 Answering Machine Connection 7 Special Functions 8 Option Settings 9 Printing Reports and Lists 10 Maintenance 11 Troubleshooting ...

Page 2: ...tion software use of consumables other than those approved by Sharp or any alterations made to the product which are not authorised by Sharp Please retain your sales documentation as this should be produced to validate a warranty claim This warranty is in addition to and in no way limits varies or excludes any express and implied rights and remedies under any relevant legislation in the country of...

Page 3: ... roll two rolls in package one roll yields approx 95 A4 pages Automatic document feeder 10 sheets max Memory size 512 KB approx 30 average pages Modem speed 9600 bps with automatic fallback to 7200 4800 or 2400 bps Transmission time Approx 15 seconds Sharp special mode Reception modes FAX TEL TEL FAX A M Resolution Horizontal 8 lines mm Vertical Standard 3 85 lines mm Fine Halftone 7 7 lines mm Su...

Page 4: ...sor Effective printing width 204 mm max Input document size Automatic feeding Width 148 to 216 mm Length 140 to 297 mm Manual feeding Width 148 to 216 mm Length 140 to 600 mm Effective scanning width 210 mm max Contrast control Automatic Dark selectable Copy function Standard Telephone function Standard Cannot be used for incoming outgoing if power fails Power requirements 230 240 V AC 50 Hz Opera...

Page 5: ... licensed serviceman In New Zealand installing or modifying telephone lines should be done in accordance with Telecom wiring practices Do not disassemble this machine or attempt any procedures not described in this manual Refer all servicing to qualified service personnel This machine must only be connected to a 230 240 V 50 Hz earthed 3 prong outlet Connecting it to any other kind of outlet may d...

Page 6: ...terface Use caution when installing or modifying telephone lines Avoid using a telephone other than a cordless type during an electrical storm There may be a remote risk of electric shock from lightning Do not use a telephone to report a gas leak in the vicinity of the leak The socket outlet must be installed near the equipment and must be easily accessible Important This facsimile machine is not ...

Page 7: ...ntee that interference will not occur in a particular installation If this equipment does cause interference to radio or television reception which can be determined by turning the equipment off and on the user is encouraged to try to correct the interference by one or more of the following measures Reorient or relocate the receiving antenna Increase the separation between the equipment and the re...

Page 8: ... assurance that any item will work correctly in all respects with another item of Telepermitted equipment of a different make or model nor does it imply that any product is compatible with all of Telecom s network services This equipment shall not be set up to make automatic calls to the Telecom 111 Emergency Service To avoid telephone charges for local calls be sure to store numbers without area ...

Page 9: ...Fax Number 21 Setting the Date and Time 24 Selecting the Reception Mode 26 Volume Adjustment 27 2 Sending Documents 29 Transmittable Documents 29 Loading the Document 30 Resolution and Contrast 32 Sending a Fax by Normal Dialling 34 Sending a Fax by Automatic Dialling 36 3 Receiving Documents 44 Using TEL FAX Mode 44 Using FAX Mode 45 Using A M Mode 46 Using TEL Mode 47 Substitute Reception to Mem...

Page 10: ...4 Cover Sheet 65 Batch Page Numbering 67 Blocking Reception of Unwanted Faxes 68 Sending Documents From Memory 70 Polling Requesting a Fax Transmission 72 Timer Operations 75 8 OptionSettings 77 9 Printing Reports and Lists 84 10 Maintenance 87 11 Troubleshooting 90 Problems and Solutions 90 Answering machine connection 90 Messages and Signals 95 Clearing Paper Jams 98 Quick Reference Guide 100 In...

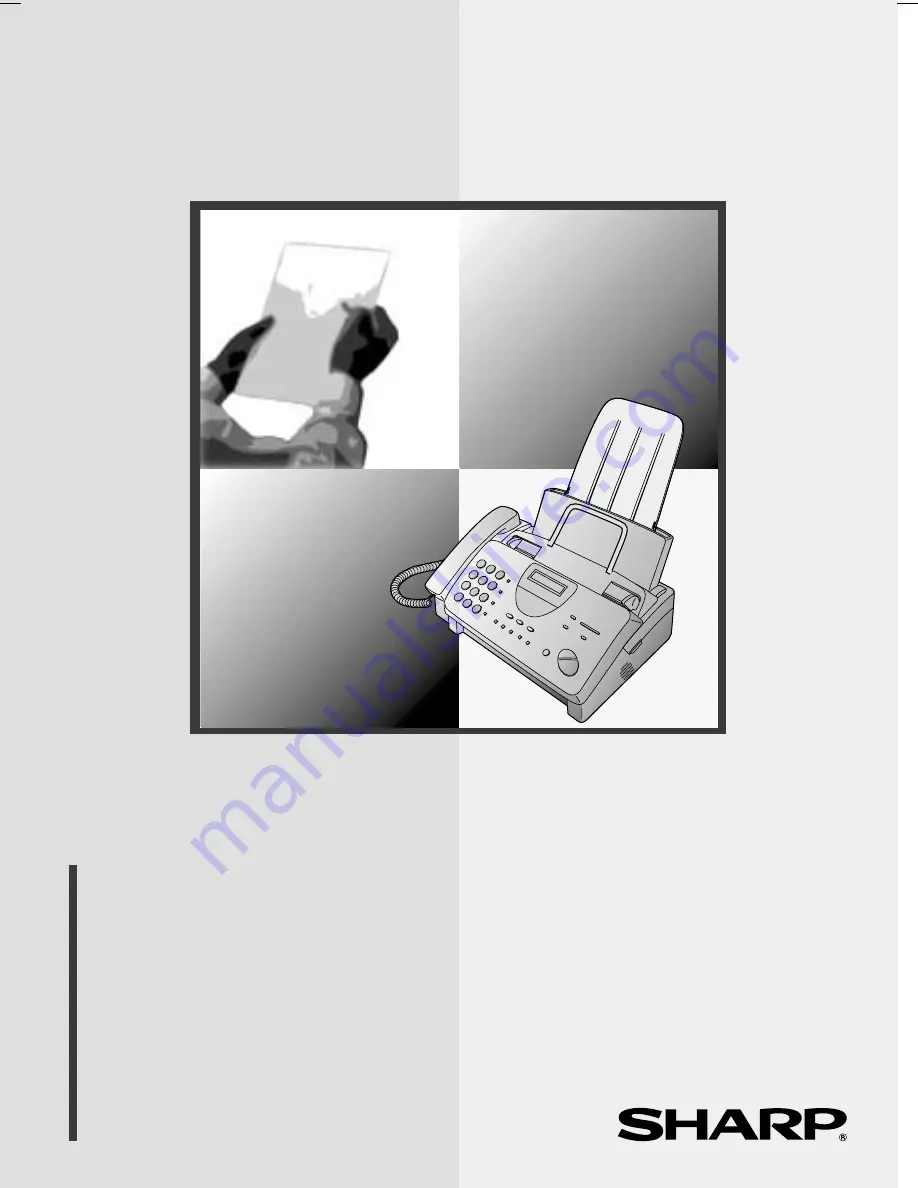
Page 11: ...a around the machine clear About condensation If the machine is moved from a cold to a warm place it is possible that condensation may form on the scanning glass preventing proper scanning of documents for transmission To remove the condensation turn on the power and wait approximately two hours before using the machine Paper tray extension Rapid key labels Original document support Handset Handse...

Page 12: ...L key Press this key to automatically redial the last number dialled Display This displays messages and prompts during operation and programming RECEPTION MODE key Press this key to select the reception mode An arrow in the display will point to the currently selected reception mode RESOLUTION key Press this key to adjust the resolution and contrast before sending or copying a document A Look at t...

Page 13: ...pick up the handset to talk with the other party Rapid Dial keys Press one of these keys to dial a fax or voice number automatically Note that you must attach the Rapid Key labels STOP key Press this key to cancel operations before they are completed START MEMORY key Press this key to send or receive a document or to scan a document into memory before sending it COPY HELP key When a document is in...

Page 14: ...ution The mains outlet socket outlet should be installed near the equipment and be easily accessable The machine does not have a power on off switch so the power is turned on and off by simply plugging or unplugging the power lead Note If your area experiences a high incidence of lightning or power surges we recommend that you install surge protectors for the power and telephone lines Surge protec...

Page 15: ...ed TEL LINE Plug the adapter into the telephone socket on the wall Comments Your fax is set for tone dialling If you are on a pulse only dial line you must set the fax for pulse dialling by changing Option Setting 7 This procedure is described in Chapter 8 Option Settings If you intend to use a computer fax modem on the same phone line you must reset Option Setting 12 Fax Signal Receive to NO in o...

Page 16: ...to the holes turn the support over Attach the original document support Extension phone optional If desired you can connect an extension phone to the TEL SET socket on the fax To connect an answering machine to your fax see Chapter 6 Answering Machine Connection 1 Remove the seal covering the TEL SET socket 2 Connect the extension phone line to the TEL SET socket TEL SET TEL LINE Important In New ...

Page 17: ...l the paper release plate forward and remove the paper before loading the imaging film When replacing the film use a roll of Sharp FO 3CR imaging film One roll can print about 95 A4 pages The initial starter roll of imaging film included with your fax can print about 30 A4 pages 1 Open the operation panel by grasping the finger hold and pulling up 2 Pull the green release on the right side of the ...

Page 18: ...the remaining three gears into the spools making sure the protrusion on each gear fits firmly into one of the slots in the end of each spool If needed pull the spools apart slightly to allow the gears to fit the band will stretch Slot Protrusion Large gear 4 Remove the used film from the cartridge 5 Remove the four green gears from the used film DO NOT DISCARD THE FOUR GREEN GEARS 3 Remove the ima...

Page 19: ...eration panel Click 9 Cut the band that holds the two spools together Unroll the film slightly and insert the small gears into their holders 10 Turn the cartridge over grasp the handle and insert the cartridge into the print compartment 8 Insert the large gear into the large holder on the imaging film cartridge make sure it clicks into place and then insert the small gear on the other end of the s...

Page 20: ...lm which is available from your dealer or retailer Sharp FO 3CR Imaging Film FILM END 13 Load paper in the paper tray and then press the following keys to initialize the film Note Paper must be loaded before the film can be initialized To load paper see the following section Loading Printing Paper 6 INITIALIZE FILM START MEMORY FUNCTION ...

Page 21: ...se plate toward you 1 Fan the paper and then tap the edge against a flat surface to even the stack 3 Insert the stack of paper into the tray print side down If paper remains in the tray take it out and combine it into a single stack with the new paper before adding the new paper Be sure to load the paper so that printing takes place on the print side of the paper Printing on the reverse side will ...

Page 22: ...ack down If the paper release plate is not pushed down paper feed errors will result Press twice Press 1 to select NORMAL or 2 to select LIGHT Press the STOP key to return to the date and time display COPY CUT OFF STOP 1 2 or NORMAL LIGHT 5 Your fax has been set at the factory to print at normal contrast Depending on the type of paper you have loaded you may find that you obtain better print quali...

Page 23: ...ax you need to enter your name and the telephone number of your fax You also need to set the date and time key FUNCTION key STOP key START MEMORY key 2 1 3 9 4 5 6 7 8 0 Note The imaging film and printing paper must be loaded before your name and fax number can be entered 1 Press these keys 3 FUNCTION Press twice OWN NUMBER SET 2 Press the START MEMORY key START MEMORY ENTER FAX The display will s...

Page 24: ...essing the number keys as shown in the following chart Up to 24 characters can be entered Example SHARP 77777 444 22 7777 77 SPEAKER A B C D E F G H I J K L M N O P Q R S T U V W X Y Z SPACE SPEAKER HOLD SEARCH move move To enter two letters in succession that require the same key press the SPEAKER key after entering the first letter The SPEAKER key moves the cursor forward and the HOLD SEARCH key...

Page 25: ...ur Name and Fax Number 23 1 Installation 6 Press the START MEMORY key to save your name in memory START MEMORY SECURITY SELECT 7 Press the STOP key to return to the date and time display STOP The display will show ...

Page 26: ...d time can be set 3 FUNCTION Press 3 times DATE TIME SET 2 Press the START MEMORY key START MEMORY The currently set date will appear in the display 3 Enter a two digit number for the day 01 to 31 Example January 0 1 To correct a mistake press the SPEED DIAL key to move the cursor back to the mistake and then enter the correct number The display will show 4 Enter a two digit number for the month 0...

Page 27: ...Enter a two digit number for the hour 00 to 23 and a two digit number for the minute 00 to 59 9 0 5 2 7 Press the START MEMORY key to start the clock STORE JUNK START MEMORY 8 Press the STOP key to return to the date and time display STOP The display will show ...

Page 28: ...ally dialled fax transmissions or an automatically dialled fax If it is a voice call the fax will make a special ringing sound to alert you to answer If it is an automatically dialled fax transmission reception will begin automatically A M mode Use this mode only if you have connected an answering machine to the fax see Chapter 6 Select this mode when you go out to receive voice messages in your a...

Page 29: ...0 3 When the display shows the desired volume level press the SPEAKER key to turn off the speaker You can adjust the volume of the speaker and ringer using the UP and DOWN keys SPEAKER SPEAKER HIGH SPEAKER MIDDLE SPEAKER LOW RINGER HIGH RINGER MIDDLE RINGER LOW RINGER OFF OK Ringer 1 Press the UP or DOWN key Make sure the SPEAKER key has not been pressed or DOWN UP ...

Page 30: ...ction system You can also set your fax machine to receive faxes silently but ring to alert you to a voice call To do so set the ringer volume to OFF and set the reception mode to TEL FAX When a voice call comes in a special ringer on the fax will ring Note that extension telephones will not ring Note During intial ringing before the fax picks up the call the fax will be silent but extension teleph...

Page 31: ...aximum weight Note Letters or graphics on the edges of a document will not be scanned 5 mm 4 mm 4 mm 5 mm Letters in the shaded area will not be scanned Other restrictions The scanner cannot recognise yellow greenish yellow or light blue ink Ink glue and correcting fluid on documents must be dry before they pass through the document feeder All clips staples and pins must be removed from documents ...

Page 32: ...ages which must be loaded one at a time insert each page into the feeder as the previous page is being scanned Insert gently to prevent double feeding READY TO SEND 2 Place the document face down and push it gently into the document feeder The top edge of the document should enter the machine first The feeder will draw the leading edge of the document into the machine The display will show 3 Adjus...

Page 33: ...document without opening the operation panel This may damage the feeder mechanism 1 Open the operation panel by grasping the finger hold and pulling up If you need to remove a document from the feeder open the operation panel 2 Remove the document 3 Close the operation panel making sure it clicks into place Click ...

Page 34: ...ntrast setting is AUTO Contrast settings 1 Load the document s AUTO Use AUTO for normal documents DARK Use DARK for faint documents The document must be loaded before the resolution and contrast can be adjusted Resolution settings STANDARD Use STANDARD for ordinary documents This setting gives you the fastest and most economical transmission FINE Use FINE for documents containing small letters or ...

Page 35: ...TO will appear next to each resolution setting The second time you move through the list the contrast setting DARK will appear STANDARD AUTO FINE AUTO SUPER FINE AUTO HALF TONE AUTO STANDARD DARK FINE DARK SUPER FINE DARK HALF TONE DARK Note In order to transmit in FINE or SUPER FINE resolution the receiving fax machine must also have that resolution If it doesn t your machine will automatically s...

Page 36: ...l Dialling allows you to listen to the line and make sure the other fax machine is responding RESOLUTION 2 Pick up the handset or press the SPEAKER key Listen for the dial tone 3 Dial the number of the receiving machine by pressing the numeric keys 4 Wait for the connection Depending on the setting of the receiving machine you will either hear a facsimile reception tone or the other person will an...

Page 37: ...hat the speaker will be automatically activated when you press the REDIAL key Facsimile reception tone This is a pronounced high pitched tone that the receiving machine sends to the transmitting machine to indicate that it is ready to receive 5 When you hear the reception tone press the START MEMORY key Replace the handset if you used it START MEMORY When transmission is completed the fax will bee...

Page 38: ...ur fax machine When you store a fax or telephone number you select a two digit Speed Dial number for it 88 Speed Dial numbers are available Rapid Keys SPEED DIAL key 2 1 3 9 4 5 6 7 8 0 When you store a number in a Rapid Key write the name of the party on the label Speed Dial numbers 09 through 88 are for dialling with the SPEED DIAL key 1 SPEED DIAL START MEMORY Speed Dial numbers 01 through 08 a...

Page 39: ...rvice or an outside line press the REDIAL key The pause will appear as a hyphen Several pauses can be entered in a row 5 Press the START MEMORY key START MEMORY 2 5 8 GHI JKL MNO TUV WXYZ PQRS ABC DEF 1 4 7 3 6 9 0 1 Example 3 Enter a two digit Speed Dial number by pressing the number keys 01 to 08 for Rapid Key Dialling 09 to 88 for Speed Dialling 2 Press 1 to select SET 1 Storing fax and telepho...

Page 40: ...ess STOP to exit If the number will be used for Rapid Key Dialling you can write the name on the appropriate Rapid Key label Step 3 or STOP 7 Press the START MEMORY key START MEMORY 6 Enter the name of the party by pressing the number keys as shown in the chart below Up to 20 characters can be entered If you don t want to enter a name skip this step To enter two letters in succession that require ...

Page 41: ...s in Step 3 and then change the number and or name when they appear in the display Steps 4 and 6 respectively A lithium battery keeps automatic dialling numbers in memory The machine uses a lithium battery to keep automatic dialling numbers and other programmed data in memory when the power is turned off Battery power is consumed primarily when the power is off With the power kept continuously off...

Page 42: ...LUTION The name of the receiving party will appear in the display If no name was stored the fax number will appear If the name or number is incorrect press the STOP key The document will be automatically transmitted once the connection is made Speed Dialling Speed Dialling can be used to dial any number that has been stored for Automatic Dialling 1 Load the document s Set the resolution and or con...

Page 43: ...f a pause is required between any of the digits to access a special service or an outside line press the REDIAL key The pause will appear as a hyphen Several pauses can be entered in a row 3 Check the display If the number of the receiving machine shown is correct press the START MEMORY key If it is not correct press the STOP key to backspace and clear one digit at a time and then re enter the cor...

Page 44: ...ress 1 If you don t remember the first letter go to Step 4 you will scroll through the list from the beginning If a name wasn t stored for the number press 0 This will cause numbers not names to appear when you scroll 4 Press the key or the key to scroll through the names numbers if you pressed 0 Stop when the desired name appears in the display or If no names have been stored that begin with the ...

Page 45: ...matic redialling If you use automatic dialling including Direct Keypad Dialling and the line is busy the machine will automatically redial the number Up to 2 redialling attempts will be made at intervals of 5 minutes To stop automatic redialling press the STOP key ...

Page 46: ...ns that the call is a voice call or manually dialled fax it will make a ringing sound called pseudo ringing for 15 seconds to alert you to answer If you don t answer within this time your fax will send a fax tone to the other machine to allow the calling party to send a fax manually if they desire Comments Only the fax will alert you to voice calls or manually dialled faxes by pseudo ringing An ex...

Page 47: ...of rings on which the machine answers calls by changing Option Setting 2 See Chapter 8 Option Settings If you pick up the handset before the machine answers you can talk to the other party and or receive a document as described in Using TEL mode Press the RECEPTION MODE key until the arrow in the display points to FAX FAX TEL A M TEL FAX RECEPTION MODE Fax reception 2 rings Using FAX Mode ...

Page 48: ... RECEPTION MODE Press the RECEPTION MODE key until the arrow in the display points to A M In A M mode your fax will automatically receive voice and fax messages if you have connected an answering machine to the fax machine See Chapter 6 for more details ...

Page 49: ...handset or an extension phone connected to the same line Beep Press the RECEPTION MODE key until the arrow in the display points to TEL Note If you have set Option Setting 12 Fax signal receive to NO press the START MEMORY key to begin reception RECEIVING RECEPTION MODE 3 If the other party first talks and then wants to send a fax press the START MEMORY key after speaking press your START MEMORY k...

Page 50: ...e only on a tone dial phone This signals the fax to begin reception Hang up 5 Comments Your fax will not accept the signal to begin reception 5 if a document is loaded in its feeder If you have set Option Setting 12 to NO and hear a fax tone when you answer the extension phone you must press 5 and if you are on a tone dial phone or walk over to the fax pick up the handset and press the START MEMOR...

Page 51: ... factory to automatically reduce the size of received documents to fit the size of the printing paper This ensures that data on the edges of the document are not cut off If desired you can turn this function off and have received documents printed at full size Note If a document is too long to fit on the printing paper the remainder will be printed on a second page In this case the cut off point m...

Page 52: ...to turn automatic reduction on or 2 to turn it off 1 2 or AUTO 100 3 If you selected AUTO select the reception ratio to be used in the event that the memory becomes full automatic reduction is not possible when the memory is full Press 1 for 93 or 2 for 100 1 2 or 93 100 4 Press the STOP key STOP ...

Page 53: ... the stored documents will automatically print out If you received documents in memory because the fax ran out of paper be sure to add paper which is the same size as the paper previously used If not the document print out size may not match the size of the printing paper Caution When documents are stored in memory do not turn the power off This will erase all of the contents If documents received...

Page 54: ...on t want to make a reduction or enlargement setting press the START MEMORY key twice Copying will begin If you are only making one copy of the original or of each original and want to make an enlargement or reduction setting press the START MEMORY key and go to Step 5 COPY HELP COPY MODE 1 MULTI COPY 2 SORT COPY START COPY READY TO SEND RESOLUTION 3 Press 1 MULTI COPY if you do not want the copie...

Page 55: ...f reduction or enlargement by entering a number from 1 to 5 as shown below or press the START MEMORY key to automatically select 100 Copying will begin 1 AUTO automatic size adjustment to match the size of the printing paper 2 50 3 100 no reduction or enlargement 4 125 5 135 Example 50 2 Copy Cut off When making a copy of a document that is longer than the printing paper use the copy cut off setti...

Page 56: ...eed Dial number with the numeric keys or Example Press Rapid Key 01 SPEAKER 01 3 Speak with the other party when they answer If you pressed the SPEAKER key pick up the handset to talk Comments While the handset of the fax is lifted off hook an extension phone connected directly to the fax cannot be used to speak with the other party The fax may interrupt a voice call received on an extension phone...

Page 57: ...arch for the number as described in Using the HOLD SEARCH key in Sending a Fax by Automatic Dialling in Chapter 2 then pick up the handset or press the SPEAKER key The number will be dialled automatically do not press the START MEMORY key Redial The last number called can be redialled by pressing the REDIAL key it is not necessary to pick up the handset or press the SPEAKER key When the other part...

Page 58: ...g machine s telephone line socket 2 Connect the answering machine s telephone line socket to the TEL SET socket If desired you can connect an extension phone to your answering machine s extension phone socket Note When Fax Ability or Fax Duet distinctive ring is used the answering machine may be connected to any extension of the same line Important In New Zealand not all standard telephones and an...

Page 59: ...ilable to take your call right now Please leave a message after the beep or press your facsimile Start key to send a fax Thank you for calling Comments It is advisable to keep the length of the message under 10 seconds If it is too long you may have difficulty receiving faxes sent by automatic dialling If your outgoing message must be longer than 10 seconds leave a pause of about four seconds at t...

Page 60: ...hile you are out all of your incoming calls will be answered by the answering machine and its outgoing message will play Voice callers can leave a message During this time your fax will quietly monitor the line If your fax detects a fax tone or a duration of silence greater than four seconds it will take over the line and begin reception When you return and turn off your answering machine be sure ...

Page 61: ...ion you must subscribe to a caller identification service from your telephone company Your fax may not be compatible with some caller identification services 1 Press these keys 2 Press 1 to turn on Caller ID or 2 to turn it off FUNCTION Press 3 times 4 CALLER ID 1 2 or YES NO 3 Press 1 if you are in Australia or 2 if you are in New Zealand COVER SHEET 4 Press the STOP key to return to the date and...

Page 62: ... have turned on the Caller ID function your fax machine will keep information on the most recent 20 calls and faxes you have received You can view this information which consists of the name and number of each caller in the Caller ID List Note For all units installed in New Zealand the direct use of the displayed number for call back does not operate properly and must not be used It is necessary t...

Page 63: ...s from the caller list If you want to delete a single call from the caller list press the 0 key while the call appears in the display If you want to delete all calls from the list hold the 0 key down for at least 3 seconds while you are viewing any number in the list Priority Call If desired you can set your fax to make a special ringing sound when you receive a call from a designated phone number...

Page 64: ...nly prevent faxes In this case when a voice call or a fax transmission comes in from a number you have specified as a Junk Number your fax will terminate the call as soon as it receives the calling phone number from the caller ID service The caller will hear a 3 second high pitch tone to signal the calls termination In Australia the call will not break off until the caller has hung up To use this ...

Page 65: ...tion Setting 2 the factory setting is 2 rings When your voice number is dialled the fax machine will signal the call with the normal ringing sound to let you know that you must answer personally The factory setting is NO If set to YES both Australian Fax Duet and New Zealand FaxAbility Distinctive Ring are supported Important The distinctive ring function can only be used if you subscribe to a dis...

Page 66: ...h of the following methods a maximum of 20 stations can be selected Enter one or more Speed Dial numbers by pressing the numeric keys RESOLUTION READY TO SEND 2 2 Press one or more Rapid Keys 4 Press the START MEMORY key START MEMORY Set the resolution and or contrast if desired 5 Press the START MEMORY key Transmission will begin START MEMORY A Transaction Report is automatically printed out afte...

Page 67: ... included with all tranmissions until you turn it off 1 Press these keys You can select a message For the recipient s name to appear you must dial using a Speed Dial or Rapid Key number with the name programmed Your name and number must be programmed as explained in Chapter 1 2 Press 1 YES to turn on the cover sheet function or 2 NO to turn it off COVER SHEET FUNCTION Press twice 4 1 2 or YES NO A...

Page 68: ...ssion 1 Load the document s The document must be loaded before a message can be selected The cover sheet function must be turned on 2 Press these keys COVER SHEET HEAD FUNCTION 5 3 Select a message by entering a number from 1 to 4 1 URGENT 2 IMPORTANT 3 CONFIDENTIAL 4 PLS DISTRIBUTE 1 Example 4 Dial the receiving machine and transmit the document Note To cancel a cover sheet header setting press t...

Page 69: ...ys Example Eight pages FUNCTION PAGE COUNTER SET 0 8 3 Enter the total number of pages 01 to 99 by pressing the number keys If you are sending a cover sheet do not include it in the total number of pages the number will be adjusted automatically 4 Dial the receiving machine and transmit the document Comments If you need to cancel a batch number entry remove the document from the feeder or press th...

Page 70: ...Anti Junk function will not operate for a number which has also been stored as a Priority Call number To clear a number from the Anti Junk Number List you need to know the 1 digit number which identifies it If you have forgotten this number print out the Anti Junk Number List as explained in Chapter 9 1 Press these keys FUNCTION Press twice 3 STORE JUNK 2 Press 1 to store a number in the Anti Junk...

Page 71: ...Functions 5 Press the START MEMORY key 4 Enter the full number you want to block max of 20 digits Step 3 or START MEMORY 2 5 8 GHI JKL MNO TUV WXYZ PQRS ABC DEF 1 4 7 3 6 9 6 Return to Step 3 to enter or clear another number or press STOP to exit STOP ...

Page 72: ... the feeder for other operations After transmission the document will be cleared from memory Only one memory transmission can be set at a time The amount of memory currently occupied appears as a percentage in the display while the document is being scanned RESOLUTION ENTER STATION 1 START MEMORY READY TO SEND Set the resolution and or contrast if desired 3 Enter the number of the receiving machin...

Page 73: ...cted from the feeder After transmission the memory will be cleared and you can transmit the remaining pages You will also need to transmit the page which was being scanned when the memory filled up Press the STOP key if you want to cancel the entire transmission 4 Press the START MEMORY key if you entered a Speed Dial number or a full number START MEMORY The document will be scanned and stored in ...

Page 74: ...ion 1 Dial the fax machine you want to poll using one of the following methods Pick up the handset or press the SPEAKER key and press a Rapid key Wait for the fax answerback tone Pick up the handset or press the SPEAKER key and dial the full number Wait for the fax answerback tone Press the SPEED DIAL key and enter a 2 digit Speed Dial number Enter the full number using the numeric keys 2 5 8 GHI ...

Page 75: ...en enter permitted numbers as shown on the following page 1 Press these keys 2 Press 1 to turn polling security on or 2 to turn it off START MEMORY FUNCTION Press 3 times 3 SECURITY SELECT 1 2 or 3 Press the START MEMORY key and then the STOP key STOP 2 Press 1 to store a number or 2 to clear a number 3 Storing Enter a 2 digit number from 01 to 10 This number identifies the fax number you will sto...

Page 76: ...ission 74 4 Enter the fax number max of 20 digits 5 Press the START MEMORY key 6 Return to Step 3 to enter or clear another number or press STOP to exit Step 3 or STOP START MEMORY 2 5 8 GHI JKL MNO TUV WXYZ PQRS ABC DEF 1 4 7 3 6 9 ...

Page 77: ...be there when the operation is performed Note Only a Speed Dial number can be used to dial the receiving machine Setting a timer operation 1 Press these keys 2 Press to set a transmission operation SEND MODE or to set a polling operation POLLING MODE 1 TIMER MODE 3 Press 1 to select SET 0 5 9 2 Example 9 25 4 Enter the time at which you want the operation to take place in 24 hour format 2 digits f...

Page 78: ...transmission operation load the document in the feeder sometime before the specified time of transmission To cancel an operation If you need to cancel an operation after it has been set follow the steps below 1 Press these keys TIMER MODE FUNCTION 1 2 Press to cancel a transmission operation or to cancel a polling operation 3 Press 2 to select CLEAR 2 or 4 Press the START MEMORY key and then the S...

Page 79: ...ing has been made for each option at the factory You can change a setting by following the steps described for each option below First press FUNCTION and 4 then press or to scroll through the options FINE PRIORITY NUMBER OF RINGS or 4 Display will show or 1 2 YES NO FUNCTION FUNCTION 4 Setting 2 NUMBER OF RINGS TO ANSWER This sets the number of rings the fax machine waits before answering an incom...

Page 80: ...use a number other than 5 to begin fax reception You can enter any number from 0 to 9 Initial setting 5 TEL FAX REMOTE until display shows Press 4 FUNCTION REMOTE RECEPTION Enter a number from 0 to 9 STOP TEL FAX REMOTE or 1 2 YES NO STOP Setting 5 REMOTE RECEPTION SELECT If you don t intend to use the above TEL FAX REMOTE NUMBER you can turn detection of the number off This will ensure that the f...

Page 81: ...ted only after a transmission 4 NEVER PRINT A report will never be printed 5 ERROR ONLY A report will be printed only after an error occurs TRANSACTION LIST until display shows Press 4 FUNCTION DIAL MODE Enter a number from 1 to 5 STOP Setting 7 DIAL MODE This sets the mode of dialling Press 1 if you are on a tone dial line or 2 if you are on a pulse dial line Initial setting 1 PSEUDO RING DUR or ...

Page 82: ... detects a certain duration of silence after the answering machine answers a call This sets the duration of silence in seconds Enter a number from 01 to 10 or enter 00 to turn off the function Initial setting 04 QUIET DETECT TM until display shows Press 4 FUNCTION FAX RX A M FAILS Enter a number from 00 to 10 STOP Setting 10 FAX RX A M FAILS Press 1 YES to have the fax answer a call if an answerin...

Page 83: ...n if you hear a high pitched fax tone after answering a call If you use a computer fax modem on the same line you must turn this function off in order to prevent your fax from mistakenly attempting to receive documents sent from the computer fax modem Press 1 to turn the function on or 2 to turn it off Initial setting 1 FAX SIGNAL RX until display shows Press 4 FUNCTION JUNK CHECK or 1 2 YES NO ST...

Page 84: ... Caller ID function press 1 To turn Caller ID off press 2 Caller ID is explained in more detail in Caller ID in Chapter 7 Initial setting 2 CALLER ID until display shows Press 4 FUNCTION STOP or 1 2 AUSTRALIA NEW ZEALAND COVER SHEET Setting 16 AUTO COVER SHEET Press 1 YES to have the fax automatically generate a cover sheet and send it as the last page of each transmission Press 2 NO to turn the f...

Page 85: ... 1 to have your fax automatically print out an Activity Report once every 30 operations The list can still be printed out on demand when desired Press 2 to turn automatic print out off Initial setting 2 AUTO PRINT OUT Display will show Press 4 FUNCTION FINE PRIORITY or 1 2 YES NO STOP ...

Page 86: ... combined maximum of 30 operations can appear The report is divided into two parts the TRANSMISSIONS ACTIVITY REPORT which shows information on transmissions and the RECEPTIONS ACTIVITY REPORT which shows information on receptions If Option Setting 17 Auto Print Out is set to YES a report will be automatically printed out whenever information on 30 operations has accumulated A report can still be ...

Page 87: ...sts try a different outlet If necessary have an electrician check your power lines JAM A problem with the paper or original document occurred Make sure the paper or document is loaded properly Make sure the operation panel is shut securely NO PAPER You ran out of paper during reception COM E 0 to COM E 7 A telephone line error prevented the transaction See Line Error in Chapter 11 CANCEL Transmiss...

Page 88: ...most recent calls maximum of 20 calls This list is only available if you are using the Caller ID function Print Setup List This list shows the current status of the printing settings accessed by pressing the FUNCTION key and the 6 key Transaction Report This report is printed out automatically after an operation is completed to allow you to check the result Your fax is set at the factory to print ...

Page 89: ...ting performance 1 First unplug the telephone line then unplug the power cord 3 Open the operation panel grasp the finger hold and pull up and then pull the release on the right side of the machine forward to open the print compartment cover 4 Take the imaging film cartridge out of the print compartment and place it on a sheet of paper For Australia For New Zealand ...

Page 90: ...d a large number of documents If this is the case allow the print head to cool prior to cleaning 6 Place the imaging film cartridge back in the print compartment 5 Wipe the print head and roller with isopropyl alcohol Roller Print head 7 Close the print compartment cover press down on both sides to make sure it clicks into place and then close the operation panel ...

Page 91: ...hese solvents may damage or discolor the machine Scanning glass and rollers Clean the scanning glass and rollers frequently to ensure the quality of transmitted images and copies Open the operation panel grasp the finger hold and pull up and wipe the scanning glass and rollers with a soft cloth Make sure that all dirt and stains such as correcting fluid are removed as dirt and stains will cause ve...

Page 92: ...ocket is connected to the wall socket Make sure your fax machine s TEL SET socket is connected to your answering machine s telephone line socket not the answering machine s extension phone socket Make sure your answering machine s outgoing message is under 10 seconds Make sure that Option Setting 9 Quiet Detect Time is set to three or four seconds see Chapter 8 Make sure that the Distinctive Ring ...

Page 93: ...ther party to make sure their fax machine is functioning properly Have your telephone line checked for line noise Try connecting your fax to a different telephone line If the problem still occurs your fax machine may need service Problem Check and remedy No dial tone when you pick up the handset or press the SPEAKER key Make sure the handset cord is connected to the correct socket See Handset in C...

Page 94: ...rm its response Nothing is printed at the receiving end Make sure that the document for transmission is placed face down in the feeder A distorted image is received at the other end Noise on the telephone line may cause distortion Try sending the document again Make a copy of the document on your fax If the copy is also distorted your fax may have a problem If the problem persists call for service...

Page 95: ...e a copy of another document on your fax If the copy is also distorted your fax may have a problem If the problem persists call for service The quality of copies is poor and or black spots appear Any dirt or material on the scanning glass will cause spots to appear on copies and transmitted faxes Clean the fax print head and the scanning glass as explained in Chapter 10 Reception copying is interr...

Page 96: ...the document see Transmittable documents in Chapter 2 Voice calls taken on an extension phone are interrupted by the fax The fax may interrupt during a voice call if the reception mode is set to A M To prevent interruption on a tone dial extension phone press any three keys on the extension phone after answering Note Do not enter the code to activate fax reception No reception occurs when polling ...

Page 97: ...on both sides of the print compartment cover to close it DOCUMENT JAMMED The original document is jammed See the following section Clearing Paper Jams FAX RX IN MEMORY A fax has been received in memory because the imaging film needs replacement you have run out of printing paper or the paper is jammed The fax will print out automatically when the problem is fixed FILM END The imaging film may need...

Page 98: ...TING The fax is preparing or printing out a document from memory NO DATA This appears if you attempt to search for an automatic dialling number when none have been stored NO STORED You have tried to dial or clear a Rapid Key or Speed Dial number that hasn t been programmed a full number hasn t been assigned to it OUT OF PAPER You are out of printing paper or the paper release plate is open Load pa...

Page 99: ...Press or to search for an automatic dialling number or press STOP to return to the data and time display See Using the HOLD SEARCH key in Sending a Fax by Automatic Dialling in Chapter 2 TOTAL PAGE S 01 Number of pages transmitted received or copied Audible signals Continuous tone 3 seconds Indicates the end of transmission reception or copying Intermittent tone 3 beeps 5 seconds 1 second on 1 sec...

Page 100: ...try pressing the START MEMORY key If it doesn t feed out remove it as follows Important Do not try to remove a document without opening the operation panel This may damage the feeder mechanism 1 Open the operation panel by grasping the finger hold and pulling up 3 Close the operation panel making sure it clicks into place Clearing jammed printing paper 1 Pull the paper release plate forward and re...

Page 101: ... Open the operation panel grasp the finger hold and pull up and then pull the release on the right side of the machine forward to open the print compartment cover 4 Close the print compartment cover press down on both sides to make sure it clicks into place and then close the operation panel 5 Reinsert the paper in the paper tray and push the paper release plate back down ...

Page 102: ...ress FUNCTION START MEMORY STOP START MEMORY START MEMORY INSTALLATION 1 Connect the handset as shown 2 Plug the power cord into a grounded 230 240 V outlet 3 Plug one end of the telephone line into the TEL LINE socket on the rear of the fax and the other end into the adapter Plug the adapter into a telephone wall socket Connecting an answering machine and or extension telephone 1 Remove the seal ...

Page 103: ...ilm and paper must be loaded to perform the following operation Press Display shows Press the START MEMORY key Enter two digits for the Day 01 through 31 Enter two digits for the Month 01 through 12 Enter four digits for the Year Ex 2001 Enter two digits for the Hour 01 through 23 Enter two digits for the Minute 00 through 59 When finished press STORING AND CLEARING NUMBERS FOR AUTO DIALING Note I...

Page 104: ...py Help key 11 52 Cover sheet 82 D Date setting 24 Dial mode 79 Dialling Direct Keypad 41 Normal 34 54 Rapid Key 40 54 Search 41 55 Speed 40 54 Direct Keypad Dialling 41 Display 10 Display messages 95 Distinctive Ring 63 Document feeder 30 Document guides 30 Document restrictions 29 Document sizes 29 Document maximum scanning size 29 E Extension telephone Connecting 14 Using 48 F Fax Ability Disti...

Page 105: ...X mode 26 45 Setting 26 TEL mode 26 47 TEL FAX mode 26 44 Reception mode key 10 26 Reception Ratio setting 49 Redial key 10 55 Redialling 35 43 55 Remote Reception Select 78 Removing original document 31 Resolution 32 Resolution key 10 Ringer volume 27 Rollers cleaning 89 S Scanning glass cleaning 89 Search Dialling 41 55 Sender s name and number entering 21 Speaker key 11 27 34 54 Speaker volume ...

Page 106: ......

Page 107: ... SHARP CORPORATION OF AUSTRALIA PTY LTD A C N 003 039 405 1 Huntingwood Drive Huntingwood Blacktown N S W 2148 SHARP CORPORATION OF NEW ZEALAND LIMITED Cnr Mahunga Drive Hastie Ave Mangere Bridge Auckland New Zealand SHARP CORPORATION ...

Reviews: