background image

SD-AT50W

OPERATION MANUAL

1-BIT DIGITAL HOME THEATER

MODEL

SDAT50W(A)_FRONT

02.11.7, 17:09

1

Summary of Contents for SD-AT50W

Page 1: ...SD AT50W OPERATION MANUAL 1 BIT DIGITAL HOME THEATER MODEL SDAT50W A _FRONT 02 11 7 17 09 1 ...

Page 2: ...eral Information Accessories 3 Precautions 4 Controls and indicators 5 7 Preparation for Use System connections 8 9 Aerial connection 10 Audio connection of other equipment 10 11 Connecting to the AC socket 12 Headphones 12 System installation 12 13 Remote control 14 General control 14 Setting the clock 15 Basic Operation Listening to the radio 16 Listening to the memorised station 17 Listening to...

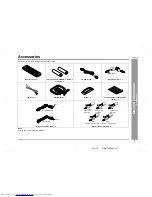
Page 3: ... control 1 AA size battery UM SUM 3 R6 HP 7 or similar 2 AC power lead 1 Digital audio cable 1 FM aerial 1 AM loop aerial 1 Stand 1 Antislip speaker cushion sheet 20 pcs 1 System connection cable 2 Speaker connection lead 5 Orange For signal power For sound Blue Black White approx 15 m 45 feet approx 15 m 45 feet approx 5 m 15 feet approx 5 m 15 feet approx 5 m 15 feet Red Green Blue Grey ...

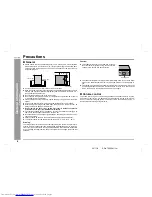
Page 4: ...o naked flame sources such as lighted candles should be placed on the compo nents of the system Attention should be drawn to the environmental aspects of battery disposal This system should only be used within the range of 5 C 35 C 41 F 95 F Warning The voltage used must be the same as that specified by this system Using this prod uct with a higher voltage other than that specified is dangerous an...

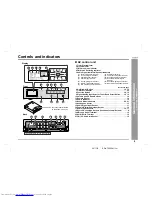
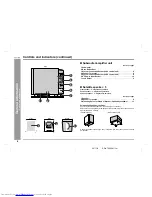
Page 5: ...udio Input Socket 10 17 Audio Input Sockets 10 11 18 System Connection Sockets to subwoofer amplifier unit 8 19 AM Loop Aerial Terminal 10 20 Aerial Earth Terminal 10 21 FM 75 Ohms Aerial Socket 10 Display Front Back The rating label is located on the bottom of the unit This product does not use this terminal 10 11 13 14 5 1 7 8 2 3 4 5 6 9 10 11 12 13 15 16 17 19 20 21 12 6 7 8 9 18 1 2 3 4 1 Lef...

Page 6: ...lly shielded Centre speaker 1 magnetically shielded Surround speaker 2 magnetically shielded Reference page 1 Speaker 2 Speaker Terminals 9 3 Mounting Holes for Stand or Bracket Optionally available 13 Using antislip speaker cushions You can install satellite speakers either vertically or horizontally Affix the cushions supplied to the bottom of the speakers to prevent them from slid ing or fallin...

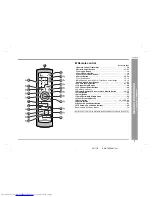
Page 7: ...ttons 21 10 TV On Stand by Button 27 28 11 TV Input Select Button 28 12 TV Channel Select Buttons 28 13 On Stand by Button 14 14 Display Brightness Select or Clock Display Button 14 15 15 Timer Button 24 16 Clear Button 17 17 Amplifier Initial Setting Button 22 18 Tuner Preset Up Button 17 19 Enter Button 15 17 22 24 20 Return Button 23 21 Dynamic Sound Select Button 21 22 TV Volume Up and Down Bu...

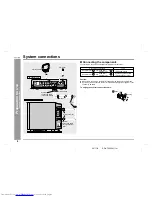
Page 8: ... for sound and signal power together If not noises may be heard To unplug the system connection cable AV control unit Subwoofer amplifier unit System connection cable For sound black Arrow upward Closer Closer Arrow to the left System connection cable For signal power blue FM aerial AM loop aerial AV control unit Connecting components Lead AV control unit System connection cable For sound black Sy...

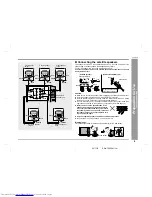
Page 9: ... terminals of the speaker leads The right speaker is placed on the right when you face the system See page 13 Only the supplied speakers should be used with this product Do not stand or sit on the speakers You may be injured Binding leads Tie the leads connected to the subwoofer amplifier unit with a lead holder Red Red Red Red Red Red Red Grey Grey Black Black Black Black Black Green Green Blue B...

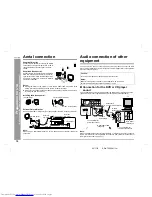
Page 10: ...ercially available cable Note When the digital audio output socket of the DVD or CD player is optical connect to the AUX terminal of this unit regardless of connection type Refer to Connection for the digital tuner sound on page 11 Supplied FM aerial Connect the FM aerial wire to the FM 75 OHMS socket and position the FM aerial wire in the di rection where the strongest signal can be re ceived Sup...

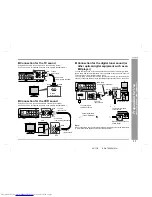
Page 11: ... either our optional cables or commercially available ones If you are using the digital tuner with the optical output socket you can enjoy better sound by connecting the tuner to the optical digital input socket of the AV control unit Note When connecting with an optical digital cable set the digital output of the digital tuner to PCM Refer to the operation manual of the digital tuner Audio cable ...

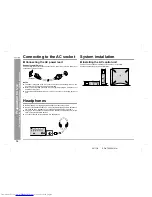
Page 12: ...ed Otherwise a malfunction or an accident may occur Unplug the subwoofer amplifier unit if it will not be used for prolonged periods of time Headphones Before plugging in or unplugging the headphones reduce the volume Be sure your headphones have a 3 5 mm 1 8 diameter plug and are between 16 ohms and 50 ohms impedance The recommended impedance is 32 ohms Plugging in the headphones disconnects the ...

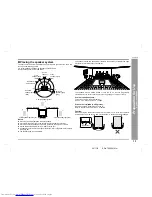
Page 13: ...nd speaker wall brackets are optionally available see page 30 Refer to their instructions for assembly The speakers may be placed beside or near the TV as they are magnetically shielded However colour variation may occur depending on the type of the TV If colour variation occurs Turn off the TV from the power switch After 15 30 minutes turn the TV on again If the colour variation is still present ...

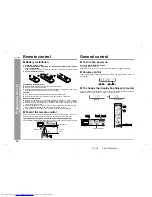
Page 14: ...the remote control away from moisture heat shock and vibrations Test of the remote control Check the remote control after checking all the connections see pages 8 10 and 12 Point the remote control directly at the remote sensor on the AV control unit The remote control can be used within the range shown below Press the ON STAND BY button Does the power turn on Now you can enjoy your system General...

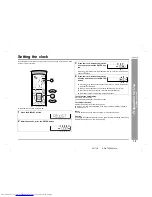
Page 15: ... system is in the stand by mode Caution Unplugging the subwoofer amplifier unit or a power failure will clear the clock setting Perform Setting the clock from the beginning 1 Press the DISPLAY button 2 Within 5 seconds press the ENTER button 3 Press the or button to adjust the hour and then press the ENTER but ton Press the or button once to advance the time by 1 hour Hold it down to ad vance cont...

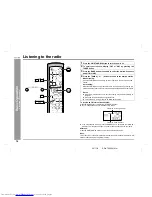
Page 16: ...o 1 Press the ON STAND BY button to turn the power on 2 To enter tuner function display FM or AM by pressing the TUNER button 3 Press the BAND button repeatedly to select the desired frequency band FM or AM 4 Press the TUNING or button to tune in to the desired station Manual tuning Press the TUNING button as many times as required to tune in to the desired station Auto tuning When the TUNING butt...

Page 17: ...erform steps 1 3 in Listening to the radio on page 16 2 Press the ENTER button to enter the preset tuning saving mode 3 Within 5 seconds press the TUNER PRESET or button to select the preset channel number Store the stations in memory in order starting with preset channel 1 4 Within 5 seconds press the ENTER button to store that station in mem ory 5 Repeat steps 1 4 to set other stations or to cha...

Page 18: ...de if you set the volume level too high If this happens lower the volume level 1 Press the ON STAND BY button on the AV control unit or the re mote control to turn the power on 2 Turn on the DVD or CD player 3 Press the FUNCTION button to set the function to DVD The DVD button on the remote control can also set the function to DVD Press the DIGITAL ANALOG button to switch the sound to AUX ANALOG o...

Page 19: ...he sys tem automatically when it is played back Standard Dynamic sound DTS Digital Theater Sys tems One of the digital audio systems for theatrical use As the sound quality is emphasised you can enjoy the realistic sound effect in the home theatre system The disc recorded in DTS is recognised by the system automatically when it is played back Stereo Digital input from discs with this trademark Sta...

Page 20: ...c effect Standard The maximum of 5 1ch surround sound is reproduced to provide three dimen sional effect The system automatically emits the 5 1ch sound according to the recorded audio signal The STANDARD indicator lights up Dynamic sound You can enjoy the normal surround with various scenes MOVIE The bass level is increased for powerful sound effect MUSIC You can enjoy lively sound by producing th...

Page 21: ...ally The sound mode cannot be changed during its playback To enjoy in the standard mode Example Dolby Digital 5 1ch Whilst the disc is playing press the STANDARD but ton STANDARD will appear To enjoy with dynamic sound in the standard mode Whilst the disc is playing press the DYNAMIC SOUND button Each press of this button changes the mode in the order of MOVIE MUSIC NIGHT Press the STANDARD button...

Page 22: ...Press the SETUP AMP button and the or button to select SP SIZE Then press the ENTER button 2 Within 10 seconds press the or button to select the desired speaker The indicators of selected speakers flash 3 Within 10 seconds press the or button to select their sizes To set sizes of other speakers repeat the operation from step 2 1 Press the SETUP AMP button and the or button to select SP DELAY Then ...

Page 23: ... and the or button to select SP LEVEL Then press the ENTER button 2 Within 10 seconds press the or button to select the desired speaker 3 Within 10 seconds press the or button to adjust the level You can adjust the level at 1 dB intervals To adjust the levels of other speakers repeat the operation from step 2 Press the SETUP AMP button and the or button to select TONE Then press the ENTER button T...

Page 24: ... select TIMER SET and press the ENTER button 3 Press the or button to adjust the hour and then press the ENTER button 4 Press the or button to adjust the minutes and then press the ENTER button The start time is set and the finish time 1 hour later will be displayed automati cally 5 Set the time to finish as in steps 3 and 4 above 6 Switch input with the or button and then press the ENTER button W...

Page 25: ...ent the connected equipment should be set to operate the timer playback at the same time 1 Whilst in the timer playback stand by mode press the TIMER button 2 Within 10 seconds press the or button to select TIMER CALL and press the ENTER button The system returns to the timer playback stand by mode after the setting con tents are displayed in order When the start time is reached Playback starts au...

Page 26: ...d wake up to the same CD 1 During playback press the TIMER button 2 Within 10 seconds press the or button to select SLEEP SET and press the ENTER button 3 Press the or button to select the time Maximum 2 hours Minimum 1 minute 2 hours 5 minutes 5 minute intervals 5 minutes 1 minute 1 minute intervals 4 Press the ENTER button SLEEP will appear 5 Your system will enter the power stand by mode automa...

Page 27: ...s in the remote control the registered number may automatically be set to 01 SHARP If it occurs register the desired number again Registration cannot be executed depending on TVs Even if numbers can be set some buttons may not work 1 Whilst holding down the TV ON STAND BY button press the TV CHANNEL button 2 Enter the manufacturer setting number 2 digits with the direct number buttons 0 9 and pres...

Page 28: ...m noise source or plug the AC power leads to other AC outlets The speaker is not connected properly The amplifier is defective Set the system to the stand by mode and turn the power on again The amplifier is defective Set the system to the stand by mode and turn the power on again The amplifier is defective Place the system away from noise source or plug the AC power leads to other AC outlets The ...

Page 29: ... clock P 15 The display on the system is dark Hold down the DISPLAY button on the remote control for 2 seconds or more to select ON P 14 The power is not turned on Is the system unplugged P 12 Are the system connection cables disconnected P 8 The protection circuit may be acti vated Unplug and plug in the power lead again after 5 minutes or more P 30 Symptom Possible cause Reference page The radio...

Page 30: ...r 5 minutes or more plug it in again Turn down the volume if set too high Maintenance Cleaning the cabinet Optional accessories Use only the specified optional accessories to operate this product properly For speaker installation read instructions supplied with stands or brackets The appearance of optional accessories may differ from the illustrations above 1 Unplug the subwoofer amplifier unit 2 ...

Page 31: ...utput terminal Headphones 16 50 ohms recommended 32 ohms Other terminals System control 3 Frequency range FM 88 108 MHz AM 531 1 602 kHz Power source AC 220 240 V 50 60 Hz Power consumption 80 W Dimensions Width 260 mm 10 1 4 Height 373 mm 14 11 16 Depth 421 mm 16 5 8 Weight 10 3 kg 22 7 lbs Output power Front speakers RMS 100 W 50 W 50 W 10 T H D 1 kHz Centre speaker RMS 50 W 10 T H D 1 kHz Surro...

Page 32: ...SHARP CORPORATION 9906 TINSE0521AWZZ 02L R HK 1 SDAT50W A _BACK 02 11 7 17 10 1 ...

Reviews: