Installation Instructions
Document No. 544-296
May 2, 2012
Electric-Pneumatic Transducer and
Enclosure
Item Number 544-296+3, Rev. DA
Page 1
of 2
Product Description
The Electric-Pneumatic Transducer (E-P) converts
an analog electrical input signal to a proportional
pneumatic output. The enclosures allow remote
mounting of the Electric-Pneumatic Transducers.
Product Numbers
Product Number
Description
544-294
Enclosure for one E-P Transducer
544-295
Enclosure for up to three E-P
Transducers
544-194
PXP0
544-196
PXP2
544-197
PXP5
Required Tools
•
Medium flat-blade screwdriver
•
Medium duty drill
•
Small socket set
•
Level and marker
•
Drill set
Expected Installation Time
Enclosure
13 minutes
Each E-P Transducer
15 minutes
Prerequisites
None
Installation
1.
Pick a position and mount the housing using the
housing holes as a template. Self-drilling
screws are supplied with the unit. If the self-
drilling feature is not being used, drill a 1/8-inch
diameter pilot hole.
2.
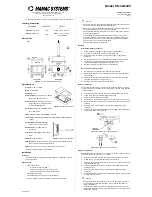
Snap in the Electric-Pneumatic Transducer(s).
See Figure 1 for single housing and Figure 2 for
housing for up to three Electric-Pneumatic
Transducers.
Figure 1. Housing for One Electric-Pneumatic
Transducer.
3.
Wire as shown in Figure 3.
4.
Move the shunt to set the desired input signal.
See Figure 3.
5.
Connect the pneumatic tubing. See Figure 3.
NOTE:
A clean, dry air supply is required for
the EP Transducers. A filter such as
Powers™ P/N 908-033 is
recommended for the branch supply
air line.
6. Both electric-pneumatic transducer housings will
accept gauges such as the Powers 1-1/2 inch
analog receiver gauges (P/N 142-373). Knock-
outs are provided on the housing to
accommodate gauges. See Figures 1 and 2.
The installation is now complete.


