

1
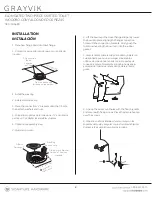
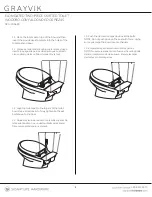
G R AY V I K
ELONGATED TWO-PIECE SKIRTED TOILET
INODORO CON FALDÓN DE DOS PIEZAS
SKU: 946603
GETTING STARTED
BEFORE YOU BEGIN
We recommend consulting a professional if you are
unfamiliar with installing plumbing fixtures. Signature
Hardware accepts no liability for any damage to the
toilet, plumbing, flooring, or for personal injury during
installation.
Observe all local plumbing and building codes.
Unpack and inspect the toilet for shipping damage. If any
damage is found, contact our Customer Relations team
at 1-800-221-3379.
Ensure that you have gathered all the required
materials that are needed for the installation.
For these instructions, it is assumed that the old toilet
has been completely removed and any necessary
repairs or modifications to the water supply have
been completed.
Confirm that there is enough floor space to install the
toilet unit and that the bathroom door will open/close
without obstruction.
Shut off the water supply lines where the new toilet is
being installed.
Water Pressure: The product is designed to operate
with a minimum working pressure
of 20psi.
ANTES DE COMENZAR
Le recomendamos que consulte a un profesional si no
sabe cómo instalar accesorios de plomería. Signature
Hardware no asume ninguna responsabilidad con respecto
a los daños causados al inodoro, sistema de plomería,
suelo o daños personales durante
la instalación.
Cumpla con todas las normas locales de plomería y
construcción.
Retire el inodoro del empaque y verifique si se produjeron
daños durante el envío. Si encuentra algún daño,
comuníquese con nuestro equipo de Servicio al cliente al
1-800-221-3379.
CÓMO COMENZAR
Asegúrese de haber reunido todos los materiales
necesarios para la instalación.
Para estas instrucciones, se supone que el inodoro
anterior se ha retirado por completo y cualquier
reparación o modificación necesaria al suministro de
agua se ha completado.
Confirme que exista suficiente espacio en el suelo para
instalar el inodoro y que la puerta del baño se abra o se
cierre sin obstrucciones.
Cierre las líneas de suministro de agua en donde se
instalará el nuevo inodoro.
Presión de agua: El producto está diseñado para
funcionar con una presión de operación mínima
de 20 psi.
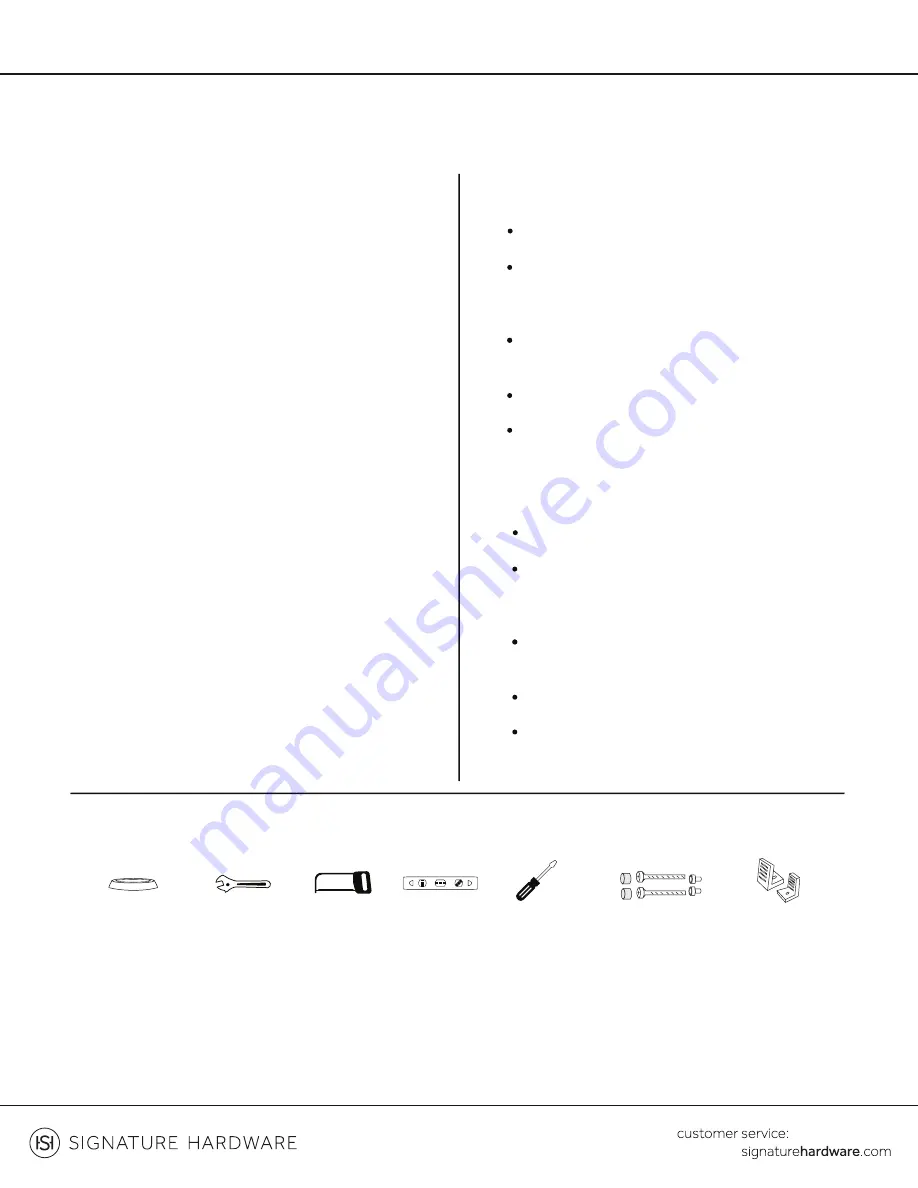
TOOLS AND MATERIALS / HERRAMIENTAS Y MATERIALES:
Fixing Screws,
Decorative Caps,
Cap Base
Tornillos de figacion,
tapas decorativas,
tapa base
Flange
Connecting
Brackets
Soportes para
conectar la brida
Flathead
Screwdriver
Destornillador de
cabeza plana
Hacksaw
Sierra para
metales
Level
Nivelador
Wax Ring
Anillo de cera
Llave inglesa
ajustable
Adjustable
Wrench
1.800.221.3379
REVISED 08/07/2019
CODES: SHGV200WH, SHGV240SWH