background image

1

USB 3.0 Internal Bay Multi
Card Reader

Quick Installation Guide

04-0723B

Introduction

The 

USB 3.0 Internal Bay Multi Card Reader 

is the

perfect choice for computer users looking for a

multi-format flash memory card reader/writer

that installs into a front drive bay of the computer.

Key Features and Benefits

Compliant with USB 3.0 Specification

Front access USB 3.0 port

Fits into any standard 3.5" drive bay

Power & Activity LEDs

Supports SD, SDHC, SDXC, microSD,

MMC,  Memory Stick, Memory Stick Pro,

Memory Stick Duo, CF and xD memory

cards

Summary of Contents for JU-MR0A11-S1

Page 1: ...users looking for a multi format flash memory card reader writer that installs into a front drive bay of the computer Key Features and Benefits Compliant with USB 3 0 Specification Front access USB 3 0 port Fits into any standard 3 5 drive bay Power Activity LEDs Supports SD SDHC SDXC microSD MMC Memory Stick Memory Stick Pro Memory Stick Duo CF and xD memory cards ...

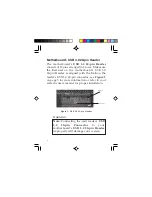
Page 2: ...7 32 64 bit Vista 32 64 bit XP 32 64 bit Server 2003 2008 32 64 bit Server 2008 R2 Package Contents USB 3 0 Internal Bay Multi Card Reader Mounting screws Quick installation guide Layout Figure 1 Layout Power LED Memory Stick xD SD MMC CF microSD M2 USB 3 0 port Activity LED USB 3 0 20 pin connector to motherboard ...

Page 3: ...rned on and will blink when memory card write activity is detected USB 3 0 Port A convenient front access USB 3 0 port Plug any USB device into this connection USB 3 0 20 pin Connector Plugs into the motherboard s USB 3 0 20 pin Header The connector is keyed to ensure proper insertion into the motherboard s header Figure 2 USB 3 0 20 pin Connector Tab ...

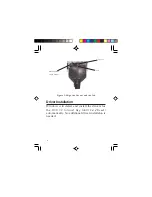
Page 4: ...in Header is aligned with the Tab on the reader s USB 3 0 20 pin connector see Figure 2 on page 3 for more information or refer to your system s users manual for proper installation Figure 3 USB 3 0 20 pin Header Cut out No pin Note Connecting the card reader s USB 3 0 20 pin Connector to your motherboard s USB 3 0 20 pin Header improperly will damage your system WARNING ...

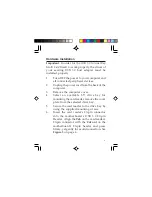
Page 5: ...he computer 3 Remove the computer cover 4 Select an available 3 5 drive bay for mounting the card reader remove the cover plate from the selected drive bay 5 Secure the card reader to the drive bay by using the supplied mounting screws 6 Insert the card reader s 20 pin connector into the motherboard s USB 3 0 20 pin Header Align the Tab on the card reader s 20 pin connector with the Cut out on the...

Page 6: ...t out and the Tab DriverInstallation Windows will detect and install the drivers for the USB 3 0 Internal Bay Multi Card Reader automatically No additional driver installaton is needed Cut out Tab Motherboard s 20 pin header ...

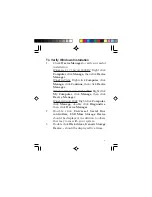
Page 7: ...n click Device Manager Windows XP Server 2003 2000 Right click My Computer click Manage then click Device Manager Windows Server 2008 Right click Computer click Manage double click Diagnostics then click Device Manager 2 Double click Universal Serial Bus controllers USB Mass Storage Device should be displayed in addition to others that may come with your system 3 Double click Disk drives Generic S...

Page 8: ...p label facing down Accessing Memory Cards For Windows 8 7 Server 2008 R2 A Removable Disk icon will appear in Computer only when a memory card is inserted into the corresponding memory card slot Otherwise no Removable Disk icons will appear in Computer If you prefer to have the disk icons appear regardless follow the steps below 1 Double click Computer click Organize click Folder and search optio...

Page 9: ...ble click the icon that corresponds to the inserted memory card The memory card slots appear in the following order CF xD SD MMC Memory Stick and microSD M2 respectively Removing Memory Cards To prevent data loss data corruption or memory card failure do not remove memory cards while the Activity LED is FLASHING ...

Page 10: ...10 Blank Page ...
Page 11: ...edures below A If it is within the store s return policy period please return the product to the store where you purchased from B If your purchase has passed the store s return policy period please follow the steps below to have the product repaired or replaced Step 1 Submit your RMA request Gotowww siig com click Support thenREQUESTAPRODUCTREPLACEMENT to submit a request to SIIG RMA or fax a requ...

Page 12: ...sktop Notebooksystemsandexternalperipherals SIIGcontinuestogrowbyadding A V and Digital Signage connectivity solutions to our extensive portfolio SIIGproductsoffercomprehensiveusermanuals manyuser friendlyfeatures andarebackedbyanextensivemanufacturerwarranty Highqualitycontrol standards are evident by the overall ease of installation and compatibility of ourproducts aswellasoneofthelowestdefectiv...

Reviews: