background image

1

“IMPORTANT SAFETY INSTRUCTIONS”

1. “This sewing machine should never be left unattended when plugged in. Always unplug this sewing machine from the electric

outlet immediately after using and before cleaning.”

2. “Always unplug before replacing light bulb. Replace bulb with same type rated DC 6.5 V  2.8 Watts.”

“WARNING-

To reduce the risk of burns, fire, electric shock, or injury to persons: ”


1. “Do not allow to be used as a toy. Close attention is necessary when this sewing machine is used by or near children.”

  2. “Use this sewing machine only for its intended use as described in this manual. Use only attachments recommended by the

manufacturer as contained in this manual.”

  3. “Never operate this sewing machine if it has a damaged cord or plug, if it is not working properly, if it has been dropped or

damaged, or dropped into water. Return the sewing machine to the nearest authorized dealer or service center for
examination, repair, electrical or mechanical adjustment.”

  4. “Never operate the sewing machine with any air openings blocked. Keep ventilation openings of the sewing machine and foot

control free from the accumulation of lint, dust, and loose cloth.”

  5. “Never drop or insert any object into any opening.”
  6. “Do not use outdoors.”
  7. “Do not operate where aerosol (spray) products are being used or where oxygen is being administered.”
  8. “To disconnect, turn switch to the off (“0”) position, then remove plug from outlet.”
  9. “Do not unplug by pulling on cord. To unplug, grasp the plug, not the cord.”
10. “Keep fingers away from all moving parts. Special care is required around the sewing machine needle.”
11. “Never sew with a damaged needle plate as this can cause needle to break.”
12. “Do not use bent needles.”
13. “Do not pull or push fabric while stitching. It may deflect the needle causing it to break.”
14. “Switch the sewing machine off (“0”) when making any adjustments in the needle area, such as threading needle, changing

needle, threading bobbin, or changing presser foot, etc.”

15. “Always unplug sewing machine from the electrical outlet when removing covers, lubricating, or when making any other user

servicing adjustments mentioned in the instruction manual.”

“CAUTION-

-

Moving parts-To reduce risk of injury, switch off before servicing. Close cover before operating machine.”

“SAVE THESE INSTRUCTIONS”

 “This product is for household use, or equivalent.”

FOOT CONTROL

 (USA only)

Use Matsushita Electric, Model 4C-333B or Yamamoto Electric, Model YC-485 with this sewing machine.

“When using an electrical appliance, basic safety precautions should always be followed, including the following.”
“Read all instructions before using this sewing machine.”

DANGER-

-

To reduce the risk of electric shock:”

This appliance complies with EEC Directive 89/336/EEC covering the electromagnetic compatibility.

® SINGER 

is a registered trademark of The Singer Company Ltd or its affiliates.

Copyright 

©

 2005

All Rights Reserved.

Summary of Contents for FUTURA CE-200

Page 1: ... disconnect turn switch to the off 0 position then remove plug from outlet 9 Do not unplug by pulling on cord To unplug grasp the plug not the cord 10 Keep fingers away from all moving parts Special care is required around the sewing machine needle 11 Never sew with a damaged needle plate as this can cause needle to break 12 Do not use bent needles 13 Do not pull or push fabric while stitching It ...

Page 2: ... pièces en mouvement spécialement autour de l aiguille de la machine à coudre 6 Utilisez toujours la plaque à aiguille recommandée Une plaque inappropriée peut causer le bris de l aiguille 7 N utilisez jamais d aiguilles gauchies 8 Ne tirez ni ne poussez le tissu pendant que vous cousez Ceci peut faire dévier l aiguille et la briser 9 Arrêtez 0 la machine à coudre lorsque vous faites des réglages ...

Page 3: ...3 ...

Page 4: ...n stitch TABLE OF CONTENTS Sewing machine Dimensions 421 mm 290 mm 286 mm Mass of the equipment 9 6 kg Embroidery unit Dimensions 435 mm 210 mm 110 mm Mass of the equipment 2 7 kg Rated Voltage 230V Rated Frequency 50Hz Rated input 70W Rating for Lamp 6 5V 2 8W Rated ambient temperature 15 35 C Acoustic noise level less than 70db A For European version Continuous patterns 54 55 Decorative embroide...

Page 5: ... motifs Point invisible Point de lingerie 44 45 Zigzag multi point Point ajouré Point rempart 46 47 Points extensibles 48 55 Point droit extensible Point surjet Point ric rac Point plume Point nid d abeille Surjet extensible Point languette Point turc Point surjet oblique Point surjet renforcé Point d épine Point sorcier Point surjet double Point croisé Point chevron TABLE DES MATIERES Motifs cont...

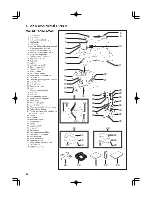
Page 6: ...6 2 1 3 4 5 6 7 8 9 10 13 17 14 12 20 21 22 23 24 25 26 27 28 29 30 31 32 34 35 37 40 41 42 39 38 45 19 33 44 46 47 49 50 53 51 16 15 36 43 48 11 18 45 44 46 47 52 ...

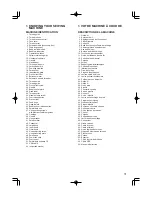
Page 7: ... Vis de réglage de cerceau 47 Plaque de montage de cerceau 48 Petit cerceau 49 Cordon 50 Rhéostat 51 CD du logiciel de broderie 52 Câble USB 53 Manuel d instruction 1 Thread guide 2 Thread take up 3 Thread tension control 4 Face cover 5 Thread cutter 6 Extension table Accessory box 7 Feed dog control 8 Bobbin winder shaft 9 Bobbin winder stop 10 Operation switches 11 Pattern reference guide 12 Hor...

Page 8: ...8 4 5 6 8 2 3 1 9 7 10 14 15 16 13 11 12 ...

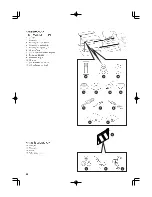
Page 9: ...Filet de bobine court POUR LA BRODERIE 13 Sachet d accessoires 14 Canettes 15 Ciseaux 16 Pied de broderie ACCESSORIES FOR SEWING MACHINE 1 Needles 2 Bobbins 3 Spool pin felt discs 4 Spool pin cap small 5 Spool pin cap large 6 Buttonhole opener Brush 7 Screwdriver for needle plate large 8 Screwdriver large 9 Screwdriver small 10 Buttonhole foot 11 Thread spool net long 12 Thread spool net short FOR...

Page 10: ...Foot control Rhéostat Power light switch OFF Interrupteur moteur lumière OFF Power light switch ON Interrupteur moteur lumière ON 2 Set power light switch at OFF Mettez l interrupteur moteur lumière sur OFF Machine socket Connecteur de la machine ...

Page 11: ...ur unique moteur lumière Vous piquez donc constamment avec votre travail éclairé Débranchez toujours La machine de l alimentation électrique en retirant la fiche de la prise murale SETTING UP YOUR MACHINE Be sure to wipe off any surplus oil from needle plate area before using your machine the first time POWER LINE CORD FOOT CONTROL Connect the plug of the power line cord into the cord socket 1 and...

Page 12: ... Témoin a diode Start stop switch For embroidery only Interrupteur marche arrêt Pour la broderie seulement Reverse stitch switch Interrupteur couture arrière Positionnement haut bas de l aiguille Needle up down switch ...

Page 13: ... machine fonctionne Un témoin clignotant au rouge indique une anomalie ou une erreur Un clignotement durant 2 3 secondes indique qu une opération incorrecte a été effectuée Un clignotement continu indique que la machine ne fonctionne pas normalement OPERATION SWITCHES NEEDLE UP DOWN SWITCH When the needle up down switch is pushed the needle moves and stops at its lowest position If the switch is p...

Page 14: ...ol pin Porte bobine Vertical spool pin Porte bobine vertical For large thread spool Pour la grande bobine For extra large thread spool Pour la très grande bobine Ajustez la direction de manière que l alimentation du fil soit effectuée bien souplement Adjust direction for smooth supply of thread ...

Page 15: ... le haut pour le mettre à sa place Placez la bobine sur le porte bobine et tirez le fil hors de la bobine par la broche du guide fil SPOOL PINS HORIZONTAL SPOOL PIN for normal thread spool Place thread spool on the pin and secure with a spool cap to ensure smooth flow of thread VERTICAL SPOOL PIN for large thread spool Pull down the spool pin and pull up the thread guide pole in place Place thread...

Page 16: ...16 ...

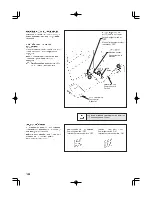
Page 17: ...le reprisage la broderie à main libre et les monogrammes soit lorsque vous et non les griffes entraînez le tissu directement PRESSER FOOT LIFTER There are three positions for your presser foot 1 Lower the presser foot to sew 2 Raise the lifter to the middle position to insert or remove fabric 3 Lift it to its highest position to change the presser foot or to remove thick fabric FEED DOG CONTROL Th...

Page 18: ...18 1 ...

Page 19: ...es doigts entre la machine et la table Introduisez le tournevis dans le trou 1 et effectuez le réglage en le tournant Utilisez le tournevis petit fourni comme accessoire Une fois le réglage effectué vérifiez le bon équilibre de la machine CONVERTING TO FREE ARM SEWING Your machine can be used either as a flat bed or as a free arm model With the extension table in position it provides a large worki...

Page 20: ...20 1 2 3 4 ...

Page 21: ... Arrêter la machine Pousser l ensemble axe canette vers la gauche pour pouvoir enlever la canette pleine de l axe Pendant la couture l axe doit toujours rester à gauche WINDING BOBBIN 1 Place a spool of thread on the spool pin and secure it with the spool pin cap Pull the thread out from the spool through thread guide 2 Pull end of thread through hole in bobbin as shown 3 Push bobbin winder shaft ...

Page 22: ...22 2 3 4 A B 5 6 1 ...

Page 23: ...squ au déclic sonore et ensuite laissez environ 15 cm de fil à l arrière 6 Replacez le couvercle de canette sur la plaque aiguille THREADING THE BOBBIN THREAD 1 Raise the needle to its highest position by rotating the hand wheel toward you 2 Remove the bobbin cover plate by pushing the release button to the right while pushing the left corner of plate 3 Insert the bobbin making sure the bobbin rot...

Page 24: ...24 1 3 5 6 4 2 Thread take up Releveur de fil Tria hilos Tab Languette Lengüeta ...

Page 25: ...le fil dans l intérieur de la rainure 4 Faites passer le fil par le guide fil 5 Faites passer le fil par l orifice du fil 6 de l avant vers l arrière THREADING THE TOP THREAD A Raise the presser foot lifter Always be sure to raise the presser foot lifter before threading the top thread If the presser foot lifter is not raised correct thread tension cannot be obtained B Turn the hand wheel toward y...

Page 26: ...26 1 2 3 ...

Page 27: ...é il est recommandé de placer la sélecteur de point en position point droit aiguille au centre avant d utiliser l enfileur USING AUTOMATIC NEEDLE THREADER Raise the needle to its highest position by rotating the hand wheel towards you 1 Hook thread to thread guide as illustrated 2 Pull down threader lever until the hooked end passes through the needle eye Guide thread into hooked end and pull it u...

Page 28: ...28 1 2 3 4 ...

Page 29: ...laissant environ 15 cm fil dépasser PICKING UP BOBBIN THREAD 1 Raise the presser foot lifter 2 Holding needle thread loosely with your left hand turn hand wheel toward you with your right hand first lowering the needle and continuing until the needle comes to its highest position 3 Lightly pull up the top thread and pick up bobbin thread which will appear through the needle plate slot 4 Pull both ...

Page 30: ...30 Flat side Côté plat Côté plat orienté vers l arrière Flat side toward the back Pin Butée Needle Aiguille Daima fişi prizden çekerek makineyi elektrik beslemesinden ayırın ...

Page 31: ...ersey Tricot Cotton wrapped Polyester 100 Polyester Mercerized Size 40 Heavy Duty Cotton wrapped Polyester 100 Polyester Mercerized Size 60 Cotton wrapped Polyester 100 Polyester Mercerized Size 50 Nylon Cotton wrapped Polyester Polyester Nylon 2020 red shank 2020 red shank 2020 red shank 2045 yellow shank 11 80 orange band 14 90 blue band 16 100 purple band 18 110 yellow band TYPE SIZE 11 80 oran...

Page 32: ...e tension Diminuer la tension Increase tension Increase tension Augmenter la tension Top side Côté de dessus 1 3 2 Foot holder Support du pied Well balanced Correct Foot release button Levier de verrouillage du pied Top stitch too loose Fil supérieur trop lâche Top stitch too tight Fil supérieur trop tendu ...

Page 33: ... la plaque aiguille comme illustré 3 Rabaissez le levier du pied presseur de façon à ce que le pied s enclenche de lui même sur son support ADJUSTING TOP THREAD TENSION STRAIGHT STITCHING The good looking appearance of your stitching is largely determined by the balanced tension of both top and bobbin threads The tension is well balanced when these two threads lock in the middle of layers of fabri...

Page 34: ...election button Touches de sélection numérique Mirror button Touche de miroir LED indicator Témoin a diode Stitch length control Longueur de point Number display Affichage numérique Stitch width needle position control Commande de largeur de point position d aiguille ...

Page 35: ...référence des motifs Motifs en bleu foncé vous pouvez changer la longueur et la largeur de point Motifs en rose La longueur et la largeur de point sont fixes Motifs en noir boutonnières et motifs à point d arrêt Pattern i l image miroir est utilisable CONTROL PANEL FUNCTIONS Direct selection buttons Frequently used patterns are available by the direct selection buttons Turn on power switch and pus...

Page 36: ... G T I O R D 1 0 5 2 5 1 0 3 2 0 0 2 5 2 0 4 H C T I T S H C T I T S T N I O P o N o N N o R O R R I M E G A M I R O R R I M E G A M I E G A M I R I O R I M H T G N E L H T G N E L m m R U E U G N O L H T D I W H T D I W m m R U E G R A L H C T I T S H C T I T S T N I O P o N o N N o R O R R I M E G A M I R O R R I M E G A M I E G A M I R I O R I M H T G N E L H T G N E L m m R U E U G N O L H T D...

Page 37: ... 5 7 6 4 6 5 0 3 0 0 1 5 6 0 4 5 7 6 3 3 0 2 0 2 0 3 0 5 5 3 5 6 5 6 5 0 3 0 0 1 5 6 0 4 5 7 6 4 3 5 2 5 1 5 2 5 5 0 4 5 6 6 6 5 0 3 0 0 1 5 6 0 4 5 7 6 5 3 5 2 5 1 0 3 0 5 0 4 5 6 7 6 5 0 3 0 0 1 0 6 5 7 3 5 7 6 6 3 5 2 5 1 5 2 0 6 0 4 0 6 8 6 5 0 3 0 0 1 5 6 0 4 5 7 6 7 3 0 4 5 1 0 4 0 6 0 3 5 7 6 9 6 0 2 5 1 0 3 5 6 0 4 5 7 6 8 3 5 1 8 0 5 1 0 4 0 2 0 4 0 7 5 0 3 0 0 1 5 6 0 4 5 7 6 9 3 5 2 5 1...

Page 38: ...38 F E A B C D I 2 3 4 1 G H 6 5 ...

Page 39: ... pied presseur tirer le tissu vers l arrière et couper la longueur de fil excessive au moyen du coupefil placé au bas de la plaque glissière comme montré sur l illustration 00 STRAIGHT STITCHING Straight stitch is most frequently used for every aspect of sewing Let s learn how to sew following the steps below 1 SETTINGS Presser foot Zigzag foot Thread tension control S A Thread tension control B N...

Page 40: ...40 Cornering guide Guide d angle Reverse stitch switch Interrupteur couture arrière Positionnement haut bas de l aiguille Needle up down switch ...

Page 41: ...ue le tissu et qui ne se verra pas 3 Augmentez légèrement la tension du fil 4 Commencez à coudre REMARQUE Lorsque le fis supérieur est desserré la machine peut s arrêter au début Si la machine s arrête dès le départ appuyez de nouveau sur l interrupteur de départ 02 TURNING A SQUARE CORNER 1 To turn a square corner 5 8 16 mm from the fabric edge stop the machine and push the needle up down switch ...

Page 42: ... 0 4 5 4 0 5 5 5 0 6 5 6 5 7 6 3 0 5 0 8 0 0 1 5 1 0 2 5 2 0 3 5 3 0 4 5 4 0 5 Under side Côté de dessous Top side Côté de dessus STITCH LENGTH LONGUEUR DU POINT STITCH WIDTH LARGEUR DU POINT Center position Position centrale 03 ...

Page 43: ...n morceau de tissu que vous allez utiliser sont les valeurs réglées automatiquement lorsque le motif No 03 est établi La longueur de point est de 2 mm et la largeur de point est de 5 mm environ est la sélection lorsque vous réglez manuellement la valeur RÉGLAGE DE LA LARGEUR ET DE LA LONGUEUR DE POINT ZIGZAG STITCHING The top thread may appear on the bottom depending on the thread fabric type of s...

Page 44: ...ulier 1 2 1 2 4 3 Medium to heavyweight fabric Material de peso medio a pesado Under side Reverso Under side Reverso Under side Reverso Under side Reverso Fine fabric Material fino Top side Cara Four point shell stitch Point coquille à quatre points ...

Page 45: ...ES Pied presseur Pied zigzag Réglage tension du fil supérieur S E BLIND STITCH 1 First finish the raw edge Do this by turning it under on fine fabrics or overcasting it on medium to heavyweight fabrics Then turn the hem up the required depth press and pin in place 2 Now fold the fabric as illustrated 3 Place the fabric under the foot with the fold of the fabric positioned so that the needle just p...

Page 46: ...46 ...

Page 47: ...er en laissant des espaces d environ 3 mm 1 8 Coudre par dessus les valeurs de couture de 3 mm 1 8 en tenant le pli du tissu sur les deux bords avec une aiguille Retirer les bâtis et le papier repasser RÉGLAGES Pied presseur Pied zigzag Réglage tension du fil supérieur S E 22 26 RAMPART STITCH This stitch is ideal for producing flat overlapped seams on almost any type of fabric and a bolder effect...

Page 48: ...48 ...

Page 49: ... les dentelles ou pour l insertion de pièces de type lingerie 08 09 STRETCH STITCHES Stretch stitches are mainly for use on knit or stretchable fabrics but can also be used on ordinary woven materials SETTINGS Presser foot Zigzag foot Thread tension control S E STRAIGHT STRETCH STITCH Straight stretch stitch is far stronger than an ordinary straight stitch because it locks three times forwards bac...

Page 50: ...50 ...

Page 51: ...11 POINT TURC Point spécial pour réaliser ou réparer de la lingerie ou du tricot Convient particulièrement bien pour assembler et surfiler en une seule opération C est aussi un point très solide Il permet également de poser aisément un élastique sur une pièce de lingerie 15 BLANKET STITCH The decorative appearance combined with practical use of this stitch enables it to be used for hemstitching an...

Page 52: ...52 39 30 35 ...

Page 53: ...ragiles Cousez le long de la bordure du tissu et coupez près de l extérieur de la couture 30 POINT D ÉPINE C est un point polyvalent utilisé pour joindre des morceaux de tissu et de la broderie 35 REINFORCED OVEREDGE STITCH Both of these stitches are perfect for attaching flat elastic when making or repairing lingerie They can also be used for smocking and as a seam finish WIZARD STITCH Wizard sti...

Page 54: ...54 19 20 21 70 71 72 80 81 82 83 84 ...

Page 55: ... tension du fil supérieur S E 41 47 POINT CHEVRON Utilisez le pour des bordures décoratives et pour la broderie 55 DOUBLE OVEREDGE STITCH Use this stitch in preference to regular overlock stitch for overcasting stretch or knit fabrics where strength and flexibility are required CROSSED STITCH Use to sew and finish elastic fabrics or for decoration of borders CONTINUOUS PATTERNS The patterns illust...

Page 56: ...56 17 74 75 76 77 78 79 16 17 18 60 61 62 63 64 65 66 67 68 69 70 18 62 16 62 16 16 67 ...

Page 57: ...bords des poches Diamant sur ourlet étroit Pliez le bord du tissu et utiliser ce point pour obtenir un bord plus net Les points feston et les points diamant peuvent être combinés pour créer d autres points attrayants DECORATIVE DESIGNS 14 different types of decorative stitches are available Following are examples of how to use and sew these stitches You can use other stitches in the same way You s...

Page 58: ...58 A B C C C C Buttonhole foot Pied boutonnière Tab A Butée A BTab B Butée B ...

Page 59: ...ezvous à la section Utilisation du pied boutonnière ci dessus 4 Réglez le levier de boutonnière C de manière qu il s abaisse verticalement entre les butées A et B BUTTONHOLE MAKING USING BUTTONHOLE FOOT 1 Insert a button in between tab A and tab B 2 Buttonholes can be sewn to match the size of the button PROCEDURE Use an interfacing in the area of the garment where buttonholes are placed Stabilize...

Page 60: ...60 1 Æ 2 Æ 3 Æ 4 Æ 5 Æ 6 Æ 7 Æ 8 Buttonhole foot alignment position Position d alignement du pied boutonnière Marque Marque du tissu Fabric marking Fabric marking Marque du tissu Mark Marque ...

Page 61: ... un outil d ouverture de boutonnière pour ouvrir le tissu au centre de la boutonnière Veillez à ne pas couper le fil de la couture 5 Carefully mark the position of buttonhole on your garment 6 Place the fabric under the foot Pull out the bobbin thread underneath the fabric to a length of about 4 inches to the rear 7 Align the buttonhole mark on the fabric with the mark on the buttonhole foot and t...

Page 62: ...62 Spur Saliente length of bar tack Longueur du point d arrêt A B C Start position Position de début 1 2 3 4 5 1 2 3 4 5 Tab A Butées A Buttonhole foot Pied boutonnière Mark Marque ...

Page 63: ...ées A et B 4 Alignez la position de début du tissu sur le repère marqué sur le pied boutonnière puis abaissez le pied boutonnière 5 Tout en tenant le fil supérieur démarrez la machine 89 CORDED BUTTONHOLES Hook filler cord crochet thread or buttonhole twist over the spur and pull both ends of the cord forward under the foot Sew buttonhole so that zigzag stitches cover the cord When completed relea...

Page 64: ... foot Pied de biche zigzag Presser bar Barre de pied presseur Embroidery presser foot Pied presseur de broderie Needle clamp Serre aiguille Drive lever Levier d entraînement Screw Vis Foot holder Support du pied ...

Page 65: ...uille ATTENTION Veillez à toujours couper l alimentation électrique de la machine avant de changer le pied presseur ATTENTION Veillez à ne pas toucher l aiguille lorsque vous remplacez le pied presseur 3 EMBROIDERING BEFORE ATTACHING EMBROIDERY UNIT ATTACHING EMBROIDERY FOOT Raise presser foot lifter Turn hand wheel toward you until needle is in its highest position 1 Remove presser foot screw pre...

Page 66: ...66 ...

Page 67: ... PLATEAU DE RALLONGE 1 Eteindre la machine 2 Faites glisser la table de rallonge vers la gauche pour la retirer de la machine Reportez vous aux pages 18 19 THREADING BOBBIN THREAD Refer to page 22 23 A large amount of thread is required for embroidering so be sure to use full bobbin THREADING TOP THREAD Refer to page 24 25 NOTE It is recommended to do the threading before data transferring PICKING...

Page 68: ...68 Feed dog control Abaisse griffe d entraînement 2 1 Connector cap Couvercle de connecteur Connector Connecteur Handle Poignée Up BAS Down HAUT B A ...

Page 69: ... installée bien fermement la forme finale du motif risquera d être incorrecte Veillez à pousser l unité de broderie bien à fond ATTENTION Veillez toujours à mettre la machine hors tension avant d installer l unité de broderie FEED DOG CONTROL Lower feed dogs by moving feed dog control toward the direction A When using machine for general sewing raise feed dogs by moving feed dog control toward the...

Page 70: ...70 2 1 Hoop adjusting screw Vis de réglage de cerceau ...

Page 71: ...it coup à la surface avec le doigt Une fois que le tissu est bien mis en place dans le cadre de broderie sans aucun pli serrez fermement la vis PREPARATION FOR EMBROIDERY SEWING SECURING MATERIAL IN EMBROIDERY HOOP 1 Loosen hoop adjusting screw on outer frame and remove inner frame Place material between inner and outer frame 2 Slightly tighten the hoop adjusting screw and pull material edges to r...

Page 72: ...dhesive surface facing down Entoilage surface adhésive orientée vers le bas Hoop position Position du cerceau Embroidering surface Top side Surface de broderie côté supérieur Material Under side TISSU Côté de dessous ...

Page 73: ...issus de poid moyen et lourd utiliser un entoilage d un poid equivalent qui se déchire pour s enlever Pour les tissus délicats utiliser un entoilage qui s enleve à l eau L entoilage est effectué à partir de tissus non tissés Il possède un adhésif sur un côté et ce côté peut être identifié par l apparence luisante que l adhésif donne au tissu L entoilage doit être plus grand que le cerceau avec leq...

Page 74: ...e broderie sur le bord du tissu Stabilizer Adhesivesurfacefacing Entoilage face à la surface adhésive Stabilizer Entoilage Hoop inner frame Cadre intérieur du cerceau Ribbon tape Ruban Stabilizer Entoilage Hoop inner frame Cadre intérieur du cerceau ...

Page 75: ...i convient à la broderie que vous voulez effectuer Il est recommandé généralement d utiliser un entoilage d une épaisseur équivalente au tissu If embroidering onto material which is smaller than the hoop size or when embroidering close to the edge of material attach the stabilizer as illustrated WHEN EMBROIDERING ALONG THE EDGE OF MATERIAL SUCH AS A HANDKERCHIEF WHEN EMBROIDERING A NARROW PIECE OF...

Page 76: ...76 2 1 USB cable Câble USB CD Insert Insertion Power light switch ON Interruptor corriente luz ON ...

Page 77: ...e et logiciel qui offre des options et des fonctions puissantes Pour installer le logiciel reportez vous aux instructions sur l insertion du CD PREPARING THE MACHINE BEFORE INSTALLING THE HOOP 1 Turn hand wheel toward you until needle comes to its highest position 2 Connect your PC to the FUTURA sewing machine with USB cable 3 Turn on power to machine Refer to page 10 12 NOTE If the USB cable is u...

Page 78: ...78 A 2 1 B B D C D Hoop mounting plate Plaque de montage de cerceau Carriage Chariot ...

Page 79: ...ceau REMARQUE Avant de fixer le petit cerceau mettez l interrupteur d alimentation sur la position de marche pour placer le chariot sur la position d attente de broderie et mettez l interrupteur d alimentation sur la position d arrêt ATTACHING AND REMOVING EMBROIDERY HOOP 1 Raise presser foot and needle and push up lever A of embroidery foot with your finger and pass embroidery hoop under it To re...

Page 80: ...80 2 1 Release lever Support de cerceau Connector cap Couvercle de connecteur Handle Poignée Tab Languette 78 79 ...

Page 81: ...z le haut du couvercle du connecteur avec le doigt comme indiqué sur l illustration ATTENTION Veillez toujours mettre la machine hors fonction avant d installer l unité de broderie CAUTION Always be sure to turn off power to machine before installing embroidery unit REMOVING EMBROIDERY UNIT Turn off power to machine Remove embroidery hoop from machine Refer to pages 78 79 1 Holding handle of embro...

Page 82: ... Témoin a diode Start stop switch For embroidery only Interrupteur marche arrêt Pour la broderie seulement Reverse stitch switch Interrupteur couture arrière Positionnement haut bas de l aiguille Needle up down switch ...

Page 83: ...une problème ou un erreur Un clignotement durant 2 3 secondes indique qu une opération incorrecte a été effectuée Un clignotement continu indique que la machine ne fonctionne pas normalement OPERATION SWITCHES WHEN EMBROIDERY UNIT IS ATTACHED OPERATION SWITCHES START STOP MACHINE When start stop switch is pushed machine starts slowly and when the switch is pushed once more the needle moves and sto...

Page 84: ...84 ...

Page 85: ...94 95 Vous utilisez une aiguille fine avec un tissu épais Utilisez une aiguille plus grosse Il faut normalement utiliser une aiguille 14 Reportez vous aux pages 24 25 TROUBLESHOOTING SKIPPED STITCHES AND THREAD BREAKAGES OCCUR Needle tip is broken Replace needle Needle is bent Replace needle Needle is not installed correctly Install the needle correctly Refer to pages 30 31 Upper thread tension is...

Page 86: ...86 92 93 72 75 70 71 78 79 ...

Page 87: ...issu sera plissé vous devez donc vérifier le fil Reportez vous aux pages 24 25 Le fil est emmêlé en un point du passage du fil CÔTÉ MACHINE CÔTÉ CERCEAU Le fil supérieur est trop tendu EMBROIDERY PATTERN IS MIS ALIGNED Embroidering is continuing when thread is tangled No stabilizer attached when using light or stretch material Attach interfacing to the material Refer to pages 72 75 Material has no...

Page 88: ...ection Section brodée Blank stitches resulting from thread breakage Points vides résultant d une rupture du fil Embroidering direction Direction de broderie 7 5 3 8 6 4 2 1 Reverse stitch switch Touche couture arrière ...

Page 89: ...u à ce que la zone vide a été complètement dépassée 2 Redémarrez la machine à broder et poursuivez la broderie IF STITCHES ARE MISSING If the embroidery machine detects that the thread has broken it may continue to embroider up to about eight stitches without any thread blank stitches before it automatically stops In such cases use the following procedure to step back through the embroidering data...

Page 90: ...90 EM 01 EM 02 EM 03 EM 04 EM 05 EM 06 EM 07 EM 08 EM 09 SAFTY DEVICE ACTIVATED ...

Page 91: ...e marche arrêt ou sur la touche couture arrière ou si vous appuyez sur le rhéostat lorsque la machine à coudre n est pas configurée correctement ou si vous effectuez une opération incorrecte la machine à coudre ne fonctionnera pas elle émettra un son d avertissement et un message d erreur apparaîtra Lorsqu un message d erreur apparaît résolvez le problème en suivant les instructions du message Le ...

Page 92: ...92 2 1 A B 2 3 4 3 5 4 1 ...

Page 93: ...mme indiqué par les flèches A B 5 Replacez le boîtier à canette avec la butée 3 positionnée contre le ressort 4 Replacez la plaque aiguille 4 ENTRETIEN DE VOTRE MACHINE CLEANING HOOK AREA AND FEED DOGS CAUTION Always disconnect the machine from power supply by removing the plug from the wall outlet To ensure the best possible operation of your machine it is necessary to keep the essential parts cl...

Page 94: ...place Remplacez Pin Butée Pin hole Trous de broches Light bulb Ampoule d éclairage Remove Retirez Replace Remplacez Light bulb Ampoule d éclairage Socket Connecteur Remove Retirez Replace Remplacez Socket Connecteur Bracket Support 4 Light bulb Ampoule d éclairage Socket Connecteur ...

Page 95: ...Remettez la plaque frontale à sa position initiale Alignez la plaque frontale de manière que la projection soit bien en place sur la broche de la machine CHANGING LIGHT BULB CAUTION Always disconnect the machine from power supply by removing the plug from the wall outlet 1 Remove the screws and face cover 2 While holding the socket move it back and forth gently to remove it from the bracket 3 Take...

Page 96: ...96 ...

Page 97: ... canette ou la coursière l enlever voir page 96 97 Le tissu fronce La tension du fil supérieur et inférieur est trop serrée l ajuster voir page 32 33 La longueur du point est trop longue pour les tissus légers et fins la réduire 5 VÉRIFICATION DES PETITS PROBLÈMES DE COUTURE 5 PERFORMANCE CHECKLIST GENERAL PROBLEMS Machine does not sew Power switch is turned off Turn on the switch Machine jams kno...

Page 98: ... Part No 77191 1 05 ENGLISH FRANÇAIS ...

Page 99: ...CE 200 INSTRUCTION MANUAL MANUEL D INSTRUCTION ...

Page 100: ......

Reviews: