Motion
Sensor Model
:
PS-SD1-CH
1. INTRODUCTION
The motion sensor is designed to monitor movement around your house. Once motion is
detected, it will send signal to activate the dialer SD-001.
Please follow the instructions below to setup the motion sensor.
2. INSTALLATION
POWER UP
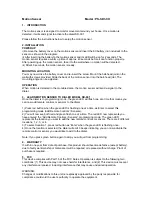
i) Remove the battery cover on the motion sensor and insert the 9V battery (not included) to the
sensor as shown in the diagram.
ii) After inserting the battery to the motion sensor and its LED will be on for 2 seconds. The
motion sensor requires a warm up time of approx. 40 seconds before it can function properly.
After powering up the motion sensor, face it to the wall where no motion will be detected.
iii) After 40 seconds, the motion sensor is ready.
MOUNTING LOCATION
You may now close the battery cover and re-insert the screw. Mount the ball-head joint on the
wall with screws provided. Slide the back of the motion sensor into the ball-head joint. The
mounting angle can be adjusted.
OPERATION
When motion is detected in the monitored area, the motion sensor will send a signal to the
dialer.
3. LEARN MOTION SENSOR TO DIALER MODEL SD-001
Once the dialer is in programming mode, the green LED will flash one at a time that means you
can now add remote controls or sensors to the dialer.
1) Press red button when the green LED is flashing one at a time, as Enter to select this
programming mode (Add Remote Controls / Sensors).
2) You will now see both red and green flash one at a time. The red LED now represents you
have entered the “Add Remote Controls / Sensors” programming mode. The green LED
represents the location you want to add the new remote controls or sensors. There are 4 different
locations, 1, 2, 3, or 4.
3) To select location 1, press red button as “Enter” when the green LED is flashing once.
4) Once the location is selected, the dialer will emit 3 beeps indicating you can now activate the
remote control or sensor you would like to add to the dialer.
Note: If you press green button again to skip, you will quit from programming.
4. WARRANTY
If, within one year from date of purchase, this product should become defective (except battery),
due to faulty workmanship or materials, it will be repaired or replaced, without charge. Proof of
purchase is required.
5. FCC
This device complies with Part 15 of the FCC Rules. Operation is subject to the following two
conditions: (1) This device may not cause harmful interference, and (2) This device must accept
any interference received, including interference that may cause undesired operation.
WARNING:
Changes or modifications to this unit not expressly approved by the party responsible for
compliance could void the user’s authority to operate the equipment.


