


Before returning your Sole product to any retailer, or if you require any assistance with assembly or
technical support please call us first for assistance at 866-697-6531. Thank you for your Sole purchase.
ATTENTION:
OWNER’S MANUAL
SC200 Climber Trainer
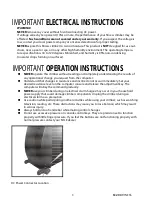
Please carefully read this entire manual
before operating your new climber.
Summary of Contents for SC200
Page 23: ......


