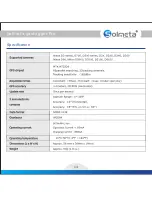
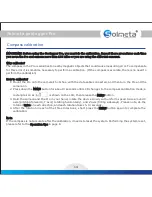
Solmeta Geotagger Pro, User Manual
The Solmeta Geotagger Pro enhances your photography experience with precise geotagging capabilities. Ensure your photos are accurately tagged with location data by downloading the user manual for free on our website. Master this essential tool with our comprehensive manual guide. Unlock the full potential of your Geotagger Pro today.
Share
Download


Reviews:
No comments
Related manuals for Geotagger Pro

3
Brand: YELLOWBRICK Pages: 2

guide+play GPS-810
Brand: Harman Kardon Pages: 16

DB01
Brand: e2Link Pages: 20

MSN Direct Receiver
Brand: Garmin Pages: 12
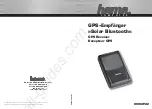
Solar Bluetooth
Brand: Hama Pages: 35

SunTura SOT-TRKS-NF
Brand: WINDY NATION Pages: 10

GB233
Brand: Navibe Pages: 16

SP611
Brand: Navibe Pages: 21

GB337
Brand: Navibe Pages: 21

KL3333
Brand: Navia Pages: 25

200G Series
Brand: Whirlwind Pages: 16

unav
Brand: Morbella Pages: 34

UM740
Brand: UniGuard Pages: 6

GPS Receiver
Brand: GMC Pages: 122

Expert USB
Brand: Gude Pages: 2

E500
Brand: LXNAV Pages: 8

MinPad
Brand: Javad Pages: 20

XR-6100
Brand: X-Route Pages: 17


