SED-E1
4-541-088-12(1)
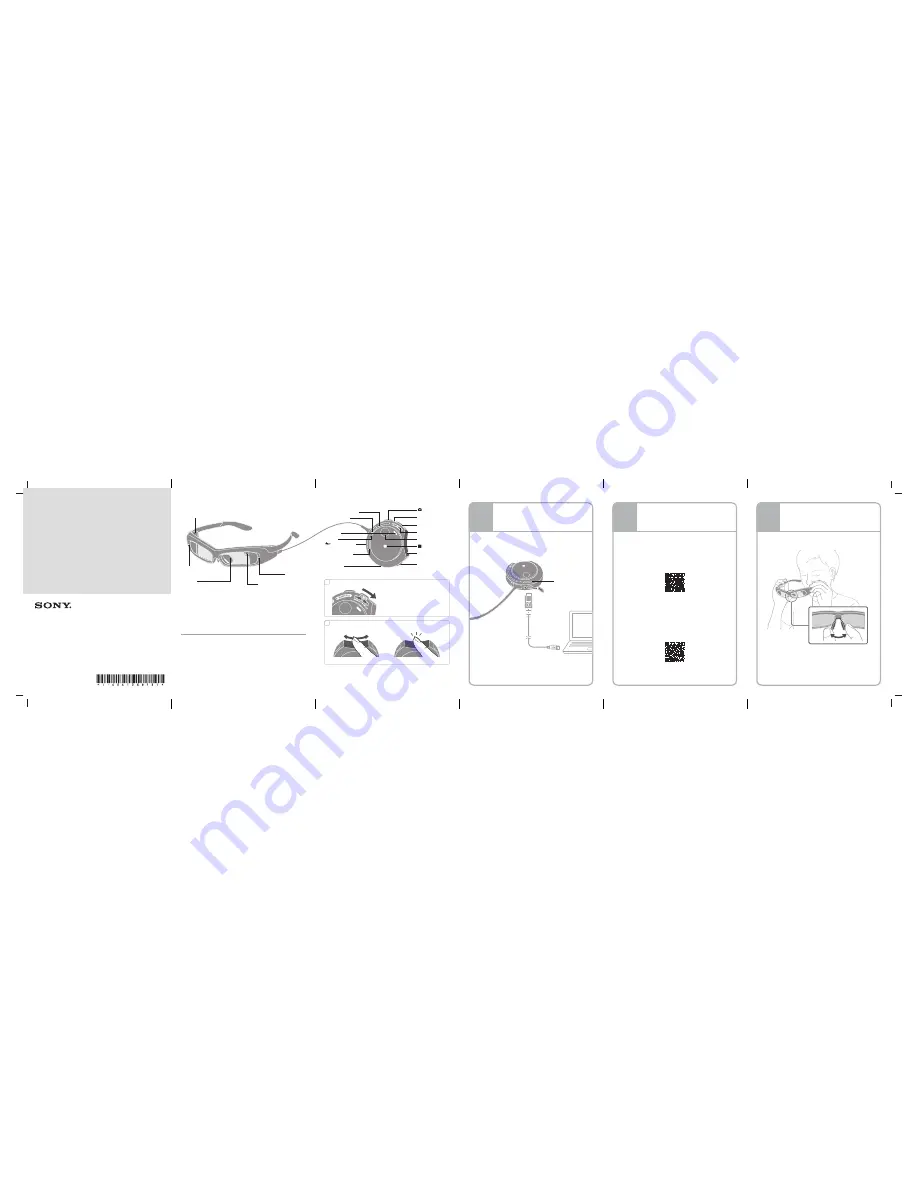
CHARGE indicator
Start Here
Startup Guide
Developer Edition
SmartEyeglass
SED-E1
4-541-088-
12
(1)
For use by developers in testing and creation of applications for
SmartEyeglass platform.
Eyewear
Controller
Camera indicator
Camera
Accelerometer, Gyroscope,
Electronic compass
Nose pad
Brightness sensor
(CAMERA) button
BACK button
POWER switch
Touch sensor
Rotary clip
Noise suppression
sub microphone
(N mark)
TALK button
Microphone
BLUETOOTH indicator
CHARGE indicator
Micro USB port
WLAN indicator
Strap hole
Speaker
Slide and hold the POWER switch to ON/
OFF for 4 seconds or more.
When only sliding the switch without
holding it, the image display turns on /
off.
To turn on/off the power
To operate the touch sensor
B
A
Supplied items
• Micro USB cable
• Carrying case
• Dark filter
• Camera cover sheet
• Nose pad (small)
• Warranty
• Startup Guide (this document)
• Reference Guide
Swipe from side to side.
Switches the item on the display.
Tap
Selects/enters the item.
Connect the controller to a computer with the supplied
micro USB cable to charge the built-in lithium-ion battery.
The CHARGE indicator lights up in orange during charging
and turns off when the charging completes.
Tip
It takes about 2 hours to completely charge a fully-discharged
battery.
Scan the 2 codes below, and install two applications into
your smartphone. Use a smartphone with Android™ 4.4 or
later.
Install “Smart Connect”.
https://play.google.com/store/apps/details?id=com.
sonyericsson.extras.liveware
If “Smart Connect” is already installed, update it to the
latest version.
After installing “Smart Connect”, select [Open] on the
“Smart Connect” screen in Google Play to start “Smart
Connect”.
Install “SmartEyeglass”.
https://play.google.com/store/apps/details?id=com.
sony.smarteyeglass
STEP
Installing the Applications
into a Smartphone
2
STEP
Charging the Battery
1
STEP
Wearing/Adjusting the
Eyewear
3
Wear the eyewear. If the eyewear does not fit, adjust the
angle or width of nose pad.
Tips
• If the eyewear does not fit by adjusting the nose pad, replace it
with the supplied nose pad (small). For details on how to replace
the nose pad, refer to the Help Guide.
• We recommend that you attach the controller to your clothing, etc.,
using the rotary clip.
• You cannot put on the eyewear while wearing glasses.


