Subwoofer Enclosure Installation Guide
As we incorporate design improvements, specifications may change without notice.
INSTALLATION INSTRUCTIONS
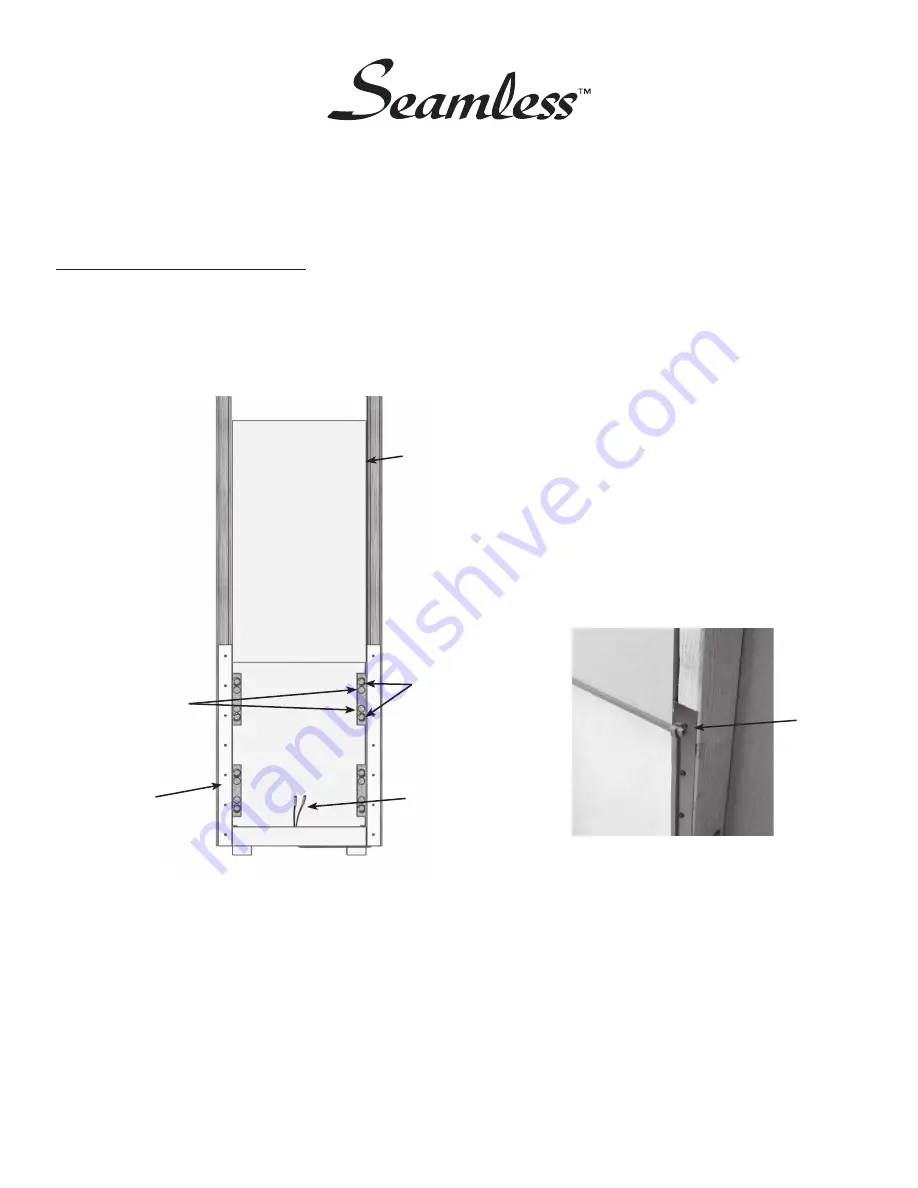
1. Attach the metal wings to studs using the supplied 1-
1
⁄
4
” drywall screws (seven screws per side).
2. Securely connect input wire to amplifier line, observing polarity.
3. Use the supplied foam gasket to seal the front edge of the speaker opening, as shown in Figure 2. This is an important
step, necessary to prevent any air leaks between the enclosure and the drywall.
4. Install drywall in front of enclosure, firmly attached with the supplied (1-
7
⁄
8
” self drilling drywall screws). Use six screws per
wing, the 10 remaining screws should be sued to to secure the whole body of the MDF enclosure to the drywall at
multiple points. A sturdy installation is very important to prevent unwanted vibrations.
5. Using a drywall knife, cut the speaker opening and vacuum the inside of the enclosure until it’s completely free of dust.
Your Seamless subwoofer driver is ready to install.
Install springs in the
inner cavities for up
to 1” drywall.
Install springs
in the outer
cavities for
3
⁄
4
” or thinner
drywall.
Input wire
Figure 1
Studs
Figure 2
Apply
gasket
Metal wing


