background image

C2V1A Router User Guide 


User Guide


M o d e l   N u m b e r   R A C 2 V 1 A  
8 0 2 . 1 1 a c   W a v e   2   R o u t e r  

Summary of Contents for RAC2V1A

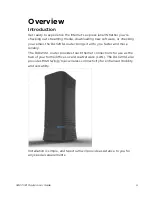
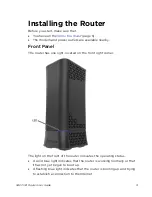
Page 1: ...C2V1A Router User Guide 1 User Guide Model Number RAC2V1A 802 11ac Wave 2 Rou ter ...

Page 2: ...llation Location 11 4 3 1 Desktop Mounting Instructions 12 4 3 2 Factors Affecting Wireless Range 12 4 4 Ethernet or Wireless 13 4 5 Connecting the Router 14 4 6 Configuring the Wireless Connection 14 4 7 Getting Support 14 5 Basic Configuration 15 5 1 Accessing the Configuration Interface 15 5 2 Configuring the Wireless Network 16 5 2 1 Enabling or Disabling the Wireless Network 16 5 2 2 Changing...

Page 3: ...g the System Logs 26 6 10 Setting Up DDNS 26 6 10 1 Requirements 27 7 Router Configuration Screen Descriptions 28 7 1 Basic Setup 29 7 1 1 Basic Wireless Settings 29 7 1 2 WPS Settings 31 7 2 WAN Setup 32 7 2 1 Dynamic Configuration Settings IPv4 32 7 2 2 Static IP Connection Type IPv4 34 7 2 3 DNS Settings 35 7 2 4 Dynamic Configuration Settings IPv6 36 7 2 5 Static IP Connection Type IPv6 37 7 3...

Page 4: ...79 7 7 2 Restart Router 81 7 7 3 Factory Defaults 82 7 7 4 System Settings 83 7 7 5 System Logs 84 7 7 6 DDNS 85 7 7 7 Blocked Device 86 7 7 8 QoS 87 8 Troubleshooting 89 8 1 The router is plugged in but the light is off 89 8 2 I m not getting on the Internet all connections 89 8 3 I m not getting on the Internet Ethernet 89 8 4 I m not getting on the Internet Wireless 89 8 5 My wireless Internet ...

Page 5: ...r email the RAC2V1A router brings it all to you faster and more reliably The RAC2V1A router provides four Ethernet connections for use as the hub of your home office Local Area Network LAN The RAC2V1A also provides 802 11a b g n ac wireless connectivity for enhanced mobility and versatility Installation is simple and Spectrum will provide assistance to you for any special requirements ...

Page 6: ...ctrum for assistance if anything is missing Router Power Supply Spectrum Quick Start Guide Two Stickers with Wi Fi Network Name and Password Ethernet Cable Safety Insert License Agreement Items You Need Make sure you have the following items on hand before continuing Router package see What s in the Box page 7 for a list of items in the package Ethernet Cable In addition to the Ethernet cable prov...

Page 7: ...This Manual This manual covers the RAC2V1A router You can find product information on the security label affixed to the back of the router 1 MAC address 2 Wi Fi Network Name SSID The XX here represents the last octet of the MAC address 3 Wi Fi Password ...

Page 8: ...uration can still work with the router but may not be able to make maximum use of available throughput CPU P4 3 GHz or faster RAM 1 GB or greater Ethernet Gig E 1000Base T Wi Fi 802 11a b g n or ac compliant Wi Fi equipment Windows Windows 7 Windows 8 or Windows 10 A supported Ethernet or wireless LAN connection must be available Mac OS System 7 5 to Mac OS 9 2 Open Transport recommended or OS X A...

Page 9: ...nearby Front Panel The router has one light located on the front right corner The light on the front of the router indicates the operating status A solid blue light indicates that the router is working normally or that it has not yet begun to boot up A flashing blue light indicates that the router is booting up and trying to establish a connection to the Internet ...

Page 10: ...tes that the router is updating firmware A flashing red light indicates that the router is not able to establish an Internet connection A solid red light indicates that the device was not able to achieve a normal operating state Rear Panel The rear of the router has the following connectors and controls ...

Page 11: ... for the power cord Note The LEDs beside each Ethernet 1 4 port and the Internet port appear green if the port is connected at 1Gbps or amber if the port is connected at 10Mbps 100Mbps The LEDs flash while data is being transferred or they appear solid when data is not currently being transferred Selecting an Installation Location There are a number of factors to consider when choosing a location ...

Page 12: ...e A number of factors can affect the usable range for wireless connections Increases range Locating the unit centrally Creating as much line of sight as possible with client devices Decreases range Metal or concrete walls between the router and other client devices Large metal appliances aquariums or metal cabinets between the router and other client devices Interference and RF noise 2 4 GHz wirel...

Page 13: ...o the router through the Ethernet ports you need an Ethernet switch available at computer retailers The router includes one 3 foot 9m Ethernet cable The enclosed Ethernet cable is yellow to match the Internet port on the back of the router because this cable is primarily intended to connect the router to the Spectrum modem You can purchase more cables if necessary at a computer retailer If you are...

Page 14: ...mputer to an available LAN port on the router or you can connect wirelessly by using the preset wireless security settings printed on the security label located on the back of the router 6 Open a browser on the computer to access the management interface of the router If the webpage does not display correctly try another browser See Accessing the Configuration Interface page 15 for more informatio...

Page 15: ... client devices to work with the security settings on the router Most client devices support the WPA2 default security standard in the router Refer to the documentation for the client device for instructions on setting security If the computer or client device supports Wi Fi Alliance WPS Wireless Protected Setup activate WPS on the computer or client device and the router simultaneously to easily ...

Page 16: ...assword for both 2 4 GHz and 5 GHz as well as WPA2 security You can find this network name and password on the label on the back of your router Perform the following steps to disable or re enable the wireless network 1 Access and sign in to the configuration interface 2 Click the Basic Setup tab 3 Click the Enable SSID checkbox in either the Wireless 2 4 GHz section or the Wireless 5 GHz section t...

Page 17: ... sign in to the configuration interface 2 Click the Basic Setup tab 3 On the Basic Wireless Settings screen enter a unique user friendly name to identify the Wi Fi network in the Wi Fi Network Name SSID field under either Wireless 2 4 GHz or Wireless 5 GHz Note This name is also referred to as the Service Set Identifier SSID The name can be up to 32 characters long Do not duplicate any other Wi Fi...

Page 18: ...WPS on the system 5 a If the client device has a WPS button press the WPS buttons on the client device and on the router simultaneously to start the WPS association Note If you prefer you can click Start PBC on the WPS Settings screen instead of pressing the WPS button on the back of the router b If the client device has a PIN number enter the enrollee s PIN in the Enrollee PIN Code field and then...

Page 19: ...de menu to display the appropriate screen for configuring that type of WAN connection 4 Set the required configuration parameters for the connection type you selected as provided by Spectrum Note Refer to WAN Setup in Router Configuration Screen Descriptions page 28 for specific instructions on setting the various connection type configuration parameters 5 Click Apply at the bottom of the screen ...

Page 20: ...router or network adapter to allow the device to request and obtain an IP address from a server which maintains a list of addresses available for use The DHCP server ensures that all IP addresses are unique e g no IP address is assigned to a second device while the first device s assignment is valid its lease has not expired Without DHCP the IP addresses must be entered manually at each computer o...

Page 21: ...splay the LAN Settings screen 4 Click the Enable checkbox under LAN Settings IPv6 5 Enter the Start IP Address and End IP Address for the range of IP addresses that the DHCP Server running on the route will be allowed to assign to a network device 6 In the Lease Time field select the time before the assigned IP address will expire After the lease time is up the user is automatically assigned a new...

Page 22: ...uration interface 2 Click the LAN Setup tab 3 Click LAN Settings IPv4 in the side menu to display the LAN Settings screen 4 Select the NAT Mode from the NAT Mode field drop down list The optional modes are o Bridged Data will pass through the router directly without any routing and without NAT o RoutedWithNAT Data will be routed by the device and all the outgoing packets will be NATed o RoutedWith...

Page 23: ... modes will be slowed down General Firewall Configuration Settings The router is equipped with a firewall that will protect your network from a wide array of common Denial of Service DoS attacks including Ping of Death PoD attacks The firewall is enabled by default but you can choose to disable it Turning off the firewall protection will not leave the network completely vulnerable to hacker attack...

Page 24: ...g The firewall passes requests from the Internet to the designated computer on the network This function works by allowing you to route external Internet calls for services such as a web server port 80 FTP server Port 21 or other applications through the router to the internal network Perform the following steps to set up port forwarding 1 Access and sign in to the configuration interface 2 Click ...

Page 25: ... may be necessary if the NAT feature is causing problems with an application such as a game or video conferencing application Use this feature only on a temporary basis The computer in the DMZ is not protected from hacker attacks Perform the following steps to put a computer in the DMZ 1 Access and sign in to the configuration interface 2 Click the Firewall tab 3 Click DMZ in the side menu to disp...

Page 26: ...wer back in Restarting the router will not delete any of the configuration settings Perform the following steps to restart the router 1 Access and sign in to the configuration interface 2 Click the Utilities tab 3 Click Restart Router in the side menu to display the Restart Router screen 4 Click the Restart Router button to restart the router Viewing the System Logs The System Logs screen displays...

Page 27: ...sen domain name to your IP address Once the account is established perform the following steps to enable DDNS 1 Access and sign in to the configuration interface 2 Click the Utilities tab 3 Click DDNS in the side menu to display the DDNS configuration screen 4 Click the DDNS Enable checkbox Note Refer to DDNS page 85 for specific instructions on setting the various DDNS configuration parameters 5 ...

Page 28: ...is section provides an overview of the graphical user interface GUI router setup screens Each of the following tabs in the GUI and their individual sub menus and configuration parameters are explained in detail Basic Setup WAN Setup LAN Setup Wireless Firewall USB Utilities ...

Page 29: ...s to set advanced options Hover the mouse pointer over the question mark icon next to an option to view a description of that option For changes to take effect you must click Apply Wireless 2 4 GHz Wireless 5 GHz Enable SSID Click this checkbox to enable the wireless network on the system Wi Fi Network Name SSID Enter a user friendly name to identify the wireless network This name is also referred...

Page 30: ... the Wi Fi password Use a Wi Fi password that will not be easy to guess Wi Fi passwords are case sensitive Valid characters are the numbers 0 to 9 the letters a through z and A through Z and printable special characters such as and others You must click Apply to save the new Wi Fi password ...

Page 31: ...p and connect to a WPS enabled 802 11 network with WPS certified devices using either a Personal Information Number PIN or the Push Button Configuration PBC method Legacy devices without WPS can be added to the network using the traditional manual configuration method WPS Enable Disable Wireless 2 4 GHz Wireless 5 GHz Click the frequency for which you want to enable WPS WPS Enable Click this check...

Page 32: ...by pressing the WPS buttons on the device if equipped and on the router or by entering the enrollee s PIN and then clicking Enroll PIN Method Enrollee PIN Code If the client device has a WPS PIN number enter it here then click Enroll Device PIN Code Enter this code on the computer if requested during connection PBC Method Start PBC Click to start the PBC connection process This is equivalent to pr...

Page 33: ...address Note You can use static manual IP addresses in addition to the DHCP server but any static addresses must be outside the range of the DHCP pool to avoid duplicate IP addresses Also the static WAN IP address must be routable by northern bound routers DHCP Enable DHCP Click this checkbox to enable a DHCP connection for the system Host Name Use this field to enter a host name for the router MT...

Page 34: ...ever changes then use this option For changes to take effect you must click Apply Static IP Settings Enable Static IP Click this checkbox to enable a static IP address connection for the system IP Address Enter the IP address assigned by Spectrum for static IP operation Subnet Mask Enter the subnet mask assigned for the device by Spectrum for static IP operation Gateway Address Enter the gateway a...

Page 35: ... DNS Settings screen to enter those settings DNS Settings Use this screen to change your DNS settings if necessary Note In most cases you will not need to change your DNS settings DNS Settings Automatic from ISP Click this checkbox if the router should automatically get its DNS settings from Spectrum Primary DNS Server IP Enter the IP address of the primary DNS server This field is only available ...

Page 36: ...a Static address you should choose a dynamic address For changes to take effect you must click Apply Dynamic Configuration IPv6 Enable DHCP IPv6 Clear this checkbox if you want to disable a DHCP IPv6 connection for the system IP Address v6 This field displays the IPv6 address automatically assigned by Spectrum An IPv6 address has eight groups of four hexadecimal digits 0 9 a f The groups are separ...

Page 37: ...gated Prefix Length This field displays the assigned IPv6 prefix length IPv6 Gateway Address This field displays the gateway address Static IP Connection Type IPv6 This screen enables a statically configured IPv6 address A static IP address connection type is less common than others and uses a permanent IPv6 address to connect to the Internet If Spectrum provides an IP address that never changes t...

Page 38: ... is shorthand for an address of all zeros Prefix Length IPv6 The length of the network portion of this address IPv6 Gateway Address Enter the gateway address assigned for the device by Spectrum for static IP operation Primary DNS Server IPv6 Enter the IPv6 address of the primary DNS server Spectrum will provide this information Secondary DNS Server IPv6 Enter the IPv6 address of the secondary DNS ...

Page 39: ...C2V1A Router User Guide 39 LAN Setup LAN Settings IPv4 You can make changes to the Local Area Network LAN configuration here For changes to take effect you must click Apply LAN IP Settings IP Address This field displays the IP address of the LAN ...

Page 40: ...ntered manually at each computer in an organization and a new IP address must be entered each time a computer moves to a new location on the network Start IP Address End IP Address Enter the range of IP addresses that the DHCP Server will be allowed to assign to a network device Lease Time Select the time before the assigned IP address will expire After the lease time is up the user is automatical...

Page 41: ...y routing and without NAT UPnP Enable UPnP Click this checkbox to enable UPnP Universal Plug and Play on the system Advertisement Period Specify how often in minutes the router should advertise its UPnP information The default is 30 minutes Advertisement Time To Live Enter the maximum number of hops that each UPnP packet can be sent before it is disregarded The default value is 4 which should be a...

Page 42: ... changes to take effect you must click Apply Enable Click the checkbox if you want to configure IPv6 in your LAN If the box is unchecked your LAN will only have an IPv4 address When you enable IPv6 in the LAN a different IPv6 based subnet is recognized on the LAN and the local DHCPv6 server will hand out stateless and stateful addresses based on the prefix information broken down from the WAN side...

Page 43: ...e LAN DHCPv6 pool range Start IP Address IPv6 End IP Address IPv6 Enter the range of IPv6 addresses that the DHCP Server will be allowed to assign to a network device Lease Time IPv6 Select the time before the assigned IP address will expire After the lease time is up the user is automatically assigned a new dynamic IP address A lease is the amount of time that a given IP address will be valid for...

Page 44: ...t List This page shows the IP address host name and MAC address of each computer that is connected to the network If a computer does not have a specified host name then the host name field will be blank Reserved IP Client List IP Address Enter the client s IP address Host Name Enter a host name for the client MAC Address Enter the client s MAC address Click Add to create a new fixed client lease C...

Page 45: ...a client and then click Delete to delete the reserved client from the list Attached Client List IP Address The IP address of a connected client Host Name The host name of a connected client MAC Address The MAC address of a connected client Click Refresh to update the client list ...

Page 46: ...Router Configuration Screen Descriptions RAC2V1A Router User Guide 46 Wireless Basic Setup ...

Page 47: ...nnel for the router The default setting is Auto in which the router selects a channel with the least amount of interference to use For 2 4 GHz if you manually select a channel it s best to choose channel 1 6 or 11 since these channels do not overlap If another router is operating in the area choose a channel that is farthest away from the channel that unit uses For example if another router is usi...

Page 48: ... for 2 4 GHz is 20 40 MHz and the default bandwidth for 5 GHz is 20 40 80 MHz Broadcast Network Name SSID Click this checkbox to allow the router to broadcast the network name SSID If you enable this the Wi Fi network name SSID will be visible to all users in the area including both authorized and unauthorized users If you would like others not to see the access point uncheck the checkbox to hide ...

Page 49: ...ur categories in order to provide priority network access for applications that are less tolerant of packet delays Security Mode Determines the security setting for the router The recommended setting and default is WPA2 PSK Wi Fi Protected Access 2 Pre Shared Key Other settings include WPA WPA2 PSK Wi Fi Protected Access Wi Fi Protected Access 2 Pre Shared Key most compatible WPA2 Enterprise or WP...

Page 50: ...dvanced Settings The Advanced Settings page is used to set up the router s advanced wireless functions These settings should only be adjusted by an expert administrator since incorrect settings can reduce wireless performance For changes to take effect you must click Apply ...

Page 51: ...the messages For compliance with most client devices the DTIM Interval should be left at 1 ms The allowable setting range is from 1 to 255 ms RTS Threshold Sets the packet size limit When the threshold is passed the ready to send clear to send RTS CTS function is invoked The default setting is 2347 bytes The allowable setting range is from 1 to 2347 bytes Guard Interval The spacing between transmi...

Page 52: ... the channel bandwidth for this radio to maximize throughput at any given time Dynamic Bandwidth Utilization makes bandwidth adjustments based on periodic monitoring of the frequency band to expand the channel width when adjacent frequencies are quiet and shrink the channel width when the frequencies being used have interference Band Steering Band Steering Enable This setting enables the router to...

Page 53: ...s The MAC address of an associated client for which statistics are being reported Network The Network name SSID where the client is connected Signal The average Received Signal Strength Indicator RSSI level of the connected client TX Rate bps The transmission rate that is being reported by the associated client RX Rate bps The receive rate that is being reported by the associated client ...

Page 54: ...er of frames By doing so you can increase the download speeds for newer faster devices even when slower devices are connected to the same wireless network ATF Enable Click the checkbox to enable Airtime Fairness Wireless 2 4 GHz SSID Percentage Use these fields to specify what percentage of the 2 4 GHz band you wish to allocate to each wireless network based on network name SSID ...

Page 55: ...ed on MAC address You can enter up to 16 MAC addresses Wireless 5 GHz SSID Percentage Use these fields to specify what percentage of the 5 GHz band you wish to allocate to each wireless network based on network name SSID Wireless 5 GHz Client Percentage Use these fields to specify what percentage of the 5 GHz band you wish to allocate to each device based on MAC address You can enter up to 16 MAC ...

Page 56: ...Router Configuration Screen Descriptions RAC2V1A Router User Guide 56 QoS Classification ...

Page 57: ...alue of the transmission packets LAN WAN to WLAN will be remarked to 802 11e QoS control field values following the DSCP remarking table below Wireless 2 4 GHz Wireless 5 GHz SSID Choose the network name SSID settings that you want to display or modify Enable Classification Click the checkbox if you want to enable this classification on your system Classification Method Choose a classification met...

Page 58: ... not change the default values displayed on the screen DSCP The DSCP value for this entry Binary The binary value for this DSCP entry Decimal The decimal value for this DSCP entry Wireless Tos The wireless type of service Larger values indicate a higher priority Log This screen shows a log of communication statistics for your wireless connections This information may be helpful in troubleshooting ...

Page 59: ...e network completely vulnerable to hacker attacks but it is recommended that you enable the firewall whenever possible For changes to take effect you must click Apply Firewall Enable Disable Enable Firewall Click the checkbox to enable the firewall on the system Enable unsolicited flow forwarding transparent mode Click the checkbox if you want to suspend simple security capabilities associated wit...

Page 60: ...ls for services such as a web server port 80 FTP server Port 21 or other applications through the router to the internal network Port Forwarding Service List Select the kind of service you would like to set up and click Add The pre defined port forwarding rules will be displayed in the table You must edit the private IP address on the LAN where you want external calls to go or you can choose Custo...

Page 61: ...cted to a client on the default LAN 192 168 1 x or on a Routing Information Protocol RIP gateway Inbound Port Enter the inbound port range for the port you want to forward It should be the same range as the local port Type Set the format for the port Options are TCP UDP or BOTH Private IP Address Enter the IP address of the machine on the LAN where you want the connections to go Private Port Enter...

Page 62: ...ssaging program features may require these special settings To add a new port trigger click Add Complete the necessary fields in the pop up window and then click Apply To edit a port trigger select the entry and then click Edit To delete a port trigger select the entry and then click Delete Description Enter a description for the trigger you want to set up Outbound Port Specify the range of outbou...

Page 63: ...work Static IP Displays router s WAN IP address This is the address that external devices will use to contact the computer in the DMZ Private IP Enter the IPv4 address of the computer to be placed in the DMZ Be sure that the address is not in the range of addresses delivered by the DHCP server if enabled Once you place the computer in the DMZ all ports on the computer are open to the Internet and ...

Page 64: ... 64 WAN Ping Blocking You can configure the router not to respond to an ICMP Ping ping to the WAN port This offers a heightened level of security Block ICMP Ping Block ICMP Ping Enable Click this checkbox to enable WAN Ping Blocking Application Layer Gateway Settings ...

Page 65: ... you want special handling Options are IPSec PPTP PppoePassthrough IpsecPassthrough PptpPassthrough and L2tpPassthrough MAC Filter MAC address filtering gives you an extra layer of security by allowing you to specify which devices can access your network Whenever a new device tries to join your network the router checks the MAC address of the device against a list of approved addresses You can cho...

Page 66: ...ize for example Home Router or Jane s Office MAC Address Enter the MAC address for the device that you want to specify You can also select the MAC address from a list of online clients Click Add to create a new MAC filter setting Complete the necessary fields in the pop up window and then click Apply To delete a MAC filter setting select the entry and then click Delete Parental Controls Parental C...

Page 67: ... filter based on keywords URL or custom parameters that you define Parental Controls Block URL Use this screen to block access to websites based on their URLs web addresses The IP address resolved by the fully qualified domain name FQDN will also be blocked Description Type a description for the filter you are creating ...

Page 68: ... part of this filter If you would like to block multiple sites you will enter them one at a time and click Apply after each URL that you want to block Days Select the days that you would like for this filter to be in effect Time Select the time of day that you would like for this filter to be in effect Display Filters This area displays any filters that you have already defined and lets you modify...

Page 69: ...ebsite s HTTP header or DNS query Description Type a description for the filter you are creating MAC Address Type the MAC address of the device that you want to restrict from accessing sites that contain these keywords If you want the filter to apply to multiple clients you must enter the MAC addresses one by one If you do not specify a MAC address the filter will apply to all clients ...

Page 70: ...to block Days Select the days that you would like for this filter to be in effect Time Select the time of day that you would like for this filter to be in effect Display Filters This area displays any filters that you have already defined and lets you modify or delete those filters If you want to edit an existing filter click Edit If you want to delete an existing filter select the filter and clic...

Page 71: ...escriptions RAC2V1A Router User Guide 71 Parental Controls Custom Use this screen to block access to websites based on custom filters that you define Description Use this field to type a description for the filter you are creating ...

Page 72: ...ting number for the range of ports that you want to block End Port Type the ending number for the range of ports that you want to block Protocol Select the protocol that you want to block Days Select the days that you would like for this filter to be in effect Time Select the time of day that you would like for this filter to be in effect Allow Block Use the drop down menu to specify whether you w...

Page 73: ... filter Complete the necessary fields in the pop up window and then click Apply Select a filter and then click Edit to edit the filter Select a filter and then click Delete to delete the filter from the list IPv6 Client Filter Action Direction Select whether the client device should be allowed to bypass the IPv6 firewall Allow Incoming or blocked from accessing the Internet Deny Outgoing Client IP...

Page 74: ...ies USB USB Status The USB status shows any USB devices that are connected to the router Click Refresh to update the list If you want to disconnect a device select the device and click Remove Then unplug the device Available Volumes Volume Name The volume name of a connected USB device Total Space The total space available on the associated USB device Free Space The amount of free space available ...

Page 75: ...Guide 75 File Sharing File sharing lets you configure folders on the USB device so that you can share files with other devices An FTP server makes the folder available for remote users over the Internet Shared folders are available to users on your local network ...

Page 76: ...ecify the folder that you want to make available as a shared folder HTTPS Server Settings Enable HTTPS Server Click this box to enable an HTTPS server on your USB device HTTPS Server Access Use this field to specify the folder that you want to make available as an HTTPS server NFS Settings Enable NFS Click this box to enable NFS on your USB device AFP Settings Enable AFP Click this box to enable A...

Page 77: ...re network folders so that you can share media movies songs and pictures with other devices on your network Media Sharing Settings Enable Media Sharing Click this box to enable media sharing on your USB device Media Sharing Name Use this field to specify the folder that you want to make available for media sharing ...

Page 78: ...ccess Control Select this box if you want to turn on USB access control USB access control is disabled by default Approved USB Device This section shows the USB devices that are able to access your network If you want to restrict a device so that it cannot access your network select the device and click Delete Attached USB Device This section shows the USB devices which are attached to your router...

Page 79: ...Router Configuration Screen Descriptions RAC2V1A Router User Guide 79 Utilities System Information This page shows a summary of the system s status ...

Page 80: ...ld displays the WAN subnet mask Primary DNS This field displays the Primary DNS IP address Secondary DNS This field displays the Secondary DNS IP address Gateway This field displays the gateway IP address LAN Status Summary MAC Address This field displays the LAN MAC Address IP Address This field displays the IP Address of the LAN Subnet Mask This field displays the subnet mask of the LAN DHCP Ser...

Page 81: ...dicates whether the WPS function is enabled or disabled Restart Router It may be necessary to restart reset the router if it stops working properly Restarting the router will not delete any of the configuration settings To restart the router click Restart Note A dialog box prompts you to confirm that you want to restart the router Click OK to restart now or click Cancel to restart later ...

Page 82: ...l of the router s configuration settings to the factory default setting Click Factory Defaults to revert to the factory default configuration settings Note A dialog box prompts you to confirm that you want to restore the factory default settings Click OK to restore now or click Cancel if you do not want to restore now ...

Page 83: ... allows you to make certain system settings For changes to take effect you must click Apply Administrator Login Current Password Enter the old password to change the administrator password New Password Confirm New Password Enter the new password in both fields to change the administrator password ...

Page 84: ...ays the current time Current Language Select the language you want to see displayed in the GUI Time Zone Select the time zone Daylight Savings Click this checkbox to automatically update the system clock for Daylight Saving Time NTP Server 1 5 The host name or IP addresses of the NTP servers that you want to use 1 4 allow you to select a server from a drop down list 5 allows you to type in a serve...

Page 85: ...us locations on the Internet to access the router and the applications that are set up in the gateway s port forwarding table without knowing your current IP address For changes to take effect you must click Apply Note You must first create an account with a DDNS provider in order to use DDNS The DDNS provider maps the chosen domain name to your IP address DDNS Setting DDNS Enable Click this check...

Page 86: ...d USB access control From MAC Filter Device Name The host name of a client for which an explicit MAC filter has been set up on the Firewall MAC Filter page MAC Address The MAC address of a client for which an explicit MAC filter has been set up on the Firewall MAC Filter page From USB Access Control Volume Name The volume name of a USB device for which an explicit USB access control has been set u...

Page 87: ...r which an explicit USB access control has been set up on the USB USB Access Control page QoS Quality of Service QoS refers to the overall performance of your network This screen allows you to prioritize certain applications such as online gaming while minimizing the effects on network performance during busy periods Enable QoS Click this checkbox to enable QoS Prioritization ...

Page 88: ... test and verify your connection speed QoS Policy for Enter a name for this QoS policy MAC Address Enter the MAC address of the client device that will be affected by this policy Device Name Enter a name for the client device that will be affected by this policy Priority Choose the priority for this policy In the event of conflicting policies this priority will be used to determine which policy ta...

Page 89: ...Connectors should be tight Cables should not be pinched kinked or bent sharply any of these can cause a break or short in the cable You may have to replace the cable Proceed to the Ethernet or wireless solutions if necessary I m not getting on the Internet Ethernet If you are using a switch is the switch turned on Are you using the right type of Ethernet cable Use an RJ45 Cat5e cable for direct co...

Page 90: ...ance or interference Try moving the device closer to the router Two common sources of interference are 2 4 GHz remote telephones and microwave ovens If you cannot remove the interfering product try using a different channel I can get on the Internet but everything is slow If the Web site you are visiting is very popular that site may be having trouble servicing all the requests If other sites down...

Page 91: ...ghtning strikes additional surge protection may be required i e PF11VNT3 from American Power Conversion on the AC and Ethernet lines When the router is connected to a local computer through Ethernet cables the computer must be properly grounded to the building residence AC ground network All plug in cards within the computer must be properly installed and grounded to the computer frame per the man...

Page 92: ...help FCC Caution Any changes or modifications not expressly approved by the party responsible for compliance could void the user s authority to operate this equipment This device complies with Part 15 of the FCC Rules Operation is subject to the following two conditions 1 This device may not cause harmful interference and 2 this device must accept any interference received including interference t...

Page 93: ...S logo are all trademarks of ARRIS Enterprises LLC Other trademarks and trade names may be used in this document to refer to either the entities claiming the marks or the names of their products ARRIS disclaims proprietary interest in the marks and names of others ARRIS provides this guide without warranty of any kind implied or expressed including but not limited to the implied warranties of merc...

Reviews: