background image

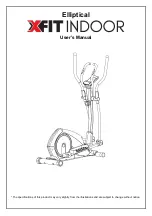
SPT0040 – XE320 


PLEASE CAREFULLY READ THIS ENTIRE MANUAL BEFORE 

OPERATING YOUR NEW ELLIPTICAL! 

OWNER’S MANUAL 

Summary of Contents for XE320

Page 1: ...SPT0040 XE320 PLEASE CAREFULLY READ THIS ENTIRE MANUAL BEFORE OPERATING YOUR NEW ELLIPTICAL OWNER S MANUAL...

Page 2: ...Safety Instructions 3 Important Electrical Information 4 Important Operation Instructions 4 Assembly Instructions 5 Features 11 Operation of Your New Elliptical 12 Parts list and Explode Drawing 21 M...

Page 3: ...t this time to record the name of the dealer and the date of purchase below to make any future needed contact easy We appreciate your support and we will always remember that you are the reason that w...

Page 4: ...ere oxygen is being administered Sparks from the motor may ignite a highly gaseous environment Never drop or insert any object into any openings Do not use outdoors To disconnect turn all controls to...

Page 5: ...immediately Set your desired level on the computer console and release the adjustment key The computer will obey the command gradually NEVER use your elliptical during an electrical storm Surges may o...

Page 6: ...ead Bolt 2pcs 60 3 8 x 2 1 4 Hex Head Bolt 1pcs 96 3 8 x 2T Split Washer 1pcs Step 2 79 5 16 x23x1 5T Flat Washer 2pcs 59 5 16 x 15 m m Hex Head Bolt 2 pcs 83 17 m m Wave Washer 2 pcs 84 3 8 x 23 x 1...

Page 7: ...ACK CHECK LIST Step 4 Tools 87 3 5x12m m Sheet Metal Screw 8pcs 105 M5 x 15m m Phillips Head Screw 14pcs 108 Phillips Head Screw Driver 1pcs 107 Short Phillips Head Screw Driver 1pcs 109 12m m Wrench...

Page 8: ...ast 12 NOTE The Computer Cable 31 runs through the Console Mast 12 Be careful not to damage or pinch this cable during this procedure Be careful as damage to the Console Assembly 30 could result Insta...

Page 9: ...XE320 Elliptical 8...

Page 10: ...and Right side of the Console Mast axle 2 Slide the Swing Arms L and R 10 11 onto the appropriate side of the axle 3 Put the 2pcs of 5 16 15m m Hex Head Bolts 59 onto the 2pcs of 5 16 23 1 5T Flat Wa...

Page 11: ...and R 10 11 bracket Take 2pcs of 5 16 x 1 1 4 Hex Head Bolts 104 and install it through the Swing Arms L and R 10 11 bracket and the rod end Install 2pcs of 5 16 x 20 x 1 5T Flat Washers 80 5 16 x 7T...

Page 12: ...ws 105 by using the Phillips Head Screw Driver 108 3 Locate the 2pcs of Rear Stabilizer Cover A 19 and 2pcs of Rear Stabilizer Covers B 20 for the Rear Rail Assembly and install with 4pcs of M5 x 15m...

Page 13: ...n the outer part of the foot and throws off the natural alignment of the joints The second problem we found is that many people tend to stay up on the ball of their foot during the elliptical motion O...

Page 14: ...raws a tiny amount of electric current similar to a TV when it is turned off When it is first powered on the console will perform an internal self test During this time all the lights will turn on Whe...

Page 15: ...nding on user physiology and workout habits including how one grips the sensors or how sweaty their hands are The Stop Reset button actually has several functions Pressing the Stop Reset key once duri...

Page 16: ...ting the settings and can begin your workout by pressing the Start key You can also go back and modify your settings by pressing the Stop key to go back one level of the programming screen 6 Once the...

Page 17: ...ecrease the workload at any time during the program press the Up or Down keys 8 During the program you will be able to scroll through the data in the message window by pressing the Display key 9 When...

Page 18: ...present position in the profile When the profile changes to the next column it will return to the preset work level 10 During the User 1 or User 2 program you will be able to scroll through the data i...

Page 19: ...m 180 X 8 144 beats per minute 80 of maximum So for a 40 year old the training zone would be 108 to 144 beats per minute If you enter your age during programming the console will perform this calculat...

Page 20: ...ception of Effort 6 Minimal 7 Very very light 8 Very very light 9 Very light 10 Very light 11 Fairly light 12 Comfortable 13 Somewhat hard 14 Somewhat hard 15 Hard 16 Hard 17 Very hard 18 Very hard 19...

Page 21: ...g the transmitter immediately against bare skin assures you of proper operation If you wish you may wear the transmitter over a shirt To do so moisten the areas of the shirt that the electrodes will r...

Page 22: ...t The default is 70 you may select 60 or 80 also Adjust the level and then press enter 6 You are now asked to select the Target heart rate Level This is the heart rate level you will experience during...

Page 23: ...ge the console settings from English to Metric and turn off the beeping of the speaker when a key is pressed for example To enter the Maintenance menu may be called Engineering mode depending on versi...

Page 24: ...ngle of the footpad to add variety to your workouts The foot plates are spring loaded and when the pull pin is pulled the foot plate can drop suddenly To avoid any injury please do not put your hand o...

Page 25: ...Cover B 2 22 11 9 8 5 15m m_Rod End Sleeve 3 23 Carriage Bolt 2 25 Drive Belt 1 26 330_Drive Pulley 1 27 Flywheel 1 28 Magnet 1 29 7 7 25L_Woodruff Key 2 30 Console Assembly 1 30 1 Console Top Cover 1...

Page 26: ...2 53 32 1 8T _Button Head Plug 4 54 Front Handle Bar Cover L 1 54 1 Rear Handle Bar Cover L 1 55 Front Handle Bar Cover R 1 55 1 Rear Handle Bar Cover R 1 56 32 2 5T_Round Cap 2 57 Connecting Arm Cov...

Page 27: ...m_Tapping Screw 4 102 30 19m m_Console Mast Bushing 2 103 3 8 3 4_Hex Head Bolt 2 104 5 16 1 1 4 _Hex Head Bolt 2 105 M5 15m m_Phillips Head Screw 14 106 13 14m m_Wrench 1 107 Short Phillips Head Scr...

Page 28: ...XE320 Elliptical 27 SPT0040 XE320 Explode Drawing...

Page 29: ...r Freecall 1800 465 070 For efficient processing of your enquiry please have relevant date of purchase retailer name you purchased the item from and the brand on the product This warranty does not ext...

Reviews: