background image

Summary of Contents for CPN1010i

Page 1: ......

Page 2: ...CPN700i and CPN1010i Multimedia Chart Plotters Page 3 CPN700i CPN1010i Multimedia Chart Plotters Owner s Manual ...

Page 3: ...t Plotter is designed for maritime use To avoid water intrusion ensure the C MAP BY JEPPESEN SD CARD door is completely closed Extensive exposure to heat may result in damage to the CPN Series Chart Plotter The CPN Series Chart Plotter contains dangerous high voltage circuits which only experienced technicians can handle STANDARD HORIZON will not be liable for errors contained herein or for incide...

Page 4: ... CHART PLOTTER CONTROLS 20 1 3 1 KEYS 20 1 3 2 PLAYING MUSIC IN BACKGROUND Chart Plotter Mode only 23 Starting Music in Background 23 Stopping Music in Background 23 1 3 3 SOFT KEYS Chart Plotter Mode only 23 Closing Soft Keys 24 1 4 MEMORY DEVICES SAFELY REMOVAL 24 2 CHART PLOTTER 25 2 1 GETTING STARTED 25 2 1 1 SWITCHING BETWEEN MODES 26 Default Mode 26 Home vs Cursor Mode 26 Cursor Mode 26 Swit...

Page 5: ...QUICK AND FULL INFO ON LAKES 49 2 4 8 LAKES BY NAME 50 2 4 9 POINTS OF INTEREST 51 2 4 10 USER POINTS 51 2 4 11 COORDINATES 51 2 4 12 INFORMATION 52 2 5 CHART DISPLAY FUNCTIONS 52 2 5 1 4D FUNCTIONS 52 Chart Window 52 Display Mode 53 Overlay 53 Overlay Mode 54 Transparency 54 3D Exaggeration Factor 54 2 5 2 GENERAL CHART DISPLAY FUNCTIONS 55 Icons Size 55 Place Names Size 55 Safety Status Bar DSI ...

Page 6: ...b 75 2 8 3 GOTO MARK 75 2 9 MAN OVER BOARD MOB FUNCTION 75 2 9 1 PLACING A MOB POINT 75 2 9 2 DELETING A MOB POINT 76 2 10 TRACKS 76 2 10 1 SAVING AND STARTING A NEW TRACK 77 2 10 2 DELETING A TRACK 78 2 10 3 OTHER SETTINGS IN THE TRACK MENU 78 2 11 TRIP LOG TIMERS 78 2 11 1 TRIP LOG SELECTION IN DATA WINDOW 78 Resetting the Trip Log 79 2 11 2 COUNT DOWN TIMER SELECTION IN DATA WINDOW 79 Setting t...

Page 7: ... 102 Distress Call 102 Position Request 102 DSC Directory 103 2 13 9 VIDEO INPUT 103 Video Input Menu 104 Video Adjustment Mode 104 Restore Defaults 104 2 13 10 ALARMS 105 Alarms Setup Menu 105 Engine Alarm Report 106 Grounding Alarm Report 106 System Alarm Report 107 2 14 ADVANCED SETTINGS 107 2 14 1 NAVIGATE MENU 107 Loran TD 107 2 14 2 COMPASS COG SETUP 108 2 14 3 DATA SOURCE PRIORITY SELECTION...

Page 8: ...ING CONNECTION C MAP 4D CHARTS NMEA FISH FINDER DATA SHARING 129 3 4 1 SETTING UP CONNECTION BETWEEN TWO CPN SERIES CHART PLOTTERS 129 Chart Plotter 1 Setup with C MAP 4D CARD inserted 130 Chart Plotter 2 Setup no chart inserted 131 3 5 ETHERNET CONFIGURATION 132 3 6 PAIRING THE CPN SERIES CHART PLOTTERS WITH Bluetooth WIRELESS TECHNOLOGY 133 3 6 1 ACTIVATION OF Bluetooth DEVICE 133 3 6 2 PAIRING ...

Page 9: ...TIONS 162 CPN Pre Amp Connector Pin Out 162 7 1 5 OPTIONAL USB THUMB DRIVE 163 7 1 6 OPTIONAL WAAS GPS ANTENNA 163 7 1 7 OPTIONAL FF525 BLACK BOX FISH FINDER 164 7 1 8 OPTIONAL EXTERNAL ALARM CONNECTION 165 7 1 9 SECOND CPN TO SHARE C MAP 4D CHARTS NMEA FF DATA 165 7 1 10 NMEA 2000 DEVICES 166 8 SPECIFICATIONS 167 8 1 CPN700i 167 8 1 1 CPN700i DIMENSIONS 168 8 2 CPN1010i 168 8 2 1 CPN1010i DIMENSI...

Page 10: ...tenna provides precise location data with a host of navigation features ideal for nautical use The CPN700i and CPN1010i are housed in rugged impact resistant cases with outstanding ergonomic design for effortless operation The CPN700i and CPN1010i are IP57 waterproof The advanced features of the CPN Series Chart Plotter include Built In Charts1 for coastal navigation of USA including Alaska Hawaii...

Page 11: ...ears waterproof warranty 1 For North America users only PACKING LIST When the package containing the Chart Plotter is first opened please check for the following contents Accessories and replacements parts may be ordered in North America by contacting STANDARD HORIZON s Parts department at 714 827 7600 Extn 6800 or by email at marineparts yaesu com UK customers may contact STANDARD HORIZON at 0196...

Page 12: ...both the 7inch CPN700i and 10inch CPN1010i Multimedia Chart Plotters which are referenced to CPN Series Chart Plotters throughout this manual In addition when a word s is bold and underlined it is referring to a menu selection on the display The screen images on this Owner s Manual refer to the CPN700i Series Chart Plotter unless specified ...

Page 13: ...automatically changes to Chart Plotter Mode 1 1 1 POWERING OFF 1 The CPN Series Chart Plotters have three modes of operation The GPS Chart Plotter Internet and Multimedia modes When the CPN Series Chart Plotter is in any of these modes and the PWR key is pressed and held a Shut Down window1 will be shown 1 FOR CHART PLOTTER MODE ONLY The option is present only in Chart Plotter Mode It allows to di...

Page 14: ...ght or left when finished tap on to save the selection and exit the brightness setting mode The Brightness control is avaible also using the Intelligent key 1 2 CHART PLOTTER FRONT PANEL Touchscreen touch the screen to interact with the Chart page Menus Internet or Multimedia modes MENU key selects the Main Menu GOTO key shows the GOTO popup window and allows selection of Go To Cursor Saved Mark o...

Page 15: ...s SD CARD slot used to insert optional C MAP 4D Cartography view pictures listen to audio files save User Points and update software from an optional SD CARD 1 2 1 TOUCHSCREEN The CPN700i and CPN1010i use a touchscreen display Many functions are controlled by touching the display or using the dedicated keys ShuttlePoint or rotary knobs The Touchscreen Calibration can be selected from the Startup S...

Page 16: ...the screen then drag the finger left or right then lift up the finger to initiate scrolling Pan Move Scrolling maps moving cursor press a finger on the screen move the finger in any direction Tap Placing a cursor activating Soft Keys selecting objects Data Boxes options in menu shortly press and release a finger on the screen Hold Opening additional related options context depended press and hold ...

Page 17: ...owser The keyboard is also used for Internet Browser Media Player and Connection Manager The keyboard can be operated by the touchscreen or by moving the ShuttlePoint knob A character is entered turns red when the key is tapped once or when ShuttlePoint knob is pressed Touchscreen Keyboard for Chart Plotter Mode Touchscreen Keyboard for Other Applications 1 2 2 MENU DESCRIPTION The menu window has...

Page 18: ...p menu when touched closes all menus Touching or in the first menu level has no effect if there is an opened submenu list of all menu items present on the current menu level There are two types of menu items opens the next menu level allows choosing one of available options when touched up down the bar scrolls the content of the related window page See the following picture Warning Window The Warn...

Page 19: ... knob up down to highlight DISPLAY COLOR and press the ShuttlePoint knob to enter A popup window will be shown with the available options To set Normal palette move the ShuttlePoint knob up down to highlight Normal and press the ShuttlePoint knob to enter or C Move the rotary knob left right to highlight DISPLAY COLOR and press the rotary knob to enter A popup window will be shown with the availab...

Page 20: ...3 seconds allows you to open the Marks Waypoints List page The key ACTIVE IN CHART PLOTTER MODE ONLY Pressing the key places a Waypoint under the vessel s or cursor position Move the cursor and press the key to place additional Waypoints to form a Route Pressing and holding for 3 seconds allows you to open the Edit Route page The ShuttlePoint knob joystick Moves the cursor around the Chart page Cu...

Page 21: ...DISPLAY menu window from which you can select 2D Vector Vector Satellite Raster or 3D Vector Satellite or Raster modes Optional C MAP 4D cartography is needed to see Raster and Satellite details on the chart The key ACTIVE IN CHART PLOTTER MODE ONLY When pressed places a MOB MOB Man Over Board mark on the Chart page under the boat s position to aid in the rescue of a person who may have fallen abo...

Page 22: ...Media Player 3 Choose an album or song to play adjust the play mode and volume see Media Player section for more information 4 Pressthe IntelligentkeytogobacktoChartPlotterMode TheMediaPlayerishidden but it is active music is playing and the Chart Plotter Mode is shown again Pressing the Intelligent key toggles between Media Player and Chart Plotter Modes Video can not be viewed when in Chart Plot...

Page 23: ...ovedifthedisplayisnotpressedformorethanaspecifictimeout user selectable see the Home Mode Revert item in the Par 2 1 4 Settings in General Setup Menu By tapping on the Close Soft key control By pressing the key 1 4 MEMORY DEVICES SAFELY REMOVAL To replace an SD CARD without chart data or a USB memory stick remove the device and wait at least 7 seconds before inserting the new one To remove an SD C...

Page 24: ...ystem Update Error Messages 2 TheStartupScreenpage will be displayed in approximately 30 45 seconds seeB This page allows you to select the Chart Plotter Connection Manager Internet Browser or Media Player modes 3 To select the Chart Plotter Mode tap on the Plotter Icon The CPN Series Chart Plotter will automatically change to Chart Plotter Mode if a key or display is not touched for 30 seconds 4 ...

Page 25: ...and hold then drag finger change page The ShuttlePoint knob when moved will change the location of the cursor When the cursor reaches the edge of the chart the chart will pan 7 When you move the ShuttlePoint knob you will notice DST and BRG values in the Cursor Window change This shows the Distance and Bearing from the GPS fix of your vessel to the position of the cursor 2 1 1 SWITCHING BETWEEN MO...

Page 26: ...vert setting in the General Setup menu see Par 2 1 4 Settings in General Setup Menu Default is 1 minute Switching between 2D and 3D Modes There are two methods to toggle between 2D and 3D modes From Main Menu 1 The Chart page in 2D mode is shown see A Press the key tap on the large Setup Menu icon 2 Tap on the small DISPLAY icon on the Desktop The Chart Display menu appears see B 3 Tapping on DISP...

Page 27: ...cted Chart page in 3D see D 2 1 2 MENU SYSTEM The CPN Series Chart Plotters have a unique menu system which allows you to select a page and see subpages on a desktop to make choices quick and easy See the following examples of how to select a page Dual Chart example 1 Press the key from any page 2 Tap on the large Chart icon see A to select a page 3 Tap on the small DUAL icon see B on the Desktop ...

Page 28: ...t and in menus when using the ShuttlePoint knob The default setting is Medium to change the speed follow the procedure below 1 Press the key tap on Setup Menu see A 2 Tap on GENERAL see B The General Setup menu appears see C 3 Tap on CURSOR SPEED The menu now shows two selections Chart and Menu which allow the Cursor Speed to be selected as High Medium or Low on the Chart page or within the menus ...

Page 29: ... to exit from the menu Selecting Course Up North Up The default selection is North Up the chart is shown with North toward the top of the display Also it is possible to select Course Up the top of the Chart page orientated so it always shows the area ahead of the direction your vessel is travelling 1 Press the key tap on Setup Menu 2 Tap on DISPLAY The Chart Display menu appears 3 Move the Shuttle...

Page 30: ...ouble arrow icon is shown see A 2 Without removing your finger slide it to the left or to the right until the arrow turns white seeB thenremoveyourfingerfromthedisplaytochangetoanotherpage seeCandD Page Change Tab The Page Change tab is displayed on every page and it is used for two actions Single tap changes to the next page In the example below a single tap on the Page Change tab changes to the ...

Page 31: ...A popup window will be shown with the available pages see C 3 Touch the desired page to select and assign the page to the Soft Key Time Setup The time information supplied by the GPS satellites is in Universal Time Coordinates UTC or Greenwich Mean Time To change the CPN Series Chart Plotter to read the correct time first you must know the correct offset for your Time Zone and then whether or not ...

Page 32: ...area Tap under the bar rotate the rotary knob or move the ShuttlePoint knob to select the desired zone and tap on it 6 Tap on DAYLIGHT SAVING to toggle between Off select Off when your location does not recognize Daylight Saving Time or On select On to manually turn Daylight Saving Time On On is the default selection 7 Tap on TIME FORMAT to toggle between 12 hour or 24 hour military format 8 Tap o...

Page 33: ...nu appears 4 Tap on COORDINATE SYSTEM 5 Tap on TD 6 Tap on CHAIN and turn the rotary knob to select the Chain then tap on the number 7 Tap on PAIR and turn the rotary knob to select the Pair then tap on the letters 8 Press the key 3 times to show the last selected page IftheTDnumbersarenotshowcorrectlyontheChartpage thePairlettersmaybebackwards Reversing the two letters usually solves this issue E...

Page 34: ...talian French German Spanish Norwegian Swedish Portuguese Chinese Traditional Danish Dutch Greek Finnish Russian Chinese Simplified Japanese Multilanguage will display the digitized data in the charts as long as the source paper chart was done in the national language For instance if a Chinese chart is digitized in English the digitized data will only display in English However if it was digitized...

Page 35: ...nt knob down or turn the rotary knob 5 Tap on the desired language 6 Tap on to exit the menu and show the last selected page If the selected language is not available on cartographic data English is used Chart Control Icon When the Chart page is selected a transparent icon see A is shown This icon allows control of Zooming Tilting Rotating and controlling the Transparency and Exaggeration Factor1 ...

Page 36: ...nu allows you to customize the display All selections are listed in the following table Time Setup Selects the Time Zone offset enables or disables Daylight Saving time selects 12 or 24 hour Time Format Date Format Selects the Date format MM DD YY default DD MM YY or YY MM DD Page Sweep Selects Animated default Normal and Off the page sweep control Keypad Beep Adjusts keypad beep On default or Off...

Page 37: ...art Page Window Allows selection of data windows Selections are None General 1 line small 1 line largeand2linessmall default Thedatawindowsmaybecustomized see Customizing Data Windows in the Par 2 13 3 Chart page and may be collapsed or shown to show more or less chart area see Collapsing Data Windows in the Par 2 13 3 Chart page Language Allows changing the language for menus and data screens Eng...

Page 38: ...eadingtoseeifapotentialdangerexists WhentheGrounding Alarm is enabled the CPN Series Chart Plotter will draw a triangle in front of the vessel on the Chart page showing the area that is being searched The safe depth can be set using this function The default setting is Off Grounding Alarm Range Setsthelengthofthesectortobedetected 0 25Nm 0 5Nmand1 0Nm Thedefaultsetting is Off Track Sets up the Tra...

Page 39: ...rinas and the list of services symbols Selectable Tide page showing Tidal information moon and sun rise and set times All Nav Aids with icon and description 2D standard nautical vector cartography Grounding Alarm is not available while using only the Built In Charts To use all Marina information along with 2D and 3D Raster and satellite imagery a C MAP 4D SD CARD must be purchased and installed Up...

Page 40: ...dow appears see A The CPN Series Chart Plotter checks the integrity of the Installation Package present on the Chart Update Card This operation might require several minutes if you want to abort the installation tap on At the end of the checking the package update window shows the following data see B The touchscreen key is now selected it appears with blue frame If case of error message press the...

Page 41: ...at a later date to upgrade to the Full 4D content simply use the same cartridge to purchase and unlock the additional technology C MAP 4D allows you to unlock or add Value Added Data to either MAX or Full 4D content as they become available General Features ISOCertification electronicchartproductionprocesswithqualitycertificationISO9001 Official data source data based on use of official data sourc...

Page 42: ...Aids Depths Land Elevation color shading of sea depth and land altitude for improved chart appearance Perspective View for a bird s eye view of your navigation area Points Of Interest POIs and road mapping searchable data base of detailed information that include facilities and services in Ports and surrounding areas C MAP 4D FULL 4D Content All above and in addition 3 Dimensional Chart View the w...

Page 43: ...f the category as a whole or of each individual object inside the category each category has a separate submenu each category has a On Off Custom settings available On switches the display of all object in the category on Off switches it off Custom allows setting each object separately in the submenu To select the VAD menu follow the procedure 1 Press the key tap on Setup Menu 2 Tap on VAD The VAD...

Page 44: ...any point on the Chart 1 For North America users only 2 The amount of information might be due to the optional C MAP 4D charts installed 1 Press the key tap on Chart 2 Tap on FIND The Find Services More menu appears After the search is finished and a found object is located on the chart iIf the CPN Series Chart Plotter was in 3D mode it will automatically change to 2D mode 2 4 1 PORT SERVICES This...

Page 45: ... Otherwise tap on to exit 6 Press the key to show the actual position of the service on the Chart page 7 Press the key twice at any time to return your cursor to your vessel s position 2 4 2 PORT A Port is represented with a on the Chart page This feature is used to locate the 20 nearest Ports to the position of your vessel 1 Press the key tap on Chart 2 Tap on FIND The Find Services More menu app...

Page 46: ... desired Tide Station and tap on it 5 Tap on to show the detail of the Tide Station see B 6 Press the key at any time to return your cursor to your vessel s position Refertotheimage B above Movingthe ShuttlePointknobleftandrightcontrolstheTide Prediction time and moving the ShuttlePoint knob up or down controls the Vessel Draft value The Local Offset matches the Time Offset entered in the Time Set...

Page 47: ...enu appears 3 Tap on WRECKS A popup window will be shown with a list of nearest Wrecks see A 4 Move the ShuttlePoint knob to highlight the desired Wreck or tap on it 5 Tap on to show the location of the Wreck see B 6 Press the key twice to revert to your vessel s position 2 4 5 OBSTRUCTIONS This feature is used to locate the 20 nearest Obstructions to the position of your vessel An Obstruction is ...

Page 48: ...t 2 Tap on FIND The Find Services More menu appears 3 Tap on LAKES INFORMATION A window is shown with a list of Outdoor Recreational Area objects see A 4 Tap on the desired object and tap on A window appears displaying the distance and position of the Lakes closest to your location see B 5 Move the ShuttlePoint knob to highlight the desired Lake or tap on it 6 Tap on to show the location of the La...

Page 49: ...h a list of nearest Lakes see A Now you can browse the list step a or enter the Lake name step b a Browse the list and tap on the desired Lake b Tap on to enter the desired Lake name The touchscreen keyboard appears it will allow you to enter in the name of the Lake you wish Insert the desired name when finished tap on the keyboard disappears Another window will appear displaying the distance and ...

Page 50: ...s feature is used to search for User Points Marks and Waypoints you have created and stored by name quickly and efficiently 1 Press the key tap on Chart 2 Tap on FIND The Find Services More menu appears 3 Tap on USER POINTS The touchscreen keyboard appears it will allow you to enter in the name of the User Point you wish to locate Insert the desired name when finished tap on the keyboard disappear...

Page 51: ...times to exit to the Chart page 2 5 CHART DISPLAY FUNCTIONS The Chart functions menu can be accessed using the Main Menu as shown below 1 Press the key tap on Setup Menu see A 2 Tap on DISPLAY seeB The Chart Display setup appears divided in two sections one related to the 4D functions and another for generic chart display see C 2 5 1 4D FUNCTIONS Chart Window This function selects the window that ...

Page 52: ...rom menu Display Mode This function allows toggling among the default 2D see A and 3D see B modes to display the chart on the screen To activate this function follow the procedure 1 Press the key tap on Setup Menu 2 Tap on DISPLAY The Chart Display menu appears 3 Tapping on DISPLAY MODE selects between 2D or 3D 4 When the item you want has been selected tap on to exit from menu Overlay This functi...

Page 53: ...sets the transparency value between the vector chart and the layer over it raster or satellite To activate this function follow the procedure 1 Press the key tap on Setup Menu 2 Tap on DISPLAY The Chart Display menu appears 3 Tap on TRANSPARENCY 4 A new window appears to insert the desired value 0 100 Tap on or to reach the desired value then tap on tap on otherwise You can use the rotary knob to ...

Page 54: ...ey tap on Setup Menu 2 Tap on DISPLAY The Chart Display menu appears 3 Tapping on ICONS SIZE selects between Standard or Large 4 When the item you want has been selected tap on to exit from menu Place Names Size It is possible to set the size of all names drawn on the charts selecting between default Standard see A Medium see B and Large see C size To activate this function follow the procedure 1 ...

Page 55: ...enu 2 Tap on DISPLAY The Chart Display menu appears 3 Tap on SAFETY STATUS BAR 4 The menu now shows the following selections On The Safety Status Bar is shown Off The Safety Status Bar is not shown default Icon In this mode the Safety Status Bar is not shown rather a Warning Icon will be shown in the top right corner on the Chart page when an alarm condition is met 5 Tap on the desired selection 6...

Page 56: ...t Key to exit Chart Language The CPN Series Chart Plotter may be customized to show the local language of the chart To select the Chart Language you want 1 Press the key tap on Setup Menu 2 Tap on DISPLAY The Chart Display menu appears 3 Turn the rotary knob to select CHART LANGUAGE 4 Tap on CHART LANGUAGE A new window will appear with available functions described in the table Language Allows set...

Page 57: ...vailable is selected or International symbols when International this is the default setting if Built In Charts1 is not available is selected When selected these functions affect how the icons for Lights Signals Buoys and Beacons are displayed To activate this function follow the procedure 1 Press the key tap on Setup Menu 2 Tap on DISPLAY The Chart Display menu appears 3 Turn the rotary knob to s...

Page 58: ...ass Indicator Allows selection of compass direction indication around ship icon The default is Off To activate this function follow the procedure 1 Press the key tap on Setup Menu 2 Tap on DISPLAY The Chart Display menu appears 3 Turn the rotary knob to select COMPASS INDICATOR 4 Tapping on COMPASS INDICATOR selects between On or Off 5 When the item you want has been selected tap on to exit to the...

Page 59: ...ects or places around the map they can be the landscape layout nearby a harbor the shape of a bridge or of a buoy etc On some objects such as bridges the image associated can represent the Diagram representing the shape of the objects and the various characteristics length height type of bridge etc How to Show Pictures or Diagrams of an Object They are shown on the Chart page with the camera icon ...

Page 60: ...s Waypoints List page and tapping on Waypoints are always linked to a Route They are placed on the Chart page using the key The difference between a Mark and a Waypoint is a when a Route is created using Waypoints and the Route is deleted the Waypoints are also deleted b if a Route is created using Marks and the Route is deleted the Marks remain 2 6 1 CREATING A NEW MARK ON THE CHART PAGE 1 Move t...

Page 61: ...eyboard appears Insert the desired coordinates when finished tap on the keyboard disappears 7 Tap on to store the Mark 2 6 3 DELETING A MARK OR WAYPOINT 1 Tap on the Mark or Waypoint you want to delete 2 Taponthe SoftKey Awarningpopupwindowwillbeshowntoconfirmdeleting 3 Tap on to confirm 2 6 4 MOVING A MARK OR WAYPOINT 1 Tap on the Mark Waypoint you want to move see A 2 Tap on the Soft Key 3 Use t...

Page 62: ...ired name Show the position of a Mark or Waypoint on the Chart page Edit a previous stored Mark or Waypoint Sort by User Points name Selections are A Z ASCENDING sorts the name of the Mark or Waypoint in ascending order Z A DESCENDING sorts the name of the Mark or Waypoint in descending order Create a new Mark under the cursor position Control how Marks or Waypoints are shown on the Chart page Sel...

Page 63: ...s window disappears 7 Turn the rotary knob to the right to select the Mark Name field and press the Rotary Knob The touchscreen keyboard appears Insert the desired name see D when finishd tap on the keyboard disappears 8 Turn the rotary knob to the right to select the Latitude Longitude field and press the rotary knob Again the touchscreen keyboard appears Insert the desired coorinates when finish...

Page 64: ... from one Waypoint to another 2 7 1 CREATING A ROUTE USING WAYPOINTS 1 On the Chart page move the ShuttlePoint knob or touch the screen to the Lat Lon of the starting Waypoint in the Route 2 Press the key you will notice the starting Waypoint will be placed under the cursor 3 Move the ShuttlePoint knob or touch the screen to the second Lat Lon of the next leg in the Route 4 Press the key You will ...

Page 65: ...t in a Route to be saved as the final destination point 1 On the Chart page move the ShuttlePoint knob or touch the screen to the Lat Lon of the starting Waypoint in the Route 2 Press the key the starting Waypoint will be placed under the cursor 3 Move the ShuttlePoint knob or touch the screen to the second Lat Lon of the next leg in the Route 4 Press the key Another Waypoint is shown under the cu...

Page 66: ...ice a bearing line joins the first and second Mark which means these Marks are selected into the Route see C 4 Repeat steps 3 and 4 until all Marks are entered into the Route You can touch the Mark on the display instead of using the ShuttlePoint knob 2 7 6 INSERTING A WAYPOINT INTO A ROUTE 1 Touch or move the ShuttlePoint knob to the navigation line between two Waypoints and tap on the Soft Key s...

Page 67: ...ernal device PC capable of listening to NMEA 0183 RTE sentences Receive Receives the points from an external device PC capable of sending NMEA 0183 RTE sentences Thickness Allows the Route line to be easily seen default selection is Thin 2 7 9 ROUTE CHECK The Route Check function is used after you have created a Route to ensure you and your vessel will not encounter problems while navigating This ...

Page 68: ...e CPN Series Chart Plotter will check to confirm navigation threats See the following picture The default setting is 0 04Nm Depth Limit Allows you to select the water depth in the Route width area so the CPN Series Chart Plotter can check and confirm underwater threats It checks if some objects with the depth attribute like Shallow Water Dredged Areas Diffusers Obstructions Pingos Production Insta...

Page 69: ...used In certain cases due to the complexity of the environment at or surrounding the Start End point Easy Routing will shift the point and place it in a safer location This leg is indicated with GRAY color Please note that due to the input data it might not be possible for Easy Routing to avoid crossing hazard areas to reach the final destination and in this case producing RED or YELLOW legs In th...

Page 70: ...tion is not yet completed The default setting is 5 Minutes 3 When all parameters are set tap on START EASY ROUTING A Warning window appears see A Move the ShuttlePoint knob up down or turn the rotary knob to left right or touch the scroll bar up down to go from one page to another 4 Tap on to start the Easy Routing steps for defining the Start start point for the path and End destination point for...

Page 71: ... information Otherwise tap on The path between the two points appears on the screen see H Warning Messages The following warning messages might appear during Easy Routing operations Distance between Start and Destination points exceeded allowed limit of 100Nm Calculation cannot be started Displayed when the Start or End points are too distant Start and Destination points placed at the same positio...

Page 72: ...ute would be overwritten No charts with Easy Routing data found Calculation cannot be started Displayed when there is no Easy Routing data on the charts While calculating Easy Routing the I O activities of the Chart Plotter will slow down and might cause incorrect communication with the autopilot It is strongly recommended that the autopilot is not engaged while Easy Routing calculation is being e...

Page 73: ...s the key and a Warning window is shown Tap on 2 8 2 GOTO A ROUTE After you have created a few Routes you can choose one of them to GOTO Using to Select a Route 1 Tap on an open position no buoy warning etc under the cursor on the Chart page 2 Press the key to show the GOTO popup window see A If you place cursor over a cartographic object the GOTO popup window will be shown too The only situation ...

Page 74: ...wn around the Icon Symbol This means the CPN Series Chart Plotter is now navigating to the point 6 Press the key to close the Marks Waypoints List page The CPN Series Chart Plotters can start navigating to the cursor location a saved Mark or any Waypoint inaRoutesimplybytouchingthedisplayormovingthecursorusingthe ShuttlePointknob toalocation or on the top of a Mark or Waypoint on the chart and pre...

Page 75: ...This allows to stop navigation to the MOB point and also deleting it 2 10 TRACKS The CPN Series Chart Plotter has the capability to store 20 individual Tracks and record up to 10 000 Track Points PleasenotetheTrackPointsmemoryis10 000points Thismeansforalongjourneyyoumayhavetoadjust thetrackingtimeordistancetobeabletotrackyourjourney Itshouldbenotedwhenthe10 000TrackPoints are used up the first Tr...

Page 76: ...key or tap on in the Track window to exit the menu When using the Tracking feature you will notice every time a Track Point is laid down on the Chart page a small filled in circle is shown on the Track line If you move the cursor over the top of the circle a popup window will be shown with the Time Water Temperature Speed and Course Over Ground COG This is very useful if you are fishing and want t...

Page 77: ... the color of the Track line Delete Deletes a Track selected in the ACTIVE TRACK menu Step Unit Allowable selections are Distance default or Time Distance User adjustable Distance interval of when Track point is laid down on the Chart page 0 1Nm is the default setting Time User adjustable Time interval of when Track point is laid down on the Chart page 5 min is the default setting 2 11 TRIP LOG TI...

Page 78: ... Data pages the windows may be customized to show a Count Down Timer HH MM SS 1 Select one of the pages listed above press and hold the key You will notice one of the data boxes will be highlighted in yellow 2 Tap on the yellow highlighted window to show the menu popup window 3 Tap on NAVIGATION 4 Tap on Count Down Timer CDT see A 5 On the selected data box CDT appears see B Press the key one time...

Page 79: ... counter The touchscreen keyboard appears Insert the desired value when finished tap on the keyboard disappears If Count Down Timer is active a Tap on STOP to stop counting down the current counter value is remembered The data customization box will be closed b Tap on RESTART to reset the current counter value to the starting value and start counting down The data customization box will be closed ...

Page 80: ...p Timer When Trip Timer is shown in one of the data windows you can reset start or stop the timer following the procedure below 1 Pressandholdthe keyuntilafieldishighlighted itwillbeshowninayellowframe 2 Tap on TRT see A A menu popup window will be shown see B a Tap on RESET to reset the counter to zero A Warning window will be shown to confirm if you want to reset the Trip Timer Tap on The Trip T...

Page 81: ...RD The User SD CARD page appears If a not initialized SD CARD is present in the slot a Warning window is shown 2 12 1 INITIALIZING THE SD CARD The initialization or formatting of a SD CARD prepares the SD CARD to receive and store information Initialization permanently erases user data previously saved on the SD CARD but it does not affect the cartographic data present on the SD CARD 1 Open the SD...

Page 82: ...ROM A USER SD CARD If you have a problem and accidentally lose the User Points in the CPN Series Chart Plotter with a User SD CARD it is possible to load the data back into the CPN Series Chart Plotter Using the following procedure to load a file from the User SD CARD inserted in the slot 1 Press the key tap on User Points 2 Tap on the right arrow next to DSC DIR Desktop icon two times to display ...

Page 83: ...nly active when FF connected Tide User Points Alarms Video Input only active when Video Camera connected Setup Menu and AIS the desktop area with the Desktop Icons Each Page Icon has a defined related set of Desktop Icons Only 8 Page Icons can be displayed on the screen at one time To scroll to the next column of Page Icons the right hand arrow or top right hand arrow if two are displayed can be t...

Page 84: ...For example to select the Dual Chart page 1 Press the key 2 Tap on Chart page Icon In the bottom of the page the available Desktop Icons appear see A 3 Tap on DUAL Desktop Icon see B The Dual Chart page appears see C 2 13 2 CUSTOMIZING A PAGE ICON 1 Tap on the icon to be changed see A 2 Press and hold the key to show the Page Icons Selection menu 3 Tap on a desired page name see B to switch the lo...

Page 85: ...ER opens the C Weather page For HIGHWAY please see Chart Highway Page in Par 2 13 4 Navigation Pages for FIND see Par 2 4 Using Find Services and for C WEATHER see Par 2 16 C MAP Weather Forecasts Service Single To show a Single Chart follow the procedure below 1 Press the key tap on Chart 2 Tap on SINGLE Dual Selecting this page will show two chart windows Each window s chart settings are indepen...

Page 86: ...N Series Chart Plotter windows displayed on Chart Dual Chart and C Weather pages may be changed in the following way 1 To change press the key tap on Setup Menu 2 Tap on GENERAL 3 Tap on CHART PAGE WINDOW 4 Tap on the desired selection The default is the 2 lines small window 5 Tap on to exit to the Chart page Customizing Data Windows The data fields contained on the General 1 line small large and ...

Page 87: ...eneral Chart window it is not customizable there 2 Available only on the Highway page Chart page 1 line large 3 When the GENERAL window is selected and the CPN Series Chart Plotter is in Home Mode the BRG willshow unlesstheCPNSeriesChartPlotterisnavigatingtoapoint WheninCursorMode theBRG shows the Bearing from the ship s position to the cursor location To select the desired field follow the proced...

Page 88: ... Analog Display may be customized in the above manner Collapsing Data Windows A data window may be visible or collapsed to show less or more chart area To collapse or expand a window tap on the arrow key as show on the following image If the Data Window is enlarged touching the icon collapses the 1 line large 1 line small 2 lines small Data Window and touching the icon collapses the General Data W...

Page 89: ... Objects follow the procedure 1 Press the key tap on Setup Menu 2 Tap on GENERAL 3 Turn the rotary knob to select AUTO INFO and tap on it 4 Tap on Off On Points or On All 5 When the item you want has been selected press the key to exit the menu Display Mode Selects from a pre defined table what cartographic objects are displayed and which display options are set Pre programmed settings are user se...

Page 90: ...ater Ob Limit 1000ft 32ft 32ft 32ft 32ft 1000ft Rocks Icon Depth Icon Icon Icon Icon Icon Obstructions Icon Depth Icon Icon Icon Icon Icon Diffusers Icon Depth Icon Icon Icon Icon Icon Wrecks Icon Depth Icon Icon Icon Icon Icon Marine Settings Controls the display on the chart of the marine features Place Names Turns the local area names On or Off Nav Aids Names Turns the Nav Aids names On or Off ...

Page 91: ...enshadingmodeissettoDynamic thedepthareasaredrawnusingacolor defined dynamically according the depth of the other areas that have to be displayed It ispossibletosummarizethebehaviorofthismodeinthesefewsteps firstofall anydepth will be collected in a ordered list then 32 different blue colors from dark blue to white are assigned to these values White is used to draw the highest depth area Dynamic I...

Page 92: ... If this occurs it will also be visible as reduced response when using the menus for example when a menu item is selected the item might not respond for several seconds The Boundaries Mode setting of Auto with Chart Boundaries set to On provides a combination believed to be adequate for the majority of situations where you want to display the Chart Boundaries VAD Boundaries Turns the Value Added D...

Page 93: ...con is visible in the range selected from Underwater Object Depth Limit option ICON DEPTH the object icon and the depth are visible in the range selected from Underwater Object Depth Limit option 2 13 4 NAVIGATION PAGES Pages contained on the Navigation Desktop are useful for navigating to a Waypoint or viewing the status of GPS signals 1 Press the key tap onNavigation Inthebottomofthepagetheavail...

Page 94: ...on HIGHWAY Compass Page This page is useful to show information when heading to a destination following a compass heading or navigating to a Mark or a Route 1 Press the key tap on Navigation 2 Tap on COMPASS The Compass page appears Data Boxes on the Compass page can be customized except for Latitude Longitude GPS Status COG and BRG Tapping anywhere on the screen brings up the Soft Key ...

Page 95: ...on the Soft Key brings up the GPS Setup menu1 See the following table GPS Source Allows setting the GPS Source among Internal Antenna External Antenna and Second CPN The default setting is Internal Antenna Restart GPS Restarts all GPS processes Once executed the message Done is shown Navigation Speed Allows setting the Navigation Speed SOG update among Low and High The default setting is High Spee...

Page 96: ...rce Priority menu appears 4 Ifyouwanttochangethedatasourcewiththehighestpriority taponthedesiredsourceanditisshown in the first position DepthSounder SpeedLogwithTemp WindSpeedandDirection FluxGateCompass and GPS information can be shown in any of the boxes The NMEA 0183 sentences and the NMEA 2000 PGNs read from external devices are listed in the Chapter 8 Specifications To display the desired NM...

Page 97: ...ighlighted in yellow release the key 2 Tap on the box to be changed see A to show the menu popup window see B 3 Tap on the desired group GPS NAVIGATION ENVIRONMENT ENGINE 11 ENGINE 21 ENGINE 31 or TANK Another popup window will be shown see C 1 These are the default Engine names To define the Engine names you want please see Par 2 14 4 Engines Name Selection 4 Tap on desired selection Both menu po...

Page 98: ...ssible to select a desired range Engine Chart Combo Page It is possible to set the Chart page and the Engine page on the same screen Data boxes and gauges on this page can be also customized 1 Press the key tap on NMEA 2 Tap on COMBO Monitor Page The Monitor page is very useful to see if an external device for example a Depth Sounder is transmitting NMEA 0183 or NMEA 2000 data to the CPN Series Ch...

Page 99: ...d icon From the left FULL 200kHz opens the Fish Finder 200kHz Full page FULL 50kHz opens the Fish Finder 50kHz Full page 200kHz CHART opens the Fish Finder 200kHz page on the right side and the Chart page on the left 50kHz CHART opens the Fish Finder 50kHz page on the right side and the Chart page on the left DUAL opens the Fish Finder 200kHz page on the right side and the 50kHz page on the left Z...

Page 100: ...ormation is displayed on the Tide page Tap on the Soft Key to enter the desired date When activated from the Page Selection menu it displays information related to the fix position or to the cursor position None of the data boxes on this page can be customized 2 13 8 VHF DIGITAL SELECTIVE CALLING Digital Selective Calling is a semi automated method of establishing a VHF radio call DSC had also bee...

Page 101: ...s to review at a later date To select the Distress Call page follow the procedure 1 Press the key tap on User Points 2 Turn the rotary knob until DSC LOG is highlighted and tap on it This page allows to tap on centers the map on the selected DSC position tap on deletes the selected DSC position tap on deletes all entries tap on allows hiding showing the selected DSC position on the chart tap on al...

Page 102: ...board tap on when finished To save entry tap on and then tap on Tap on deletes the selected DSC Directory Entry Tap on deletes all DSC Directory Entries 2 13 9 VIDEO INPUT TheCPNSeriesChartPlottersareabletobeconnectedtoanNTSCorPALtypevideocamera or DVD player To connect an optional Adapter Cable ACVC10 is needed The camera must be powered externally as the CPN Series Chart Plotters video jack does...

Page 103: ...tap on Page Icon Video Input 2 Select the video image type for CPN700i tap on VIEW1 or PIP1 for CPN1010i tap on VIEW1 VIEW2 PIP1 or PIP2 as you want After the video image type has been selected the CPN Series Chart Plotter will show a Warning message with the instructions to adjust the image from the Video Input tap on to close the Warning window and activate the video in If Full Screen View was s...

Page 104: ...ith a Max current 400mA or less The default setting is Off Grounding Alarm Looks ahead of the vessel s heading to see if a potential danger exists When the Grounding Alarm is enabled the CPN Series Chart Plotter will draw a triangle in front of the vessel on the Chart page showing the area that is being searched see below The safe depth can be set using this function The default setting is Off Gro...

Page 105: ...EL PRESSURE LOW SYSTEM VOLTAGE LOW COOLANT LEVEL WATER IN FUEL WATER FLOW HIGH BOOST PRESSURE REV LIMIT EXCEEDED EGR SYSTEM THROTTLE POSITION SENSOR ENGINE EMERGENCY STOP MODE WARNING LEVEL 1 WARNING LEVEL 2 POWER REDUCTION MAINTENANCE NEEDED ENGIN COMM ERROR SUB OR SECONDARY THROTTLE NEUTRAL START PROTECT ENGINE SHUTTING DOWN 1 These are the default Engine names To define the Engine names you wan...

Page 106: ...tical model of the earth which approximates the shape of the earth and enables calculations such as position and area to be carried out in a consistent and accurate manner Chart Orientation Res Sets the angle the vessel has to change before the chart is redrawn The default setting is 30 Example if the vessel is heading 000T at a speed of 25 Knots the display will redraw a In Home Mode the CPN Seri...

Page 107: ...otter to customize the following selections Bearings Selects between True and Magnetic When Magnetic bearing is enabled the CPN Series Chart Plotter applies the selected Magnetic Variation Auto or Manual see next item to compute Magnetic bearing Variation Allows the user to select Auto or manual When Auto mode is selected the CPN Series Chart Plotter computes the offset by the current GPS fixed lo...

Page 108: ... the priority data source tap on the desired source and it is shown in the first position For example tap on 1 NMEA 0183 and then in the following picture B the input data source with the highest priority for GPS changes to NMEA 2000 2 14 4 ENGINES NAME SELECTION The Engines submenu allows you to name each instance of an Engine which is connected to the NMEA 2000 bus These name are displayed in ga...

Page 109: ...ing for each port Sentence Port1 Port2 Port3 Port4 GLL On On On On VTG Off Off Off Off BWC Off Off Off Off WCV Off Off Off Off APA Off Off On Off APB Off Off On Off HDG Off Off Off Off BOD Off Off On Off XTE On On On On RMA Off Off Off Off RMB Off Off Off Off RMC On On On On GGA On On On On HSC Off Off Off Off DBT On Off Off Off DPT On Off Off Off MTW On Off Off Off VHW On Off Off Off GSA On Off O...

Page 110: ...the Route s that are stored in the CPN Series Chart Plotter s memory appears 7 Tap on the desired Route 8 Tap on SPEED 9 The touchscreen keyboard appears Enter in the speed you want the vessel to travel at in Simulation Mode when finished tap on the keyboard disappears 10 Tap on to exit to the last selected page 2 14 7 DSC POLLING This menu is used to enable or disable features related to the DSC ...

Page 111: ...pdating purposes The Soft Key opens the Data Access Manager Report page The Soft Key starts the Safely Remove Data Cartridge procedure see Par 2 3 Removing the SD CARD In the previous picture UNIT ID code is for North America users only Connected Mobile Device reports a name of a mobile device which via P2N Link functionality is being used as a remote display of the CPN Series Chart Plotter screen...

Page 112: ...rked Chart Yes the chart is on the remote CPN Series Chart Plotter No the chart is on the local CPN Series Chart Plotter Warning Status reports the specific warning message about the chart s data Segmentation is the kind of data available 4D MAX BASE invalid chart currently content not supported 1 For North America users only 2 15 AIS AIS is an Automatic Identification System It has been introduce...

Page 113: ... Radio Call Sign international call sign assigned to vessel often used on voice radio Name name of ship 20 characters MMSI Maritime Mobile Service Identity number a unique 9 digit number that is assigned to a DSC radio station It primarily registers the boat information in the U S Coast Guard s national distress database for use in emergency situations Active Target Target located within the Activ...

Page 114: ...he fix within which the AIS Target becomes active The values allowed are from 0 1 to 20Nm CPA Alarm Turns On or Off the alarm CPA Limit The values allowed are from 0 1 to 10Nm TCPA Alarm Turns On or Off the alarm TCPA Limit The values allowed are from 1 to 30 Min SART MOB EPIRB Test Turns On or Off receiving of AIS SART AIS MOB or AIS EPIRB test alerts 2 15 3 QUICK INFO ON AIS TARGET Tap on an AIS...

Page 115: ...able AIS SART Test Mode The CPN Series Chart Plotter by default ignores test AIS SART AIS MOB and AIS EPIRB signals in order to avoid a large number of alerts However the CPN Series Chart Plotter can be enabled to receive test alerts see Par 2 15 2 AIS Setup Menu if you want to test them 2 15 6 AIS LIST The AIS List page shows basic information of the Target ship with the ability to select a Targe...

Page 116: ...ather Forecasts Service is a free worldwide service available on the CPN Series Chart Plotter Weather Forecasts are based on data received from the European Centre for Medium Range Weather Forecasts ECMWF To display C Weather data on the CPN Series Chart Plotter simply download the weather data via the chart plotters built in Wi Fi if a Wi Fi connection is not present onboard your vessel download ...

Page 117: ...ckage from Internet Downloading a new set of C Weather data will overwrite data already stored in internal memory Downloadispossibleonlyif Wi Fi connection is set and an Internet connection is available If not please go to Connection Manager and establish connection manually see Chapter 3 Connection Manager To activate the direct download of C Weather data please follow the procedure below 1 Tap o...

Page 118: ...e is a SD CARD inserted into the slot before following the loading procedure please safely remove it using the procedure described in the Par 2 3 Removing the SD CARD 2 Press the key tap on Chart 3 Tap on C WEATHER The C MAP Weather page appears 4 Tap on the Soft Key see A 5 A Warning window is shown to confirm to replace the current C Weather data see B Tap on 6 An Information window is shown to ...

Page 119: ...g the desired one Set forecast time the and Soft Keys allow to modify time values Change data type tap on the Soft Key see A to change the data type displayed on the screen It opens an option window with all available data types see B and allows choosing the desired one 2 17 P2N LINK The P2N Link allows viewing of the CPN Series Chart Plotter s screen on iOS mobile devices such as tablets and smar...

Page 120: ...s quitted In order to use the P2N Link functionality the steps below must be followed Launch the Chart Plotter Mode on the CPN Series Chart Plotter Enable the P2N Link function on the CPN Series Chart Plotter Connect the mobile device to the same Wi Fi network as the CPN Series Chart Plotter Launch the Plan2Nav application on the mobile device Activate the P2N Link function on the Plan2Nav applica...

Page 121: ...on 1 While in Chart Plotter Mode press the Intelligent key 2 Tap on P2N Link Icon 3 Tap on to stop the CPN Series Chart Plotter from sending out a picture of its screen or tap on to close the window without taking any action 4 P2N Link is deactivated but the Wi Fi connection is maintained also Ad Hoc 2 17 2 P2N LINK ACTIVATION ON MOBILE DEVICE Before starting Plan2Nav application and P2N Link func...

Page 122: ...lotters is found a window displaying their names and serial numbers is shown see C Tap on the desired CPN Series Chart Plotter to estabilish the connection If only one CPN Series Chart Plotter is found the Chart Plotter selection window C is not shown and the connection is automatically estabilished 6 Once a connection is estabilished see connection status tap on see D 7 If the connection is prope...

Page 123: ...e connection When the signal level is poor the image might be scattered some frames might be lost and in the worst cases the image might turn green P2N Link Deactivation on Mobile Device 1 Tap anywhere on the iOS device screen to show the control icons 2 Tap on to exit the Chart Plotter Link functionality ThefunctionisalsoautomaticallyterminatedassoonastheChartPlotterModeisexitedorwhentheCPN Serie...

Page 124: ...tionality It also allows you to set up a link between two CPN Series Chart Plotters so they can share data and to pair a Bluetooth device such as a keyboard or mouse with the CPN Series Chart Plotter 3 2 STARTING THE CONNECTION MANAGER There are two ways to access the Connection Manager follow the procedure below From the Chart Plotter Mode 1 Press and hold the PWR key until the display shows the ...

Page 125: ... restart your CPN Series Chart Plotter unit after using the Connection Manager for the first time This is needed for the system to correctly set up some of its initial configuartion values 3 3 Wi Fi CONNECTION 3 3 1 LIST OF Wi Fi HOTSPOTS The Wi Fi tab lists the available Hotspots found by the CPN Series Chart Plotter see the picture below and allows connection to a desired Hotspot ...

Page 126: ...ap on the Soft Key 2 Tap on the desired Wi Fi Hotspot from the list 3 Tap on the Soft Key 4 If the Hotspot has been used before tapping on the Soft Key directly tries to connect to the selected Hotspot by using the Authentication Information password stored 5 If the CPN Series Chart Plotter was not connected to the Hotspot before and the Hotspot requires a Network Password Key the configuration pa...

Page 127: ... see previous picture on Par 3 3 1 the first item on this list represents CPN Wi Fi network It is an open Ad hock Wi Fi network not password protected which when activated works as an access point for iOS mobile devices This allowes to set up a connection between CPN Series Chart Plotter and a mobile device in order to use P2N Link functionality see Par 2 17 P2N Link If there are Hotspots availabl...

Page 128: ...ng option enabled Vector Charts will not be shared The connection between CPN Series Chart Plotters is accomplished by connecting an optional crossover cable2 between the Chart Plotter 1 and Chart Plotter 2 Ethernet connections on the rear panel The maximum cable length is about 300ft or 100m 1 Only Vector Charts are shared no Satellite or Raster Charts 2 It is possible to connect the two CPN Seri...

Page 129: ...is shown tap on the Connect Icon see A 2 The next display shown is the Connection Manager see B tap on the Services tab 3 Tap on Vector Chart Sharing to share Vector Charts inserted in the Chart Plotter 1 with the Chart Plotter 2 see C After tapping Vector Chart Sharing the following Warning window appears ...

Page 130: ...id overloading the network 4 Tap on the Ethernet tab see D to configure the network settings 5 Tap on Chart Plotter 1 to select this CPN Series Chart Plotter as Chart Plotter 1 see E 6 Tap on the Soft Key see E Chart Plotter 2 Setup no chart inserted 1 When the Startup Screen page is shown tap on the Connect Icon see F 2 The next display shown is the Connection Manager see G tap on the Services ta...

Page 131: ...he Plotter Icon and confirm the C MAP 4D charts are shown on Chart Plotter 2 Open the About page1 on both CPN Series Chart Plotters and verify that the Chart Plotter 1 where the C MAP 4D CARD is inserted displays the Chart Code in field Local SD Chart and that the same Chart Code is displayed in the Chart Plotter 2 in the Remote SD Chart field 1 To display the About page 1 Press the key tap on Set...

Page 132: ...e Services tab 3 6 PAIRING THE CPN SERIES CHART PLOTTERS WITH Bluetooth WIRELESS TECHNOLOGY It is possible to pair the CPN Series Chart Plotters with a Bluetooth wireless mouse and or keyboard following the procedures below During the pairing process the Bluetooth device must be in Discovery Mode it might be named slightly differently depending on the device manufacturer Please refer to the docume...

Page 133: ...ooth see E Depending on the screen size the Manager window for Bluetooth might be partially covered by the touchscreen keyboard Please drag the Manager window for Bluetooth up until Scan Device button is visible All available Bluetooth wireless devices in your proximity will appear in the Untrusted list see E left side of the Manager window for Bluetooth While scanning Bluetooth wireless devices t...

Page 134: ... window up until is visible If the Authentication process is successfully completed the device will be moved in the Trusted list on the right see H 5 DoubletaponyourdeviceintheTrustedlisttodisplay themenu seeI andtaponActive A red check mark appears on the device icon in the Trusted list The Bluetooth wireless device is now paired and ready to use 3 6 3 UNPAIRING Bluetooth DEVICE Tounpairthe CPN S...

Page 135: ...rwegian Swedish Portuguese Chinese Traditional Danish Dutch Greek Finnish Russian Chinese Simplified Japanese The CPN Series Chart Plotter uses Zetakey Browser Some websites may be not fully compatible with Zetakey Browser 4 2 STARTING THE INTERNET BROWSER To activate the Browser as a standalone application follow the procedure below From the Chart Plotter Mode 1 Press and hold the PWR key until t...

Page 136: ...lotter WhileinChartPlotterModepressthe Intelligentkey TaponBrowserIcon toopen the Browser application The Chart Plotter Mode will be closed If no Wi Fi network connection is available the Connection Manager page is automatically opened When a connection is established and the Connection Manager is closed the Browser is automatically launched 4 3 BROWSER OVERVIEW ...

Page 137: ...nual The Browser Home page is displayed when the Browser is launched see C when loading is completed the green progress bar disappears and the Stop icon is replaced by the Reload icon see D 4 3 1 INTERNET BROWSER CONTROLS ...

Page 138: ...arch terms When finished tap on or on the Soft Key to perform the operation the keyboard disappears The Soft Key might be hidden from view because it is under the Touchscreen Keyboard tapping on and places the keyboard on the bottom and top side of the screen respectively To return to the previous page tap on on the Soft Key at the bottom of the page While browsing sometimes it is needed to insert...

Page 139: ...vorite icon turns to Remove Favorite icon allowing to remove that page from the list Tap on the Favorites icon see A to display the favorites list see B You can now access the desired favorite page by tapping on the relative preview delete one or more pages from the list of favorites by tapping on the Soft Key A cross icon appears in the upper right corner of each preview tap on the cross to delet...

Page 140: ... contents a PLAY icon will be displayed over them tap on the PLAY icon to reproduce the content Media contents present in web pages will be played in Media Player After closing Media Player the web page containing the content will be displayed again 4 8 DOWNLOADING PDF FILES It is possible to read PDF files from a website To open a PDF file contained in a web page simply tap on its link The PDF fi...

Page 141: ...played no video or images files can be viewed while in Chart Plotter Mode The Media Player is able to display and reproduce the following formats Video Audio Image Document MPEG 1 MP3 BMP Decoder PDF MPEG 4 Wave GIF Decoder H 264 AIFF JPG Decoder VPU SW DivX FLAC PNG Decoder Xvid VMA8 QuickTime VMA9 MOV AU 5 2 STARTING MEDIA PLAYER To activate the Media Player functionality as a standalone not usi...

Page 142: ...ligent key Tap on Media Player Icon to open the player application Press the Intelligent key to toggle between the Media Player and Chart Plotter Modes 5 3 OVERVIEW If you have saved audio video image or PDF files on a USB Thumb Drive see Par 5 6 Saving Files on a USB Thumb Drive or an SD CARD now you are able to display and reproduce these files on the CPN Series Chart Plotter 1 Connect the media...

Page 143: ...splay its content see B 4 Tap on the folder to be viewed example Audio see C 5 Tap on the multimedia file to play see D The selected multimedia file will automatically begin to play 5 4 MEDIA PLAYER CONTROLS While playing files you can touch the Progress Bar to move forward or backward ...

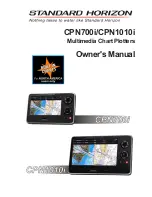
Page 144: ...CPN700i and CPN1010i Multimedia Chart Plotters Page 145 ...

Page 145: ...ached the next previous page is shown Depending on zoom level it is possible to move the page to left or right too zoom in out on the page Pressing the or keyallows to increase decrease the zoom level obtain information about the application by tapping on the icon return to the previous next page by tapping on the icon After pressing the icon the new page is displayed from the beginning go to the ...

Page 146: ... will be displayed In this case double click on OPEN FOLDER TO VIEW FILES USING WINDOW EXPLORER Otherwise open MY COMPUTER and double click on the USB device e g USB Disk Removable Disk 3 The content of the device will be displayed Create directories to save files to example Music Images Videos or name of Artist etc Creating these folders will make it easier when using the Media Player to view ima...

Page 147: ...e CPN Series Chart Plotter to power enter Chart Plotter Mode and check the signal strengths by touching on the Navigation icon and touching the GPS Status icon If the GPS satellite signals are low or the CPN Series Chart Plotter cannot receive a fix an optional GPS Antenna may be purchased and installed Refer to Introduction section in the Optional Accessories paragraph To swivel the bracket loose...

Page 148: ...y After the location is found attach the mounting base to the area using the supplied hardware see the previous picture 6 1 2 FLUSH MOUNTING THE CPN SERIES CHART PLOTTER The CPN Series Chart Plotters are supplied with a flush mount cutout template and a flush mount kit Refer to the images below as a guide to installing ...

Page 149: ...o be inserted Insert and cut out the area on the panel using the jig saw 3 Next drill the four holes required to insert the CPN Series Chart Plotter with the mounting studs 4 Install pieces into mounting holes on the side of the CPN Series Chart Plotter before inserting plotter into mounting hole 5 Slide the CPN Series Chart Plotter into the dash of mounting hole 6 Install the left and right brack...

Page 150: ...eCPNSeriesChartPlotterholds the fix use the GPS Status page see sub paragraph GPS Status page in the Par 2 13 4 The thread used on the antenna is an industry standard 1inch 14TPI used on a wide range of mounting brackets The antenna cable can be cut and spliced to ease installation Care must be taken when reconnecting the antenna cable to protect from water and corrosion 6 2 1 FLUSH MOUNTING THE A...

Page 151: ...EA 0183 Devices VHFs AIS Receiver Digital Instruments and Autopilots Optional FF525 BLACK BOX FISH FINDER Optional Video Camera Optional monitor with VGA input CPN1010i Optional GPS Antenna Optional Audio Amplifier and speakers Optional USB memory stick Optional External Alarm Second CPN Series Chart Plotter to share C MAP 4D charts NMEA 2000 Devices ...

Page 152: ...also be installed in the red wire 2 Two accessory cables exactly the same cable are supplied with the CPN Series Chart Plotter 3 Connect one of the accessory cables to the PWR ACC1 connector on the rear panel The other accessory cable is used to connect to ACC2 connector 4 This cable has many wires however only the Red and Black wires are used to connect to a switched battery supply Refer to the f...

Page 153: ...duct performances Warning Product Grounding Beforepoweringthisproduct pleasemakesureitiscorrectlygroundedtoyourBoatGround following the installation instructions below Step1 DeterminethepotentialofyourBoatGround Thepossibleoptionsarethefollowing 1 Boat Ground connected to the negative pole of the Boat Battery most common 2 Boat Ground connected to the positive pole of the Boat Battery rare 3 Boat ...

Page 154: ...nd Step2 1 Please connect the Black wire of the Power Cable at its termination to the Boat Ground 2 Please connect the Red wire of the Power Cable at its termination to the Boat Ground 3 Please connect the Black wire of the Power Cable at its termination to the Boat Ground If not available it could be the engine chassis ...

Page 155: ...e respectively to the positive and negative poles of the Boat Battery In the pictures indicates Boat Battery Boat Ground and Power Cable 7 1 2 NMEA 0183 CONNECTIONS TheCPNSeriesChartPlotterissuppliedwithtwo accessorycables Thesetwocablesmaybeconnected to PWR ACC1 or ACC2 connections ...

Page 156: ...CPN700i and CPN1010i Multimedia Chart Plotters Page 157 ...

Page 157: ...tion follow the procedure below 1 Press the key tap on Setup Menu 2 Tap on ADVANCED 3 Tap on IN OUT Connections 4 Tap on the Port Input to be changed than tap on the desired input 5 Press the key to exit the menu PORT Output Sentences When NMEA 0183 4800 is selected the CPN Series Chart Plotter allows selection of the NMEA 0183 Output sentences The NMEA 0183 sentences read from external devices ar...

Page 158: ...X2150 Connections RS232 Fish Finder and VHF AIS and Autopilot Connection By default the CPN Series Chart Plotters PWR ACC1 Port2 connection is set to Fish Finder When an optional FF525 is connected Port2 Input Gray and Output White wires are not used for connections to other devices ...

Page 159: ...Page 160 Owner s Manual ...

Page 160: ...ot supply a DC power source for the camera Video Input Connections for CPN700i The CPN700i has 1 NTSC or PAL Compatible Input NTSC or PAL Video Input allows a camera DVD or VCR to be connected To connect a video source use the optional ACVC10 cable 3 pin to RCA phone adapter Video Input Output Connections for CPN1010i The CPN1010i has 1 VGA output allows connection to a compatible TV or monitor us...

Page 161: ...on of 1024x600 7 1 4 PRE AMP OUTPUT EXTERNAL AMPLIFIER SPEAKER CONNECTIONS The CPN Series Chart Plotter has a Pre Amp Output designed to connect to an External Amplifier To connect an External Amplifier to the Pre Amp Output an optional ACAC10 Adapter Cable will have to be purchased separately The following is an example of connections CPN Pre Amp Connector Pin Out CPN700i CPN1010i LINE Output Con...

Page 162: ...a Player refer to Chapter 5 Media Player Below is an example of USB Thumb Drive connection 7 1 6 OPTIONAL WAAS GPS ANTENNA The optional WAAS GPS Receiver is based on an ultimate GPS engine that delivers accuracy better than 10ft by decoding the GPS correction signals from the satellite based WAAS Wide Area Augmentation System The GPS engine interface electronics and the passive antenna are enclose...

Page 163: ...Page 164 Owner s Manual 7 1 7 OPTIONAL FF525 BLACK BOX FISH FINDER ...

Page 164: ...ECTION 7 1 9 SECONDCPNTOSHAREC MAP4DCHARTS NMEA FFDATA TwoCPNSeriesChartPlottersmaybelinkedtogetherusinganoptionalEthernetcrossover cable to share optional C MAP 4D cartography NMEA and Fish Finder data Refer also to Par 3 4 Networking Connection C MAP 4D Charts NMEA Fish Finder Data Sharing ...

Page 165: ... connect marine electronic equipment on vessels The devices connected by NMEA 2000 have the ability to share data with other devices over a single bus The following is an example of a NMEA 2000 connection The list of PGNs is shown in the Specification Chapter Par 8 1 and 8 2 For more information please visit www nmea org ...

Page 166: ... Input sentences BWC DBT DPT DSC DSE GGA GLL GSA GSV HDG HDM HDT MTW MWD MWV RMC RTE TLL VDM VHW VTG VWR VWT WPL NMEA 2000 Output PGNs 127258 128259 128267 129026 130312 126992 129025 129029 129033 128275 129808 129539 129540 129283 129284 129285 NMEA 2000 Input PGNs 126992 127245 127250 127258 127488 127489 127497 127505 128259 128267 129025 129026 129029 129033 129038 129039 129040 129540 129794...

Page 167: ... 1000nits Touchscreen Capacitive Cartography C MAP 4D SD CARD Operating temperature range 32 F 131 F 0 C 55 C Storage temperature 4 F 158 F 20 C 70 C Keyboard Silicon rubber LED backlight Weight without bracket 4 4 lbs 2000 g User Points Marks Waypoints 10000 Routes 50 Track Points 10000 recordable in 20 Tracks NMEA 0183 Output sentences GLL VTG BWC WCV APA APB HDG BOD XTE RMA RMB RMC GGA HSC DBT ...

Page 168: ...8267 129025 129026 129029 129033 129038 129039 129040 129540 129794 129798 129808 129809 129810 130306 130310 130311 130312 130314 130577 USB on rear panel USB A type USB 2 0 480mbs USB stick USB on front panel Micro AB USB USB stick an adapter is required for indoor use only LAN one RJ45 port up to 100 Mbps FastEthernet 100baseT Video Input 2 inputs NTSC or PAL Video Output 1 output VGA signals 1...

Page 169: ...ser selectable 8 4 OPTIONAL WAAS GPS RECEIVER Physical Characteristics Color Ivory white Dimensions 97mm in diameter x 32mm in height flush mounted or 61 5mm on flag pole mount Weight without cable 0 35 lb 160 g Cable white 15m 8x28AWG cable with 6 pins female connector Electrical Characteristics Input Voltage 10 VDC to 35 VDC unregulated Input Current 0 8 Wmax GPS Receiver Sensitivity Tracking Na...

Page 170: ... is shown then let go of the key A new menu will appear on the display Choose the test and tap on it To exit from the System Test choose EXIT option 9 1 1 RAM MENU RESET After performing a RAM Clear all Marks Routes Tracks and C Weather data will be erased RAM Clear All the internal memory can be erased and the default setting restored If the CPN Series Chart Plotter exhibits unusual operations or...

Page 171: ...ce This menu allows selecting the Port Signal Source between Port1 Port2 Port3 Port4 the Baud Rate between 300 1200 2400 4800 9600 38400 115200 the Data Bits Word Length between 7 or 8 the Parity between even odd or none the Stop Bits between 1 or 2 Default settings are Port PORT2 Baud Rate 4800 Data Bits 8 Parity none Stop Bits 1 Input Data Display To allow the CPN Series Chart Plotter to act as ...

Page 172: ... SD CARD into the slot 4 Press and hold the PWR key to turn on the CPN Series Chart Plotter 5 The Operating System OS installation starts When completed the CPN Series Chart Plotter automatically restarts 6 The package update window appears see A The CPN Series Chart Plotter checks the integrity of the Installation Package present on the SD CARD This operation might require several minutes if you ...

Page 173: ... SD CARD from the slot 11 Then press and hold the PWR key to turn the CPN Series Chart Plotter On the system is now updated and ready to use 10 1 1 SYSTEM UPDATE ERROR MESSAGES Below there is the list of the error messages that can occur while updating system with the relative explanation and problem solving procedure Error Messages 01 02 03 04 05 06 07 09 Error 01 INFO DAT file not found The file...

Page 174: ...e slot or the SD CARD slot is damaged If this message appears press the PWR key to turn Off the CPN Series Chart Plotter and then follow the procedure 1 Download the Installation Package again and install it on a different SD CARD or contact your dealer to obtain the proper Installation Package 2 Repeat the installation procedure 3 If the problem persists contact your dealer to check the SD CARD s...

Page 175: ...riod of time has elapsed e g Stopwatch COG Course Over Ground The course your vessel is heading DATE Shows the current date received by the GPS DEPTH AREAS Sea areas included in the user selectable range of minimum and maximum depth limits DEW Dew point Temperature DPT Depth Shows the water depth when the optional FF525 50 200kHz BLACK BOX FISH FINDER or digital Depth Sounder is connected DRAUGHT ...

Page 176: ...t in 24 hours LVL BW Fluid level Black Water LVL FUEL Fluid level Fuel LVL FW Fluid level Fresh Water O TEMP Engine Oil Temp PINGO Mound of earth covered ice found in the Arctic and subarctic that can reach up to 70m 230ft in height and up to 600m 2 000ft in diameter Position Request Marine DSC VHF Function of transmitting a GPS position to another Marine DSC VHF When CPN Series Chart Plotter is c...

Page 177: ... reference stations and create a GPS correction message This correction accounts for GPS satellite orbit and clock drift plus signal delays caused by the atmosphere and ionosphere The corrected differential message is then broadcast through one of two gestational satellites or satellites with a fixed position over the equator The information is compatible with the basic GPS signal structure which ...

Page 178: ...Arrival Alarm 39 105 ASCII 172 ASF1 2 108 Asia 170 Assigning Page Soft Keys 32 assistance 41 Atmospheric Pressure 88 176 Attention Areas 91 Audible Alarm 39 79 105 Audio Amplifier 152 Authentication Protocols 128 AUTO 100 Auto Info 38 90 111 Auto Position 111 Automatic Check 69 Automatic Identification System 113 Autopilot 159 171 AWD 88 176 AWS 88 176 B background colors 38 BACKLIGHT 172 backligh...

Page 179: ...ction 56 Cursor Control 111 Cursor Mode 21 26 27 38 74 88 CURSOR SPEED 29 Cursor Speed 38 Cursor Window 26 38 Custom 90 91 CUSTOMIZING A PAGE ICON 85 Customizing data boxes 98 Customizing Data Windows 87 D DAM Report page 112 dangerous objects 43 68 Dangerous Target 114 Danish 35 136 Data Access Manager Report page 112 Data Bits 172 Data Safety Indicator 56 93 Data Source Priority 97 109 Data Wind...

Page 180: ...it 37 Fathom 178 fathoms 37 Faulty 172 Favorites icon 140 favorites list 140 feet 37 178 FF525 39 100 105 110 152 158 159 170 176 178 file 83 174 FIND 45 46 47 48 49 50 51 52 86 Finnish 35 136 Fish Finder 12 100 110 112 129 158 159 165 Fish Symbols 170 Fishing Facility 68 FLAC 142 Flick 17 Fluid level Black Water 177 Fluid level Fresh Water 177 Fluid level Fuel 177 flush mount 149 Flush Mount Brac...

Page 181: ...and Elevation 43 Language 35 38 57 58 Lat Lon Grid 91 93 Latitude Longitude 34 51 License page 112 Light Sectors 91 Lights 58 90 91 LINE COLOR 78 Line Out 167 169 LOADING A FILE 83 Long press 32 Loop Back Test 172 Loran TD 34 107 Lost Target 114 LOW COOLANT LEVEL 106 LOW FUEL PRESSURE 106 LOW OIL LEVEL 106 LOW OIL PRESSURE 106 LOW SYSTEM VOLTAGE 106 LOW WATER 177 LVL BW 177 LVL FUEL 177 LVL FW 177...

Page 182: ...weeping 17 Pages Selection 30 Pair 34 107 PAL 12 103 161 167 169 Pan 17 26 Panning 120 Parity 172 PART CODE 12 PC Planner 119 PDF 11 141 142 143 146 147 Perspective View 43 PGN 167 Photos Diagrams 43 Physical Characteristics 170 Picture in Picture 103 104 Pictures 60 PINGO 177 Pingos 68 PiP 103 104 Place Names 91 Place Names Size 55 places a MOB 22 PLACING A MOB 75 Plan2Nav 121 122 124 Playing mus...

Page 183: ...nt Enter 37 ShuttlePoint knob 16 21 37 85 Signals 58 91 Simulation Mode 110 Single Chart 52 86 Single tap 26 31 Sleeping Target 114 slot 41 119 SM 37 178 SOFT KEYS 23 Soft Keys 32 SOG 85 87 96 108 111 177 178 Spanish 35 136 SPD 88 177 SPECIFICATIONS 167 Speed 37 77 108 111 129 170 177 Speed Filter 96 Speed Log 97 Speed Over Ground 87 177 Speed Through Water 88 108 Splash Screen 14 25 171 Spot Soun...

Page 184: ... based Chart 178 Vector Sat 16 Vector Satellite 22 VEL 88 178 Velocity Made Good 88 Vertical Dilution of Precision 87 VGA 11 152 161 162 167 169 VGAC10 adapter cable 161 VHF 12 101 113 152 158 159 176 177 VHW 110 167 168 169 Video adjustment mode 104 Video Camera 152 video default settings 104 Video Input 12 103 104 161 167 169 Video Output 169 video source 161 Visibility 117 VISIBLE 78 VMA8 142 V...

Page 185: ...n of the Product with any ancillary equipment and all such equipment is expressly excluded from this warranty STANDARD HORIZON disclaims liability for range coverage or operation of the Product and ancillary equipment as a whole under this warranty STANDARD HORIZON reserves the right to make changes or improvements in Products during subsequent production without incurring the obligation to instal...

Page 186: ...onducted Emissions Radiated Emissions Radiated interference Radiated RF immunity IEC EN 60945 2002 ETSI EN 301 489 1 V1 8 1 ETSI EN 301 489 17 V2 1 1 Receiver requirements ETSI EN 300 328 V1 7 1 Electrostatic Discharge ESD Conducted RF interference Conducted RF immunity IEC EN 60945 2002 ETSI EN 301 489 1 V1 8 1 ETSI EN 301 489 17 V2 1 1 Compass Safe Distance IEC EN 60945 2002 ISO R 694 EFT Bursts...

Page 187: ...ions Radiated Emissions Radiated interference Radiated RF immunity IEC EN 60945 2002 ETSI EN 301 489 1 V1 8 1 ETSI EN 301 489 17 V2 1 1 Receiver requirements ETSI EN 300 328 V1 7 1 Electrostatic Discharge ESD Conducted RF interference Conducted RF immunity IEC EN 60945 2002 ETSI EN 301 489 1 V1 8 1 ETSI EN 301 489 17 V2 1 1 Compass Safe Distance IEC EN 60945 2002 ISO R 694 EFT Bursts Fast Transien...

Page 188: ......

Reviews: