background image

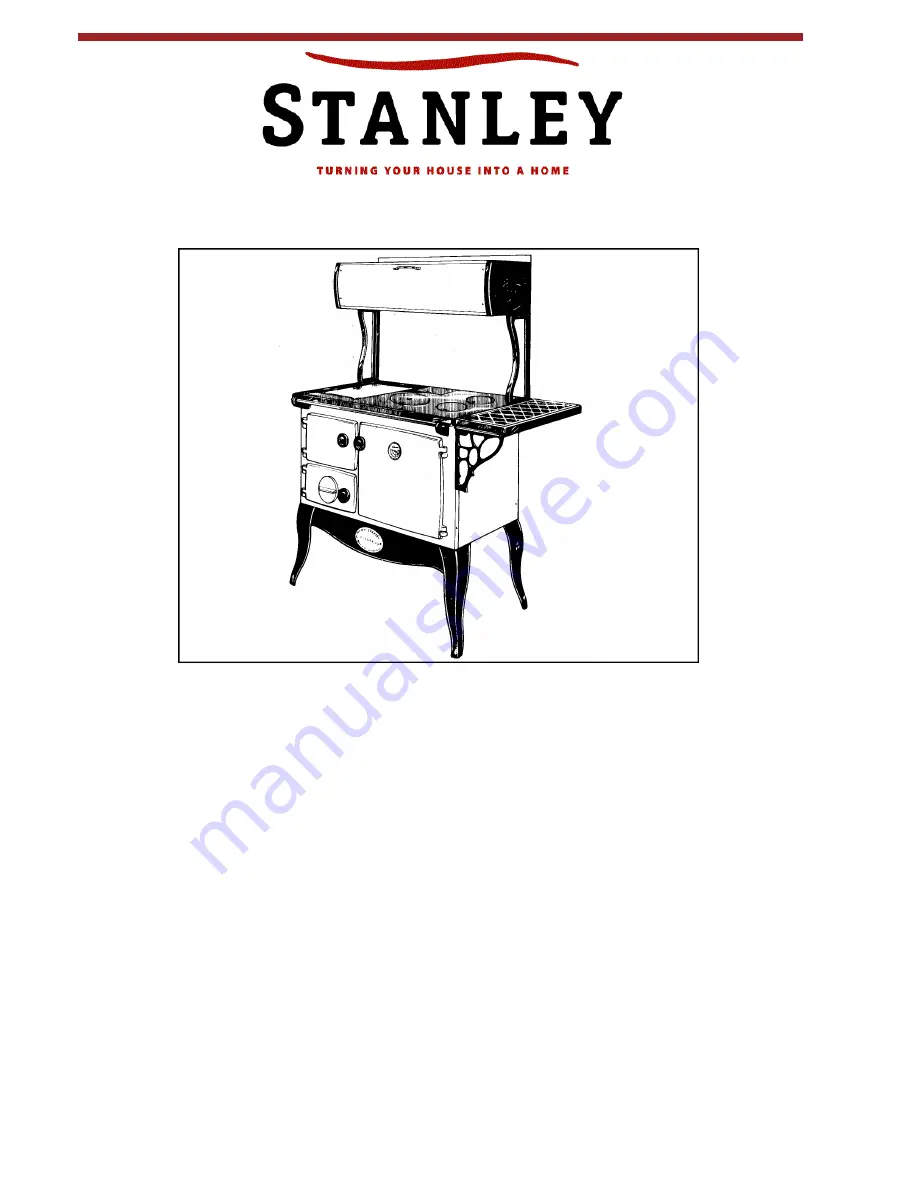
Woodburning Range

SAFETY NOTICE

PLEASE READ THIS ENTIRE MANUAL BEFORE YOU INSTALL AND USE YOUR NEW COOK STOVE.
FAILURE TO FOLLOW INSTRUCTIONS MAY RESULT IN PROPERTY DAMAGE, 
BODILY INJURY OR EVEN DEATH.  SAVE THESE INSTRUCTIONS FOR FUTURE REFERENCE.

IF THIS APPLIANCE IS NOT PROPERLY INSTALLED, A HOUSE FIRE MAY RESULT.  FOR YOUR SAFE-
TY, FOLLOW THE INSTALLATION DIRECTIONS.  CONTACT LOCAL BUILDING OR FIRE OFFICIALS
ABOUT RESTRICTIONS AND INSTALLATION INSPECTION REQUIREMENTS IN YOUR AREA.

THIS APPLIANCE MUST BE CONNECTED TO A LISTED, HIGH-TEMPERATURE RESIDENTIAL TYPE
AND BUILDING HEATING APPLIANCE CHIMNEY OR AN APPROVED MASONRY
CHIMNEY WITH FLUE LINER.

THE COMPLETE INSTALLATION MUST BE DONE IN ACCORDANCE WITH CURRENT STANDARDS AND
LOCAL CODES.  IT SHOULD BE NOTED THAT THE REQUIREMENTS AND THESE PUBLICATIONS MAY
BE SUPERSEDED DURING THE LIFE OF THIS MANUAL.

THIS APPLIANCE IS HOT WHILE IN OPERATION AND RETAINS ITS HEAT FOR A LONG PERIOD OF
TIME AFTER USE.  CHILDREN, AGED OR INFIRM PERSONS SHOULD BE SUPERVISED AT ALL TIMES
AND SHOULD NOT BE ALLOWED TO TOUCH THE HOT WORKING SURFACES WHILE IN USE OR UNTIL
THE APPLIANCE HAS THOROUGHLY COOLED.

MANUFACTURED BY: WATERFORD STANLEY (MARKETING) LTD., BILBERRY, WATERFORD, 

IRELAND.

ASSEMBLY INSTALLATION AND OPERATING INSTRUCTIONS

Summary of Contents for Woodburning Range and

Page 1: ...H TEMPERATURE RESIDENTIAL TYPE AND BUILDING HEATING APPLIANCE CHIMNEY OR AN APPROVED MASONRY CHIMNEY WITH FLUE LINER THE COMPLETE INSTALLATION MUST BE DONE IN ACCORDANCE WITH CURRENT STANDARDS AND LOCAL CODES IT SHOULD BE NOTED THAT THE REQUIREMENTS AND THESE PUBLICATIONS MAY BE SUPERSEDED DURING THE LIFE OF THIS MANUAL THIS APPLIANCE IS HOT WHILE IN OPERATION AND RETAINS ITS HEAT FOR A LONG PERIO...

Page 2: ......

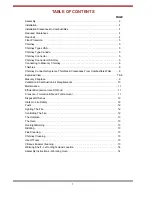
Page 3: ...rances From Combustible Walls 6 Exploded View 7 8 Masonry Fireplace 9 Ventilation Combustion Air Requirements 10 Maintenance 11 Efficient Economical Use Of Wood 11 Creosote Formation Need For Removal 11 Disposal Of Ashes 12 Hints On Fire Safety 12 Fuels 12 Lighting The Fire 12 Controlling The Fire 12 The Hotplate 13 The Oven 13 Overnight Burning 13 Riddling 13 Flue Cleaning 13 Chimney Cleaning 13 ...

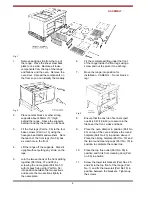
Page 4: ... fixing strip Part No 54 into position between the two sections and secure the two sections tightly to the name plate 6 Fit the complete skirting under the front of the range inside the front legs using a screw and nut to secure it to each leg 7 Move the range into position for installation CAREFUL Do not break a leg 8 Ensure that the cast iron fire liners part nos 44 46 47 48 49 are secure in the...

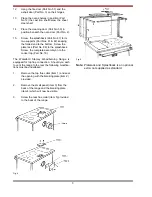
Page 5: ...ashback Screw the complete assembly on to the cooker top Part No 18 The Waterford Stanley Woodburning Range is equipped for top flue connection Should you wish to vent the range to the rear the following modifica tions must be undertaken 1 Remove the top flue collar item 1 and seal the opening with the blanking plate item 2 provided 2 Remove the small panel item 3 from the back of the range and th...

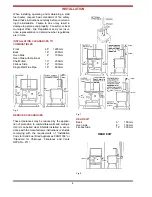
Page 6: ...nal Shelf Fitted 10 250mm Firebox Side 12 300mm Single Wall Flue Pipe 18 460mm REDUCED CLEARANCES These clearances may be reduced by the applica tion of protection to combustible walls and ceilings ULC UL Labelled Heat Shields installed in accor dance with the manufacturers instructions or shields complying with the requirements of Installation Code for Solid Fuel Fired Appliances CAN31336 or Stan...

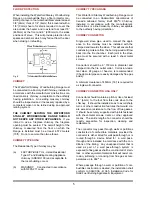
Page 7: ...y acceptable to the authority having jurisdiction CHIMNEY CONNECTOR Single wall stove pipe used to connect the appli ance to the chimney must be installed with the crimped end towards the stove This will ensure that condensing moisture from the burning wood will flow back into the fire chamber Each joint in the stove pipe must be secured with a least 3 sheet metal screws Connectors should be 6 153...

Page 8: ...ick nesses are minimums larger clearances and thick nesses are acceptable Any material used to close up the opening for the connector should be of non combustible material A connector to a masonry chimney except for System 2 under heading Chimney Connector System Thimbles and Clearances shall extend to piece through the wall pass through system and the chimney wall to the inner face of the flue li...

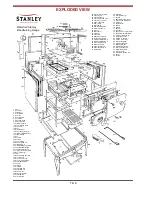
Page 9: ...ate 46 Fire Lining L H 47 Fire Lining Back 48 Fire Lining Bottom Front 49 Fire Lining Top Front 50 Sham Cheek Top 51 Name Plate 52 Bonnet Ring 53 Hob Protecting Plate 54 Plinth Jointing Clip 55 Bonnet 56 Bonnet Door 57 Fire Door 58 Spin Valve 59 Base Cleaning Door 60 Optional Pipe Shield 61 Platerack Standard R H 62 Platerack Standard L H 63 Oven Flue Damper 64 Base Flue Cheek 65 Sheet Iron Side L...

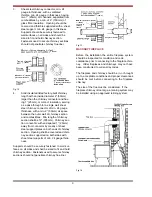
Page 10: ... spaced 1 25mm away from connector by means of sheet steel support plates on both ends of chimney section Opening shall be covered and chim ney section supported on both sides with sheet steel supports of min 24 gauge thick ness Supports should be securely fastened to wall sur faces on all sides and shall be sized to fit and hold chimney section Fasteners used to secure chimney sections should not...

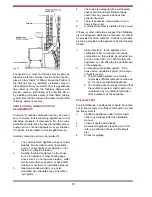
Page 11: ...dless day alleviates any of the above symptoms 10 Fig 15 4 The house is equipped with a well sealed vapour barrier and tight fitting windows and or has any powered devices that exhaust house air 5 There is excessive condensation on win dows in the winter 6 A ventilation system is installed in the house If these or other indications suggest that infiltration air is inadequate additional combustion ...

Page 12: ...p the flue and reduces the amount of unburned gasses and distillates to the flue If you have no alternative but to use soft wood like elder spruce or pine or when green wood has to be used then the result will be low heat and the formation of much cre osote In these conditions the fire must receive plenty of draught which will help to prevent creosote forming The Waterford Stanley Woodburning Rang...

Page 13: ...e door Part no 57 when the kindling has caught fire allow 15 minutes for this to happen add larger pieces of dry wood until the fire box is half filled When the larg er pieces of wood have caught fire add full sized logs IMPORTANT UNDER NO CIRCUMSTANCES SHOULD ANY FLAMMABLE LIQUID GASOLINE KEROSENE LIGHTER FLUID OR CHARCOAL STARTERS BE USED TO LIGHT OR FRESHEN UP THE FIRE NEVER USE MANUFACTURED LO...

Page 14: ...and fro Empty the ash pan Part No 70 as required Always close the ash pit door tightly FLUE CLEANING Open the oblong hot plate Part No 19 Remove the simmering oven hob cleaning cups Part No 15 open the direct damper Part No 14 Brush deposits on the oven top into the fire box brush downwards the deposits in the space both behind and at the side of the oven Remove the cleaning door Part No 59 from b...

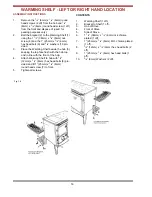
Page 15: ...ed 3 Place the Warming Shelf beside the hob 3 keeping the top face flush with the hob top and in line with the front of the hob 4 Attach Warming Shelf to hob with 1 2 12mm x 1 4 6mm hex head bolts 8 pro vided and fit 1 25mm x 1 4 6mm round head screw 7 to front 5 Tighten all screws 14 Fig 18 CONTENTS 1 Warming Shelf 1 off 2 Bracket to Shelf 1 off 3 Hob of Stove 4 Front of Stove 5 Side of Stove 6 1...

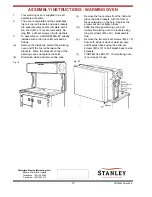
Page 16: ... Remove the inside top bolts of the warming oven and fit the top rail between the brackets Place the brackets on top of the warming oven and replace the bolts b Dismantle clean and remove flue pipe c Remove the four screws from the hob and place the side brackets with the flat sur faces outwards on the hob Replace the screws but do not tighten them d Slide flue through warming oven and loosely fit...

Reviews: